
Introduction to Bruschetta Pasta Salad
Summer days call for light, refreshing meals, and that’s where Bruschetta Pasta Salad comes in. This dish is like a burst of sunshine on your plate, perfect for those warm evenings when you want something quick yet impressive. I remember the first time I made it for a backyard barbecue; the vibrant colors and fresh flavors had everyone asking for the recipe. It’s not just a salad; it’s a celebration of summer! Whether you’re hosting friends or just looking for a quick solution after a long day, this pasta salad is sure to delight.
Why You’ll Love This Bruschetta Pasta Salad
This Bruschetta Pasta Salad is a game-changer for busy days. It’s quick to whip up, taking just about 25 minutes from start to finish. The combination of fresh ingredients creates a flavor explosion that’s hard to resist. Plus, it’s versatile! You can serve it as a side or a main dish. With its vibrant colors and delightful taste, it’s bound to impress your family and friends at any gathering.
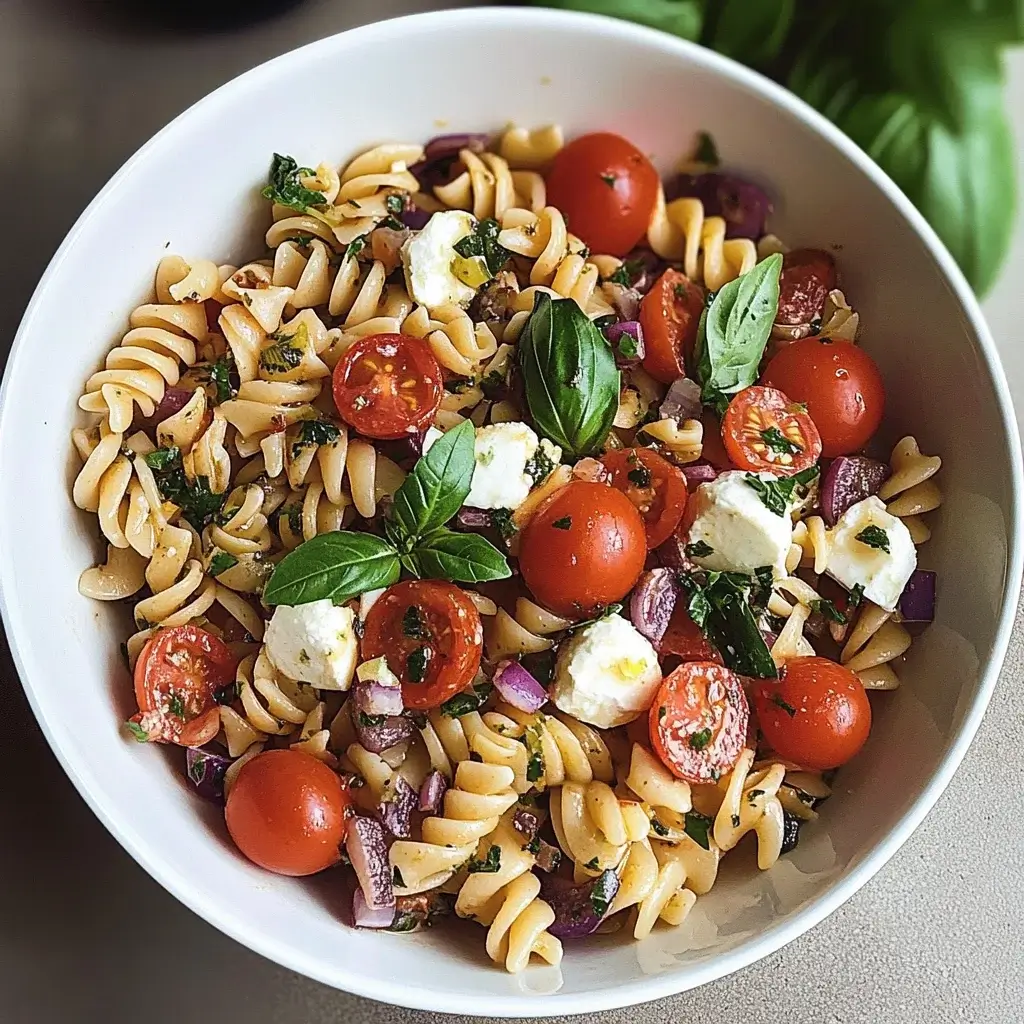
Ingredients for Bruschetta Pasta Salad
Gathering the right ingredients is key to making a delicious Bruschetta Pasta Salad. Here’s what you’ll need:
- Rotini Pasta: This spiral-shaped pasta holds onto the dressing and flavors beautifully, making every bite a delight.
- Cherry Tomatoes: Sweet and juicy, these little gems add a burst of freshness and color to your salad.
- Fresh Mozzarella Balls: Creamy and mild, they provide a lovely contrast to the tangy dressing.
- Fresh Basil Leaves: The aromatic herb brings a fragrant touch, elevating the dish to new heights.
- Red Onion: Finely chopped, it adds a bit of crunch and a hint of sharpness that balances the flavors.
- Balsamic Vinegar: This tangy dressing ingredient gives the salad a rich depth and a touch of sweetness.
- Olive Oil: A drizzle of good quality olive oil enhances the overall flavor and adds a silky texture.
- Garlic Powder: A sprinkle of this adds a subtle kick without overpowering the fresh ingredients.
- Salt and Pepper: Essential for seasoning, these staples help bring all the flavors together.
For those looking to customize, consider adding grilled chicken or chickpeas for extra protein. If you’re in the mood for a tangy twist, feta cheese can be a delightful substitute for mozzarella. You can find the exact quantities for each ingredient at the bottom of the article, ready for printing!
How to Make Bruschetta Pasta Salad
Creating a Bruschetta Pasta Salad is a breeze! Follow these simple steps, and you’ll have a delicious dish ready in no time. Let’s dive in!
Step 1: Cook the Pasta
Start by boiling a pot of salted water. Once it’s bubbling, add the rotini pasta. Cook it according to the package instructions until it’s al dente. This usually takes about 8-10 minutes. Remember, you want it firm enough to hold up in the salad. After cooking, drain the pasta and rinse it under cold water. This stops the cooking process and cools it down quickly.
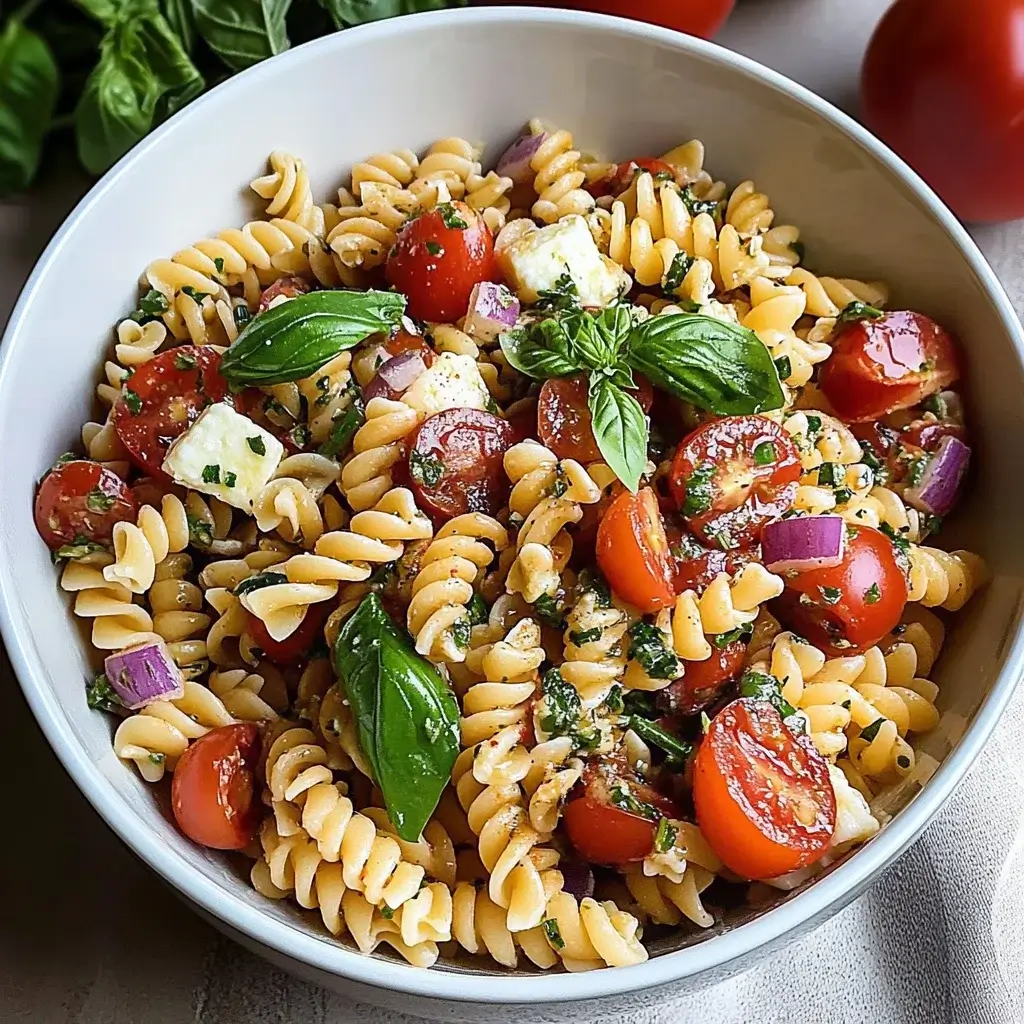
Step 2: Combine the Ingredients
In a large mixing bowl, toss together the cooled pasta, halved cherry tomatoes, mozzarella balls, chopped basil, and red onion. The colors should pop, making your salad visually appealing. This is where the magic begins! Each ingredient adds its own unique flavor, creating a delightful medley.
Step 3: Prepare the Dressing
In a separate small bowl, whisk together the balsamic vinegar, olive oil, garlic powder, salt, and pepper. This dressing is the heart of your Bruschetta Pasta Salad. It brings everything together with its tangy and rich flavor. Taste it! Adjust the seasoning if needed. A little extra salt or pepper can make a big difference.
Step 4: Mix and Chill
Pour the dressing over the pasta mixture. Gently toss everything together until the pasta and veggies are well coated. Cover the bowl with plastic wrap or a lid and refrigerate for at least 30 minutes. This chilling time allows the flavors to meld beautifully. Trust me, it’s worth the wait!
Step 5: Serve
When you’re ready to serve, give the salad a quick toss. You can enjoy it chilled or at room temperature. Either way, it’s a refreshing dish that’s perfect for summer gatherings. Garnish with a few extra basil leaves for that finishing touch. Your Bruschetta Pasta Salad is now ready to impress!
Tips for Success
- Always salt your pasta water; it enhances the flavor of the pasta.
- Use fresh ingredients for the best taste; quality matters!
- Let the salad chill longer if possible; it allows flavors to develop.
- Adjust the dressing to your taste; don’t be afraid to experiment!
- For a colorful presentation, add extra cherry tomatoes or basil on top.
Equipment Needed
- Large Pot: For boiling pasta; a deep skillet can work too.
- Colander: To drain the pasta; a slotted spoon can be a quick alternative.
- Mixing Bowl: A large bowl for combining ingredients; any big bowl will do.
- Whisk: For mixing the dressing; a fork can also get the job done.
Variations
- Grilled Chicken: Add sliced grilled chicken for a protein-packed meal that’s still light and refreshing.
- Chickpeas: For a vegetarian option, toss in some chickpeas for added protein and texture.
- Feta Cheese: Swap mozzarella for feta cheese to introduce a tangy flavor that complements the other ingredients.
- Roasted Vegetables: Incorporate roasted bell peppers or zucchini for a smoky twist and extra nutrients.
- Gluten-Free Pasta: Use gluten-free rotini to make this dish suitable for those with gluten sensitivities.
Serving Suggestions
- Pair with Grilled Chicken: Serve alongside grilled chicken for a complete meal that’s satisfying and delicious.
- Refreshing Drinks: Complement with a chilled white wine or sparkling lemonade to enhance the summer vibe.
- Presentation: Serve in a large, colorful bowl and garnish with extra basil leaves for a beautiful touch.
FAQs about Bruschetta Pasta Salad
Can I make Bruschetta Pasta Salad ahead of time?
Absolutely! This salad is perfect for meal prep. You can make it a day in advance and store it in the fridge. Just give it a quick toss before serving to refresh the flavors.
What can I substitute for mozzarella in this recipe?
If you’re looking for a different flavor, feta cheese is a fantastic substitute. It adds a tangy kick that pairs beautifully with the other ingredients.
Is Bruschetta Pasta Salad suitable for vegetarians?
Yes! This dish is entirely vegetarian, making it a great option for meatless meals. You can also add chickpeas for extra protein if desired.
How long does Bruschetta Pasta Salad last in the fridge?
When stored properly in an airtight container, it can last up to 3 days in the fridge. Just keep in mind that the pasta may absorb some dressing over time.
Can I add other vegetables to the salad?
Definitely! Feel free to get creative. Roasted bell peppers, cucumbers, or even spinach can add extra flavor and nutrition to your Bruschetta Pasta Salad.
Final Thoughts
Creating this Bruschetta Pasta Salad is more than just a cooking task; it’s an experience that brings joy to your table. The vibrant colors and fresh flavors remind me of sun-soaked afternoons spent with family and friends. Each bite is a celebration of summer, evoking laughter and shared stories. Whether you’re hosting a gathering or enjoying a quiet dinner, this dish is sure to impress. It’s a simple yet delightful way to elevate your meals, making every occasion feel special. So, roll up your sleeves and dive into this refreshing recipe; your taste buds will thank you!
Bruschetta Pasta Salad: A Refreshing Recipe Delight!
Ingredients
Method
- Cook the rotini pasta according to package instructions until al dente. Drain and rinse under cold water to cool.
- In a large bowl, combine the cooled pasta, cherry tomatoes, mozzarella balls, basil, and red onion.
- In a small bowl, whisk together the balsamic vinegar, olive oil, garlic powder, salt, and pepper.
- Pour the dressing over the pasta salad and toss gently to combine.
- Cover and refrigerate for at least 30 minutes to allow the flavors to meld.
- Serve chilled or at room temperature.
Nutrition
Notes
- For added protein, consider mixing in grilled chicken or chickpeas.
- Substitute the mozzarella with feta cheese for a tangy twist.
Leave a Reply