
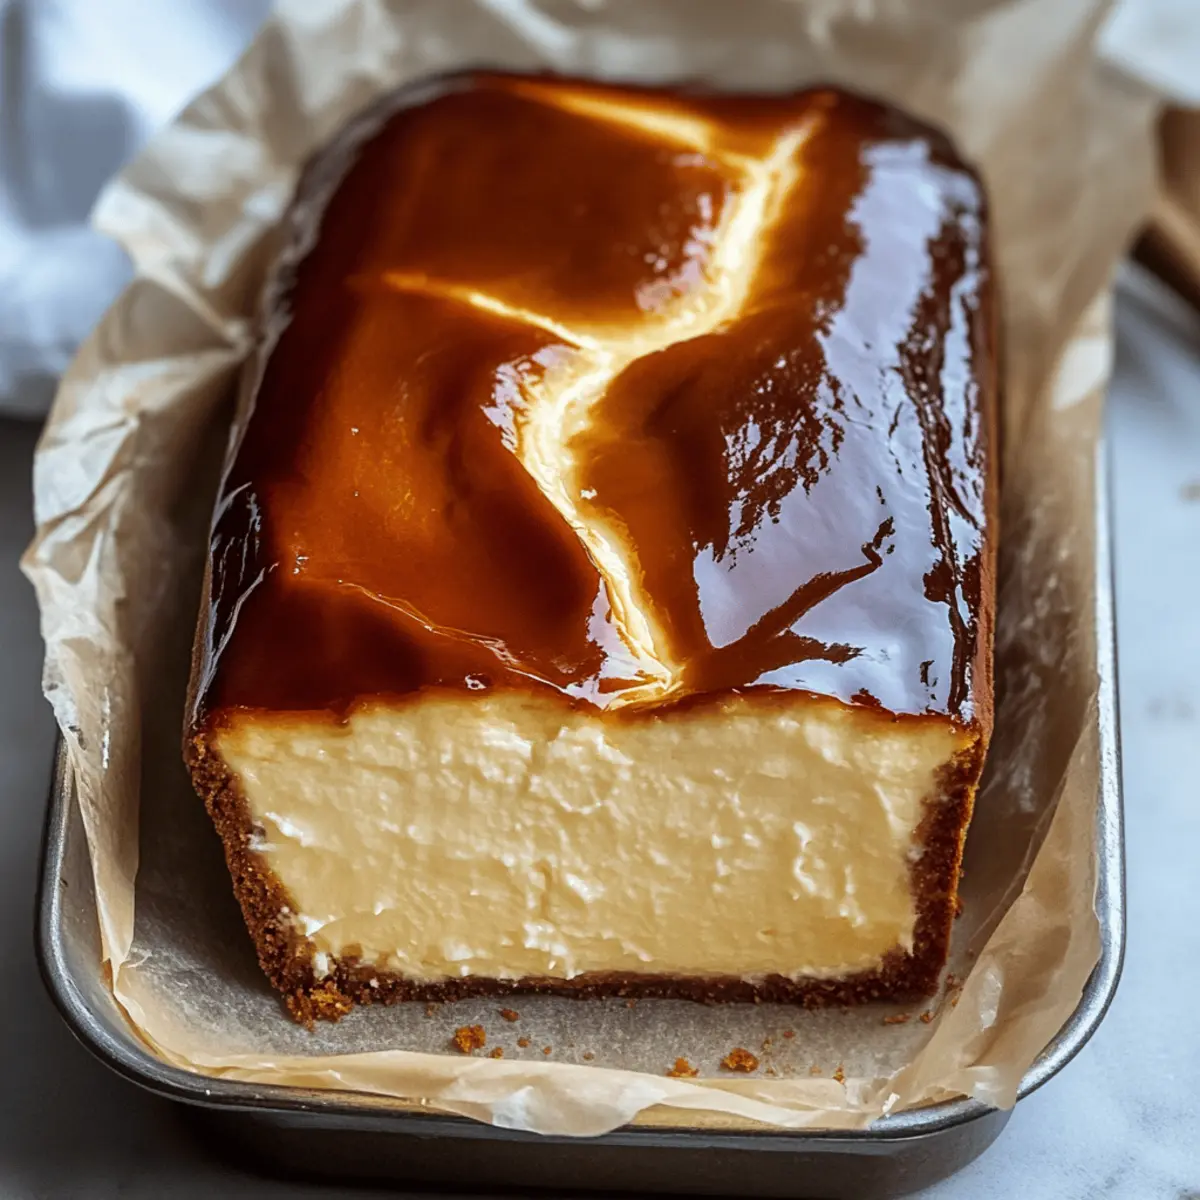
As I stood in my kitchen, an unexpected craving for something sweet washed over me. That’s when the idea of a Burnt Basque Cheesecake in a loaf pan struck. This rustic yet elegant dessert, with its creamy center and bold caramelized top, is a crowd-pleaser that anyone can whip up—seriously! With no crust and straightforward prep, it’s perfect for those moments when you want homemade indulgence without the fuss. Whether you’re a seasoned baker or just starting your kitchen adventures, this cheesecake is tailor-made for you. Are you ready to discover how simple and delightful it is to create this perfectly imperfect treat? Let’s dive in!
Why is Burnt Basque Cheesecake a Must-Try?
Uniquely Delicious: This Burnt Basque Cheesecake marries a rich, creamy interior with a delightfully charred top for a flavor profile that mesmerizes.
No Fuss, All Flavor: With no crust required, it’s an easy recipe perfect for chefs at all skill levels!
Quick to Prep: In just about an hour, you can create a stunning dessert that impresses guests and satisfies cravings alike.
Perfect for Celebrations: Serve it at your next gathering, and watch it disappear faster than you can say, “cheesecake”!
Customize to Your Taste: Add citrus zest or spices to make this dish uniquely yours—like in my Fruity Pebbles Cheesecake or for a festive touch, try the Patriotic Hot Fudge.
Burnt Basque Cheesecake Ingredients
For the Batter
- Cream Cheese – Ensure it’s softened for smooth blending and a creamy texture.
- Granulated Sugar – Adds sweetness and aids in creating the caramelized top; brown sugar works for a deeper flavor too.
- Eggs – Provide structure and richness; using room temperature eggs helps to achieve a perfect mixture.
- Heavy Cream – Adds luxurious creaminess; substitute with half-and-half for a lighter version if desired.
- All-Purpose Flour – Slightly firms the batter as it sets—gluten-free flour makes a suitable replacement.
- Salt – Balances sweetness and enhances flavors; omit for a low-sodium option.
- Vanilla Extract – Infuses warmth and depth; consider using vanilla bean paste for a more intense flavor.
For Pan Preparation
- Butter/Parchment for Greasing – Essential for easy removal from the pan, promoting a beautiful presentation.
This Burnt Basque Cheesecake is a charming yet easy-to-make dessert that’s sure to delight everyone at your table!
Step‑by‑Step Instructions for Burnt Basque Cheesecake
Step 1: Preheat and Prepare the Pan
Preheat your oven to 400°F (205°C). While it’s heating, take a loaf pan and generously grease it with butter. Line the pan with parchment paper, ensuring that the edges overhang. This makes for easy removal later and gives the Burnt Basque Cheesecake a rustic look.
Step 2: Blend the Cream Cheese
In a large mixing bowl, add the softened cream cheese. Using an electric mixer, beat it until the texture is completely smooth, about 2 minutes. Gradually incorporate the granulated sugar, continuing to blend until the mixture becomes fluffy and light, roughly another 2 minutes. This base is essential for a creamy cheesecake.
Step 3: Add the Eggs
Crack and add the room temperature eggs one at a time into the cream cheese mixture. Ensure each egg is fully incorporated before adding the next, which will take about 30 seconds of mixing per egg. This step builds the structure and richness of your Burnt Basque Cheesecake, lending that delightful custardy quality.
Step 4: Mix in the Vanilla and Cream
Pour in the vanilla extract and a pinch of salt to enhance the flavors. Slowly drizzle in the heavy cream while continuing to mix on low speed. This should take about 1-2 minutes, resulting in a rich and velvety batter that’s both smooth and indulgent, ready to embrace the flour next.
Step 5: Incorporate the Flour
Sift in the all-purpose flour directly into the batter to avoid lumps. Gently fold it in with a spatula until just combined, taking care not to overmix. A few flour streaks are okay. This tender handling ensures your Burnt Basque Cheesecake maintains the creamy texture and doesn’t become dense.
Step 6: Pour the Batter into the Pan
Carefully pour the luscious batter into the prepared loaf pan, using a spatula to scrape every last bit from the bowl. Gently tap the pan on the countertop a couple of times to release any air bubbles that may have formed, ensuring an even bake and a smooth surface.
Step 7: Bake the Cheesecake
Place the loaf pan in the center of the preheated oven and bake the Burnt Basque Cheesecake for 45-50 minutes. Look for a deeply caramelized top with a slight jiggle in the center, which indicates a perfectly creamy interior. The cheesecake should have a rich, dark color that contrasts beautifully with its silken core.
Step 8: Cooling and Refrigeration
Once baked, remove the cheesecake from the oven and let it cool in the pan for about 30 minutes. After cooling, transfer it to the refrigerator and chill for at least 4 hours or overnight. This step enhances the flavors, allowing your Burnt Basque Cheesecake to firm up for easy slicing when you’re ready to serve.
What to Serve with Burnt Basque Cheesecake in a Loaf Pan
Indulging in a slice of creamy Burnt Basque Cheesecake opens the door to heavenly pairings that enhance your dessert experience.
-
Fresh Berries: A medley of strawberries, blueberries, and raspberries not only adds a vibrant pop of color but also a refreshing tartness to balance the cheesecake’s richness.
-
Whipped Cream: Light and airy, a dollop of flavored whipped cream (think vanilla or lemon) complements the cheesecake’s dense texture, creating a delightful contrast with every bite.
-
Caramel Sauce: Drizzling warm caramel over each slice adds an extra layer of sweetness and a beautiful glossy finish, making every bite a decadent experience.
-
Chocolate Shavings: Sprinkle dark chocolate shavings on top for a touch of elegant bitterness that perfectly contrasts the creamy and sweet flavors of the cheesecake.
-
Coffee or Espresso: A cup of bold coffee or a shot of espresso elevates the dessert experience, the rich flavors harmonizing beautifully with the cheesecake’s caramelized top.
-
Dessert Wine: Pairing with a glass of sweet dessert wine, like a late-harvest Riesling or Sauternes, enhances the dessert with its fruity notes, making your meal feel truly luxurious.
-
Citrus Zest: A sprinkle of lemon or orange zest not only adds a refreshing aroma but also a zingy brightness that cuts through the creaminess of the cheesecake, waking up your palate.
-
Almond Biscotti: For a delightful crunch and a nutty twist, serve a couple of almond biscotti on the side; they’re perfect for dipping into the cheesecake and enjoying with coffee.
These pairings will transform your Burnt Basque Cheesecake into a feast for the senses, turning an already special dessert into an unforgettable celebration.
Burnt Basque Cheesecake Variations & Substitutions
Feel free to personalize your Burnt Basque Cheesecake with these delightful variations that add flavor and flair!
-
Citrus Zest: Add the zest of a lemon or orange to the batter for a refreshing and vibrant twist. The citrus enhances the cheesecake’s richness while brightening the overall flavor profile.
-
Spicy Warmth: Incorporate warm spices like cinnamon or nutmeg directly into the batter. Just a teaspoon can evoke cozy vibes, making your dessert even more inviting for chilly nights.
-
Extract Experimentation: Swap regular vanilla extract for almond or maple extract for unique flavors. Each option brings its own charm and elevates your cheesecake to new heights.
-
Chocolate Delight: Fold in mini chocolate chips or swirl in melted chocolate before baking. This adds a delightful surprise with every creamy bite and creates a new layer of indulgence.
-
Nutty Crunch: Top your cheesecake with crushed nuts, such as pistachios or almonds, after slicing. It adds a satisfying contrast to the smooth texture and brings an extra nutty flavor.
-
Gluten-Free: Use a gluten-free flour blend instead of all-purpose flour to make your cheesecake suitable for those with gluten sensitivities. The taste will still be incredibly delicious!
-
Lower Fat Option: Substitute half the heavy cream with Greek yogurt to cut calories while maintaining creaminess. This twist not only lightens the dessert but also adds a lovely tang.
-
Fruit Infusion: Blend fresh berries or a fruit puree into the batter for a fruity cheesecake experience. Consider pairing it with a drizzle of berry sauce for an eye-catching presentation.
Your creativity can shine brightly as you enjoy this versatile dessert. For more delicious variations, don’t miss checking out my Lemon Blueberry Cheesecake or try the flavor-packed Key Lime Cheesecake to satisfy your sweet tooth!
Make Ahead Options
Preparing the Burnt Basque Cheesecake ahead of time is a fantastic way to save hours on busy days, allowing the flavors to deepen while you focus on other tasks. You can make the cheesecake batter up to 24 hours in advance; simply prepare as directed, then pour the mixture into the lined loaf pan and cover it tightly with plastic wrap before refrigerating. This ensures the cheesecake stays fresh and maintains its creamy texture. When you’re ready to delight your guests or satisfy your sweet tooth, just bake the cheesecake and allow it to cool before chilling. It will be just as delicious and decadent, making your life easier without sacrificing any flavor!
How to Store and Freeze Burnt Basque Cheesecake
Fridge: Keep your Burnt Basque Cheesecake covered in plastic wrap or an airtight container in the refrigerator for up to 3 days to maintain its creamy texture and flavor.
Freezer: For longer storage, wrap slices individually in plastic wrap and place them in a freezer bag. The cheesecake can be frozen for up to 2 months—just thaw in the fridge before serving.
Reheating: To enjoy, simply let the cheesecake sit at room temperature for about 30 minutes to an hour before serving. This helps restore its creamy goodness.
Make-Ahead: Consider preparing the cheesecake a day in advance! Storing it overnight allows the flavors to develop further, enhancing your treat’s overall taste.
Expert Tips for Burnt Basque Cheesecake
-
Room Temperature Perfection: Use room temperature ingredients for a smooth batter; this helps in achieving the perfect consistency for your Burnt Basque Cheesecake.
-
Avoid Overmixing: Mix the batter just until combined when adding flour. Overmixing can lead to a denser cheesecake, so keep it light and airy!
-
Parchment Paper Trick: Generously line your loaf pan with parchment paper. Not only does it help with easy release, but it also gives the cheesecake a rustic charm.
-
Watch the Jiggle: Keep an eye on the baking time! The cheesecake should jiggle slightly in the center when done; this ensures it retains that desired creamy texture.
-
Cooling Time Matters: Allow the cheesecake to cool completely before refrigerating. This step is essential for optimal flavor development and texture enhancement.
Burnt Basque Cheesecake Recipe FAQs
What is the best way to select ripe ingredients for the Burnt Basque Cheesecake?
Absolutely! For the best results, choose cream cheese that is soft and at room temperature for easy blending. When selecting eggs, pick ones that have a clean, uncracked shell; they should feel heavy for their size, which indicates freshness. If you’re using heavy cream, make sure it’s not close to its expiration date to ensure a rich and indulgent flavor.
How should I store the Burnt Basque Cheesecake to keep it fresh?
Very simple! Store your cheesecake in the refrigerator covered in plastic wrap or an airtight container. This will keep it fresh for up to 3 days. Just remember that its silky texture is best experienced when chilled, yet not too cold, so let it sit out for about 30 minutes before serving for that creamy perfection.
Can I freeze the Burnt Basque Cheesecake? If so, how?
Absolutely! To freeze, wrap the cooled cheesecake tightly in plastic wrap, or slice it into individual servings and wrap those separately. Place it in a freezer bag or airtight container, and you can enjoy it for up to 2 months. When you’re ready to indulge again, simply thaw it in the fridge overnight to preserve its delightful texture.
What if my Burnt Basque Cheesecake cracks or doesn’t caramelize properly?
Don’t worry! If your cheesecake cracks, it may have been overbaked or mixed too much. To avoid this in the future, ensure your oven temperature is accurate and that you stop mixing just until combined. If the top doesn’t caramelize to the desired color, you can use a kitchen torch gently to darken the top without further cooking the inside. Just be careful to keep the torch moving to avoid burning any one spot too much!
Are there any dietary considerations I should keep in mind for this recipe?
Yes! If you’re cooking for someone with allergies, you might want to consider substitutes like lactose-free cream cheese or non-dairy heavy cream if they cannot consume dairy. Additionally, for those avoiding gluten, substituting regular flour with a gluten-free blend is a great option. Always check labels to ensure safety for those with food sensitivities or restrictions.
Burnt Basque Cheesecake: Creamy, Caramelized Magic at Home
Ingredients
Equipment
Method
- Preheat your oven to 400°F (205°C). Grease the loaf pan with butter and line with parchment paper.
- In a mixing bowl, beat the softened cream cheese until smooth, about 2 minutes. Gradually add granulated sugar and mix until fluffy, another 2 minutes.
- Add the eggs one at a time, mixing for about 30 seconds after each addition to incorporate fully.
- Pour in the vanilla and add a pinch of salt. Gradually mix in the heavy cream on low speed, ensuring a rich batter.
- Sift the flour into the batter and gently fold it in with a spatula until just combined.
- Pour the batter into the prepared loaf pan and tap it on the countertop to release air bubbles.
- Bake for 45-50 minutes until the top is caramelized and the center jiggles slightly.
- Cool the cheesecake in the pan for 30 minutes, then refrigerate for at least 4 hours or overnight.
Leave a Reply