
“Can you believe how simple it is to make your own nutritious snacks?” The moment I discovered these No-Bake Protein-Packed Chickpea and Date Snack Bars, I felt like I had struck culinary gold. A delightful blend of sweet dates and earthy chickpeas coming together in a chewy treat not only satisfies hunger but also fuels your day with healthy energy. These bars are a lifesaver for busy mornings and midday cravings, offering a protein-rich alternative to store-bought snacks. Plus, they’re easily customizable, making them a fun way to experiment with your favorite superfoods. Imagine indulging without guilt, knowing exactly what went into your snack! Who wouldn’t want to embark on this delicious journey? Let’s dive into this recipe together—aren’t you curious to see how easy it is?

Why are these bars a game-changer?
Nutritious Snacking Made Easy: Say goodbye to processed snacks with this effortless no-bake recipe that anyone can whip up. Packed with Protein: Chickpeas deliver a powerful protein boost, ensuring you stay full longer. Customize Your Creation: Feel free to experiment with mix-ins like chia seeds or dark chocolate chips for an exciting twist. Guilt-Free Indulgence: Naturally sweetened with dates and a touch of honey, these bars offer all the flavor without the fuss. Perfect for Busy Days: Prepare a batch in advance, and enjoy a quick energy boost whenever hunger strikes! If you’re looking for more healthy snacks, don’t miss out on my Mediterranean Chickpea Bowls or Blueberry Cheesecake Bars for something different.
Chickpea and Date Snack Bars Ingredients
For the Base
- Cooked Chickpeas – Provides plant-based protein and structure; use canned chickpeas, drained and rinsed for convenience.
- Pitted Dates – Adds natural sweetness and binds the ingredients; soak dry dates in warm water for 5-10 minutes to soften.
- Oats – Contributes texture and fiber; opt for certified gluten-free oats for a gluten-free option.
- Nut Butter – Offers creaminess and healthy fats; sunflower seed butter works well for nut-free bars.
For Sweetness
- Honey/Maple Syrup – Natural sweetener and binding agent; replace with agave syrup for a vegan alternative.
- Vanilla Extract – Enhances flavor; can be replaced with almond extract if desired.
For Flavor
- Cinnamon – Adds warmth and flavor; skip if you prefer a milder taste.
- Salt – Enhances sweetness and overall flavor profile; adjust to taste.
Optional Add-ins
- Dark Chocolate Chips – Adds extra indulgence and texture; use carob chips or omit them entirely for a different flavor.
These Chickpea and Date Snack Bars not only satisfy your sweet tooth but also provide a nutritious boost!
Step‑by‑Step Instructions for Chickpea and Date Snack Bars
Step 1: Blend Base
In a food processor, combine 1 cup of cooked chickpeas and 1 cup of pitted dates. Blend on high speed until the mixture becomes smooth, resembling a thick paste. This should take about 1-2 minutes. Make sure the chickpeas are well integrated, creating a cohesive base for your Chickpea and Date Snack Bars.
Step 2: Combine Ingredients
Add 1/2 cup of oats, 1/4 cup of nut butter, 1 tablespoon of honey or maple syrup, 1 teaspoon of vanilla extract, 1/2 teaspoon of cinnamon, and 1/4 teaspoon of salt into the blended mixture. Pulse the food processor until all ingredients are thoroughly combined, forming a thick, sticky mixture. This step should take about 30 seconds, so you can see and feel the mixture come together beautifully.
Step 3: Add Chocolate
If you’d like a touch of indulgence, fold in 1/4 cup of dark chocolate chips by hand after removing the mixture from the processor. Make sure to distribute the chocolate evenly throughout the Chickpea and Date Snack Bars mixture, ensuring that every bite has delightful bursts of chocolatey goodness.
Step 4: Prepare Dish
Line an 8×8-inch baking dish with parchment paper, allowing some overhang for easy removal later. Carefully spread the mixture into the dish, using a spatula to press it down firmly into an even layer. This is crucial for making sure your bars hold together well when sliced, so spend a minute ensuring they are nicely compacted.
Step 5: Chill to Set
Place the prepared dish into the refrigerator and chill for at least 1 hour. This time allows the Chickpea and Date Snack Bars to firm up, making them easier to cut and handle. You’ll know they’re ready when they feel solid to the touch and can hold their shape without sticking.
Step 6: Slice and Serve
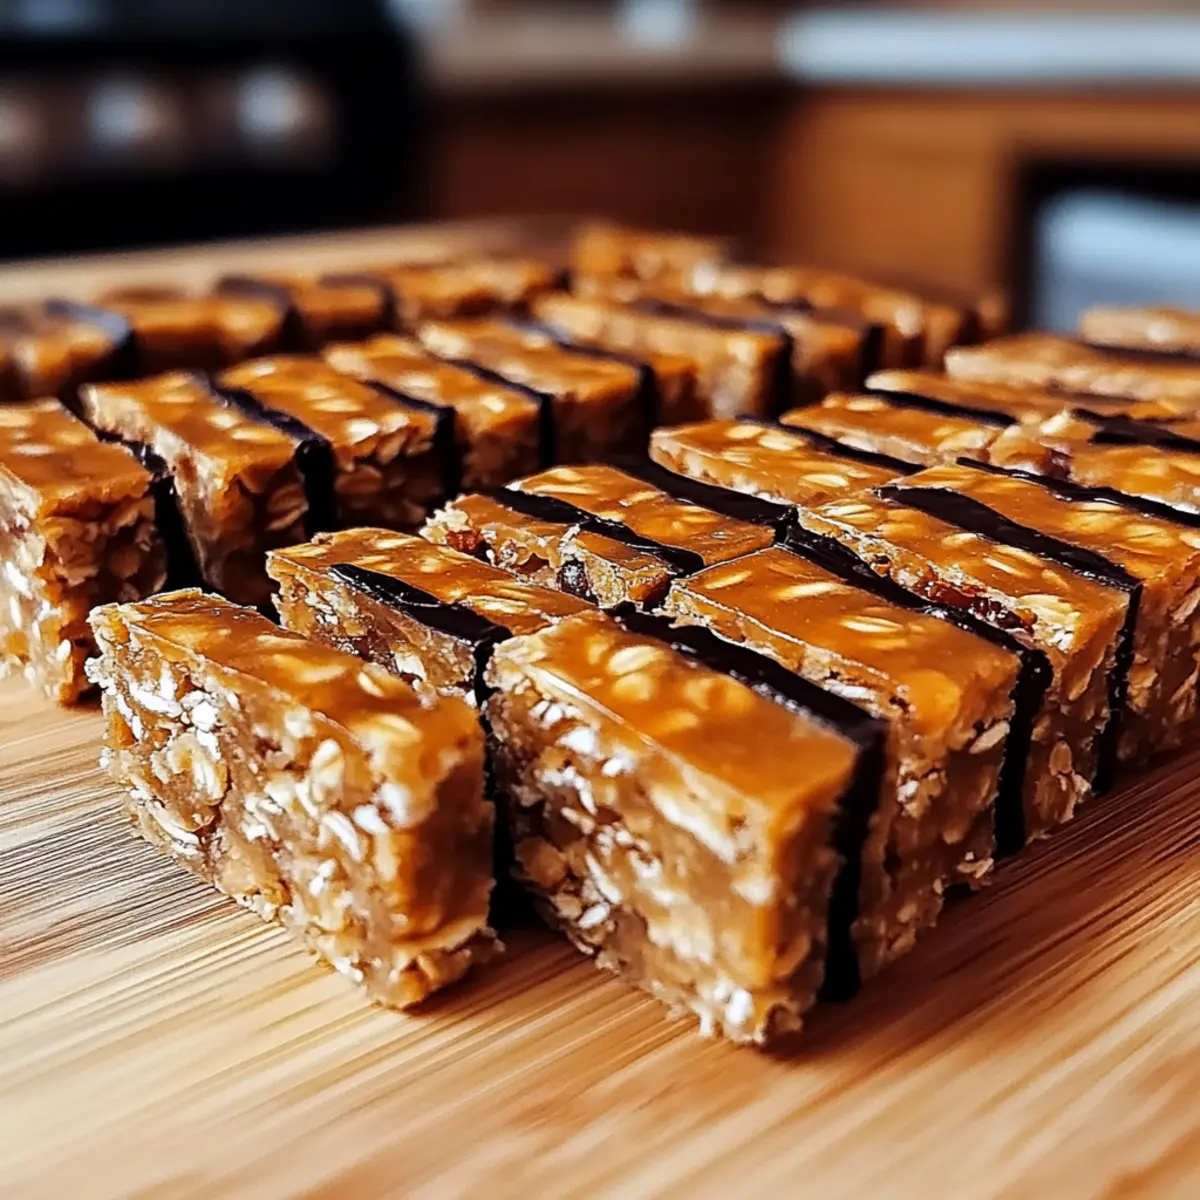
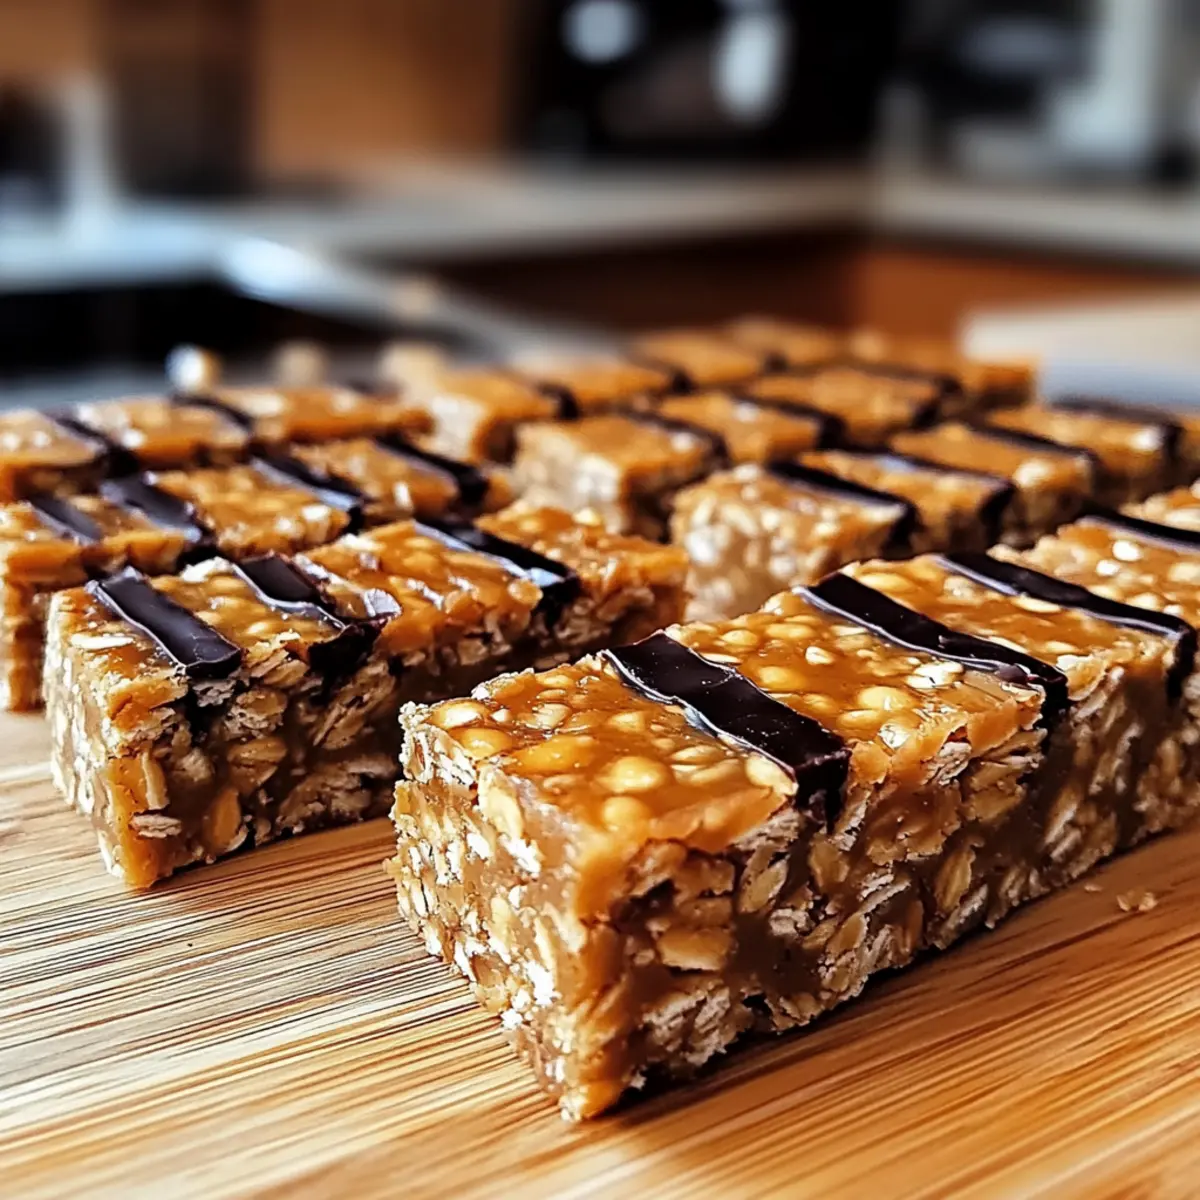
Once chilled, carefully lift the bars out of the baking dish using the parchment paper overhang. Place on a cutting board and slice into squares or rectangles as desired. The bars are now ready to be served, offering a delicious and nutritious snack that can be enjoyed anytime!
Make Ahead Options
These Chickpea and Date Snack Bars are perfect for meal prep enthusiasts! You can prepare the base mixture up to 24 hours in advance and refrigerate it, allowing the flavors to develop beautifully. To do this, blend your cooked chickpeas and pitted dates as instructed, then combine all ingredients (including oats, nut butter, and sweetener). Transfer the mixture to your prepared baking dish and chill it to set. For optimal quality, ensure the bars are well-pressed to hold together once sliced. When you’re ready to serve, simply slice them into bars and enjoy nutritious, homemade snacks that are just as delicious as when freshly made!
Chickpea and Date Snack Bars Variations
Feeling adventurous? Get ready to personalize your snack bars with these fun variations that bring flavor and nutrition to life.
-
Nut-Free Option: Replace nut butter with sunflower seed butter for a delicious, allergy-friendly alternative. This twist keeps the bars creamy while being safe for school snacks!
-
Add Superfoods: Mix in chia seeds or hemp seeds to amp up the nutritional profile. These tiny powerhouses pack a punch of omega-3s and fiber, making your bars even more wholesome.
-
Flavor Boost: Incorporate a splash of coconut extract for a tropical twist. Just a tiny hint can transform the bars into a delightful vacation for your taste buds.
-
Fruit Medley: Toss in dried cranberries or raisins for a chewy bite. The added sweetness perfectly complements the rich taste of dates, creating layers of flavor in each morsel.
-
Crunchy Texture: Add chopped walnuts or pumpkin seeds for a satisfying crunch. These ingredients lend a varied texture, making every bite exciting and fulfilling.
-
Chocolate Swirl: Instead of chocolate chips, swirl in some melted dark chocolate for a decadent feel. This gives your bars an indulgent flair while keeping them healthy.
-
Spice It Up: Experiment with spices like cardamom or ginger to give your bars an unexpected kick. A hint of these warm spices brings a whole new flavor dimension that you’re bound to love.
-
Protein Boost: Stir in a scoop of your favorite protein powder for an extra energy hit. This is perfect for post-workout snacks or a busy day on the go!
With these variations, your Chickpea and Date Snack Bars can become a canvas for your creativity. And if you’re looking for more healthy recipes that are both comforting and delicious, check out my Chicken Mac Cheese or the warming Beef Bake Comfort! Enjoy the delightful adventure of customizing your snacks!
How to Store and Freeze Chickpea and Date Snack Bars
Fridge: Store your Chickpea and Date Snack Bars in an airtight container in the refrigerator for up to one week. This keeps them fresh and ready for quick snacking.
Freezer: Wrap individual bars tightly in plastic wrap or foil and place them in a freezer-safe container. They can be frozen for up to three months, making it easy to enjoy healthy snacks later.
Reheating: When you’re ready to enjoy a frozen bar, simply remove it from the freezer and let it thaw in the fridge overnight. For a quick treat, take it out and let it sit at room temperature for about 30 minutes before indulging!
Serve Fresh: For the best flavor and texture, enjoy these snacks after chilling them thoroughly in the fridge.
What to Serve with Protein-Packed Chickpea and Date Snack Bars
Complement these chewy bars with delightful pairings that enhance their nutritious profile and satisfying flavors.
-
Creamy Greek Yogurt: A dollop adds a refreshing creaminess that perfectly balances the sweetness of the bars. Enjoy it as a quick breakfast or snack option!
-
Fresh Berries: Juicy blueberries or strawberries provide a burst of freshness, boosting antioxidants and flavor harmony. Their tartness complements the rich sweetness of the bars beautifully.
-
Sliced Bananas: Layering slices of ripe banana on top elevates both taste and texture, making it a deliciously wholesome afternoon treat.
-
Coconut Chia Pudding: This light and creamy pudding offers a contrasting texture and a tropical flair, marrying perfectly with the bars’ earthy tones.
-
Nutty Trail Mix: A handful of mixed nuts and seeds adds crunch and protein that makes each snack truly filling.
-
Herbal Iced Tea: Refreshing yet not too sweet, a glass of lightly brewed herbal tea cleanses the palate and complements the richness of the bars.
-
Dairy-Free Ice Cream: For a decadent dessert twist, pair a scoop with these bars for a delightful treat that feels indulgent without the guilt.
-
Dark Chocolate Dipped Strawberries: Elevate your snacking experience by adding these as a sweet touch, enhancing both indulgence and visual appeal.
-
Honey Drizzle: A light drizzle on top of the bars adds a touch of natural sweetness, enhancing the flavors while providing extra moisture.
-
Cottage Cheese: Creamy and high in protein, pairing with a side of cottage cheese creates a wholesome snack that keeps you feeling satisfied longer.
Expert Tips for Chickpea and Date Snack Bars
-
Proper Mixing: Ensure the chickpeas and dates are blended until smooth for a cohesive texture. Lumpy mixtures can lead to uneven bars.
-
Adjust Sweetness: Taste the mixture before chilling. If you desire more sweetness, add honey or maple syrup to achieve your preferred flavor.
-
Firming Up: Make sure to chill the bars long enough. A good hour in the refrigerator allows them to firm up, making slicing easier.
-
Customizable Options: Feel free to experiment with add-ins like seeds or dried fruits, keeping the base recipe intact for the best results.
-
Texture Pro Tip: If the mixture feels too dry, a splash of water or more nut butter can help! Just mix until satisfied, ensuring your Chickpea and Date Snack Bars have the right consistency.
Chickpea and Date Snack Bars Recipe FAQs
How do I choose ripe dates?
Absolutely! When selecting dates, go for those that are plump and slightly sticky. Look for deep caramel color and avoid any with dark spots or a dry, wrinkled skin, as this may indicate they’re overripe. Fresh dates should feel soft but firm enough to hold their shape.
What is the best way to store these snack bars?
To maintain freshness, store your Chickpea and Date Snack Bars in an airtight container in the refrigerator for up to one week. This method helps prevent them from drying out and keeps those delicious flavors intact. For optimal ease, pre-cut them into squares for quick snacking!
Can I freeze these snack bars?
Yes, you can! Wrap each Chickpea and Date Snack Bar individually in plastic wrap or foil, then store them in a freezer-safe container or zip-top bag. They can be frozen for up to three months. To enjoy, simply thaw in the fridge overnight or let sit at room temperature for about 30 minutes before indulging.
What if my mixture is too dry?
If your mixture feels too dry and crumbly, don’t panic! Start by adding a splash of water or an extra tablespoon of your nut butter into the food processor. Pulse it again until the texture becomes moister and holds together better. Aim for a thick but sticky consistency that can be pressed into your baking dish without falling apart.
Are these bars safe for pets?
It’s always best to keep these Chickpea and Date Snack Bars away from pets, especially due to the presence of ingredients like chocolate or certain nut butters that can be harmful to them. If you’re considering homemade snacks for your furry friends, consult your vet for safe alternatives tailored for pets.
Can I make these bars nut-free?
Absolutely! To make a nut-free version, simply swap out the nut butter with sunflower seed butter or another seed-based alternative. This will still provide the necessary creaminess and healthy fats to the bars without any nut allergies concerns. Just ensure that your oats are certified gluten-free if you have gluten sensitivities!

Protein-Packed Chickpea and Date Snack Bars You’ll Love
Ingredients
Equipment
Method
- In a food processor, combine cooked chickpeas and pitted dates. Blend until smooth, resembling a thick paste. This takes about 1-2 minutes.
- Add oats, nut butter, honey or maple syrup, vanilla extract, cinnamon, and salt into the blended mixture. Pulse until combined, forming a thick, sticky mixture (about 30 seconds).
- Fold in dark chocolate chips by hand after removing the mixture from the processor, ensuring even distribution.
- Line an 8x8-inch baking dish with parchment paper. Spread the mixture into the dish, pressing it down firmly.
- Place the dish into the refrigerator and chill for at least 1 hour until firm.
- Carefully lift the bars out using the parchment paper. Slice into squares or rectangles as desired.
Leave a Reply