
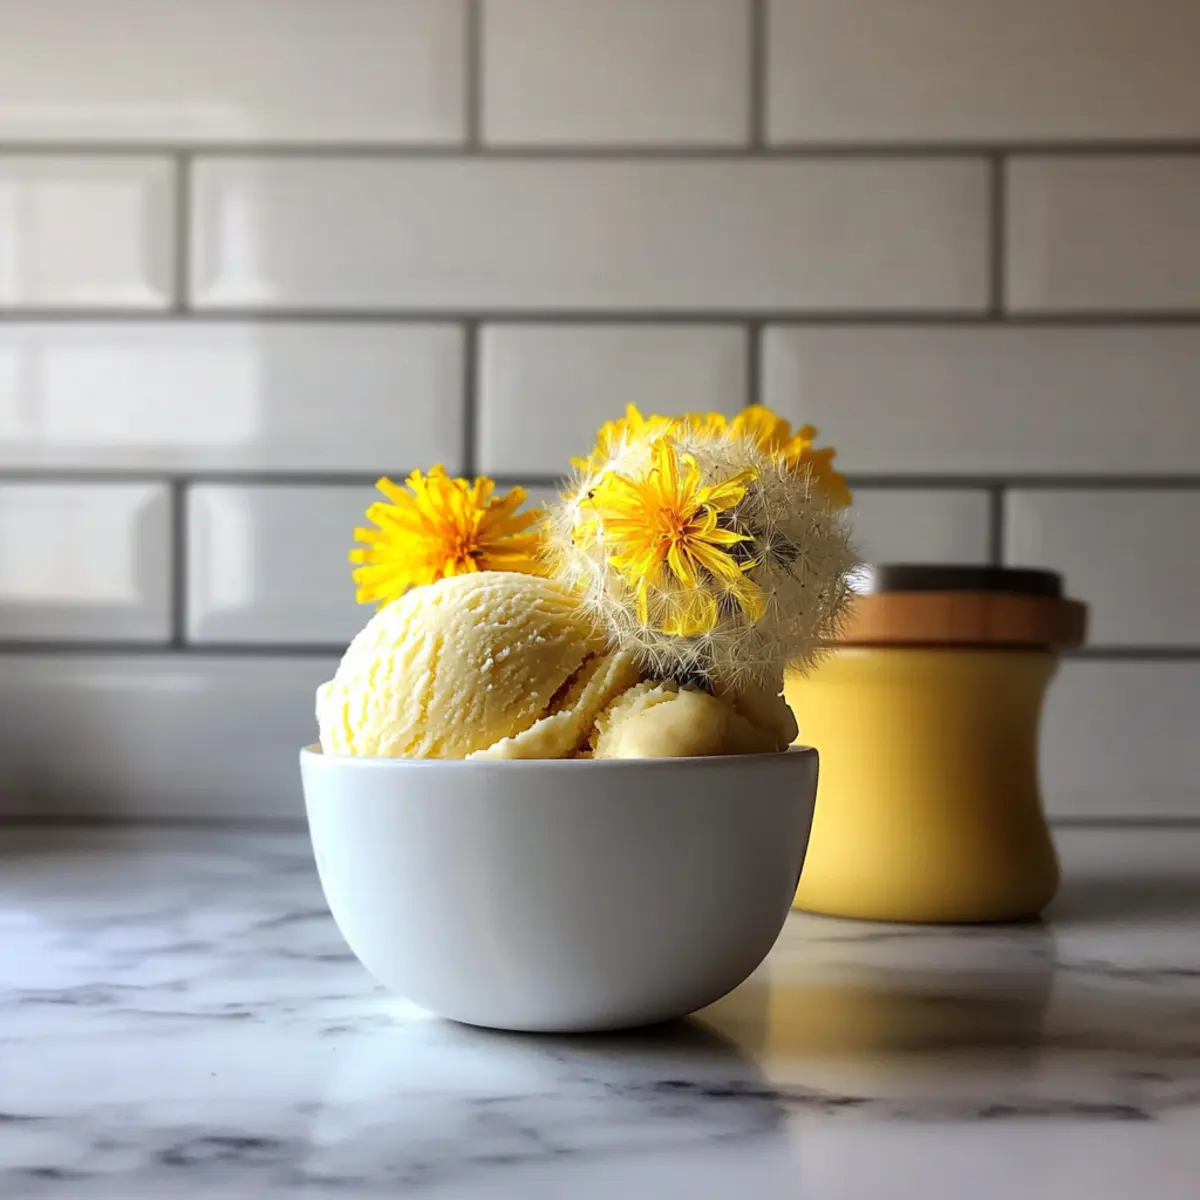
Walking through my garden the other day, I stumbled upon a vibrant patch of dandelions, their cheerful yellow petals waving at me like little flags of spring. This delightful find inspired me to create something extraordinary: Dandelion & Honey Ice Cream! Not only does this unique dessert showcase the beauty of foraged ingredients, but it also offers a creamy texture and a subtly floral flavor that’s perfect for welcoming warmer days. Embracing the natural sweetness of honey, this ice cream is a wholesome treat that’s also packed with health benefits, making it a sweet indulgence you can feel good about. Ready to impress your friends and family with this refreshing surprise? Let’s dive into the joy of crafting our own Dandelion & Honey Ice Cream!
Why Is Dandelion & Honey Ice Cream Unique?
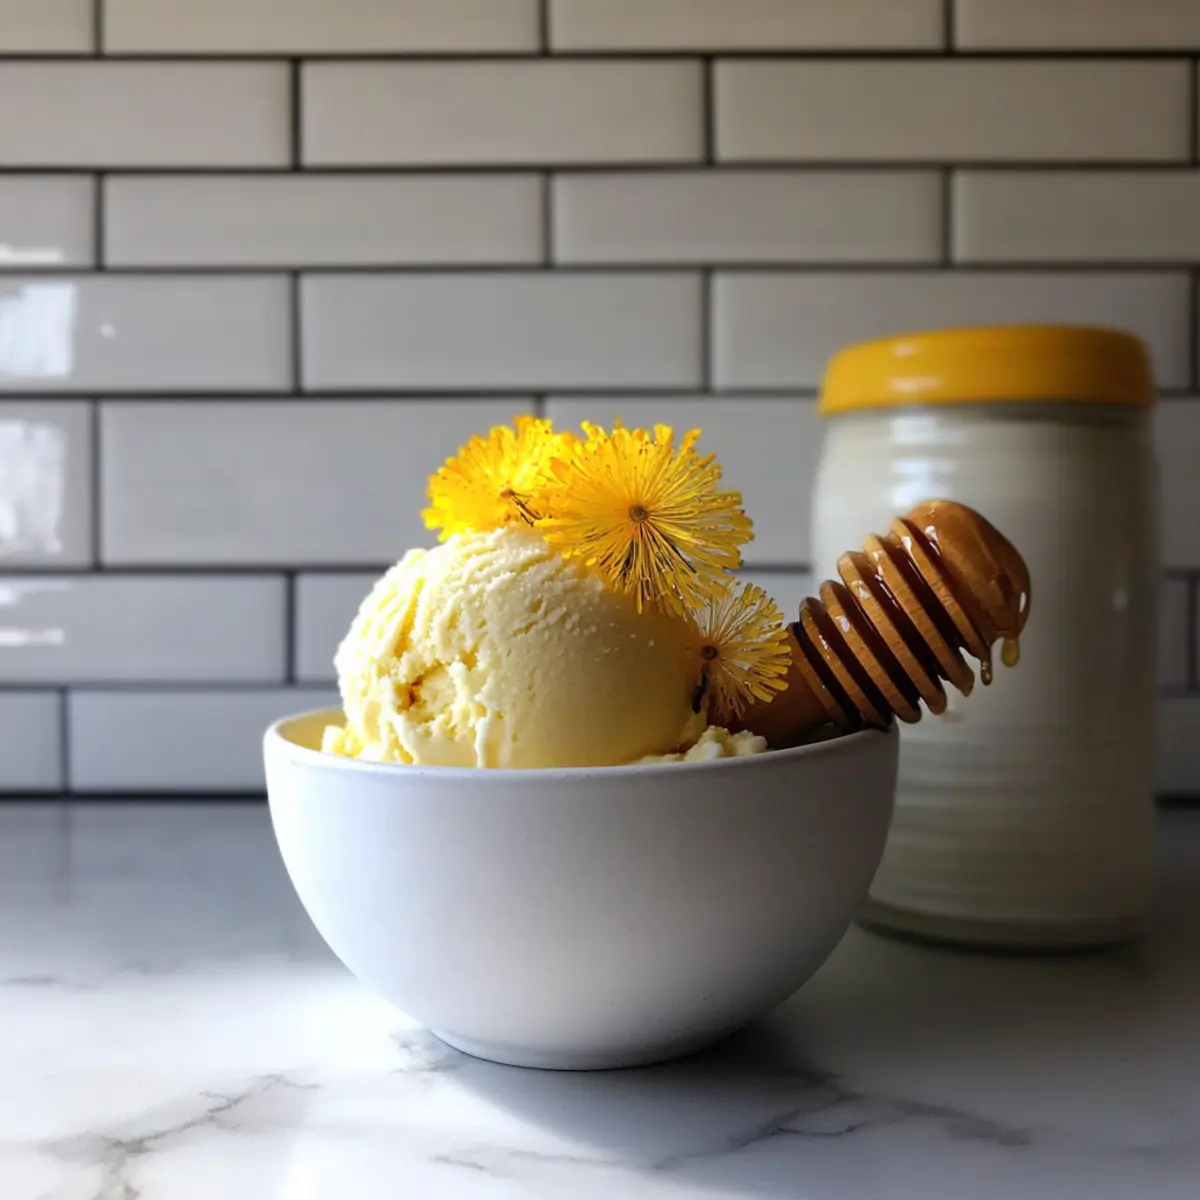
Dandelion & Honey Ice Cream isn’t just a dessert; it’s an experience! Natural Ingredients shine through in every scoop, showcasing the vibrant dandelion petals that bring a refreshing floral twist. Health Benefits abound, with rich nutrients that elevate this treat beyond ordinary ice cream. Simplicity is key, as this recipe requires minimal ingredients and effort, making it accessible for all home chefs. Plus, Crowd-Pleasing flavors will entice your guests, turning any gathering into a delightful spring celebration. Try drizzling it with additional honey or adding fresh berries for an extra touch of joy!
Dandelion & Honey Ice Cream Ingredients
• Discover the natural goodness in this unique dessert!
For the Ice Cream Base
- Honey – Provides sweet floral undertones; adjust to taste as less can be more initially.
- Heavy Cream – Adds rich creaminess; can be replaced with lighter creams if desired.
- Whole Milk/Half and Half – Offers a smoother texture; half and half intensifies richness.
- Sea Salt – Balances sweetness and enhances overall flavor in your Dandelion & Honey Ice Cream.
- Egg Yolks – Act as a thickening agent to create a luscious custard base.
For the Dandelion Flavor
- Dandelion Petals (yellow parts only) – These are the star ingredient, adding a delicate floral flavor; ensure to only use yellow petals to avoid bitterness.
Enjoy crafting this beautiful and wholesome dessert!
Step‑by‑Step Instructions for Dandelion & Honey Ice Cream
Step 1: Heat the Base
In a medium saucepan, carefully combine honey, heavy cream, and either whole milk or half and half. Gradually heat the mixture over medium-low heat, stirring gently until it reaches a gentle simmer. Watch for small bubbles forming at the edges; this is your cue to remove the saucepan from the heat. The sweet aroma of honey and cream will fill your kitchen, setting the stage for the delightful Dandelion & Honey Ice Cream.
Step 2: Infuse the Flavor
Once off the heat, add the yellow dandelion petals to the warm mixture, stirring to ensure they are submerged. Allow the mixture to steep and infuse for 30 to 40 minutes, letting the floral notes develop beautifully. As the petals impart their color and flavor, you may notice the cream taking on a pale yellow hue, signaling that it’s absorbing all the delightful essence of the dandelions.
Step 3: Strain the Mixture
After the infusion time, prepare a fine mesh strainer and place it over a clean bowl. Carefully pour the mixture through the strainer to separate the dandelion petals from the infused cream. Use a spatula to press down on the petals, extracting every last drop of flavor. Discard the petals, and rejoice as the liquid transforms into a fragrant base for your Dandelion & Honey Ice Cream.
Step 4: Prepare the Custard
In a clean saucepan, whisk together the egg yolks until they become slightly frothy. Slowly add the warm infused cream mixture to the egg yolks, whisking continuously to temper the eggs. Place the saucepan over low heat and cook, stirring constantly, until the custard thickens to a custard-like consistency, reaching about 175°F. The mixture should coat the back of a spoon, indicating it’s ready for the next step.
Step 5: Chill the Custard
Remove your saucepan from the heat and allow the custard to cool slightly. For best results, transfer the mixture to an airtight container and chill it in the fridge for at least four hours, or overnight if you prefer. A well-chilled custard is essential for creating creamy Dandelion & Honey Ice Cream, so be patient as the flavors meld and the mixture cools down.
Step 6: Churn the Ice Cream
Once your custard is thoroughly chilled, set up your ice cream maker according to the manufacturer’s instructions. Pour the cold custard into the machine and churn it for 20 to 25 minutes, or until it reaches a soft-serve consistency. The cold air will produce a creamy texture, which beautifully showcases the flavors of dandelion and honey in this unique ice cream.
Step 7: Freeze for Firmness
After churning, transfer the soft ice cream to a freezer-safe container. Spread the ice cream evenly and press down lightly to minimize air pockets. Secure the container with a lid and freeze the ice cream for at least 4 hours, or until it is firm enough to scoop. Enjoy the anticipation as the Dandelion & Honey Ice Cream transforms into a delightful treat ready to be shared.
Expert Tips for Dandelion & Honey Ice Cream
-
Petal Selection: Use only yellow dandelion petals to prevent bitterness in your ice cream. The green parts should be avoided for the best flavor.
-
Custard Thickness: If the custard doesn’t thicken quickly, maintain low heat and keep whisking until you achieve the desired custard-like consistency.
-
Chill Thoroughly: Make sure to chill the mixture for at least four hours before churning. A well-chilled custard is crucial for achieving smooth Dandelion & Honey Ice Cream.
-
Infusion Time: Allow sufficient infusion time for the dandelion petals in the cream mixture—30 to 40 minutes is ideal for maximizing flavor and aroma.
-
Sweetness Check: Adjust the honey based on your preference; start with less to gauge sweetness and add more if desired. Balance is key for this unique ice cream!
Dandelion & Honey Ice Cream Variations
Feel free to let your creativity shine as you customize this delightful ice cream recipe to suit your taste buds!
-
Citrus Zest: Add a few teaspoons of lemon or orange zest to the mixture for a refreshing citrus twist.
-
Vanilla Infusion: Stir in a splash of pure vanilla extract during the heating phase to deepen the flavor profile. The warmth of vanilla will complement the floral notes beautifully.
-
Berry Blend: Mix in a cup of fresh or frozen berries, such as blueberries or strawberries, for a burst of color and fruity goodness. It creates a delicious contrast with the floral base.
-
Edible Flower Swap: Instead of dandelions, consider using violet or elderflower petals! Their unique flavors will change the entire experience while keeping it equally delightful.
-
Herb Enhancement: Infuse mint or basil into the cream along with the dandelion petals for an unexpected but flavorful herbal note that lifts the dish.
-
Nutty Crunch: Fold in crushed almonds or pistachios just before freezing for an added texture and nutty flair. It’s a delightful surprise in every scoop!
-
Sweetener Alternatives: Experiment with maple syrup or agave nectar instead of honey for a different sweet twist. Each will lend a unique flavor to the final result.
-
Chocolate Drizzle: For chocolate lovers, serve your ice cream drizzled with melted dark chocolate or cacao nibs for a rich contrast that demands attention!
These variations ensure that your Dandelion & Honey Ice Cream remains a personalized treat, perfect for every occasion—whether you’re enjoying a calm evening or dazzling guests at a spring gathering. Plus, while you’re at it, why not pair your ice cream with some delicious desserts like Blueberry Cream Cake or a slice of rich Boston Cream Pie? The possibilities are endless!
Storage Tips for Dandelion & Honey Ice Cream
-
Fridge: Store any leftover Dandelion & Honey Ice Cream in an airtight container for up to 3 days. This is best for short-term enjoyment, but freezing is recommended for long-term storage.
-
Freezer: To maintain freshness, keep the ice cream in the freezer for up to 2 weeks. Ensure the container is well-sealed to prevent freezer burn and preserve its creamy texture.
-
Serving: Before serving, let the ice cream sit at room temperature for about 5-10 minutes to soften slightly. This makes it easier to scoop and enhances its creamy consistency.
-
Avoid Freezer Burn: To prevent the formation of ice crystals, press a piece of parchment paper directly onto the surface of the ice cream before sealing the container. This will help keep it silky after freezing.
What to Serve with Dandelion & Honey Ice Cream?
Looking to create a delightful spread that shines alongside your floral ice cream? Here are some perfect pairings to tantalize your taste buds.
-
Fresh Berries: Juicy strawberries, blueberries, or raspberries add a burst of color and sweetness, enhancing the floral notes of the ice cream beautifully.
-
Honey Drizzle: A light drizzle of additional honey elevates the natural sweetness, making every scoop taste like spring in a bowl.
-
Chopped Nuts: Toasted almonds or walnuts provide a satisfying crunch, adding textural contrast to the creamy, smooth ice cream.
-
Shortbread Cookies: Crisp, buttery cookies offer a delightful pairing, perfect for dipping and complementing the soft floral flavors of your dessert.
-
Mint Leaves: A sprinkle of fresh mint adds a refreshing touch and beautiful presentation, enhancing the ice cream’s overall floral profile.
-
Sparkling Lemonade: A glass of bubbly lemonade provides a zesty refreshment, balancing the sweetness and making for a cheerful spring gathering.
-
Chocolate Sauce: For those who love indulging, a swirl of rich chocolate sauce offers a decadent contrast to the honey and dandelions, creating a delightful harmony.
Embrace the delicate flavors of spring with these pairings, creating a memorable dessert experience for you and your guests!
Make Ahead Options
These Dandelion & Honey Ice Cream preparations are a breeze for busy home cooks! You can make the custard base up to 24 hours ahead by following steps 1 to 5, allowing it to chill in the fridge overnight. This not only saves time but also enhances the flavor as the ingredients meld beautifully. To maintain quality, be sure to store the mixture in an airtight container to prevent it from absorbing odors. When you’re ready to serve your delightful Dandelion & Honey Ice Cream, simply churn the chilled custard in your ice cream maker (step 6) and freeze for a few hours (step 7) until firm. Enjoy having this springtime treat at your fingertips!

Dandelion & Honey Ice Cream Recipe FAQs
What should I look for when selecting dandelion petals?
Absolutely! When harvesting dandelion petals for your ice cream, ensure you select only the bright yellow parts. Avoid the green parts as they can impart a bitter taste to the final product. Choose petals that are fresh and vibrant, free from dark spots or wilting, which could affect the flavor quality.
How should I store Dandelion & Honey Ice Cream?
To keep your Dandelion & Honey Ice Cream at its best, store it in an airtight container in the freezer for up to 2 weeks. It’s important to seal it tightly to prevent freezer burn. For best results, allow the ice cream to sit at room temperature for about 5-10 minutes before scooping to achieve that creamy texture you’re looking for.
Can I freeze Dandelion & Honey Ice Cream?
Yes, indeed! To freeze your ice cream, simply transfer it to a freezer-safe container after churning. Make sure to spread it evenly and press it down to minimize air pockets. Cover it securely and freeze for at least 4 hours or until firm enough to scoop. If you plan on storing it longer, consider placing parchment paper on the surface to prevent ice crystals from forming.
What if my custard doesn’t thicken while cooking?
Very! If your custard isn’t thickening as expected, keep the heat on low and continue whisking patiently. Cook until it reaches 175°F or until it coats the back of a spoon. If it still doesn’t thicken after several minutes, try increasing the heat slightly while still whisking, but be cautious not to scramble the eggs. If you do experience any issues, simply pour it back in the pan and whisk to revive it.
Is Dandelion & Honey Ice Cream safe for those with allergies?
If you have food allergies, it’s essential to take precautions. While dandelions themselves are safe and nutritious, always ensure that the flowers haven’t been treated with pesticides. Additionally, this recipe contains dairy, eggs, and honey, which are common allergens. Consider using dairy alternatives if you or your guests have lactose intolerance or dairy allergies.
How long can I store leftover Dandelion & Honey Ice Cream?
You can keep leftover Dandelion & Honey Ice Cream in the freezer for up to 2 weeks. However, for the freshest taste and optimal texture, I recommend enjoying it within the first week. After that, flavor intensity may diminish. When storing, remember that an airtight container is key to maintaining its luscious quality!

Dandelion & Honey Ice Cream
Ingredients
Equipment
Method
- In a medium saucepan, combine honey, heavy cream, and either whole milk or half and half. Gradually heat over medium-low until it simmers.
- Add yellow dandelion petals. Stir and steep for 30-40 minutes.
- Strain the mixture through a fine mesh strainer to separate petals, pressing down to extract flavor.
- Whisk egg yolks until frothy. Slowly add warm infused cream to yolks, whisking continuously. Cook over low heat until thickened.
- Allow the custard to cool and chill in the fridge for at least four hours or overnight.
- Churn the chilled custard in an ice cream maker for 20-25 minutes until soft-serve consistency.
- Transfer to freezer-safe container, spread evenly, and freeze for at least 4 hours until firm.
Leave a Reply