
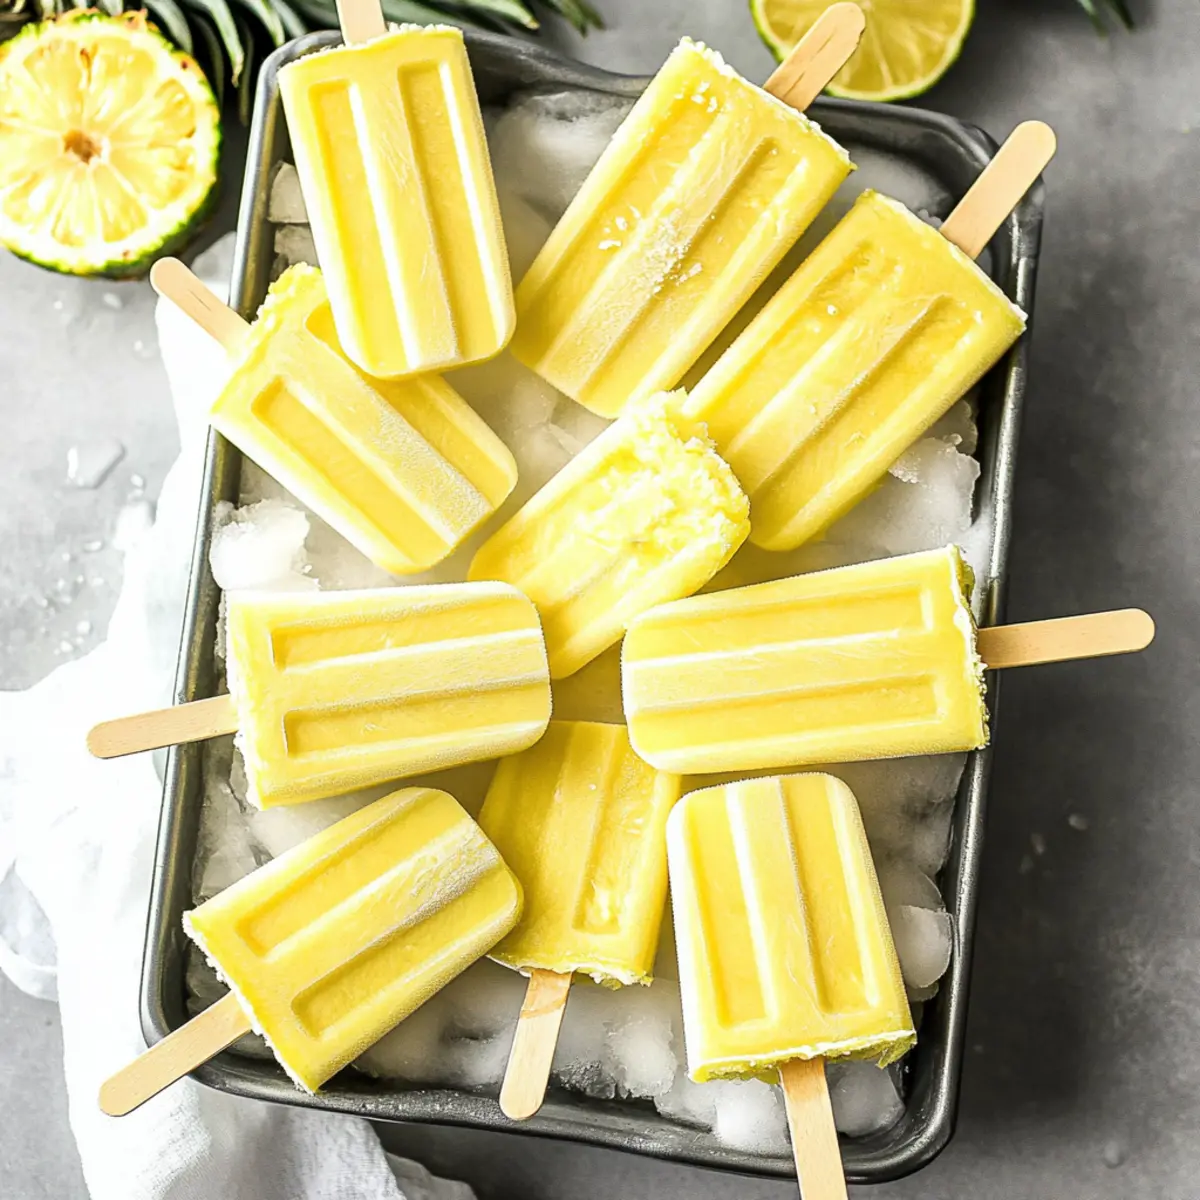
As I stood in my kitchen, the warm breeze wafted through the open window, carrying the scent of ripe pineapple ripening in my fruit bowl. I knew it was time for a refreshing treat—one that would capture the essence of summer. Enter my homemade pineapple popsicles, a simple and delightful indulgence that’s just as fun to make as it is to enjoy. These pops are not only a tropical escape but also a guilt-free option—dairy-free, gluten-free, and loaded with natural sweetness. With creamy coconut milk marrying the tangy notes of fresh pineapple, you’ll savor every bite, leaving fast food cravings far behind. Whip up these popsicles, and you’ll be ready to beat the heat while impressing your friends and family. Ready to dive into a whirlwind of flavor and simplicity? Let’s get popping!
Why Are These Popsicles So Irresistible?
Pure Joy: Each bite of these homemade pineapple popsicles transports you straight to a sun-soaked beach, with vibrant tropical flavors dancing on your palate.
Health-Conscious Delight: Made with fresh ingredients, they’re completely dairy-free and gluten-free, making them a guilt-free indulgence for everyone!
Quick & Easy: This recipe requires minimal effort; simply blend, pour, and freeze for a delicious treat ready in no time.
Customizable Goodness: Feel free to mix in your favorite fruits or adjust the sweetness to suit your taste! For a berry twist, check out my berry-infused popsicle recipes.
Crowd Pleaser: Perfect for summer gatherings, your friends and family will be clamoring for seconds of these delightful treats!
Homemade Pineapple Popsicle Ingredients
For the Popsicles
- Fresh Pineapple Chunks – These add natural sweetness and an irresistible tropical flavor; make sure to use ripe pineapple for the best taste!
- Juice of 1 Lime – This brings a zesty acidity that balances the sweetness; substitute with lemon juice for a refreshing twist.
- Coconut Milk (Full Fat, Unsweetened) – Provides a creamy texture reminiscent of paradise; other non-dairy milks can be used, but may change the final consistency.
- Honey – Acts as your sweetener; feel free to adjust the amount based on your preference, or try maple syrup for a vegan alternative.
- Guar Gum Powder (Optional) – Helps achieve a smoother texture and ensures ingredients blend well; skip it if you don’t have it!
With these simple, wholesome ingredients, you’ll create homemade pineapple popsicles that are sure to delight everyone.
Step‑by‑Step Instructions for Homemade Pineapple Popsicles
Step 1: Prepare the Pineapple
Begin by peeling, coring, and chopping a ripe pineapple into chunks. This step is essential for ensuring that your homemade pineapple popsicles are bursting with the sweetest flavor. Aim for about 3 cups of fresh pineapple, then set the chunks aside as you get ready to blend.
Step 2: Juice the Lime
Squeeze the juice of one lime directly into the blender, adding a refreshing zesty flavor that beautifully balances the sweetness of the pineapple. The acidity from the lime will enhance the overall taste of your homemade pineapple popsicles, making them even more invigorating.
Step 3: Blend the Ingredients
Add the chopped pineapple chunks and coconut milk (full fat, unsweetened) to the blender. Pour in 2 tablespoons of honey to start sweetening the mixture. Blend everything on high speed for about 30 seconds until the mixture is smooth and creamy, ensuring no pineapple chunks remain.
Step 4: Adjust Sweetness
Take a moment to taste the blended mixture, and if you prefer it sweeter, add more honey gradually. Blend again briefly for about 10 seconds to incorporate the additional sweetness. This step is crucial to achieving the perfect flavor for your homemade pineapple popsicles.
Step 5: Pour into Molds
Carefully pour the smooth mixture into popsicle molds, leaving a little space at the top as the mixture will expand when frozen. To avoid air bubbles, gently tap the molds on the counter a few times. This will help achieve a creamy texture and avoid any inconvenient gaps in your popsicles.
Step 6: Insert Sticks and Freeze
If your molds allow for sticks, insert them carefully into the center of the mixture before placing them in the freezer. To ensure they freeze evenly, lay them flat in the freezer and allow them to set for at least 6 hours, or ideally overnight for the best texture in your homemade pineapple popsicles.
Step 7: Release the Popsicles
Once frozen, it’s time to enjoy your delightful treats! To easily release the popsicles from their molds, run warm water over the outside of the molds for about 10 seconds. This will gently loosen them, making it simple to slide out your homemade pineapple popsicles.
Step 8: Serve and Savor
Your homemade pineapple popsicles are now ready to be served on a hot summer day. Enjoy them as a refreshing snack or dessert; the creamy texture combined with sweet and tangy pineapple will be a hit with family and friends.
How to Store and Freeze Homemade Pineapple Popsicles
Fridge: Store for up to 2 days in an airtight container if you plan to consume them quickly. However, freezing is recommended for best texture.
Freezer: Keep your homemade pineapple popsicles in the freezer for up to 6-8 weeks. Ensure they’re in an airtight container or plastic wrap to prevent freezer burn.
Thawing: When ready to enjoy, simply let the popsicles sit at room temperature for a few minutes or run warm water over the mold for easy release.
Reheating: These popsicles are best enjoyed frozen! Avoid reheating, as it may compromise their delightful creamy texture.
Homemade Pineapple Popsicle Variations
Feel free to explore and make these homemade pineapple popsicles your own with delightful twists and substitutions!
-
Dairy-Free: Swap coconut milk for almond or oat milk for a lighter option, but expect a slight change in creaminess.
-
Berry Blast: Add mixed berries like strawberries or raspberries to the blender for a tangy, colorful twist, creating a tropical berry fusion!
-
Citrus Swap: Use lemon or orange juice instead of lime for a refreshing change, giving your popsicles a bright, citrusy flavor profile.
-
Creamy Banana: Blend in a ripe banana for added creaminess and natural sweetness, making each popsicle taste even more indulgent.
-
Minty Fresh: Toss in fresh mint leaves before blending for a refreshing herbal note that beautifully complements the pineapple flavor.
-
Spicy Kick: Add a pinch of cayenne pepper or a small slice of jalapeño for a surprising heat element that balances the sweetness—just a sprinkle will do!
-
Nut Butter Delight: Stir in a spoonful of almond or peanut butter after blending for a rich and nutty flavor that elevates the texture.
-
Tropical Twist: Get playful by blending in other fruits like mango or kiwi for a vibrant, tropical party in every popsicle! Check out my mango popsicle recipe if you’re interested in this delicious addition.
Embrace these variations, and your homemade popsicles will become a canvas for your creativity!
Expert Tips for Homemade Pineapple Popsicles
-
Use Ripe Pineapple: Choose ripe pineapple for the sweetest flavor; unripe fruit can make your popsicles taste less delicious.
-
Blend Well: Ensure your blender is powerful enough to create a smooth mixture; lingering chunks are a sign of incomplete blending, affecting texture.
-
Sweetness Check: Always taste before freezing! Feel free to tweak the sweetness of your homemade pineapple popsicles to suit your personal preference.
-
Mold Selection: Silicone molds work wonders for easy popsicle removal; avoid rigid plastic molds that may cause frustration when releasing your pops.
-
Freezing Time: Patience is key! Let your popsicles freeze for at least 6 hours or overnight to achieve that perfect, creamy consistency.
Make Ahead Options
These homemade pineapple popsicles are a fantastic meal prep solution for busy days! You can prepare the pineapple mixture up to 24 hours in advance, allowing you to blend the ingredients—fresh pineapple, lime juice, coconut milk, and honey—store them in an airtight container in the refrigerator. This not only saves time but also enhances the flavors as they meld together. When you’re ready to enjoy, simply pour the mixture into popsicle molds and freeze for a minimum of 6 hours or ideally overnight. By following these make-ahead tips, you’ll have creamy, refreshing pineapple popsicles ready to beat the heat whenever summer calls!
What to Serve with Homemade Pineapple Popsicles
Nothing beats the joy of pairing refreshing treats with delightful sides, elevating your summer snacking experience.
-
Tropical Fruit Salad: A vibrantly colored fruit salad with mango, kiwi, and berries perfectly enhances the tropical theme of the popsicles, adding freshness and crunch.
-
Coconut Whipped Cream: Serve with a dollop of light, airy coconut whipped cream for a luscious, creamy contrast that complements the popsicles’ texture beautifully.
-
Chili-Lime Corn on the Cob: This zesty corn dish offers a smoky flavor that pairs well with the sweet pineapple popsicles, creating a delightful balance of spicy and sweet.
-
Lemonade Spritzer: Refreshing homemade lemonade mixed with sparkling water serves as the perfect thirst-quenching companion, matching the popsicle’s fruity tones with a bubbly twist.
-
Coconut Macaroons: These chewy, sweet cookies add another layer of coconut goodness to your dessert spread, enticing your taste buds with every bite.
-
Grilled Shrimp Skewers: For a savory option, these skewers provide a smoky flavor to contrast the sweet popsicles, creating a unique and delicious meal experience.
With these delightful pairings, your homemade pineapple popsicles will shine even brighter, making your summer gatherings a feast for the senses!
Homemade Pineapple Popsicles Recipe FAQs
What type of pineapple should I use for the best popsicles?
Absolutely! For the sweetest and most flavorful homemade pineapple popsicles, always choose a ripe pineapple. Look for one that is golden-yellow, with a sweet scent and slight give when gently pressed. Avoid pineapples with dark spots or blemishes, as these can indicate overripeness.
How should I store homemade pineapple popsicles?
For optimal freshness, keep your homemade pineapple popsicles in an airtight container in the freezer. They can be stored for up to 6-8 weeks without losing flavor or texture. If you plan on consuming them within 2 days, you can refrigerate them in an airtight container, but freezing is the best way to save them long-term.
Can I freeze these popsicles for later?
Absolutely! To freeze your homemade pineapple popsicles, pour the blended mixture into popsicle molds and insert sticks if applicable. Freeze for at least 6 hours or overnight for the best results. When you’re ready to enjoy, simply run warm water over the outside of the molds for about 10 seconds to help release them easily.
What if my popsicles don’t set properly?
If your homemade pineapple popsicles don’t freeze correctly or seem too soft, there could be a few reasons. First, ensure you blended the mixture thoroughly; chunks can prevent even freezing. Additionally, check that they were placed in the freezer for at least 6 hours, or preferably overnight. If they’re still too soft after freezing, you might need to reduce the liquid next time; using less coconut milk or adjusting the honey can help.
Are these pineapple popsicles safe for my pets, and are they allergy-friendly?
While fresh pineapple is a safe snack for dogs in moderation, it’s important to ensure that the popsicles don’t contain any harmful ingredients like honey for pets with specific dietary restrictions. For allergies, always verify the coconut milk and sweeteners you’re using, as some individuals may be allergic. The popsicles are dairy-free, gluten-free, and vegetarian, making them a suitable treat for many!
Homemade Pineapple Popsicles that Taste Like Paradise
Ingredients
Equipment
Method
- Prepare the pineapple by peeling, coring, and chopping into chunks. Aim for about 3 cups.
- Juice the lime and add it to the blender for zesty flavor.
- Add pineapple chunks and coconut milk to blender, pour in honey, and blend until smooth.
- Taste the mixture and adjust sweetness with honey if needed, blend briefly to mix.
- Pour the mixture into popsicle molds, leaving a little space at the top.
- Insert sticks into molds, lay flat in freezer, and freeze for at least 6 hours or overnight.
- To release, run warm water over molds for about 10 seconds.
- Serve and enjoy your refreshing popsicles!
Leave a Reply