
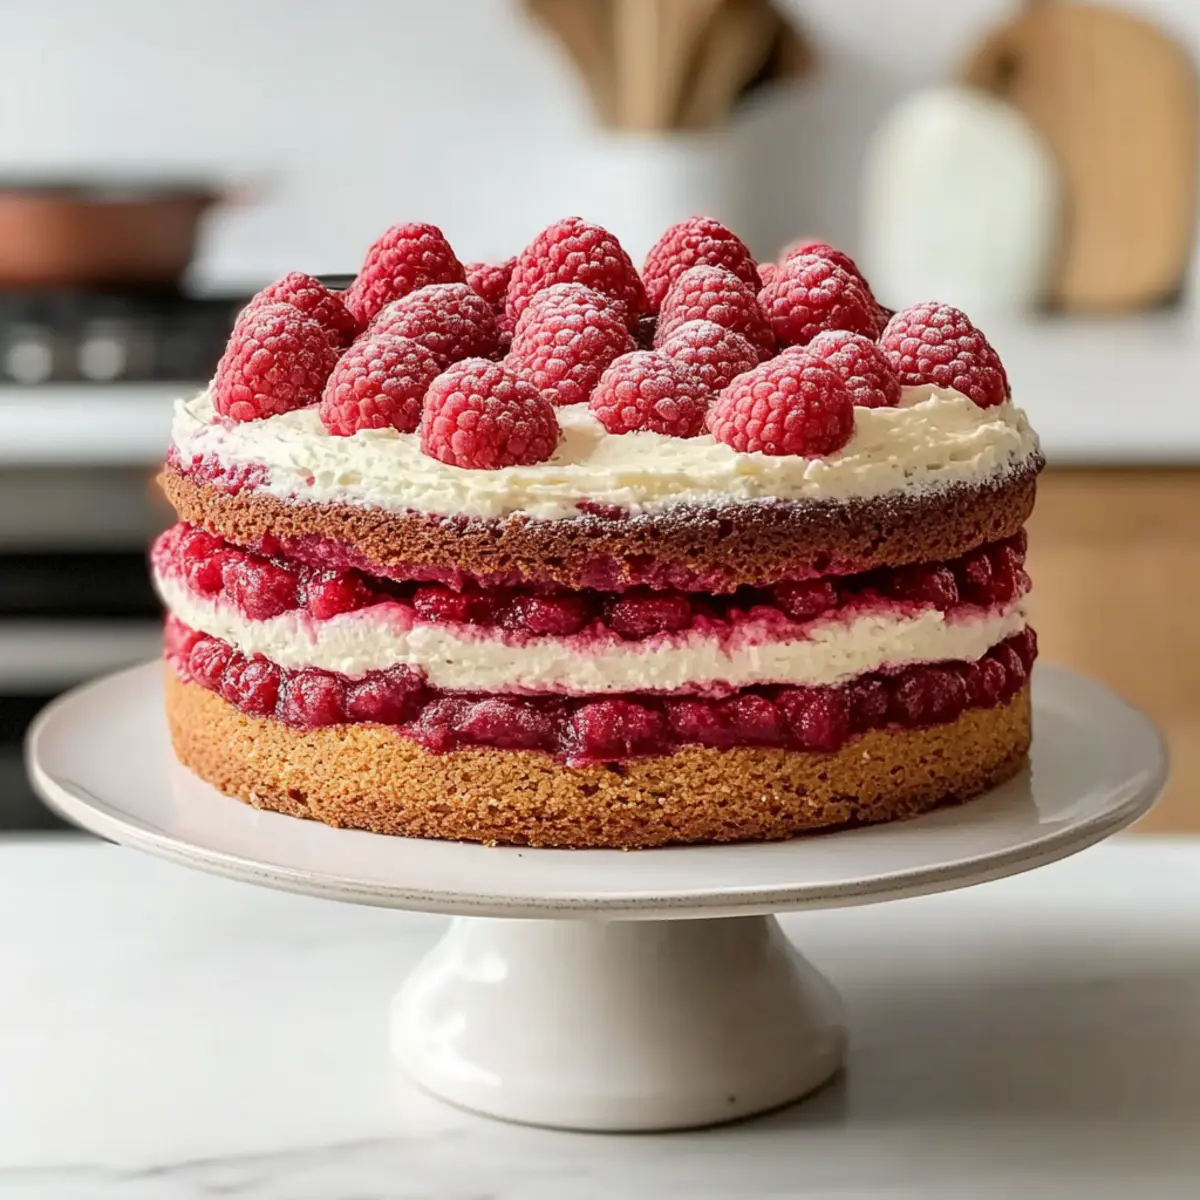
As I sifted through my pantry, I stumbled upon a bright box of fresh raspberries, and it sparked something delightful in me. This moment transformed into a kitchen adventure, leading to the creation of a Guilt-Free Raspberry Cake that completely redefines indulgence. Perfectly moist, this health-conscious dessert allows you to savor every bite while keeping your well-being in mind. Not only is it quick to whip up, but it’s also a nutritious option that doesn’t skimp on flavor—ideal for both seasoned home bakers and those just starting to explore their baking skills. Trust me, you won’t believe how satisfying it is to treat yourself guilt-free. Are you ready to dive into this delightful recipe that balances sweetness with health? Let’s get started!
Why is this cake a must-try?
Guilt-Free indulgence never tasted so good! This cake combines wholesome ingredients to create a dessert that satisfies without the extra calories. Moist texture and rich raspberry flavor make each bite a blissful treat. Quick and easy to prepare, it’s perfect for busy home chefs or those new to baking. Plus, it’s versatile—try adding lemon zest for a fresh twist or serve with a dollop of Greek yogurt for an elevated experience! Your friends and family will be amazed that something so delicious can be so guilt-free! If you’re looking for more mouth-watering options, don’t miss out on my Coconut Cloud Cake or Blueberry Cream Cake.
Guilt-Free Raspberry Cake Ingredients
• Embrace wholesome baking with these nutritious ingredients!
For the Batter
- Fresh Raspberries – Provide natural sweetness and a burst of flavor; frozen raspberries work well if fresh ones aren’t available.
- Almond Flour – Acts as a gluten-free base, adding moisture and a delightful nutty taste; substitute with oat flour for a different flair.
- Greek Yogurt – Adds creaminess and protein while cutting down on fat; plain yogurt can be used as an alternative.
- Honey or Maple Syrup – Offers natural sweetness; adjust according to your preferred level of sweetness, or use brown sugar for a richer flavor.
- Eggs – Essential for binding your cake together; flax eggs make an excellent vegan option.
- Baking Powder – Provides lift and lightness to the cake; ensuring it’s fresh will yield the best results.
- Vanilla Extract – Enhances the overall flavor; feel free to omit it for a simpler taste.
- Salt – Balances flavors and enhances sweetness.
This Guilt-Free Raspberry Cake uses these wholesome ingredients to create a dessert you can truly feel good about enjoying!
Step‑by‑Step Instructions for Guilt-Free Raspberry Cake
Step 1: Preheat the Oven
Begin by preheating your oven to 350°F (175°C). While the oven warms up, take a round cake pan and lightly grease it with a non-stick spray or a thin layer of oil to ensure the Guilt-Free Raspberry Cake slides out easily once baked.
Step 2: Mix Dry Ingredients
In a large mixing bowl, whisk together the almond flour, baking powder, and salt until well combined. This process not only blends the dry ingredients but also aerates them, ensuring a light crumb in your cake. Set this bowl aside as you move on to the wet ingredients.
Step 3: Combine Wet Ingredients
In another bowl, crack the eggs and add the Greek yogurt, honey (or maple syrup), and vanilla extract. Use a whisk or an electric mixer to blend the mixture until it reaches a smooth, creamy consistency. This will create a luscious base for your Guilt-Free Raspberry Cake.
Step 4: Combine Mixtures
Carefully fold the dry ingredients into the wet mixture using a spatula. Combine them gently until just blended, being cautious not to overmix, as this can lead to a denser cake. The batter should still be a bit lumpy, which is perfect for the final texture of the cake.
Step 5: Add Raspberries
Now it’s time to gently incorporate the fresh raspberries into the batter. Fold them in softly to maintain their shape and avoid crushing them. This will distribute the delightful raspberry flavor throughout the Guilt-Free Raspberry Cake without losing the beautiful berry integrity.
Step 6: Pour into Pan
Transfer your mixed batter into the prepared cake pan, using a spatula to scrape the sides and ensure all the batter is used. Smooth the top with the spatula, creating an even surface, which will help the cake bake uniformly, resulting in a beautifully rounded top.
Step 7: Bake
Place the cake in the preheated oven and bake for 25-30 minutes. To check for doneness, insert a toothpick into the center; if it comes out clean with a few moist crumbs clinging to it, your cake is ready. The edges should be lightly golden, indicating that it’s perfectly baked.
Step 8: Cool the Cake
Once baked, remove the cake from the oven and allow it to cool in the pan for about 10 minutes. Then, carefully transfer the cake onto a wire rack to cool completely. This step helps retain its moistness while ensuring it’s ready to be sliced and enjoyed as a delightful, guilt-free dessert.
Make Ahead Options
These Guilt-Free Raspberry Cake preparations are perfect for busy home cooks looking to save time! You can mix the dry ingredients (almond flour, baking powder, and salt) and store them in an airtight container for up to 3 days. Additionally, you can pre-combine the wet ingredients (eggs, Greek yogurt, honey, and vanilla) and refrigerate them for up to 24 hours before baking. This not only saves you precious time but also enhances the flavors. When you’re ready to bake, simply mix the prepped wet and dry ingredients, gently fold in the raspberries, and bake as directed for a deliciously moist cake that’s just as delightful as if made fresh!
What to Serve with Guilt-Free Raspberry Cake?
Treat your loved ones to a delightful meal that perfectly complements this flavorful, nutritious dessert!
- Creamy Greek Yogurt: A dollop of Greek yogurt pairs beautifully, adding a tangy creaminess that balances the cake’s sweetness and enhances its health benefits.
- Fresh Fruit Salad: A mix of seasonal fruits can add a refreshing contrast, making the meal lighter and vibrant while playing off the raspberry notes.
- Nutty Granola: Sprinkling nutty granola on top provides a crunchy texture that complements the soft cake, creating a delightful mouthfeel.
- Herbal Tea: A warm cup of herbal tea, such as chamomile or mint, pairs well, soothing the palate and offering a calm finish to your meal.
- Almond Milkshake: For something indulgent yet healthy, an almond milkshake can enrich the experience with its creamy and nutty tones, harmonizing with the cake’s flavors.
- Simple Green Salad: A light salad with mixed greens, dressed in a lemon vinaigrette, can introduce fresh, zesty flavors, enhancing the cake without overpowering it.
- Chia Seed Pudding: A small bowl of chia seed pudding in vanilla or coconut adds an interesting texture and nourishing benefits, perfect for a delightful dessert duo.
- Dark Chocolate Squares: A few squares of dark chocolate on the side add a touch of indulgence and a rich flavor contrast that works wonderfully with the raspberry cake.
Expert Tips for Guilt-Free Raspberry Cake
-
Avoid Overmixing: Combine wet and dry ingredients just until blended to keep the cake light and fluffy. Overmixing may result in a dense texture.
-
Use Room Temperature Ingredients: Bringing eggs and yogurt to room temperature promotes even baking, ensuring a moist and flavorful Guilt-Free Raspberry Cake.
-
Keep Raspberries Intact: Gently fold in the raspberries to prevent them from breaking apart, ensuring each slice showcases the beautiful berries.
-
Check Freshness of Baking Powder: Always ensure your baking powder is fresh. Old baking powder won’t give your cake the lift it needs, leading to a flat result.
-
Cool Completely: Letting the cake cool completely before slicing enhances its texture and makes for cleaner, more appealing slices.
How to Store and Freeze Guilt-Free Raspberry Cake
Fridge: Keep your cake in an airtight container in the fridge for up to 5 days, ensuring it stays moist and delicious for each slice you take.
Freezer: For longer storage, wrap slices of the Guilt-Free Raspberry Cake tightly in plastic wrap and then place them in a freezer-safe bag. They can be frozen for up to 3 months.
Thawing: When you’re ready to enjoy the cake, simply remove the slices from the freezer and let them thaw in the fridge overnight. You can also thaw at room temperature for a couple of hours.
Reheating: If you prefer your cake warm, pop a slice in the microwave for about 15-20 seconds to gently warm it up without drying it out.
Guilt-Free Raspberry Cake Substitutions
Feel free to make this delightful cake your own with some simple tweaks that enhance flavors and textures!
-
Nut-Free: Use a gluten-free all-purpose flour blend in place of almond flour for those with nut allergies. It retains the cake’s lightness while keeping it safe for everyone.
-
Vegan: Swap eggs for flax eggs (1 tablespoon flaxseed meal + 2.5 tablespoons water for each egg). This substitution still gives the cake great structure without compromising flavor.
-
Low Sugar: Replace honey or maple syrup with a low-calorie sweetener like stevia or erythritol. Adjust to taste and enjoy a guilt-free treat.
-
Citrusy Twist: Add the zest of a lemon or orange to the batter for a refreshing, zesty flavor. The citrus pairs beautifully with the tart raspberries for an elevated experience.
-
Berry Blend: Mix in other berries, such as blueberries or blackberries, for a berry medley. The added color and flavor will delight your taste buds even more!
-
Chocolate Fan? For a decadent chocolate version, replace ¼ cup of almond flour with unsweetened cocoa powder. Your cake will be rich and indulgent without the guilt.
-
Nutty Flavor Boost: Enhance the nuttiness by adding a tablespoon of almond extract. It deepens the almond flavor in the cake while remaining low in calories.
If you’re looking for even more delectable dessert ideas, check out my Strawberry Shortcake Ice or give my Flourless Orange Cake a try for a unique treat!
Guilt-Free Raspberry Cake Recipe FAQs
Are fresh raspberries better than frozen for this recipe?
Absolutely! Fresh raspberries provide a delightful burst of flavor and a beautiful presentation in the cake. However, if fresh ones aren’t available, frozen raspberries work just fine. Just be sure to fold them in gently to maintain their shape.
How should I store the Guilt-Free Raspberry Cake?
To keep your cake fresh, store it in an airtight container in the refrigerator for up to 5 days. This will help maintain its moist texture, allowing you to enjoy it slice after slice!
Can I freeze the Guilt-Free Raspberry Cake?
Yes! For longer-term storage, wrap slices of the cake tightly in plastic wrap, then place them in a freezer-safe bag. It can be kept in the freezer for up to 3 months. Just remember to label the bag with the date for easy tracking!
What if my cake didn’t rise properly?
If your cake doesn’t rise as expected, it’s most likely due to stale baking powder. To ensure the best results, always check the freshness of your baking powder before use. A quick test is to add a teaspoon to warm water; if it bubbles vigorously, it’s still good to go!
Is this cake suitable for those with nut allergies?
Since this Guilt-Free Raspberry Cake uses almond flour, it’s not recommended for individuals with nut allergies. A good alternative would be oat flour, which can create a delightful texture as well! Always check for allergies and adjust accordingly.
How can I make this cake vegan-friendly?
You can easily modify this recipe to fit a vegan diet! Replace the eggs with flax eggs (mix 1 tablespoon of ground flaxseed with 3 tablespoons of water for each egg). Additionally, ensure the yogurt is a plant-based alternative, and your cake will be completely vegan-friendly.
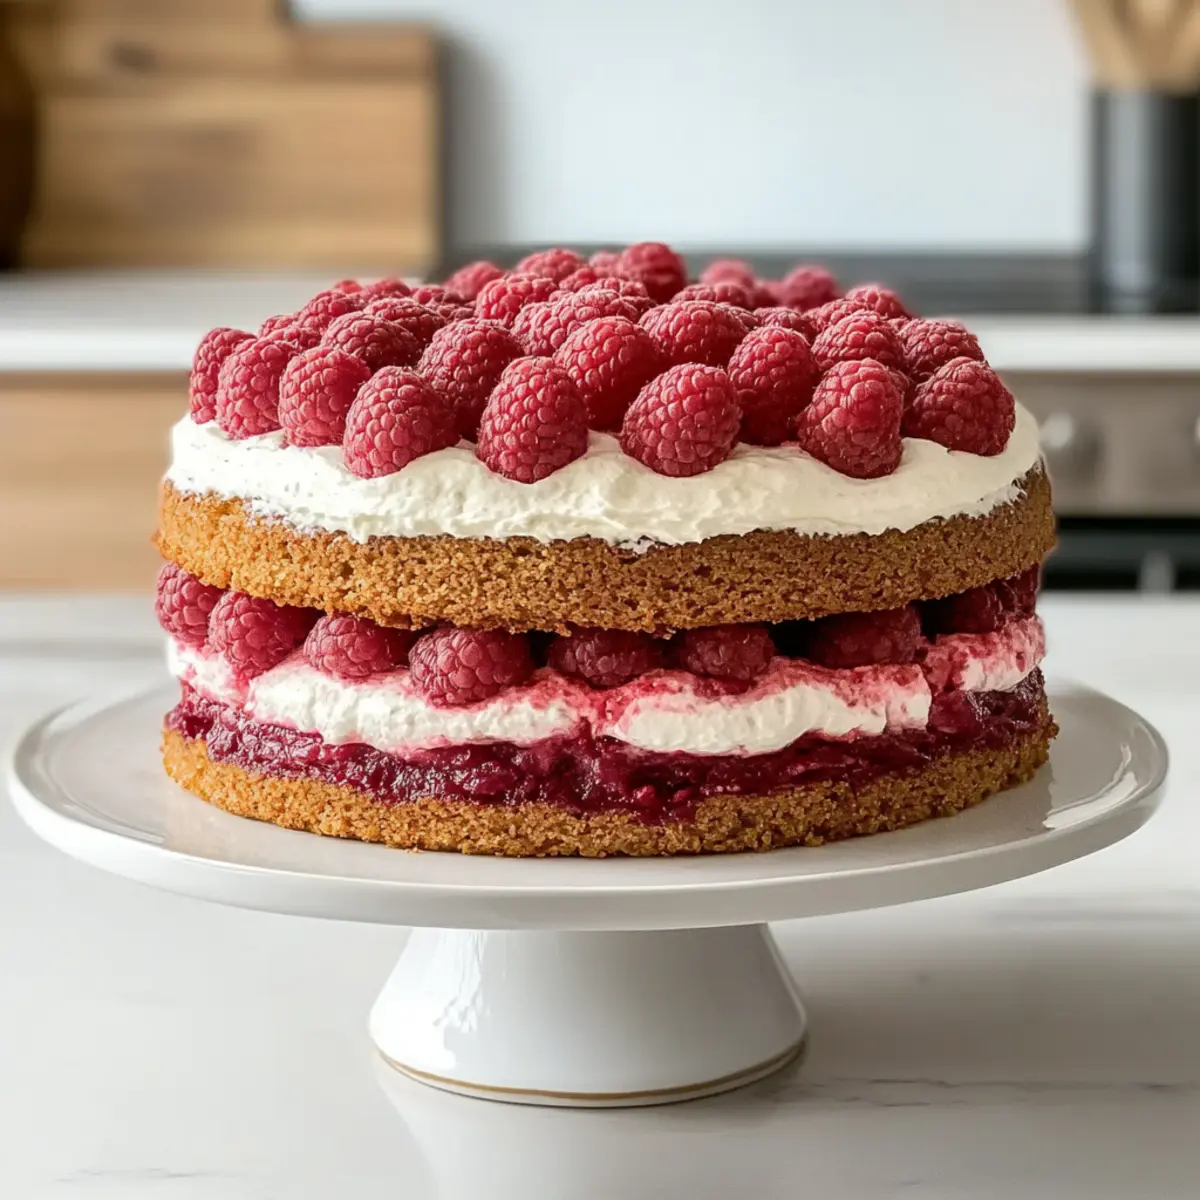
Guilt-Free Raspberry Cake: Indulge Without the Extra Calories
Ingredients
Equipment
Method
- Preheat your oven to 350°F (175°C) and lightly grease a round cake pan.
- In a large mixing bowl, whisk together the almond flour, baking powder, and salt.
- In another bowl, combine the eggs, Greek yogurt, honey, and vanilla extract until smooth.
- Gently fold the dry ingredients into the wet ingredients until just blended.
- Fold in the fresh raspberries carefully.
- Transfer the batter into the prepared cake pan and smooth the top.
- Bake for 25-30 minutes and check for doneness using a toothpick.
- Cool the cake in the pan for 10 minutes before transferring it to a wire rack.
Leave a Reply