
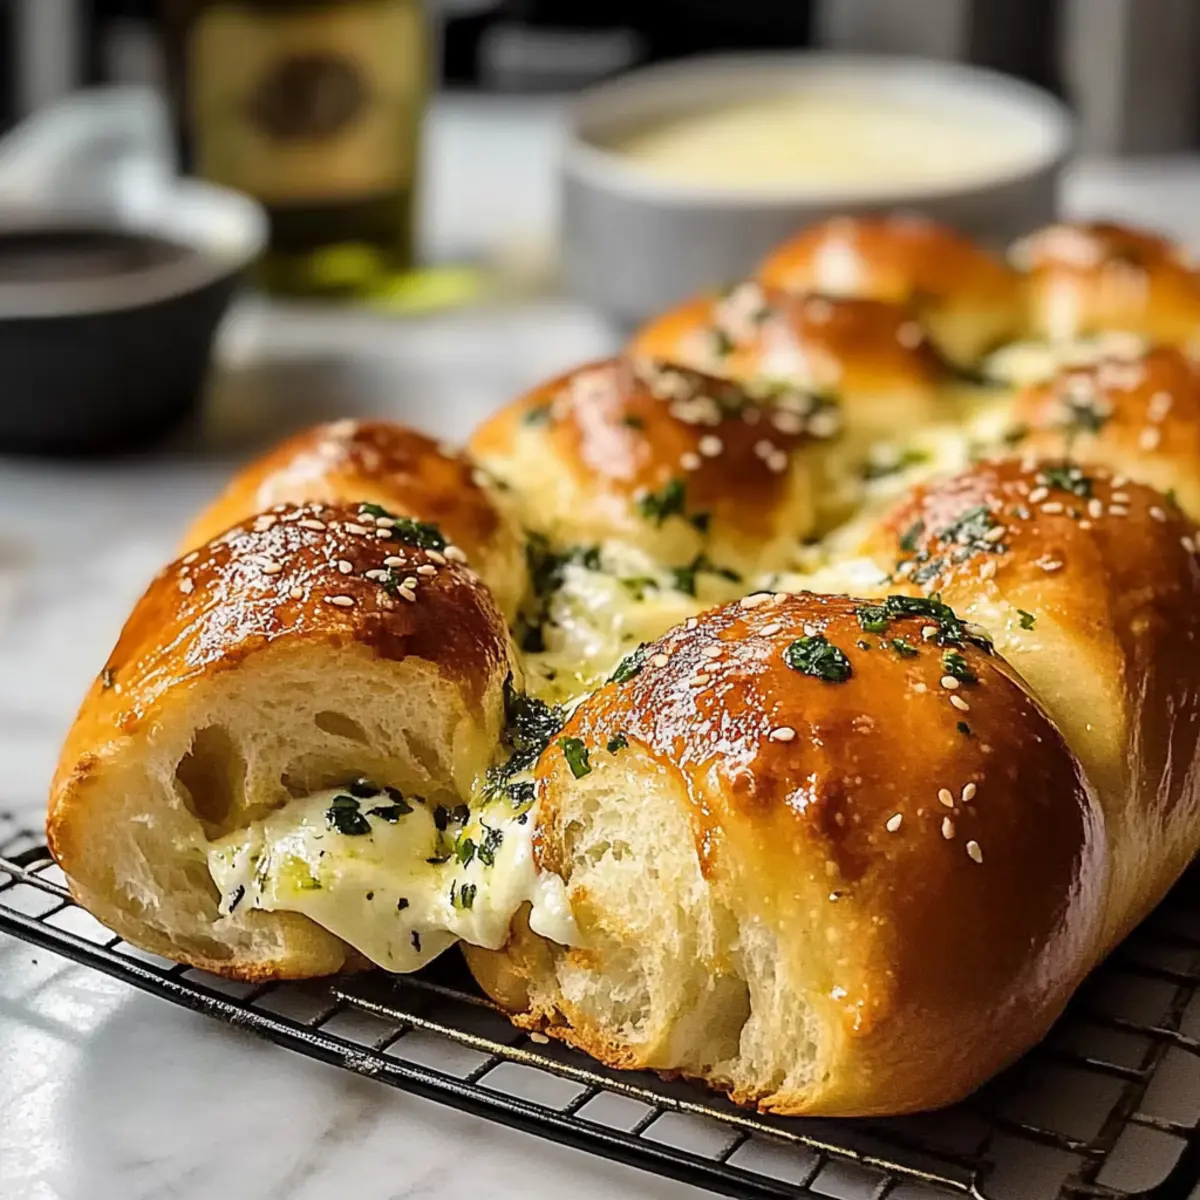
The first bite transports you straight to a bustling Korean bakery, where the aroma of warm, buttery bread fills the air. Homemade Korean Cream Cheese Garlic Bread is not just a snack; it’s a delightful marriage of crispy and creamy that you can easily create in your own kitchen. This recipe requires no special skills and is perfect for anyone looking to elevate their homemade food game. Imagine surprising your family with a savory-sweet treat that’s just as impressive as it is approachable. You’ll whip up a batch of these golden-brown treasures in no time, making it an ideal choice for a cozy evening or a gathering with friends. Ready to indulge in this delightful fusion of flavors? Let’s dive into the delicious details!
Why is This Recipe a Must-Try?
Simplicity: You don’t need to be a pro chef to whip up this delicious treat.
Flavor Explosion: The harmonious blend of creamy cheese and garlicky sweetness is unlike anything you’ve tasted.
Crowd-Pleaser: Friends and family will rave about this delightful fusion, making it perfect for gatherings.
Versatile Snack: Enjoy it as a midday treat or pair it with spicy dishes like Korean fried chicken for a flavorful meal.
Quick Preparation: With minimal effort, you’ll have golden-brown perfection ready to serve in just 20 minutes!
Each bite guarantees satisfaction and may just become your new favorite indulgence!
Homemade Korean Cream Cheese Garlic Bread Ingredients
-
For the Buns
• Brioche Buns – Soft base for the bread; choose high-quality buns for the best texture; St Pierre is recommended. -
For the Cream Cheese Filling
• Cream Cheese (12.35 oz) – Main filling providing creaminess; ensure it’s softened to room temperature for easy mixing.
• Sugar (4 tbsp + 3 tbsp for custard) – Sweetness for filling and custard; can use alternative sweeteners if desired.
• Vanilla Extract (1/2 tsp) – Enhances the sweetness of the filling; pure vanilla extract recommended for better flavor. -
For the Garlic Butter
• Unsalted Butter (2.45 oz) – Richness and moisture in garlic butter; Kerrygold is preferred for premium quality.
• Minced Garlic (2.5 tbsp) – Adds robust flavor; use fresh garlic for best taste; avoid browning while cooking. -
For the Custard
• Milk (2 tbsp) & Heavy Cream (1 tbsp) – Adds creaminess to custard; can substitute with plant-based milk for dietary needs.
• Mayonnaise (1.5 tbsp) – Adds richness and moisture; Hellmann’s recommended for best results.
• Dried Parsley (1 tbsp) – Aromatic garnish; fresh parsley can be used for more vibrancy if preferred.
• Egg (1) – Binds the custard ingredients; can substitute with a flax egg for vegan options.
• Salt (1/4 tsp) – Balances flavors; keep the quantity as specified for best results.
Each ingredient plays a role in crafting the delightful homemade Korean cream cheese garlic bread that your family will love!
Step‑by‑Step Instructions for Homemade Korean Cream Cheese Garlic Bread
Step 1: Preheat the Oven
Begin by preheating your oven to 180°C (356°F). While the oven warms, gather all your ingredients and equipment, ensuring everything is within reach. This will streamline your process and keep your cooking space organized. Once the oven reaches temperature, you’ll be ready to assemble your delicious Korean cream cheese garlic bread.
Step 2: Prepare the Garlic
Finely mince 2.5 tablespoons of fresh garlic, and set it aside along with your other ingredients. A sharp knife and a cutting board work best for this task. Make sure to mince the garlic finely to enhance its flavor while cooking, but watch closely to prevent browning. With your garlic prepped, you’re one step closer to creating aromatic garlic butter!
Step 3: Make the Cream Cheese Filling
In a mixing bowl, combine the softened cream cheese, 4 tablespoons of sugar, and ½ teaspoon of vanilla extract. Use an electric mixer or a whisk to blend these ingredients until they’re smooth and creamy, with no lumps remaining. After achieving a delightful consistency, transfer the mixture to a piping bag for easy filling later on. This creamy filling is the star of your homemade Korean cream cheese garlic bread!
Step 4: Cook the Garlic Butter
In a small saucepan over medium heat, melt 1.5 tablespoons of unsalted butter. Once melted, add the minced garlic and sauté for 2-3 minutes until fragrant, but be careful not to let it brown. The goal is to infuse the butter with the lovely garlic aroma without burning it. Remove from heat and set the garlic butter aside, as it will be used in the custard and for dipping the buns.
Step 5: Mix the Custard
In a bowl, whisk together the cooked garlic butter, the remaining melted butter, 2 tablespoons of milk, 1 tablespoon of heavy cream, 1.5 tablespoons of mayonnaise, 3 tablespoons of sugar, 1 tablespoon of dried parsley, 1 egg, and ¼ teaspoon of salt. Continue mixing until the mixture is smooth and glossy. This custard will soak into your buns, adding layers of flavor to the crispy Korean cream cheese garlic bread.
Step 6: Cut the Buns
Take your brioche buns and make six diagonal cuts into each one, ensuring not to cut all the way through. You want to create pocket-like sections for the filling while keeping the buns intact. This step is essential for holding in all the creamy goodness and garlic butter. Place the prepared buns aside; they’ll be filled with deliciousness soon!
Step 7: Fill the Buns
Now, grab your piping bag filled with the cream cheese mixture. Carefully fill each cut in the brioche buns with the cream cheese filling, making sure to distribute the mixture evenly among the cuts. You want every bite of your homemade Korean cream cheese garlic bread to be bursting with the creamy filling, so take your time here.
Step 8: Dip in Custard
Next, take each filled bun and dip it generously into the custard mixture. Ensure that the entire bun is coated, allowing the custard to soak into the cuts. Once dipped, place the buns on a baking tray lined with parchment paper. This buttery custard will add richness and moisture during baking, making your bread irresistibly tasty.
Step 9: Add Extra Cream Cheese
For an extra touch of creaminess, pipe a bit more of the cream cheese filling directly into the center of each bun after coating them in custard. This step ensures that each bite of your homemade Korean cream cheese garlic bread is fully loaded with flavor.
Step 10: Bake to Golden Perfection
Place the baking tray in the preheated oven and bake for about 10 minutes, or until the tops of the buns are golden brown and crispy. You’ll know they’re ready when the kitchen is filled with a delicious aroma. Once baked, remove them from the oven and allow the buns to cool for 5-10 minutes before serving, letting the filling set slightly for the ultimate experience.
What to Serve with Homemade Korean Cream Cheese Garlic Bread
Delightful pairings can elevate your homemade Korean cream cheese garlic bread to a full-fledged meal experience.
-
Korean Fried Chicken: The savory, crispy chicken complements the sweet and creamy bread, creating a delicious contrast. Perfect for those cozy evenings with friends!
-
Kimchi Salad: Bright, tangy kimchi adds a refreshing crunch, enhancing the flavor profile without overwhelming your palate. It’s a classic pairing that balances richness with zest.
-
Spicy Tteokbokki: These chewy rice cakes in a spicy sauce offer an Asian flair, providing a lovely heat that pairs beautifully with the garlic bread’s sweetness.
-
Cucumber Pickles: Crisp, tangy cucumber pickles cut through the richness, cleansing your palate after each bite. A simple and easy side that packs a flavor punch!
-
Creamy Coleslaw: The cool, creamy slaw introduces a soft crunch alongside the garlic bread, offering a delightful contrast in texture that’s simply irresistible.
-
Sweetened Iced Tea: A lightly sweetened iced tea refreshes your senses while harmonizing nicely with the savory-sweet flavors of the bread. It’s like sipping summer in a glass!
-
Chocolate Dipped Strawberries: End your meal on a sweet note with these juicy morsels that add a touch of romance and indulgence, creating a charming balance with the hearty savory bread.
These pairings promise a feast for the senses, ensuring your homemade Korean cream cheese garlic bread shines as the star of the meal!
Homemade Korean Cream Cheese Garlic Bread Variations
Feel free to get creative with this recipe that invites personalization and flavor exploration!
- Gluten-Free: Use gluten-free bread instead of brioche to accommodate dietary restrictions without sacrificing taste.
- Dairy-Free: Substitute cream cheese with dairy-free alternatives, like cashew cream or a plant-based cream cheese.
- Spicy Kick: Add a pinch of red pepper flakes or diced jalapeños to the garlic butter for an extra layer of heat.
- Herb Infusion: Mix fresh herbs, such as chives or basil, into the cream cheese filling for a burst of freshness in every bite.
- Savory Twist: Incorporate crispy, cooked bacon bits into the cream cheese filling to add a delightful smokiness.
- Sweet Variation: Swap vanilla extract for almond or hazelnut extract, creating a unique nutty flavor in the filling.
- Extra Crispy: Before baking, sprinkle panko breadcrumbs on top for an added crunch that complements the soft bread underneath.
- Cheesy Goodness: Blend additional cheese, like mozzarella or cheddar, with the cream cheese for a rich, gooey filling that enhances the savory profile.
These variations offer endless possibilities and might just inspire you to create your very own signature version of this delicious bread! If you’re feeling adventurous, you can also pair this treat with dishes like Chicken Mac Cheese or Garlic Shrimp Spinach for a fabulous meal!
Expert Tips for Homemade Korean Cream Cheese Garlic Bread
-
Room Temperature Cream Cheese: Make sure your cream cheese is at room temperature. This prevents lumps and ensures a smooth filling for your homemade Korean cream cheese garlic bread.
-
Do Not Cut All the Way Through: When slicing the brioche buns, avoid cutting all the way through. This keeps the buns intact and helps hold in the creamy filling during baking.
-
Finely Mince Garlic: Mince the garlic finely to prevent it from burning while sautéing in the butter. Keep an eye on it to maintain that delightful aroma.
-
Let Cool Before Serving: Allow the bread to cool for a few minutes after baking before serving. This helps the filling to set properly, enhancing the overall texture and flavor.
-
Experiment with Fillings: Feel free to customize the cream cheese filling by adding herbs or different flavorings to suit your taste. This personal touch can elevate your homemade Korean cream cheese garlic bread experience!
Make Ahead Options
These Homemade Korean Cream Cheese Garlic Breads are perfect for meal prep, allowing you to save precious time on busy weeknights! You can prepare the cream cheese filling and custard up to 24 hours in advance; simply refrigerate them in separate airtight containers to maintain quality. Additionally, you can cut the brioche buns and fill them with the cream cheese mixture up to 3 days ahead. When ready to serve, dip the filled buns in the custard mixture, bake for about 10 minutes, and enjoy warm, golden-brown perfection. Following these steps ensures that your homemade Korean cream cheese garlic bread stays just as delicious as if made fresh!
Storage Tips for Homemade Korean Cream Cheese Garlic Bread
-
Room Temperature: Store your garlic bread in an airtight container at room temperature for up to 2 days to maintain its crispy texture.
-
Fridge: If you have leftovers, keep them in the refrigerator for up to 5 days. Make sure they are wrapped tightly to prevent them from drying out.
-
Freezer: For longer storage, individually wrap each bun in plastic wrap and place them in a freezer bag. They can be stored for up to 2 months.
-
Reheating: To restore the delicious crispy crust, reheat the buns in a 350°F oven for 8-10 minutes before serving. Enjoy your homemade Korean cream cheese garlic bread at its best!
Homemade Korean Cream Cheese Garlic Bread Recipe FAQs
What type of brioche buns should I use?
Choose high-quality brioche buns for the best texture and flavor. I recommend St Pierre buns as they offer a delightful softness that complements the creamy filling perfectly. Look for buns that are fresh and slightly squishy to ensure a great result in your homemade Korean cream cheese garlic bread.
How should I store the leftovers?
Store your garlic bread in an airtight container at room temperature for up to 2 days to maintain its crunchy crust. If you want to keep them longer, place the buns in the refrigerator, wrapped tightly to prevent drying, for up to 5 days. For longer-term storage, you can individually wrap each bun and freeze them for up to 2 months!
Can I freeze the Korean cream cheese garlic bread?
Absolutely! To freeze, individually wrap each baked bun in plastic wrap, then place them in a resealable freezer bag. This helps prevent freezer burn and keeps them fresh. When you’re ready to enjoy, simply reheat them in a 350°F oven for about 8-10 minutes until warm and crispy!
What should I do if my cream cheese filling is lumpy?
If you find your cream cheese filling is lumpy, it’s likely because the cream cheese wasn’t softened enough. To fix this, allow the cream cheese to come to room temperature before mixing, and try using an electric mixer to blend it again until smooth. This extra step ensures that your filling is creamy and delightful in every bite of your homemade Korean cream cheese garlic bread.
Are there any dietary considerations for this recipe?
Yes! If you have dietary restrictions, you can make several adjustments. For a vegan option, substitute the egg with a flax egg (1 tablespoon ground flaxseed mixed with 2.5 tablespoons of water) and use plant-based cream cheese. Additionally, be aware of any allergies to dairy, eggs, or gluten when preparing this dish. It’s wonderful that you’re considering the needs of all your eaters!
Homemade Korean Cream Cheese Garlic Bread: Your New Favorite Snack
Ingredients
Equipment
Method
- Preheat your oven to 180°C (356°F). Gather all your ingredients and equipment.
- Finely mince 2.5 tablespoons of fresh garlic and set aside.
- Combine the softened cream cheese, 4 tablespoons of sugar, and ½ teaspoon of vanilla extract in a mixing bowl and mix until smooth.
- In a small saucepan, melt 1.5 tablespoons of unsalted butter, add minced garlic, sauté for 2-3 minutes.
- Whisk together the cooked garlic butter, remaining melted butter, 2 tablespoons of milk, 1 tablespoon of heavy cream, 1.5 tablespoons of mayonnaise, 3 tablespoons of sugar, 1 tablespoon of dried parsley, 1 egg, and ¼ teaspoon of salt until smooth.
- Make six diagonal cuts into each brioche bun without cutting all the way through.
- Fill each cut in the brioche buns with the cream cheese filling.
- Dip each filled bun into the custard mixture and ensure they are coated.
- Pipe a bit more cream cheese filling directly into the center of each bun after coating them in custard.
- Bake the buns in the preheated oven for about 10 minutes until golden brown and crispy.
- Allow the buns to cool for 5-10 minutes before serving.
Leave a Reply