
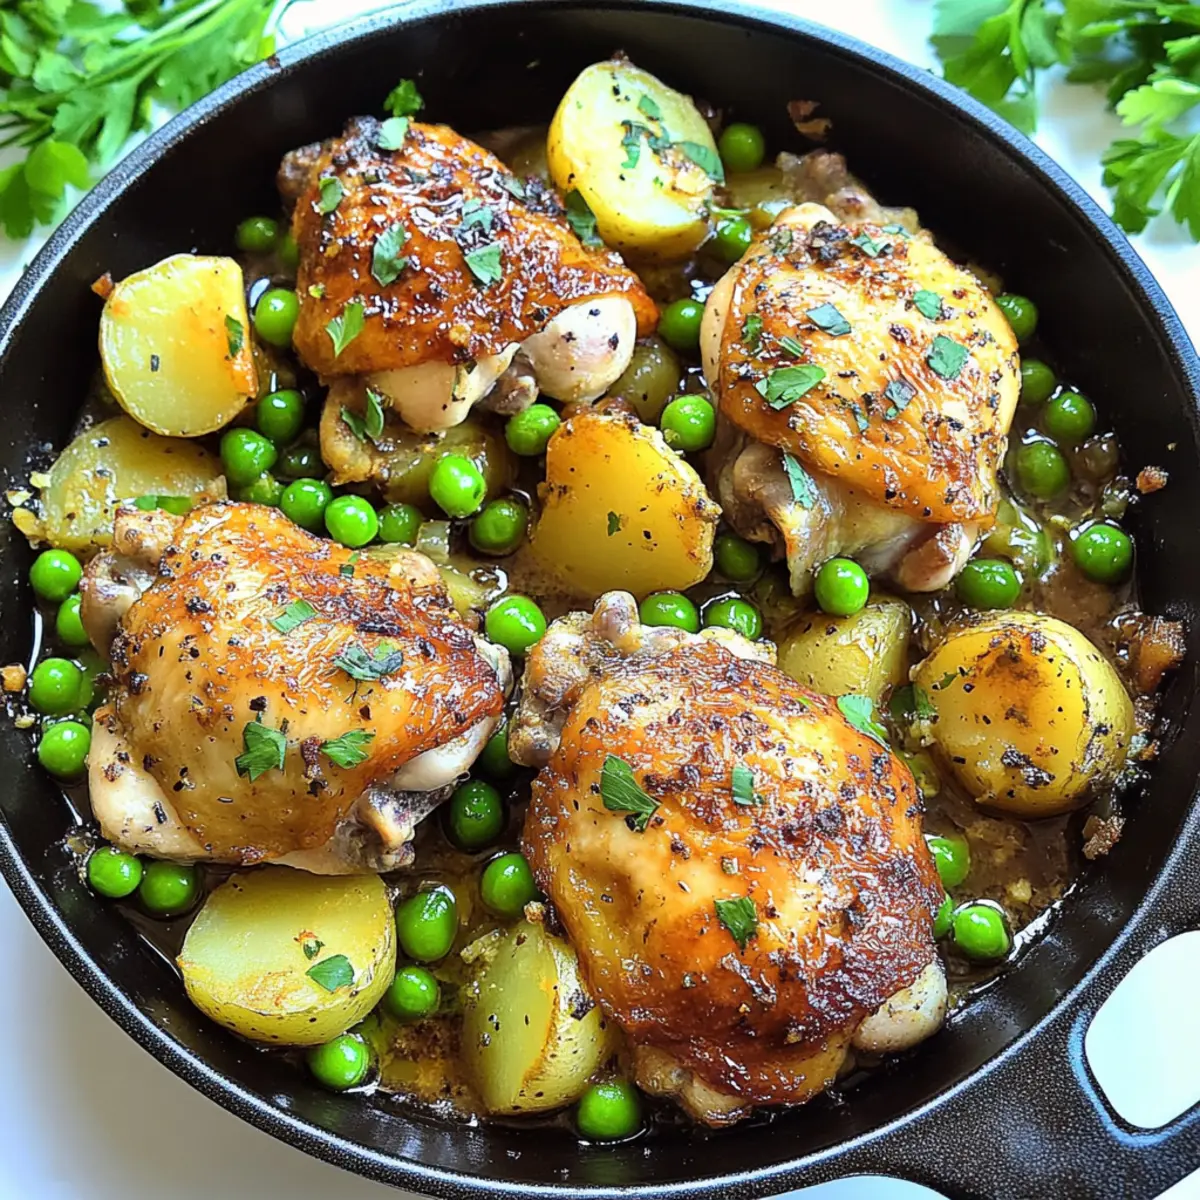
The aroma of sizzling garlic and tender chicken fills the kitchen, transporting you to the Italian-American roots of Chicken Vesuvio. This magnificent one-pot meal marries crispy potatoes and vibrant peas in a delightful garlic and white wine sauce that feels like a culinary embrace. What I love most about this dish is its ability to elevate any weeknight dinner while keeping the cleanup to a blissful minimum—no endless pots and pans to scrub! Ideal for family gatherings or cozy nights in, Chicken Vesuvio is not just a recipe; it’s a celebration of hearty, homemade goodness. Are you ready to create your very own masterpiece and impress those at your table? Let’s dive in!
Why Is Chicken Vesuvio So Special?
Comforting, Hearty Meal: This one-pot Chicken Vesuvio delivers warmth and satisfaction to every bite, perfect for turning a mundane weeknight into something memorable.
Versatile Cooking Options: Whether you choose chicken thighs, breasts, or even add seasonal veggies, this dish adapts beautifully to your preferences.
Time-Saving Magic: With its simple preparation and minimal cleanup, enjoy more time with family instead of scrubbing dishes—ask about pairing it with a side of Grilled Chicken Salad for a fresh contrast!
Restaurant Quality: The combination of crispy chicken skin and tender potatoes in a fragrant sauce makes you feel like a chef at a five-star restaurant.
Get ready for a meal that’s as stunning as it is delicious!
Chicken Vesuvio Ingredients
For the Chicken
• Olive Oil – Adds richness and helps to sauté the chicken and vegetables. Can substitute with canola oil or melted butter if needed.
• Chicken Thighs (Bone-in, Skin-on) – Provides flavorful, juicy meat; boneless thighs or breasts can also be used, but adjust cook time.
For the Base
• Potatoes – Serve as the hearty foundation; Yukon gold or red potatoes are ideal for a creamy texture.
• Dry White Wine – Enhances the flavor of the sauce; for a non-alcoholic option, use chicken stock instead.
• Chicken Stock – Adds depth to the sauce; can swap for low-sodium broth to control saltiness.
For Flavor
• Garlic – Offers essential flavor; fresh is best, but garlic powder works in a pinch if you’re in a hurry.
• Herbs (Oregano, Thyme) – Provide aromatic notes; fresh herbs are preferable, but dried can be substituted (use less).
For Brightness and Color
• Frozen Peas – Introduce color and a touch of sweetness; feel free to swap with green beans or spinach if desired.
• Fresh Lemon Juice – Brightens the dish with acidity; it’s optional but definitely recommended for a zesty kick.
This Chicken Vesuvio recipe transforms simple ingredients into a comforting masterpiece, perfect for any weeknight dinner!
Step‑by‑Step Instructions for Chicken Vesuvio
Step 1: Preheat the Oven
Begin by preheating your oven to 375°F (190°C). This crucial step ensures that your Chicken Vesuvio will cook evenly and thoroughly, allowing all the flavors to meld beautifully during baking. While the oven heats up, you can gather your ingredients and get ready for the cooking process.
Step 2: Sauté the Chicken
In a large, heavy-bottomed skillet (oven-safe if possible), heat a generous drizzle of olive oil over medium-high heat. Once shimmering, carefully place the bone-in chicken thighs into the skillet, skin side down, and sauté for about 5-7 minutes until golden brown. Flip the chicken and cook for an additional 4-5 minutes, allowing the skin to crisp up nicely.
Step 3: Cook the Potatoes
Add the roughly chopped potatoes to the skillet, stirring them gently with the chicken. Sauté these for around 5 minutes until they achieve a slight golden color. This step brings out their natural sweetness and adds a delightful texture to your Chicken Vesuvio. Make sure to mix them well with the rendered fat for that extra flavor.
Step 4: Add Garlic & Herbs
Now, stir in the minced garlic, dried oregano, and thyme into the skillet. Cook for about 1-2 minutes, stirring frequently, until the garlic becomes fragrant. This aromatic infusion will create a wonderful base for the sauce in your Chicken Vesuvio, enhancing the flavors that will envelop the chicken and potatoes.
Step 5: Deglaze the Skillet
Pour in the dry white wine, scraping the bottom of the skillet with a wooden spoon to release any flavorful browned bits. Allow this to cook for 2-3 minutes, as the wine reduces slightly. This deglazing step not only adds depth but infuses your Chicken Vesuvio with a rich flavor profile, making every bite unforgettable.
Step 6: Mix in the Broth
Carefully pour the chicken stock into the skillet, stirring to combine everything well. Season with salt and pepper to taste, balancing the flavors. This liquid will create a luscious sauce that complements the chicken and potatoes in your Chicken Vesuvio as it cooks in the oven.
Step 7: Bake the Dish
Transfer the skillet to the preheated oven and bake for approximately 30-40 minutes. Check for doneness; the chicken should reach an internal temperature of 165°F (75°C) and be beautifully golden with the potatoes tender. This baking process allows all the flavors to meld while ensuring a juicy, succulent result.
Step 8: Stir in the Peas
About 5 minutes before the Chicken Vesuvio finishes baking, pull the skillet out and stir in the frozen peas. They will add a lovely burst of color and sweetness to the dish. Return the skillet to the oven, allowing the peas to warm through and complement the overall presentation.
Step 9: Serve with Love
Once out of the oven, drizzle fresh lemon juice over the Chicken Vesuvio for a zesty enhancement. Garnish with freshly chopped parsley to add a pop of color and a fresh finish. Serve this comforting one-pot meal family-style, allowing everyone to indulge in the heartwarming flavors you’ve created with ease!
What to Serve with One-Pot Chicken Vesuvio?
Delight in a full culinary experience with these perfect pairings that uplift your Chicken Vesuvio and make your meal unforgettable.
-
Crusty Italian Bread: Perfectly ideal for soaking up the delicious garlic and wine sauce, enhancing each bite of your Chicken Vesuvio. Serve slices warm, straight from the oven.
-
Garlic Roasted Asparagus: The crisp, grilled nature of asparagus complements the richness of the dish, providing a vibrant green contrast that’s as beautiful as it is tasty.
-
Simple Garden Salad: A refreshing mix of greens with a light vinaigrette adds a bright contrast to the hearty flavors of Chicken Vesuvio, keeping your meal balanced.
-
Creamy Polenta: The smooth and creamy texture pairs wonderfully with the crispy chicken and potatoes, soaking up the savory sauce for an indulgent twist.
-
Lemon Herb Couscous: This light and fluffy side dish brings a nutty flavor and zesty notes that echo the bright lemon in your Chicken Vesuvio.
-
White Wine Spritzer: A light, fizzy drink that balances the richness of the meal, making every sip a refreshing complement to the flavors on your plate.
-
Tiramisu: Finish off your meal with this classic Italian dessert—its coffee-soaked layers and creamy texture create a perfect sweet closure after the savory Chicken Vesuvio.
With these suggestions, you’ll create a well-rounded feast that transforms dinner into a delightful celebration. Enjoy!
Make Ahead Options
These Chicken Vesuvio are perfect for busy weeknights and meal prep! You can sauté the chicken and potatoes up to 24 hours in advance; simply refrigerate them in an airtight container after their initial cooking. Additionally, you can whisk together the garlic, herbs, chicken stock, and white wine and store that blend for up to 3 days. When you’re ready to enjoy your Chicken Vesuvio, just combine the prepped ingredients in the oven-safe skillet, bake as directed, and stir in the peas during the final minutes. This way, you’ll have a flavorful, comforting meal that feels as fresh as if you just made it from scratch!
Storage Tips for Chicken Vesuvio
Fridge: Store leftovers in an airtight container for up to 3 days to maintain freshness. This keeps your Chicken Vesuvio delectable for those next-day cravings!
Freezer: For longer storage, freeze in a tightly sealed container for up to 3 months. Make sure to cool the dish completely before freezing to prevent ice crystals from forming.
Reheating: When ready to enjoy, reheat in the oven at 350°F (175°C) for about 20 minutes, or until heated through. This will help restore the chicken’s crispiness and keep the flavors intact.
Separate Components: For best results, consider storing the chicken, potatoes, and peas separately if possible, allowing for easy reheating and preventing sogginess during storage.
Expert Tips for Chicken Vesuvio
-
Choose the Right Skillet: Using a heavy-bottomed or cast iron skillet is key for even cooking and browning—don’t skip this step!
-
Watch Your Cook Time: If using boneless chicken breasts, reduce the baking time to avoid drying out the meat, ensuring juicy Chicken Vesuvio.
-
Season Generously: Make sure to season the chicken and potatoes well before adding the liquids; it enhances the dish’s overall flavor significantly.
-
Double the Sauce: Consider doubling the sauce for extra richness—perfect for mopping up with crusty bread alongside your Chicken Vesuvio.
-
Add Your Favorites: Feel free to customize by adding seasonal vegetables or different herbs; this dish’s versatility is part of its charm!
Chicken Vesuvio Variations & Substitutions
Feel free to get creative with your Chicken Vesuvio and tailor it to your taste—let’s explore some delightful options!
- Dairy-Free: Replace butter with olive oil for sautéing without sacrificing flavor. You’ll still enjoy that rich taste!
- Vegetarian: Swap chicken for hearty plant-based alternatives like chickpeas or mushrooms, and keep the rest of the recipe intact for a satisfying dish.
- Add More Veggies: Toss in seasonal vegetables such as zucchini or bell peppers for added color, flavor, and nutrients that pop!
- Spice it Up: Bring some heat by including red pepper flakes or jalapeños when sautéing the garlic for a lovely kick.
- Herb Variation: Experiment with fresh rosemary or basil in place of oregano and thyme for an aromatic twist that’s truly unique.
- Upgrade the Potatoes: Try using sweet potatoes or butternut squash for a deliciously sweet alternative that complements the savory elements beautifully.
- Adding Protein: Consider integrating Italian sausage or shrimp for an extra burst of flavor and texture that pairs perfectly with the other ingredients.
- Lemon Twist: Swap fresh lemon juice for a splash of balsamic vinegar to introduce a tangy sweetness that brightens up this comforting dish!
If you want to keep exploring, why not pair your Chicken Vesuvio with a refreshing side like Grilled Chicken Salad or some Cozy Chicken Sausage Pasta for a delightful meal combo?
Chicken Vesuvio Recipe FAQs
What type of chicken should I use for Chicken Vesuvio?
Absolutely! Bone-in, skin-on chicken thighs are ideal for their juicy flavor, but boneless thighs or breasts can work too. Just be mindful that you may need to adjust the cooking time for boneless cuts to avoid drying them out.
How do I store leftover Chicken Vesuvio?
To keep your Chicken Vesuvio fresh, transfer leftovers to an airtight container and store them in the fridge for up to 3 days. Ensure the dish has cooled completely before refrigerating to preserve its taste and texture.
Can I freeze Chicken Vesuvio?
Very! You can freeze Chicken Vesuvio for up to 3 months. Before freezing, let the dish cool completely to prevent ice crystals from forming. Use a tightly sealed container or freezer bag and label with the date. When you’re ready to enjoy, thaw in the fridge overnight before reheating.
What should I do if my chicken isn’t cooking evenly?
If your chicken isn’t cooking evenly, it could be due to uneven heating in your oven or the size of the chicken pieces. To troubleshoot, ensure your oven is properly calibrated and rotate the skillet halfway through baking. Additionally, cut chicken into similar sizes for uniform cooking and ensure the internal temperature reaches 165°F (75°C).
Is Chicken Vesuvio suitable for food allergies and dietary restrictions?
Absolutely! You can easily modify this recipe to fit dietary needs. For gluten-free options, ensure your chicken stock is gluten-free. If you have allergies to certain ingredients like garlic or wine, feel free to omit or substitute with alternatives—such as using vegetable broth instead of chicken stock for a vegetarian option. Just pay attention to other ingredients you use to maintain a delicious flavor!
How do I know when Chicken Vesuvio is done?
To check for doneness, your chicken should reach an internal temperature of 165°F (75°C) and the potatoes should be tender. Use a meat thermometer for accuracy, and check the juices; they should run clear without any pink tinge. If you’re unsure, an extra 5-10 minutes in the oven often helps for those larger pieces.
Savory Chicken Vesuvio: A Comforting One-Pot Delight
Ingredients
Equipment
Method
- Preheat your oven to 375°F (190°C).
- Heat olive oil in a large skillet over medium-high heat, then sauté chicken thighs skin side down for 5-7 minutes until golden brown. Flip and cook for another 4-5 minutes.
- Add chopped potatoes to the skillet, sautéing for about 5 minutes until they achieve a slight golden color.
- Stir in minced garlic, dried oregano, and thyme, cooking for about 1-2 minutes until the garlic becomes fragrant.
- Pour in the dry white wine, scraping the bottom of the skillet. Allow to cook for 2-3 minutes to reduce slightly.
- Add chicken stock, stirring well. Season with salt and pepper to taste.
- Transfer the skillet to the oven and bake for approximately 30-40 minutes until chicken reaches 165°F (75°C).
- About 5 minutes before it's done, stir in the frozen peas.
- Drizzle fresh lemon juice over and garnish with parsley before serving.
Leave a Reply