
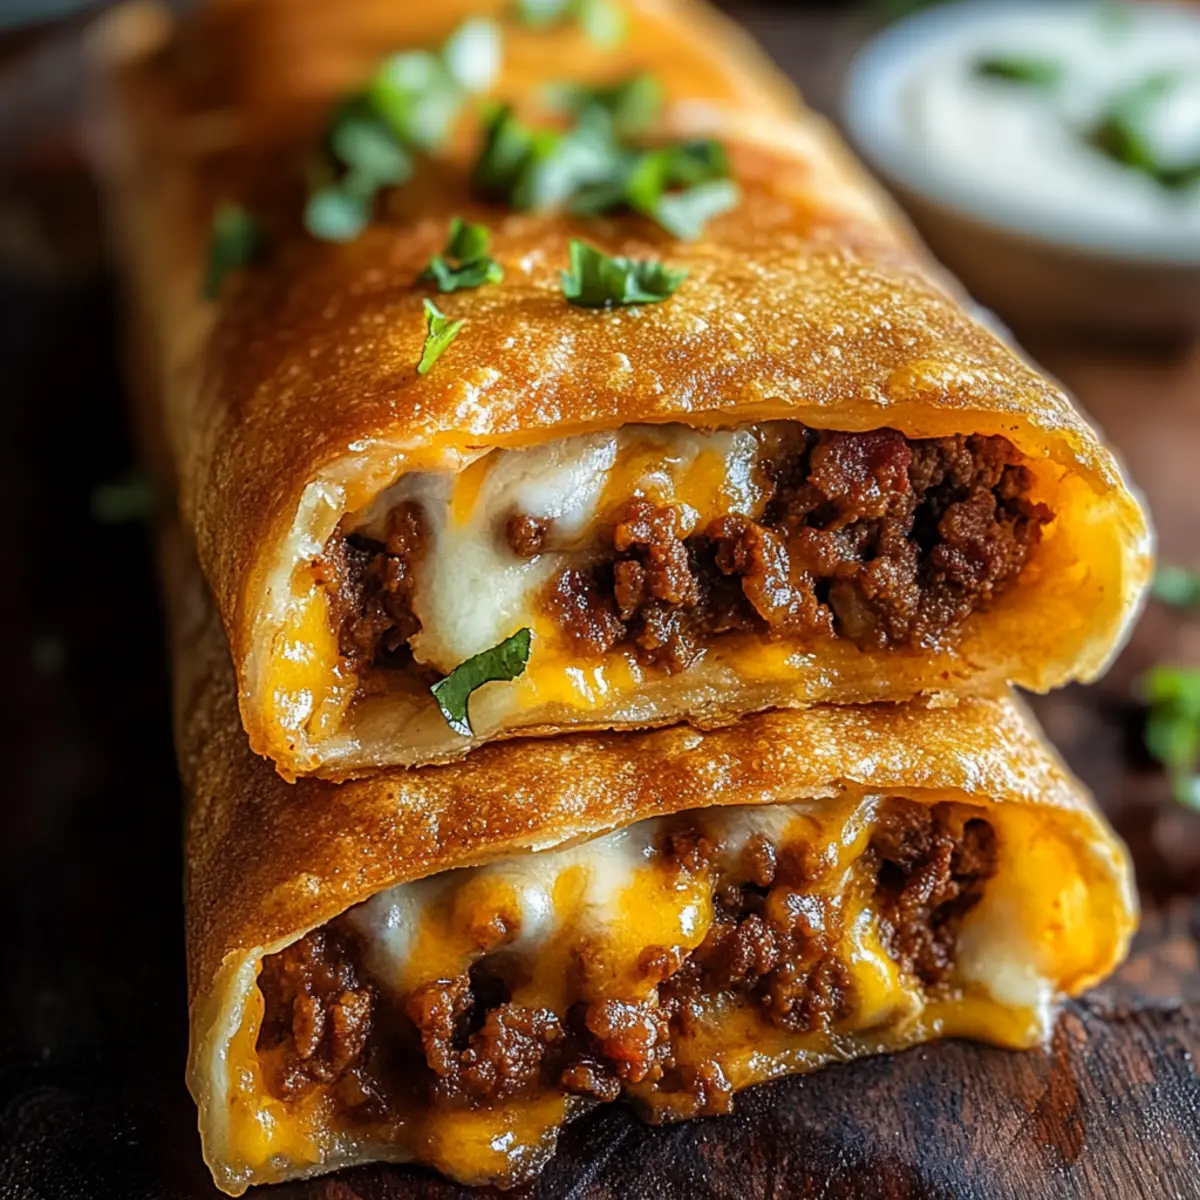
As I held the golden, crispy chimichanga in my hand, I could already feel the anticipation building for that first bite. This Beef and Cheese Chimichangas Recipe transforms simple ingredients into a family favorite that’s perfect for busy weeknights. With its delightful blend of savory ground beef and gooey cheese wrapped in a crunchy tortilla, this Tex-Mex classic is not only quick to prepare but also incredibly customizable to suit everyone’s tastes. The best part? You can make extra and have them ready for the freezer, turning meal prep into a breeze. Whether you love them filled with beans, piled high with toppings, or as a spicy breakfast twist, these chimichangas will quickly become your go-to dish. Ready to dive into this crispy goodness? Let’s get cooking!

Why are Chimichangas a Family Favorite?
Deliciously Customizable: With endless filling options, you can easily adapt this Beef and Cheese Chimichangas recipe to satisfy everyone’s cravings. Time-Saving Delight: Prepare a batch ahead of time and freeze for quick weeknight meals. Crispy Perfection: Achieve a satisfyingly crunchy exterior, while the interior remains gooey and cheesy. Crowd-Pleasing Appeal: Serve them at parties or family gatherings, and watch your guests devour every last bite! For more delectable ideas, try adding a twist to your dinner with Chicken Mac Cheese or exploring tasty variations like Savory Ham Cheese.
Beef and Cheese Chimichangas Ingredients
• Prepare to delight your taste buds with this hearty Beef and Cheese Chimichangas Recipe!
For the Filling
- Ground Beef – The main protein source; feel free to substitute with shredded chicken, turkey, or pulled pork for a different flavor.
- Small Onion – Adds depth and sweetness; finely diced works best for even cooking.
- Garlic Cloves – Fresh garlic intensifies the flavor; minced garlic is a good alternative in a pinch.
- Taco Seasoning – The perfect spice mix to elevate your filling; you can use store-bought or make a homemade blend.
- Salsa – Adds moisture and zesty flavor to the filling; if you’re out of salsa, tomato sauce works too.
- Refried Beans – Adds creaminess and helps bind the filling; you can skip this if you want a meatier texture.
- Shredded Cheese – A gooey melting agent; cheddar or a Mexican blend are both excellent choices.
For the Wrapping
- Flour Tortillas – Choose large (10-inch) tortillas for easy wrapping and enough room for generous fillings.
For Cooking
- Vegetable Oil – Essential for frying or brushing; canola or other neutral oils are great substitutes.
Get ready to enjoy a delightful meal that’s bursting with flavor!
Step‑by‑Step Instructions for Beef and Cheese Chimichangas Recipe
Step 1: Cook the Beef Filling
In a large skillet over medium heat, brown 1 pound of ground beef along with a finely diced small onion for 5-7 minutes, until browned. Drain excess grease, then stir in 2 minced garlic cloves, 1 packet of taco seasoning, and ½ cup of salsa. Let the mixture simmer for an additional 5 minutes until thickened and fragrant.
Step 2: Assemble the Chimichangas
Lay out your large flour tortillas on a flat surface. Spread a layer of refried beans (optional) evenly across each tortilla, then add a generous scoop of the beef mixture and a sprinkle of shredded cheese. Fold in the sides of the tortillas and tightly roll them up to encase the filling, ensuring a snug fit.
Step 3: Prepare for Cooking
If you’re frying, heat vegetable oil in a deep skillet or fryer to 350°F (175°C). Make sure the oil is hot enough before adding the chimichangas for that perfect crispy texture. For baking, preheat your oven to 400°F (200°C) and line a baking sheet with parchment paper.
Step 4: Cook the Chimichangas
To fry, carefully place the chimichangas seam-side down in the hot oil. Fry for 3-5 minutes on each side until they are golden brown and crispy. If baking, arrange the chimichangas on the prepared baking sheet, brush them lightly with oil, and bake for about 20-25 minutes, or until they’re crisp and lightly browned.
Step 5: Serve the Chimichangas
Once cooked, remove the chimichangas from the oil or oven and allow them to cool for a minute or two. Serve warm with your favorite toppings, such as sour cream, guacamole, or additional salsa. Enjoy your delicious Beef and Cheese Chimichangas with family and friends!
How to Store and Freeze Beef and Cheese Chimichangas
Fridge: Store cooked chimichangas in an airtight container for up to 3 days. This helps maintain their flavor and texture.
Freezer: For longer storage, wrap chimichangas individually in foil or plastic wrap and place them in a freezer-safe bag. They can be frozen for up to 2 months.
Reheating: When you’re ready to enjoy your frozen Beef and Cheese Chimichangas, cook them directly from frozen either in an oven at 375°F (190°C) for about 25-30 minutes or in an air fryer at 350°F (175°C) until hot and crispy.
Assembling Ahead: You can also assemble them and refrigerate uncooked for up to 2 days. Just make sure to wrap them tightly to prevent drying out.
Make Ahead Options
These Beef and Cheese Chimichangas are a fantastic choice for meal prep, allowing you to save precious time on busy weeknights! You can assemble the chimichangas and refrigerate them for up to 2 days before cooking, just ensure they are tightly wrapped to maintain freshness. Alternatively, if you’re planning ahead, you can freeze them for up to 2 months. To prevent the tortillas from becoming soggy, lay a piece of parchment paper between each chimichanga before stacking. When you’re ready to enjoy your homemade Beef and Cheese Chimichangas, simply cook them directly from frozen, adding extra cooking time as needed, for a convenient, delicious meal that feels just as fresh as when you first made them!
Expert Tips for Beef and Cheese Chimichangas
- Hot Oil Matters: Ensure your oil reaches 350°F (175°C) for the crispiest texture; lukewarm oil leads to soggy chimichangas.
- Avoid Overfilling: Don’t overstuff your tortillas to prevent any spills while cooking; a modest amount keeps the rolls secure and manageable.
- Secure Seams: Use toothpicks to hold the seams closed when frying; this can help avoid any messy leaks.
- Freezing Made Easy: If you’re freezing chimichangas, wrap them individually in foil to prevent freezer burn and keep them fresh.
- Reheat Right: For crispy leftovers, reheat in an oven or air fryer instead of the microwave to maintain crispiness.
- Personalize Your Filling: Feel free to mix in vegetables or different proteins for added flavor in this Beef and Cheese Chimichangas recipe.
What to Serve with Beef and Cheese Chimichangas
Indulge in a hearty meal that will tantalize your taste buds while complementing the crispy goodness of these golden chimichangas.
-
Creamy Guacamole: Fresh and creamy, guacamole adds a refreshing contrast that balances the savory filling. Don’t forget a squeeze of lime for a zesty twist!
-
Zesty Salsa: A vibrant salsa made with fresh tomatoes, onions, and cilantro brightens up each bite, enhancing those Tex-Mex flavors beautifully.
-
Pico de Gallo: This fresh salsa, bursting with tomatoes and onions, offers a crisp texture and refreshing taste that pairs perfectly with warm, cheesy chimichangas.
-
Mexican Rice: Fluffy, seasoned rice brings a comforting and filling side to your meal, making it even more satisfying while soaking up the flavors.
-
Refried Beans: Serve a side of refried beans for a rich, creamy element that harmonizes with the crunch of the chimichangas, adding a classic touch.
-
Shredded Lettuce: A light, crunchy addition, shredded lettuce adds freshness and color, making every bite a joyful mix of textures.
-
Sour Cream: A dollop of cool sour cream offers a tangy contrast, balancing the heat and richness of the chimichangas.
-
A Cold Beverage: Pair with a chilled margarita or refreshing iced tea, which can enhance your dining experience while cutting through the richness.
-
Chocolate Flan: After enjoying the savory delights, indulge in a slice of velvety chocolate flan to satisfy your sweet tooth, rounding out your meal wonderfully.
Beef and Cheese Chimichangas Recipe Variations
Feel free to let your culinary creativity shine and make these chimichangas truly your own!
- Vegetarian Chimichangas: Substitute ground beef with sautéed vegetables and black beans for a hearty, plant-based option. Add in some bell peppers and corn for extra sweetness!
- Breakfast Chimichangas: Swap the beef for scrambled eggs and crispy bacon to create a delightful breakfast version. Perfect for a fun brunch gathering!
- Spicy Chimichangas: For a heat kick, toss in jalapeños or use spicy cheese in your filling. This twist will bring bold flavor and excitement to the table.
- Bean and Beef Chimichangas: Enhance creaminess by mixing refried beans with the beef filling. This blend adds texture and ensures every bite is delightful.
- Sauced Chimichangas: Top your chimichangas with warm queso dip or enchilada sauce before serving for an extra layer of deliciousness. This makes for a superbly indulgent experience!
- Freezer-Friendly: Prep some extra chimichangas for busy nights! Wrap them individually and freeze, so you’ll always have a tasty meal ready to go. For a quick serving suggestion, check out these Sticky Beef Noodles.
- Flavorful Filling Variety: Try adding spices like smoked paprika or cumin to your beef mixture for variations in flavor that will surprise and delight your taste buds.
- Different Cheese Blends: Experiment with different cheese varieties such as Monterey Jack or pepper jack for a unique melty experience!
Enjoy mixing flavors and styles with your Beef and Cheese Chimichangas recipe!
Beef and Cheese Chimichangas Recipe FAQs
What type of ground beef should I use for the filling?
I recommend using 80/20 ground beef for the best balance of flavor and juiciness, but you can also opt for leaner cuts, such as 90/10. If you’re looking for a healthier option, ground turkey or shredded chicken work wonderfully as substitutes too!
How can I store my cooked Beef and Cheese Chimichangas?
Store your delicious Beef and Cheese Chimichangas in an airtight container in the fridge for up to 3 days. To maintain their crispiness, let them cool completely before storing. For longer storage, freeze them wrapped tightly in foil or plastic wrap, where they can last up to 2 months.
Can I assemble the chimichangas ahead of time?
Absolutely! You can assemble your chimichangas and refrigerate them uncooked for up to 2 days. Just make sure to wrap them tightly to prevent drying out. When you’re ready to cook, they can go straight into the fryer or oven without any additional prep!
How should I reheat chimichangas to keep them crispy?
To maintain the crispy texture, I recommend reheating your chimichangas in an oven preheated to 375°F (190°C) for about 15–20 minutes or by using an air fryer at 350°F (175°C) until they are heated through. Avoid using the microwave, as that can make them soggy.
What can I do if my chimichangas are leaking filling while cooking?
If your chimichangas are leaking during cooking, consider these solutions: Ensure they are rolled tightly and you haven’t overfilled them. You can also secure the seams with toothpicks while frying to help keep everything together. If you’re frying, make sure the oil is hot enough as well—this helps achieve a crispy shell that keeps the filling contained!
What are some dietary considerations when making chimichangas?
If you have dietary restrictions, this Beef and Cheese Chimichangas Recipe can be easily customized! For a vegetarian option, replace the ground beef with sautéed vegetables or black beans. If anyone has cheese allergies, try a dairy-free cheese alternative for a similar melting effect. Always check for allergens based on your guests’ needs to make it a safe and enjoyable meal!
Savor Homemade Beef and Cheese Chimichangas Recipe Today
Ingredients
Equipment
Method
- In a large skillet over medium heat, brown the ground beef along with a finely diced onion for 5-7 minutes, until browned. Drain excess grease, then stir in minced garlic, taco seasoning, and salsa. Let simmer for an additional 5 minutes until thickened and fragrant.
- Lay out your large flour tortillas on a flat surface. Spread a layer of refried beans (if using) across each tortilla, then add a scoop of the beef mixture and a sprinkle of shredded cheese. Fold in the sides and tightly roll them up.
- If frying, heat vegetable oil in a deep skillet or fryer to 350°F (175°C). For baking, preheat your oven to 400°F (200°C) and line a baking sheet with parchment paper.
- Carefully place the chimichangas seam-side down in the hot oil. Fry for 3-5 minutes on each side until golden brown and crispy. If baking, arrange on the prepared baking sheet, brush lightly with oil, and bake for about 20-25 minutes until crisp.
- Once cooked, remove chimichangas from heat and allow to cool for a minute or two. Serve warm with toppings like sour cream, guacamole, or additional salsa.
Leave a Reply