
Introduction to Blue Velvet Cake
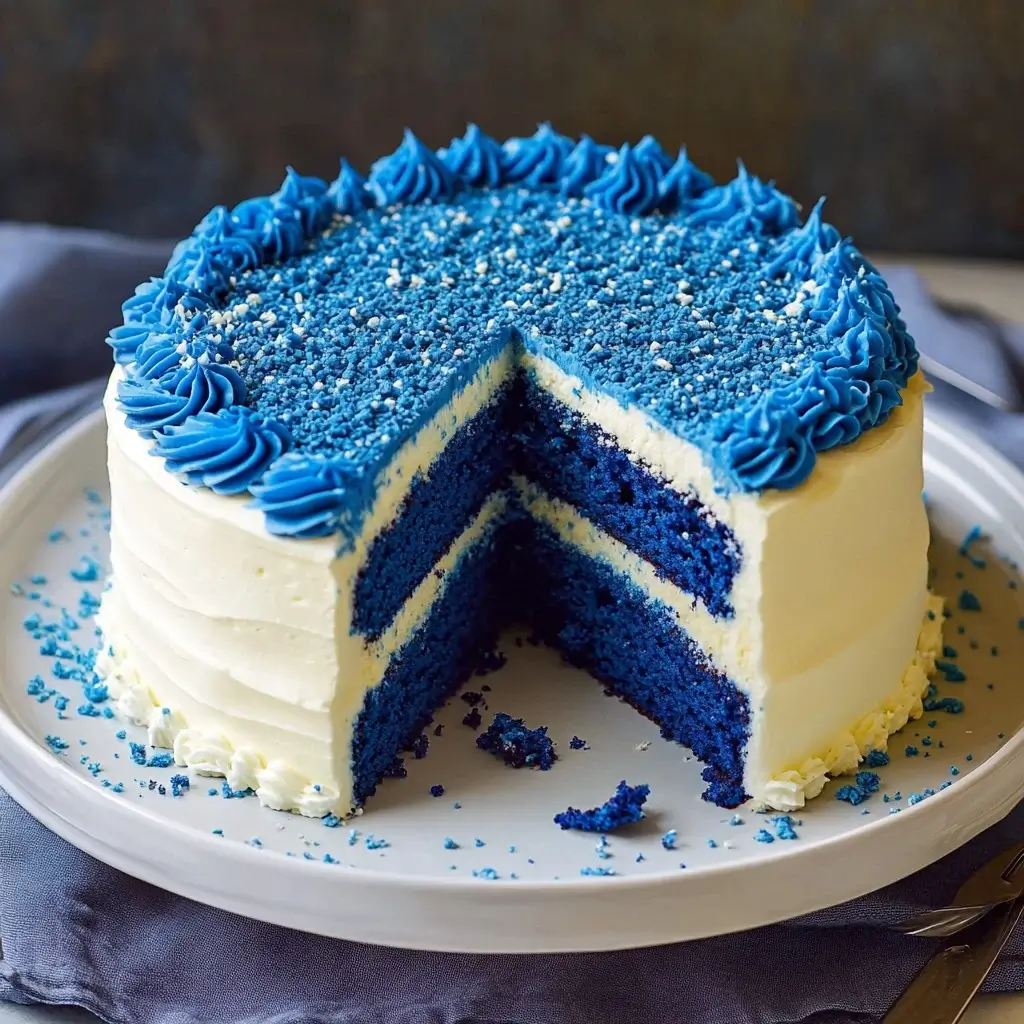
There’s something magical about a cake that not only tastes incredible but also looks like a work of art. The Blue Velvet Cake is just that—a stunning centerpiece that will wow your friends and family. I remember the first time I laid eyes on this vibrant dessert; it was like a burst of color on a dreary day. This recipe is perfect for those moments when you want to impress without spending hours in the kitchen. With its rich cream cheese frosting and unique hue, this cake is sure to become a favorite in your home.
Why You’ll Love This Blue Velvet Cake
This Blue Velvet Cake is not just a feast for the eyes; it’s a delight for the taste buds too. It’s surprisingly easy to whip up, making it perfect for both novice bakers and seasoned pros. The rich, velvety texture paired with the tangy cream cheese frosting creates a flavor explosion that’s hard to resist. Plus, it’s a fantastic conversation starter at any gathering, ensuring your baking skills shine bright!
Ingredients for Blue Velvet Cake
Gathering the right ingredients is the first step to creating your masterpiece. For this Blue Velvet Cake, you’ll need a mix of pantry staples and a few special items to achieve that stunning color and flavor.
- All-purpose flour: The backbone of your cake, providing structure and texture.
- Granulated sugar: Sweetens the cake and helps create that moist, tender crumb.
- Baking soda and baking powder: These leavening agents work together to give your cake a light, airy feel.
- Salt: Enhances the flavors and balances the sweetness.
- Vegetable oil: Keeps the cake moist and adds richness without overpowering the flavor.
- Buttermilk: Adds a tangy flavor and helps tenderize the cake, making it extra soft.
- Eggs: Provide structure and stability, while also adding moisture.
- Blue food coloring: The star of the show! This gives the cake its signature blue hue.
- Vanilla and almond extracts: These flavor enhancers add depth and a lovely aroma.
- White vinegar: A secret ingredient that reacts with the baking soda for a lighter texture.
For the frosting, you’ll need:
- Cream cheese: The creamy base that gives the frosting its rich flavor.
- Unsalted butter: Adds smoothness and richness to the frosting.
- Powdered sugar: Sweetens the frosting and helps achieve that perfect spreadable consistency.
- Milk: Adjusts the frosting’s thickness to your liking.
For those looking to get creative, consider adding a teaspoon of lemon zest for a citrusy twist or decorating with fresh blueberries for a pop of color. Exact measurements for all these ingredients can be found at the bottom of the article, ready for printing!
How to Make Blue Velvet Cake
Step 1: Preheat and Prepare
Start by preheating your oven to 350°F (175°C). This ensures your Blue Velvet Cake bakes evenly. While the oven warms up, grab two 9-inch round cake pans. Grease them with butter or cooking spray, then dust with flour. This step is crucial to prevent sticking. Trust me, there’s nothing worse than a cake that won’t come out of the pan. Set the prepared pans aside while you mix the batter.
Step 2: Mix Dry Ingredients
In a large mixing bowl, combine the all-purpose flour, granulated sugar, baking soda, baking powder, and salt. Whisk them together until they’re well blended. This step is important because it ensures that the leavening agents are evenly distributed throughout the flour. A good mix here means a fluffy cake later. Take a moment to enjoy the sweet aroma of the sugar and flour mingling together.
Step 3: Combine Wet Ingredients
In another bowl, mix together the vegetable oil, buttermilk, eggs, blue food coloring, vanilla extract, almond extract, and white vinegar. Stir until everything is smooth and well combined. The blue food coloring is what gives this cake its signature look, so don’t be shy! This mixture will add moisture and flavor, making your cake rich and delicious. It’s like a colorful potion waiting to transform into something magical.
Step 4: Combine Wet and Dry Mixtures
Now, it’s time to bring the two mixtures together. Gradually pour the wet ingredients into the bowl of dry ingredients. Gently mix until just combined. Be careful not to overmix; a few lumps are perfectly fine. Overmixing can lead to a dense cake, and we want that light, velvety texture. This is where the magic starts to happen, as the batter transforms into a beautiful blue hue.
Step 5: Bake the Cake
Divide the batter evenly between the prepared cake pans. Smooth the tops with a spatula for an even bake. Place them in the preheated oven and bake for 25-30 minutes. You’ll know they’re done when a toothpick inserted into the center comes out clean. The aroma wafting through your kitchen will be irresistible. Just try not to peek too often; it can cause the cakes to sink!
Step 6: Cool the Cakes
Once baked, remove the cakes from the oven and let them cool in the pans for about 10 minutes. This allows them to set slightly. After that, carefully turn them out onto wire racks to cool completely. Cooling is essential; frosting a warm cake can lead to a melty mess. Patience is key here, but the wait will be worth it when you see that stunning blue layer!
Step 7: Make the Cream Cheese Frosting
While the cakes cool, it’s time to whip up the cream cheese frosting. In a large bowl, beat the softened cream cheese and unsalted butter together until smooth and creamy. Gradually add the powdered sugar, mixing until well combined. Add the vanilla extract and mix until everything is smooth. If the frosting is too thick, add milk one tablespoon at a time until you reach your desired consistency. This frosting is the perfect complement to your Blue Velvet Cake!
Step 8: Assemble the Cake
Once the cakes are completely cool, place one layer on a serving plate. Spread a generous amount of cream cheese frosting on top. Then, carefully place the second layer on top and frost the top and sides of the cake. Don’t worry about making it perfect; a little rustic charm adds character. Chill the cake for about 30 minutes before serving to set the frosting. This is the moment you’ve been waiting for!
Tips for Success
- Use room temperature ingredients for a smoother batter and better rise.
- Don’t skip the cooling step; it prevents the frosting from melting.
- For a vibrant blue color, use gel food coloring instead of liquid.
- Keep an eye on the baking time; ovens can vary.
- Experiment with flavors by adding a hint of lemon zest or almond extract.
Equipment Needed
- 9-inch round cake pans: If you don’t have these, use square pans or a single larger pan.
- Mixing bowls: Any size will do; just ensure they’re large enough for mixing.
- Whisk: A fork can work in a pinch for mixing dry ingredients.
- Spatula: A rubber spatula is great for folding and spreading frosting.
- Cooling racks: If you lack these, a plate or cutting board can suffice.
Variations
- Chocolate Blue Velvet: Add cocoa powder to the batter for a chocolate twist on the classic flavor.
- Gluten-Free Option: Substitute all-purpose flour with a gluten-free blend to accommodate dietary needs.
- Vegan Version: Replace eggs with flax eggs and use plant-based butter and cream cheese for a vegan-friendly cake.
- Citrus Zest: Incorporate lemon or orange zest into the batter for a refreshing citrus flavor.
- Layered Delight: Add layers of fruit preserves or whipped cream between the cake layers for added flavor and texture.
Serving Suggestions
- Pair with a scoop of vanilla ice cream for a delightful contrast in temperature and texture.
- Serve alongside fresh berries to enhance the cake’s vibrant color and add a fruity touch.
- For drinks, consider a chilled glass of lemonade or a rich cup of coffee.
- Garnish with edible flowers or mint leaves for an elegant presentation.
FAQs about Blue Velvet Cake
What makes Blue Velvet Cake different from Red Velvet Cake?
The main difference lies in the color and flavor. While Red Velvet Cake uses cocoa powder and red food coloring, Blue Velvet Cake features blue food coloring and often has a lighter flavor profile. The cream cheese frosting complements both cakes beautifully, but the blue version adds a unique twist!
Can I make Blue Velvet Cake ahead of time?
Absolutely! You can bake the cake layers a day in advance. Just wrap them tightly in plastic wrap and store them in the fridge. Frost the cake on the day you plan to serve it for the best texture and flavor. This makes it a great option for parties or gatherings!
How should I store leftover Blue Velvet Cake?
Store any leftover cake in an airtight container in the refrigerator. It will stay fresh for about 3-4 days. If you want to keep it longer, consider freezing individual slices. Just wrap them well in plastic wrap and foil before placing them in the freezer.
Can I use a different frosting for Blue Velvet Cake?
Of course! While cream cheese frosting is a classic pairing, you can experiment with other frostings like buttercream or whipped cream. A chocolate ganache could also add a rich flavor contrast to the cake’s sweetness.
Is Blue Velvet Cake suitable for special diets?
It can be adapted! For a gluten-free version, use a gluten-free flour blend. If you’re looking for a vegan option, substitute eggs with flax eggs and use plant-based cream cheese and butter. This way, everyone can enjoy a slice of this stunning cake!
Final Thoughts
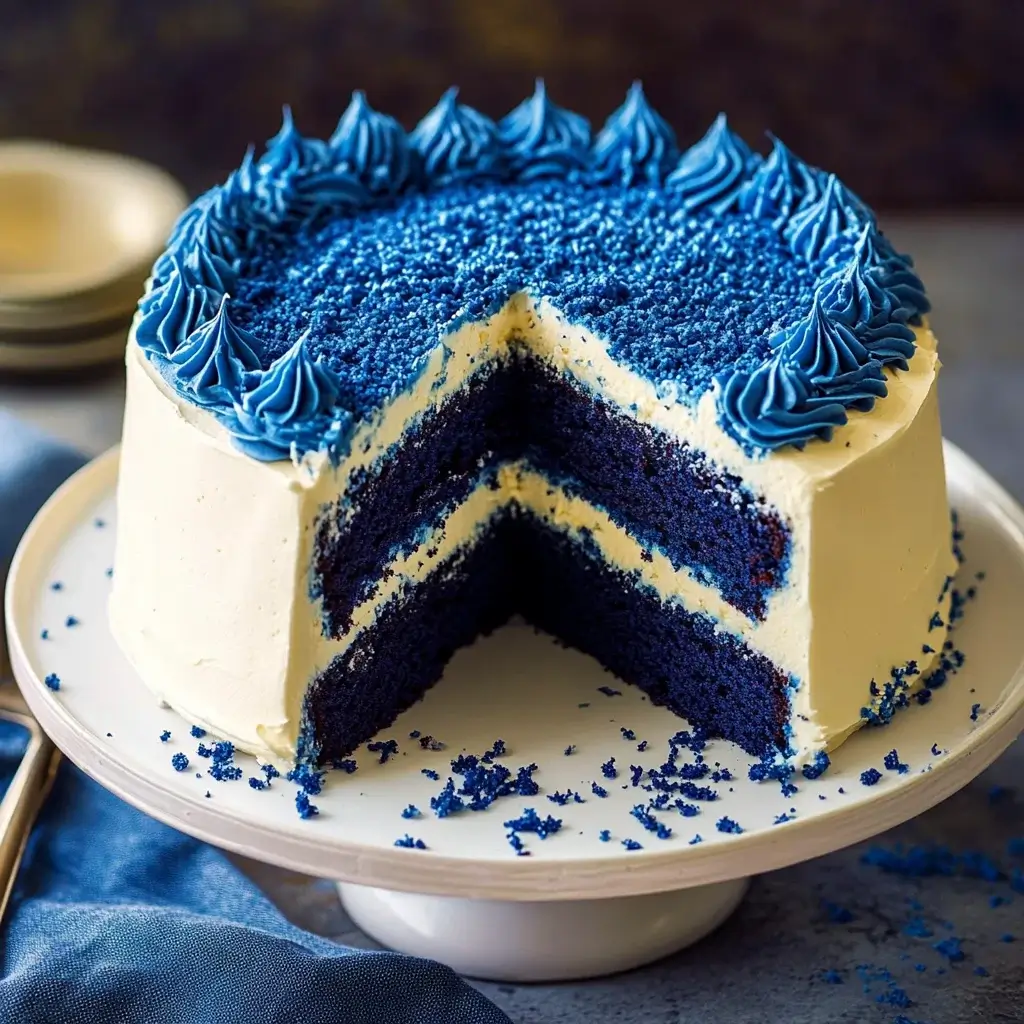
Creating a Blue Velvet Cake is more than just baking; it’s about crafting a memorable experience. The vibrant color and rich flavor bring joy to any occasion, whether it’s a birthday, holiday, or just a Tuesday that needs a little sparkle. Each slice is a celebration, inviting laughter and conversation around the table. As you share this delightful cake with loved ones, you’ll find that it’s not just about the dessert, but the moments created together. So, roll up your sleeves, embrace the process, and let this Blue Velvet Cake become a cherished part of your culinary adventures!
Blue Velvet Cake: Discover This Unique Recipe Today!
Ingredients
Method
- Preheat your oven to 350°F (175°C). Grease and flour two 9-inch round cake pans.
- In a large mixing bowl, whisk together the flour, sugar, baking soda, baking powder, and salt until well combined.
- In another bowl, mix the vegetable oil, buttermilk, eggs, blue food coloring, vanilla extract, almond extract, and vinegar. Stir until smooth.
- Gradually add the wet ingredients to the dry ingredients, mixing until just combined. Do not overmix.
- Divide the batter evenly between the prepared cake pans. Bake for 25-30 minutes, or until a toothpick inserted into the center comes out clean.
- Allow the cakes to cool in the pans for 10 minutes, then turn them out onto wire racks to cool completely.
- While the cakes are cooling, prepare the cream cheese frosting. In a large bowl, beat the softened cream cheese and butter together until smooth and creamy.
- Gradually add the powdered sugar, mixing until well combined. Add the vanilla extract and mix until smooth. If the frosting is too thick, add milk one tablespoon at a time until you reach your desired consistency.
- Once the cakes are completely cool, place one layer on a serving plate. Spread a generous amount of cream cheese frosting on top. Place the second layer on top and frost the top and sides of the cake.
- Chill the cake for about 30 minutes before serving to set the frosting.
Nutrition
Notes
- For a fun twist, try adding a teaspoon of lemon zest to the batter for a citrusy flavor.
- You can also decorate the cake with fresh blueberries or edible flowers for a beautiful presentation.
Leave a Reply