
There’s something magical about a one-pan meal that brings everyone to the table, and my Cheesy Taco Rice Skillet does just that. As the rich aroma of seasoned ground beef, black beans, and sweet corn fills your kitchen, you’ll find it hard to resist. This quick and easy dish not only packs a protein punch but also delivers comfort in every cheesy bite. Whether it’s a hectic weeknight or a cozy Sunday dinner, this skillet delight makes meal prep a breeze—all in under 30 minutes! Ready to elevate your taco night routine with a dish that requires minimal cleanup and maximum flavor? Let’s dive into this culinary adventure!

Why is this skillet recipe a must-try?
Quick and Easy: With only one pan needed, cleanup is a breeze, allowing you to savor the flavors without the hassle.
Protein-Packed: Combining lean ground beef and black beans, this dish ensures you stay fueled and satisfied.
Versatile Ingredients: Feel free to mix in your favorite veggies or try variations like the Cheesy Ground Beef Enchilada Skillet for an extra twist.
Crowd-Pleasing: Perfect for family dinners or gatherings, it’s a dish that appeals to all ages.
Gluten-Free: This recipe caters to a variety of dietary needs, making it accessible and enjoyable for everyone.
Cheesy Taco Rice Skillet Ingredients
For the Skillet
• Lean Ground Beef – The main protein source; swap with ground turkey or diced chicken for a lighter dish.
• Onion – Adds sweetness and depth; white or yellow onions are perfect for sautéing.
• Taco Seasoning – Essential for that taco flavor; opt for store-bought or make your own blend.
• Salsa – Provides moisture and tang; a smooth salsa works best for even flavor distribution.
• Black Beans – Packed with fiber and protein; drain and rinse for a cleaner taste.
• Sweet Corn – Adds delightful sweetness and texture; use canned for convenience or frozen for freshness.
• Diced Tomatoes and Green Chiles – Contributes moisture and spice; fire-roasted tomatoes offer incredible depth.
• Ready Rice – Ensures quick cooking; swap with cooked long-grain or cauliflower rice for a low-carb option.
• Colby Jack Cheese – Melts beautifully for a gooey topping; shredding from the block enhances meltiness.
This Cheesy Taco Rice Skillet is not just a meal; it’s a family favorite waiting to become part of your routine!
Step‑by‑Step Instructions for Cheesy Taco Rice Skillet
Step 1: Brown the Beef and Onions
Begin by heating a large oven-safe skillet over medium heat and spray it lightly with cooking oil. Add the lean ground beef and diced onions, cooking for about 8–10 minutes, or until the beef is browned and the onions are soft and translucent. Stir occasionally to ensure even cooking and prevent sticking, filling your kitchen with delicious aromas.
Step 2: Add Seasoning and Salsa
Once the beef is fully cooked, sprinkle in your taco seasoning and pour in the salsa, mixing them thoroughly to coat the meat. Allow this mixture to cook for an additional 2–3 minutes, letting the flavors meld together beautifully. You’ll know it’s ready when the spices are fragrant and the salsa starts to bubble gently.
Step 3: Incorporate Beans, Corn, and Tomatoes
Next, stir in the drained black beans, undrained corn, and undrained diced tomatoes with green chiles. Allow everything to simmer for 5–6 minutes, stirring occasionally, until most of the liquid is absorbed. You want to see the mixture becoming thick and hearty, providing a vibrant base for your Cheesy Taco Rice Skillet.
Step 4: Mix in the Rice and Cheese
Fold in the ready rice gently, ensuring it’s well combined with the beef mixture. Once the rice is evenly distributed, sprinkle the shredded Colby Jack cheese generously over the top. This final blend should create a bubbly, cheesy layer just waiting to be broiled to perfection.
Step 5: Broil to Melt the Cheese
Transfer the skillet to the oven and set it to broil on high for about 1 minute, or until the cheese is bubbly and golden brown. Keep a close eye on it, as broiling can happen quickly. The melted cheese should create a beautifully satisfying crust that invites everyone to dig into this cheesy goodness.
Step 6: Serve and Garnish
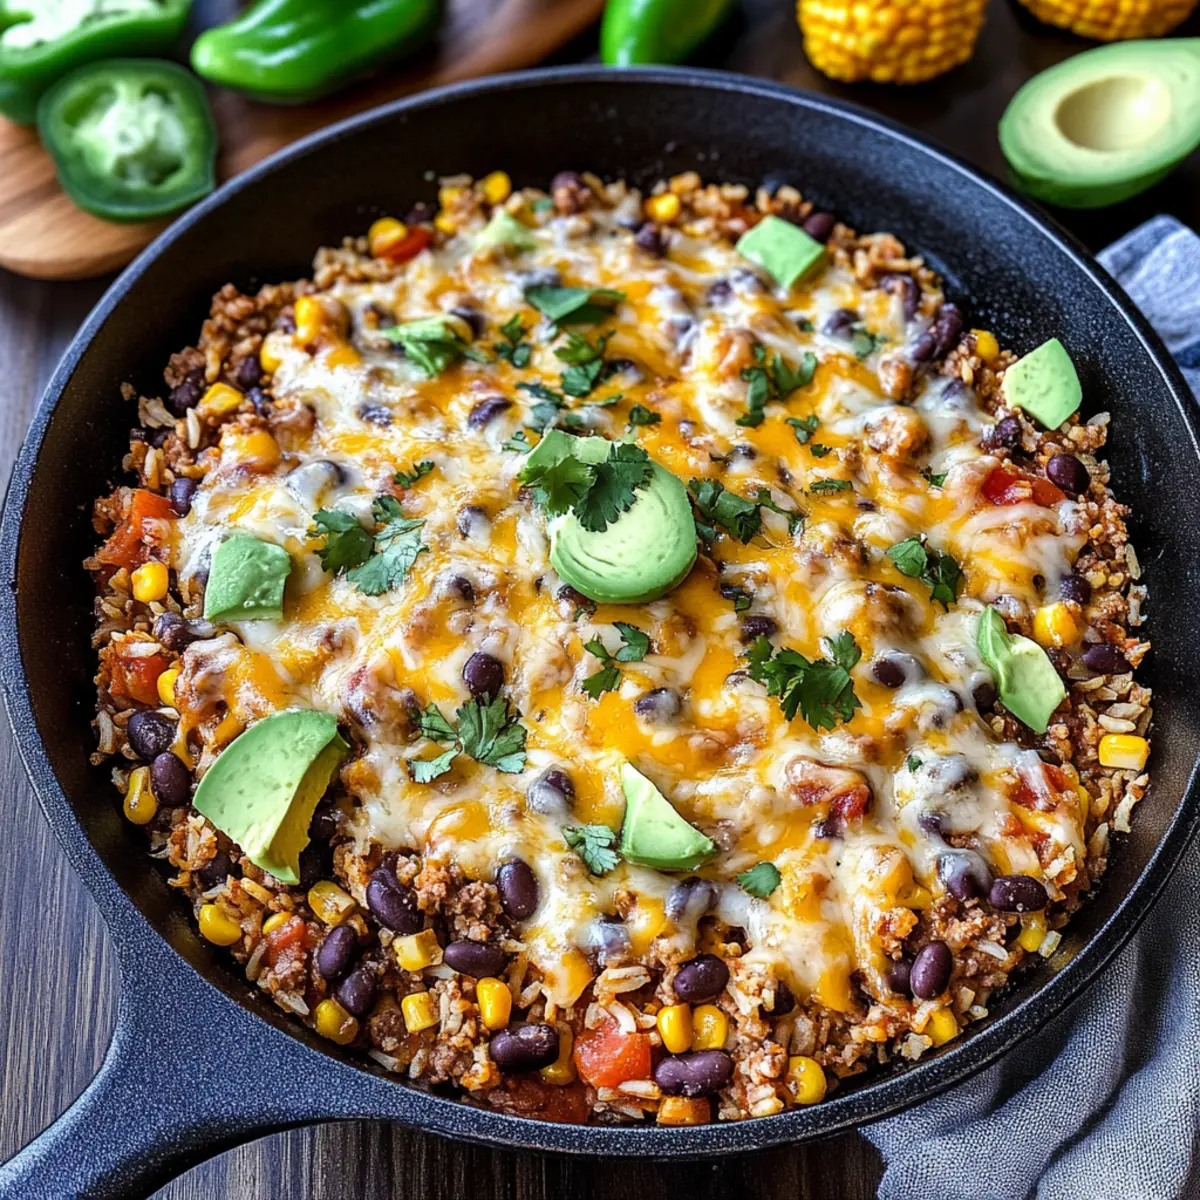
Once broiled to perfection, remove the skillet from the oven carefully. Optionally, garnish with fresh cilantro, slices of avocado, and a dollop of sour cream for an extra touch. Serve hot, either straight from the skillet or transferring to plates, for a comforting meal that everyone will love, bringing the essence of your Cheesy Taco Rice Skillet to the table.

How to Store and Freeze Cheesy Taco Rice Skillet
Fridge: Store leftovers in an airtight container for up to 4 days. Make sure to let it cool before sealing to prevent condensation.
Freezer: This Cheesy Taco Rice Skillet can be frozen for up to 3 months. Portion it into freezer-safe containers, leaving some space for expansion.
Thawing: Thaw in the refrigerator overnight before reheating for the best texture and flavor preservation.
Reheating: To reheat, warm in a skillet over medium heat or microwave until heated through, adding a splash of water to maintain moisture if necessary.
Make Ahead Options
These Cheesy Taco Rice Skillet ingredients are perfect for busy home cooks looking to save time during the week! You can brown the ground beef and onions, add the seasoning and salsa, and store this mixture in the refrigerator for up to 3 days. Alternatively, you can prepare the entire dish (excluding the cheese) and cover it tightly for up to 24 hours before baking. Keep the cheese separate to maintain its melty quality when broiling. When you’re ready to eat, simply fold in the rice, sprinkle the cheese on top, and pop it under the broiler for about 1 minute for that gooey, comforting finish. Enjoy a delicious home-cooked meal with minimal effort!
Tips for the Best Cheesy Taco Rice Skillet
• Cheese Matters: Use freshly shredded Colby Jack for ultimate meltiness. Pre-shredded cheese often contains anti-caking agents, which can affect melt quality.
• Simmer Time: Don’t rush the simmering step; allowing the mixture to thicken ensures a heartier and more flavorful Cheesy Taco Rice Skillet.
• Oven Safety: If your skillet isn’t oven-safe, remember to transfer the mixture into a baking dish before broiling to achieve that golden, cheesy top.
• Add Heat Gently: Start with mild salsa if you’re unsure about spice levels. You can always adjust the heat later by adding jalapeños or a hotter salsa.
• Flavor Boost: Sautéing garlic or bell peppers with the onions adds a delicious layer of flavor. Don’t skip this step for an even richer taste!
Cheesy Taco Rice Skillet Variations
Feel free to tweak this recipe to fit your taste and dietary needs; let your imagination run wild in the kitchen!
-
Vegetarian Option: Substitute ground beef with crumbled tofu or a medley of your favorite veggies for a hearty, meat-free meal. This way, you can still enjoy the savory flavors while keeping it plant-based.
-
Spicy Kick: For a fiery twist, include diced jalapeños or opt for a spicy taco seasoning. Your taste buds will thank you for taking the heat up a notch!
-
Corn-Free Alternative: Swap sweet corn for black olives or bell peppers depending on what you like best. This simple change creates a different flavor profile but keeps the texture delightful.
-
Whole Grain Swap: Use brown rice instead of ready rice for an extra boost of fiber and nuttiness. This will not only enhance the dish’s healthiness but adds a lovely texture contrast too.
-
Extra Creaminess: Mix in some cream cheese or sour cream to the skillet before broiling. It will make every bite supremely creamy and indulgent.
-
Add Fresh Herbs: Dicing some fresh cilantro or parsley to sprinkle on top before serving will elevate the freshness of the dish. It’s an easy way to add a burst of flavor!
-
Cheese Swap: Try using pepper jack cheese for a spicy, flavorful twist, or go for a combination of cheddar and mozzarella for a gooier effect. The choices are endless!
-
Meal Prep Delight: For an easy meal prep option, divide the already prepped ingredients into containers, and add a grain of your choice. When ready to cook, simply combine everything in a skillet for a quick warm-up and enjoy a delicious dinner!
And if you’re looking for more delicious one-pan meals, don’t miss out on trying out the scrumptious Cheesy Chicken Broccoli Orzo or the delightful Cheesy Ground Beef Potato Bake. Happy cooking!
What to Serve with Cheesy Taco Rice Skillet
There’s nothing like a cozy meal that warms both the heart and the home, and adding delightful side dishes transforms your Cheesy Taco Rice Skillet into a complete feast.
-
Crispy Tortilla Chips: These provide a satisfying crunch that perfectly complements the creamy texture of the skillet. Dip them into the cheesy mixture for every last bite!
-
Fresh Guacamole: The creamy avocado adds a cool contrast to the hearty flavors of the skillet. A dollop on top transforms each serving into a delicious experience.
-
Zesty Mexican Street Corn: Combining grilled corn with lime, cheese, and spices, this side brings vibrant flavors and a touch of sweetness that pairs beautifully with the savory rice skillet.
-
Simple Green Salad: A light salad with mixed greens, cucumbers, and a tangy vinaigrette balances the richness of the dish. It adds a refreshing crunch that enhances the overall meal.
-
Sour Cream or Greek Yogurt: Adding a spoonful of either on top creates a creamy, tangy element that complements the spices. It helps mellow the heat while enriching each bite.
-
Pico de Gallo: Freshly chopped tomatoes, onions, and cilantro create a burst of freshness. This vibrant salsa will elevate the flavors of your Cheesy Taco Rice Skillet while adding a bit of zing.
-
Classic Margaritas: For a drink option, pair this dish with a refreshing margarita. The citrus notes enhance the flavors and bring a festive touch.
Transform your meal into a delightful affair with these mouthwatering pairings that elevate your Cheesy Taco Rice Skillet experience!
Cheesy Taco Rice Skillet Recipe FAQs
What type of ground meat should I use for the Cheesy Taco Rice Skillet?
I recommend using lean ground beef for a hearty texture, but you can easily substitute it with ground turkey or diced chicken for a lighter option. If you’re looking for a vegetarian dish, crumbled tofu or additional vegetables would also work wonderfully!
How do I properly store leftovers of the Cheesy Taco Rice Skillet?
To ensure your leftovers stay fresh, store them in an airtight container in the refrigerator for up to 4 days. Make sure to let the dish cool completely before sealing to avoid moisture buildup.
Can I freeze the Cheesy Taco Rice Skillet?
Absolutely! You can freeze this dish for up to 3 months. Simply portion it into freezer-safe containers, leaving a bit of space at the top for the mixture to expand as it freezes.
What are some tips for reheating the Cheesy Taco Rice Skillet?
When reheating, the best method is to warm it in a skillet over medium heat, stirring occasionally until heated through. If using a microwave, add a splash of water and cover to retain moisture. Be sure to reheat until it’s steaming hot throughout!
What should I do if my Cheesy Taco Rice Skillet seems too watery?
If you find your dish is too watery after adding the beans and corn, let it simmer longer to allow excess liquid to evaporate. Aim for a thick, hearty consistency before folding in the rice. This step is crucial for achieving a satisfying texture.
Are there any dietary considerations for this recipe?
This Cheesy Taco Rice Skillet is gluten-free and can be adjusted for various dietary needs. Substitute the salsa and taco seasoning with gluten-free options for those with gluten sensitivities. Always check labels for any allergens, especially for store-bought ingredients.

Cheesy Taco Rice Skillet You’ll Crave Again and Again
Ingredients
Equipment
Method
- Begin by heating a large oven-safe skillet over medium heat and spray it lightly with cooking oil. Add the lean ground beef and diced onions, cooking for about 8–10 minutes, or until the beef is browned and the onions are soft and translucent.
- Once the beef is fully cooked, sprinkle in your taco seasoning and pour in the salsa, mixing thoroughly to coat the meat. Cook for an additional 2–3 minutes.
- Stir in the drained black beans, undrained corn, and undrained diced tomatoes with green chiles, allowing everything to simmer for 5–6 minutes.
- Fold in the ready rice gently. Once the rice is evenly mixed, sprinkle shredded Colby Jack cheese generously over the top.
- Transfer the skillet to the oven and set it to broil on high for about 1 minute, or until the cheese is bubbly and golden brown.
- Remove the skillet from the oven carefully. Optionally, garnish with fresh cilantro, slices of avocado, and a dollop of sour cream.
Leave a Reply