
Introduction to Chocolate Chip Rice Krispie Cookies
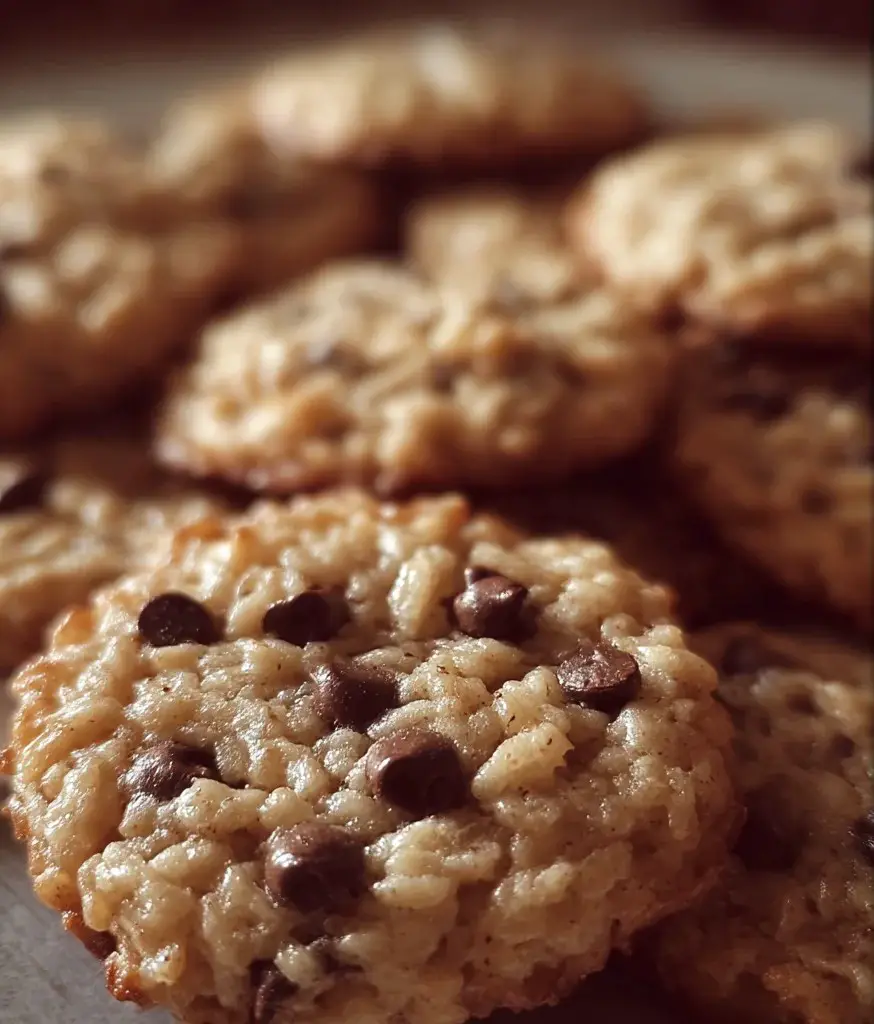
These Chocolate Chip Rice Krispie Cookies combine the buttery, chewy goodness of a classic chocolate chip cookie with the light, crispy crunch of your favorite cereal. The result? A playful, irresistible texture that’s crispy on the outside, soft in the center, and loaded with melty chocolate chips in every bite. These cookies bring the fun of childhood treats into a grown-up bake that’s perfect for sharing—or not.
Why You’ll Love This Chocolate Chip Rice Krispie Cookies
-
Classic cookie meets nostalgic cereal crunch.
-
Chewy, crisp, and perfectly balanced.
-
Easy to make and fun to eat.
-
A great twist for cookie lovers and Rice Krispie fans alike.
-
Kids love them, and adults can’t resist.
Ingredients for Chocolate Chip Rice Krispie Cookies
Simple ingredients. Big payoff. Let’s start with what you need.
- Unsalted butter: Softened to create a rich, creamy base.
- Brown sugar: Adds moisture and a hint of caramel flavor.
- Granulated sugar: For that classic sweetness and texture.
- Large eggs: Essential for binding and moisture.
- Vanilla extract: A splash of this brings warmth and depth to the flavor.
- All-purpose flour: The backbone of your cookie dough, providing structure.
- Baking soda: This leavening agent helps the cookies rise and stay soft.
- Salt: Just a pinch enhances all the flavors beautifully.
- Chocolate chips: The star of the show, adding gooey chocolate goodness.
- Rice Krispies cereal: For that delightful crunch that sets these cookies apart.
Feel free to get creative! You can substitute half of the chocolate chips with butterscotch or peanut butter chips for a fun twist. If you’re looking for a healthier option, consider using whole wheat flour or adding nuts for extra texture. For exact measurements, check the bottom of the article where you can find everything listed for easy printing.
How to Make Chocolate Chip Rice Krispie Cookies
Now that you have your ingredients ready, let’s dive into the fun part—making these delicious Chocolate Chip Rice Krispie Cookies! Follow these simple steps, and you’ll be enjoying warm, gooey cookies in no time.
Step 1: Preheat and Prepare
First things first, preheat your oven to 350°F (175°C). This is crucial for achieving that perfect cookie texture. While the oven warms up, line two baking sheets with parchment paper. This prevents sticking and makes cleanup a breeze.
Step 2: Cream the Butter and Sugars
In a large mixing bowl, cream together the softened butter, brown sugar, and granulated sugar until the mixture is light and fluffy. This step is key! It creates a rich base for your cookies, ensuring they’re soft and delicious.
Step 3: Add Eggs and Vanilla
Next, add the eggs one at a time, mixing well after each addition. Then, stir in the vanilla extract. This not only adds moisture but also infuses your cookies with a warm, inviting flavor that’s hard to resist.
Step 4: Combine Dry Ingredients
In a separate bowl, whisk together the all-purpose flour, baking soda, and salt. This ensures that the leavening agents are evenly distributed, which is essential for achieving that perfect rise in your cookies.
Step 5: Mix Wet and Dry Ingredients
Gradually add the dry ingredients to the wet mixture, mixing until just combined. Be careful not to overmix! This is a common mistake that can lead to tough cookies. We want them tender and chewy, not dense.
Step 6: Fold in Chocolate Chips and Rice Krispies
Now comes the fun part! Gently fold in the chocolate chips and Rice Krispies until they’re evenly distributed throughout the dough. This is where the magic happens—the combination of gooey chocolate and crispy cereal creates a delightful texture.
Step 7: Scoop and Bake
Using a cookie scoop or a tablespoon, drop rounded balls of dough onto the prepared baking sheets, spacing them about 2 inches apart. This allows room for spreading. Bake for 10-12 minutes, or until the edges are lightly golden. Your kitchen will smell heavenly!
Step 8: Cool and Enjoy
Once baked, allow the cookies to cool on the baking sheets for about 5 minutes. This helps them set perfectly. After that, transfer them to a wire rack to cool completely. Now, grab a glass of milk and enjoy your delicious Chocolate Chip Rice Krispie Cookies!
Tips for Success
- Chill the dough for 30 minutes for chewier cookies.
- Use a cookie scoop for uniform sizes and even baking.
- Don’t skip the parchment paper; it prevents sticking.
- Experiment with different chocolate chip varieties for unique flavors.
- Keep an eye on the cookies; they can go from perfect to overbaked quickly!
Equipment Needed
- Mixing bowls: A large bowl for mixing and a smaller one for dry ingredients.
- Electric mixer: A hand mixer works great, but a whisk can do the job too.
- Baking sheets: Use any flat baking tray; just line it with parchment paper.
- Cookie scoop: A tablespoon works well if you don’t have one.
- Wire rack: Essential for cooling, but a plate can work in a pinch.
Variations
- Nutty Delight: Add chopped walnuts or pecans for a crunchy twist.
- Peanut Butter Swirl: Mix in a half cup of creamy peanut butter for a rich flavor.
- Oatmeal Crunch: Substitute one cup of flour with rolled oats for added texture.
- Gluten-Free Option: Use a gluten-free all-purpose flour blend to make these cookies suitable for gluten-sensitive friends.
- Dark Chocolate Lovers: Swap regular chocolate chips for dark chocolate chips for a more intense flavor.
Serving Suggestions
- Milk: Pair these cookies with a cold glass of milk for the ultimate treat.
- Coffee: Enjoy them alongside a warm cup of coffee for a delightful afternoon pick-me-up.
- Presentation: Serve on a colorful platter, garnished with a sprinkle of sea salt for a gourmet touch.
- Ice Cream: Sandwich them with your favorite ice cream for a delicious dessert twist.
FAQs about Chocolate Chip Rice Krispie Cookies
Can I use margarine instead of butter?
Yes, you can substitute margarine for butter in this Chocolate Chip Rice Krispie Cookies recipe. However, the flavor and texture may vary slightly. Butter gives a richer taste, while margarine can make the cookies a bit softer.
How do I store leftover cookies?
To keep your cookies fresh, store them in an airtight container at room temperature. They should stay delicious for about a week. If you want to keep them longer, consider freezing them!
Can I make the dough ahead of time?
Absolutely! You can prepare the dough and refrigerate it for up to 3 days before baking. Just remember to let it sit at room temperature for a few minutes before scooping and baking.
What can I substitute for Rice Krispies?
If you don’t have Rice Krispies on hand, you can use any crispy cereal, like Cornflakes or even granola. Just make sure it has a similar crunch to maintain that delightful texture in your cookies.
Are these cookies suitable for a gluten-free diet?
Yes, you can make these Chocolate Chip Rice Krispie Cookies gluten-free by using a gluten-free all-purpose flour blend. Just check the Rice Krispies packaging to ensure they are gluten-free as well!
Final Thoughts
There’s a certain joy that comes from baking, especially when it involves Chocolate Chip Rice Krispie Cookies. The aroma wafting through your kitchen, the anticipation as they bake, and the first bite of that perfect blend of chewy and crunchy—it’s pure bliss. These cookies are more than just a treat; they’re a way to create memories with family and friends. Whether you’re sharing them at a gathering or enjoying them solo with a glass of milk, each cookie is a little moment of happiness. So, roll up your sleeves and dive into this delightful baking adventure!
Chocolate Chip Rice Krispie Cookies: A Must-Try Recipe!
Ingredients
Method
- Preheat your oven to 350°F (175°C) and line two baking sheets with parchment paper.
- In a large mixing bowl, cream together the softened butter, brown sugar, and granulated sugar until light and fluffy.
- Add the eggs one at a time, mixing well after each addition, then stir in the vanilla extract.
- In a separate bowl, whisk together the flour, baking soda, and salt.
- Gradually add the dry ingredients to the wet mixture, mixing until just combined.
- Fold in the chocolate chips and Rice Krispies cereal until evenly distributed.
- Using a cookie scoop or tablespoon, drop rounded balls of dough onto the prepared baking sheets, spacing them about 2 inches apart.
- Bake for 10-12 minutes, or until the edges are lightly golden.
- Allow the cookies to cool on the baking sheets for 5 minutes before transferring them to a wire rack to cool completely.
Nutrition
Notes
- For a chewier cookie, refrigerate the dough for 30 minutes before baking.
- You can substitute half of the chocolate chips with butterscotch or peanut butter chips for a different flavor.
Leave a Reply