
As I stood in my kitchen, a whirlwind of springtime excitement surrounding me, I couldn’t help but marvel at how delightful enticing appetizers could transform any gathering. This Easter, I wanted to create something truly special for my loved ones, and what better than my playful Deviled Egg Chicks (Hatching Style)? Beyond being incredibly cute, these little creations are quick to assemble and make for the perfect centerpiece at your festive table. With the vibrant colors of spring and the genuine smiles they bring, these appetizers promise to captivate guests of all ages. Get ready to dive into a world of creativity and flavor, because I can’t wait to share these charming recipes with you! What will you add to your Easter celebration this year?
Why Not Make Hatching Deviled Egg Chicks?
Adorable Presentation: These cute deviled egg chicks add a playful touch to your Easter table, instantly impressing guests.
Quick to Assemble: With simple ingredients and a few minutes of prep, you’ll be ready to serve a delightful treat in no time.
Kid-Friendly Fun: Children love the whimsical design, making them eager to try an egg-filled treat—great for picky eaters!
Versatile Options: Customize filling flavors, like adding avocado or bacon, for a delicious twist.
Centerpiece Appeal: Create a stunning platter that perfectly complements other dishes, such as savory pinwheels or a colorful veggie tray, making your gathering truly festive.
Memorable Moments: The smiles these little chicks bring create lasting memories for friends and family alike!
Deviled Egg Chicks Ingredients
• For these delightful little hatching chicks, gather all the necessary ingredients to make your Easter table shine!
For the Egg Filling
- Large Eggs – Boil and peel them to create the perfect base for your chick design.
- Mayonnaise – Adds creaminess to the filling; adjust the amount to your taste preference.
- Dijon Mustard – A hint of tanginess complements the eggs’ richness.
- Salt and Pepper – Essential for seasoning; taste as you mix to find your flavor balance.
- Turmeric – Use this to add a bright yellow hue to your filling, enhancing the chick presentation.
For Decoration
- Carrot – Cut into tiny pieces to create eyes and beaks, bringing your chicks to life!
- Black Olives – Sliced for an adorable eye; they add a salty contrast to the creamy filling.
- Chives or Green Onions – Snipped for an added touch of color and a mild onion flavor.
Additional Note
To make the Deviled Egg Chicks truly eye-catching, feel free to get creative with colors and flavors, while keeping the fun theme intact!
Step‑by‑Step Instructions for Deviled Egg Chicks (Hatching Style)
Step 1: Boil and Prepare Eggs
Begin by boiling six large eggs in a pot of cold water. Bring the water to a rolling boil over high heat, then reduce the heat and simmer for 10–12 minutes. Once cooked, transfer the eggs to an ice bath to cool for at least 5 minutes; this will make peeling easier. Carefully peel the eggs and slice them in half lengthwise, removing the yolks for the filling.
Step 2: Make the Chick Filling
In a mixing bowl, combine the egg yolks with ¼ cup mayonnaise, 1 teaspoon Dijon mustard, and a pinch of salt and pepper. If you’d like a vibrant hue, add ½ teaspoon of turmeric to the mixture. Mash everything together using a fork until the filling is smooth and creamy, resembling a bright yellow color that captures the essence of your Deviled Egg Chicks.
Step 3: Fill the Egg Whites
Use a piping bag or a small spoon to carefully fill each egg white half with the creamy yolk mixture. For a charming appearance, overfill them slightly to create a “hatching” effect. Place the filled eggs on a serving platter, ensuring they are stable and aligned for an aesthetically pleasing presentation. Aim for a vibrant display that attracts attention and sparks joy at your Easter gathering.
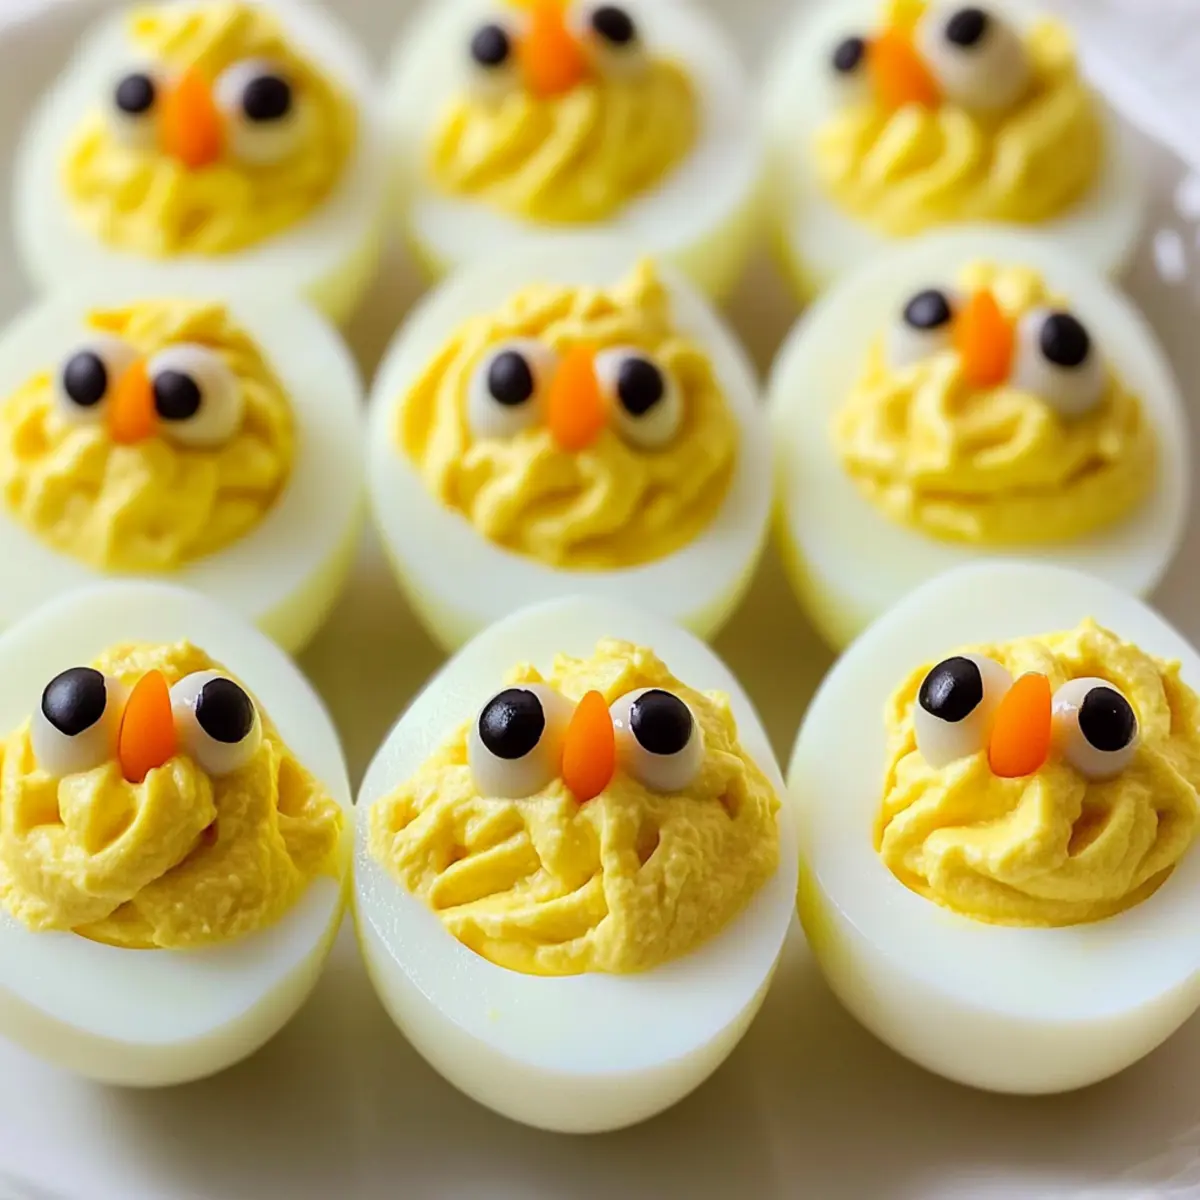
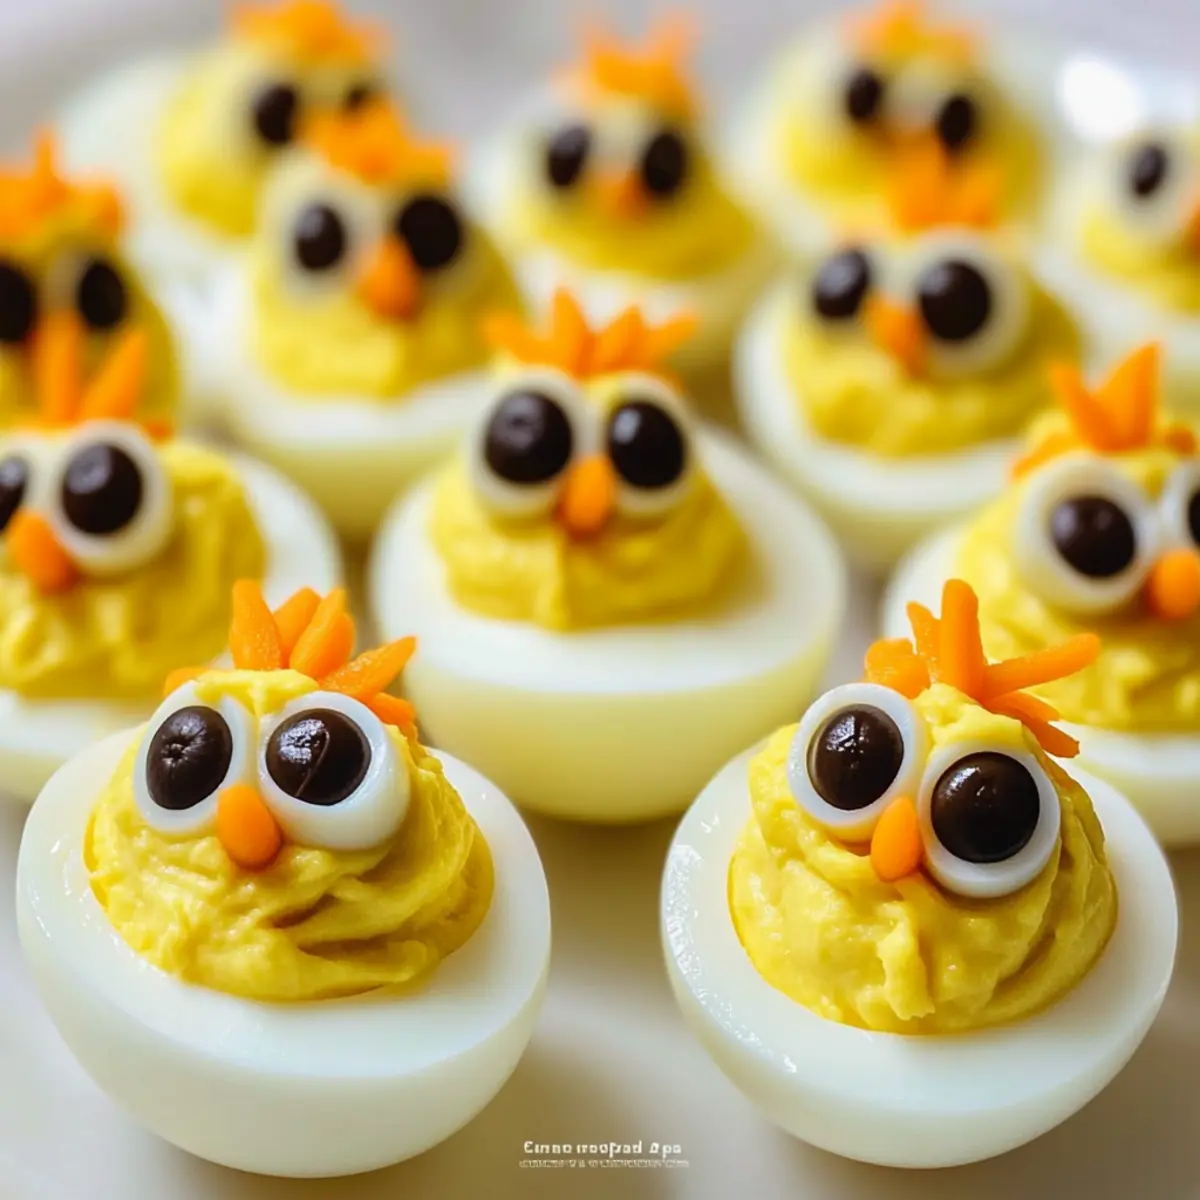
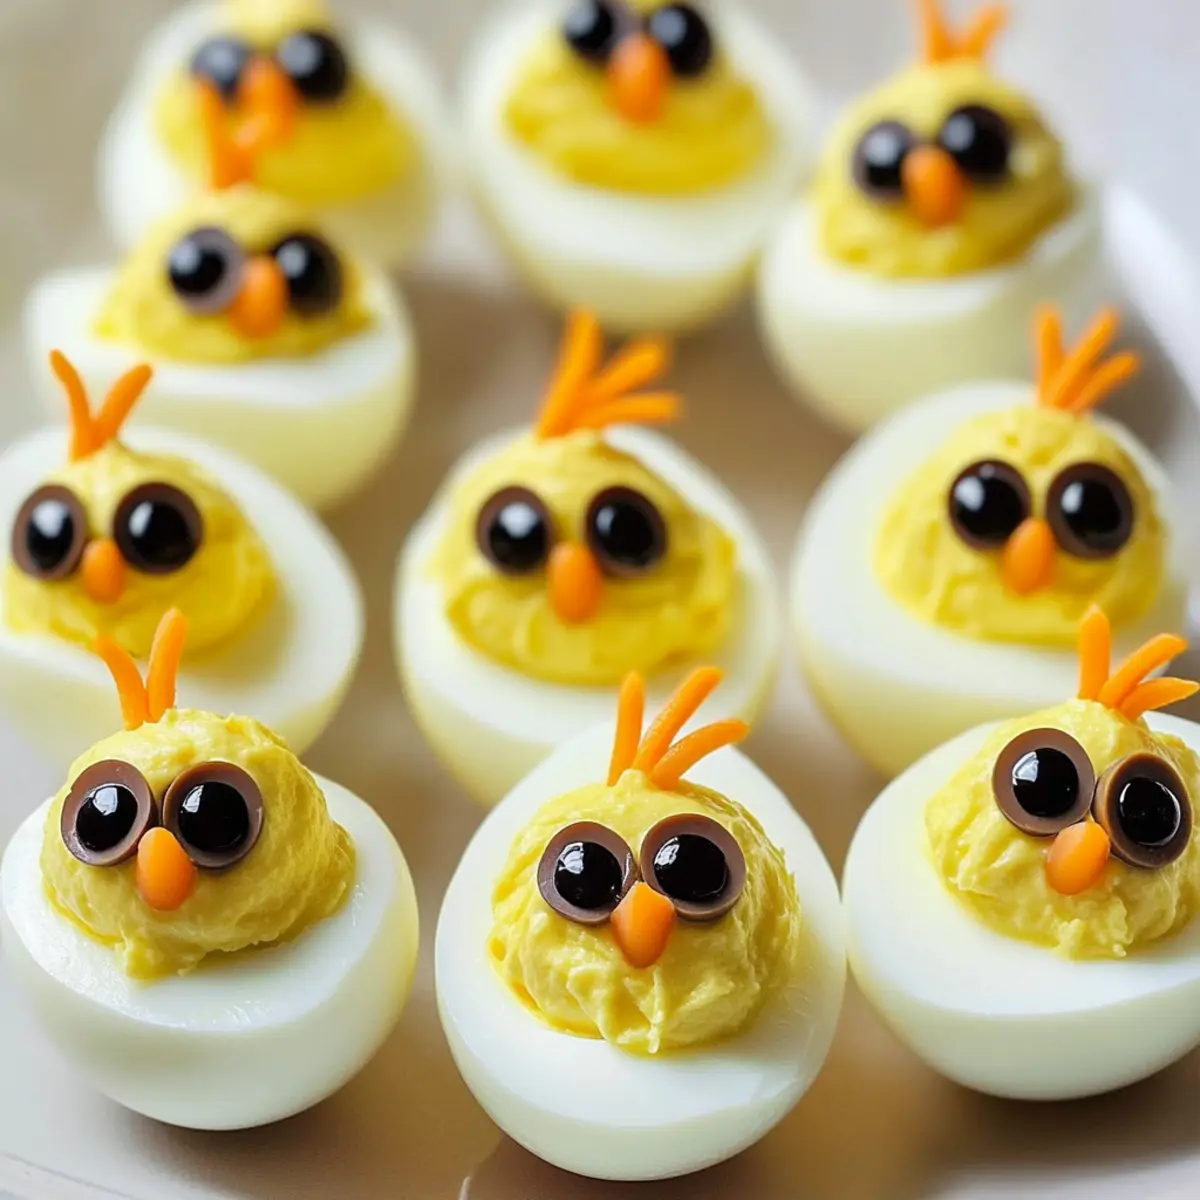
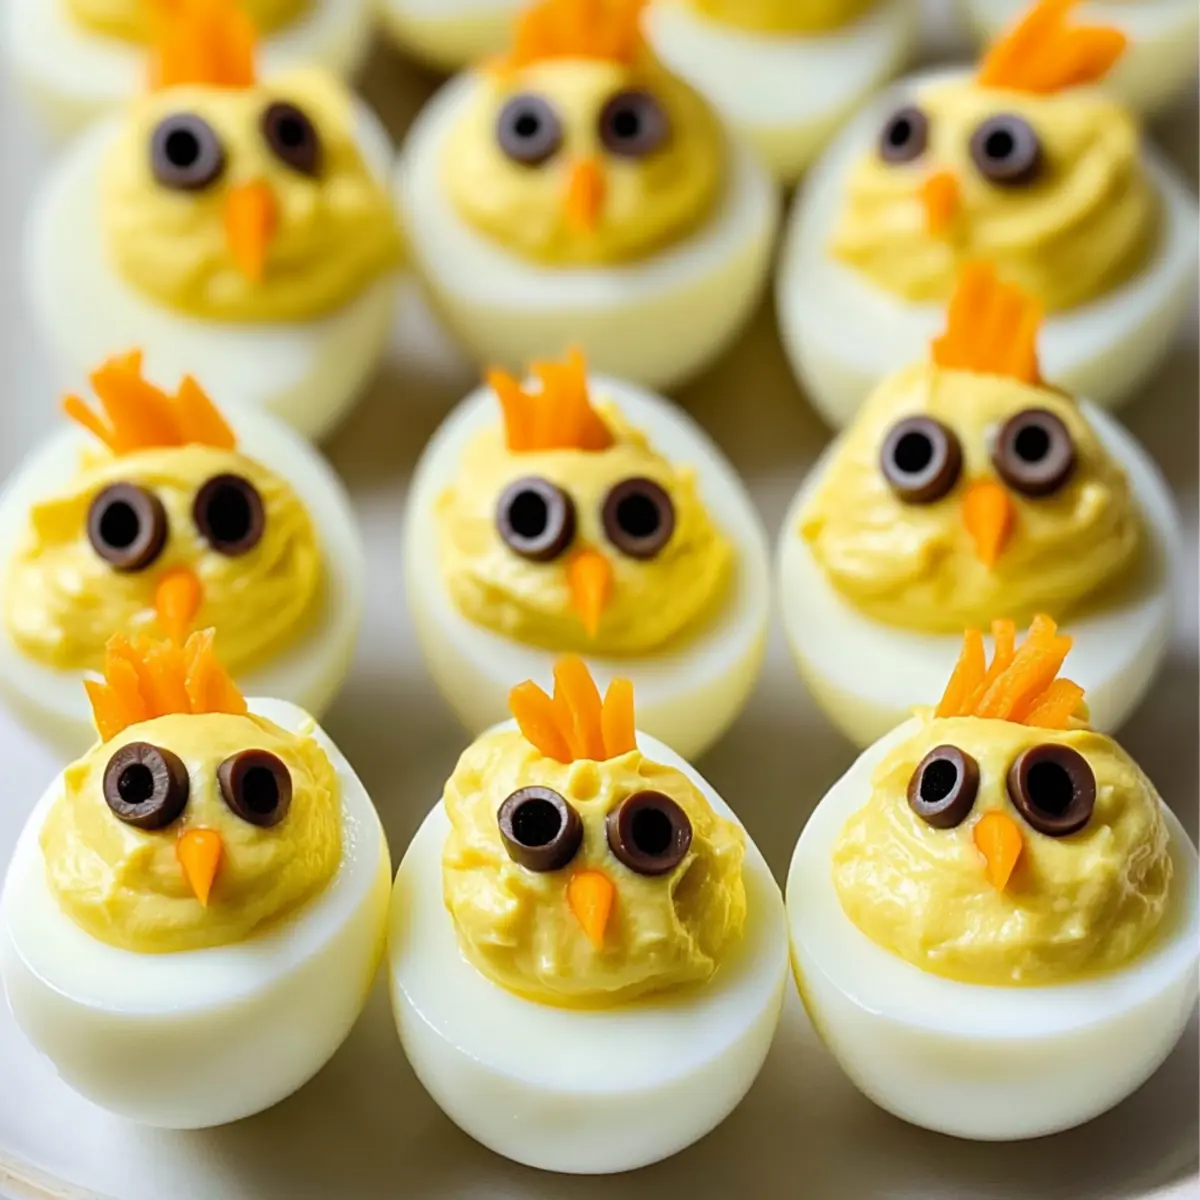
Step 4: Create Cute Faces
To bring your Deviled Egg Chicks to life, take small pieces of carrot for beaks and tiny slices of black olives for eyes. Use a toothpick or small knife to gently press these embellishments into the filling. For a whimsical finishing touch, snip chives or green onions to create “hair” on top of the eggs. Enjoy the creative process as you transform simple ingredients into delightful little characters!
Step 5: Chill Before Serving
Cover the platter with plastic wrap and refrigerate your adorable Deviled Egg Chicks for about 30 minutes before serving. Chilling enhances the flavors and allows the eggs to set. The contrast of the creamy filling and fresh decoration will be at their peak as your guests arrive, ensuring this playful appetizer steals the show at your Easter celebration.
What to Serve with Deviled Egg Chicks: Hatching Style?
Bring your Easter gathering to life with delightful accompaniments that enhance every bite of these whimsical creations.
-
Colorful Veggie Tray: Fresh, crunchy vegetables offer a bright contrast and can easily be paired with a creamy dip for added flavor. Arrange them to create a festive bunny shape for an extra touch of creativity.
-
Savory Pinwheels: Filled with cream cheese and herbs, these rolled tortillas are not only visually appealing but equally delicious. Their creamy texture complements the richness of the deviled egg chicks perfectly.
-
Mini Cheese Balls: Shaped like carrots, these delicious bites are both fun and tasty. The creamy cheese mingling with herbs adds an engaging contrast to the playful deviled eggs.
-
Carrot Patch Dip: This eye-catching dip made with creamy goodness and crunchy carrots adds both flavor and a playful nod to Easter traditions. It’s like having a mini garden on your platter!
-
Sweet Fruit Skewers: Skewered pieces of seasonal fruit bring a sweet and refreshing balance to the savory appetizers. The natural sugars and bright colors will delight kids and adults alike.
-
Sparkling Lemonade: A refreshing, fizzy drink that pairs beautifully with your appetizers, providing a bright and zesty flavor that enhances the festive atmosphere of your gathering.
-
Chocolate Bunny Treats: Add a touch of sweetness with chocolate-covered treats shaped like bunnies. Their playful theme ties the meal together, ensuring your guests leave with satisfied smiles.
Let your creativity shine as you assemble these complementary delights next to the star of the show, the Deviled Egg Chicks!
Deviled Egg Chicks Variations & Substitutions
Feel free to get creative and customize these Deviled Egg Chicks to suit your taste and dietary preferences!
-
Spicy Kick: Add a dash of sriracha to the filling for an unexpected heat that pairs delightfully with the creamy texture. This little twist is sure to intrigue those seeking bold flavors.
-
Avocado Swap: Substitute half the mayonnaise with mashed avocado for a creamy, healthier version that adds a lovely green hue to your chicks.
-
Smoky Flavor: Incorporate smoked paprika into the filling for a compelling, smoky undertone that enhances the richness of the yolks. Pairing this with a touch of bacon bits can elevate the dish even further.
-
Herbed Chicks: Mix in fresh herbs like dill or parsley to the deviled mixture for an aromatic, garden-fresh taste. This addition not only boosts flavor but makes your chicks look even more vibrant!
-
Cheesy Delight: Blend in grated cheese, such as cheddar or feta, for a deliciously cheesy filling that takes your Deviled Egg Chicks to new heights. The contrasting flavors create a delightful experience.
-
Colorful Decor: Use diced bell peppers instead of olives for the eyes; this brings an extra pop of color and sweetness to your adorable chicks. It makes for an enjoyable presentation that catches the eye.
-
Gluten-Free Hosting: Serve these Deviled Egg Chicks with crispy veggie sticks instead of bread for dipping to create gluten-free options for those who prefer to skip the carbs during your Easter gathering.
-
Fruity Surprise: For a surprising twist, incorporate finely chopped pickles or sweet relish for a touch of sweetness in your filling—this little hack can enchant even the pickiest of eaters!
Whether you’re just enjoying these beauties on their own or presenting them alongside other festive options like savory pinwheels or a vibrant veggie tray, the possibilities are endless!
How to Store and Freeze Deviled Egg Chicks
Fridge: Keep your Deviled Egg Chicks in an airtight container, where they’ll stay fresh for up to 3 days. Ensure they’re covered well to prevent drying out.
Make-Ahead: You can prepare the chick filling a day in advance; store it in the fridge and assemble just before serving for optimal freshness.
Freezer: Deviled Egg Chicks are not recommended for freezing, as the texture of the eggs may change. It’s best to enjoy them fresh!
Reheating: If any leftover egg whites remain, warm them slightly in the microwave for around 10-15 seconds before refilling, but keep in mind that freezing isn’t ideal for this delightful appetizer.
Expert Tips for Deviled Egg Chicks
-
Perfect Boil: Ensure eggs are fresh for easier peeling. Start with cold water and gently boil to avoid cracks in the shells.
-
Flavor Balance: Adjust mayo and mustard to your taste; remember, adding too much can make the filling runny.
-
Creative Dots: Use colorful vegetable garnishes to enhance your hatching chicks’ appearance—think radish or bell pepper for extra flair!
-
Assembly Ease: Use a piping bag for filling; it not only provides a neater look but makes creating your Deviled Egg Chicks easier and more fun.
-
Chill for Flavor: Don’t skip chilling before serving! It allows the flavors of your filling to meld beautifully, enhancing the overall taste.
-
Presentation Matters: Arrange your Deviled Egg Chicks in a playful manner on the platter, surrounded by garnish like greens or edible flowers to elevate your Easter display.
Make Ahead Options
These adorable Deviled Egg Chicks are perfect for meal prep, allowing you to save precious time on the day of your Easter gathering! You can hard boil and prepare the eggs up to 3 days in advance; simply store the peeled egg whites and prepared filling separately in airtight containers in the refrigerator. To enhance flavor and texture, refrigerate the filled eggs for at least 30 minutes before serving. When you’re ready to impress your guests, just assemble the chicks by adding the carrot beaks, olive eyes, and chive “hair” right before serving to ensure they look their best. With these make-ahead tips, you’ll have a delightful centerpiece with minimal effort!
Deviled Egg Chicks: Adorable Hatching Style for Easter Fun Recipe FAQs
How do I select the best eggs for deviled eggs?
Absolutely! When selecting eggs for your Deviled Egg Chicks, look for large, fresh eggs that have no cracks. Farm-fresh eggs or organic options often yield the best flavor. Older eggs make peeling easier due to the air cell forming inside as they age, so a balance is key!
How should I store my Deviled Egg Chicks?
To keep your Deviled Egg Chicks fresh, place them in an airtight container in the fridge, where they’ll stay good for up to 3 days. Be sure to cover them well with plastic wrap to prevent drying out. You can also store the filling separately in the fridge for up to a day, and assemble them just before serving for the best presentation.
Can I freeze Deviled Egg Chicks?
Unfortunately, freezing is not recommended for Deviled Egg Chicks. The texture of boiled eggs changes once frozen, becoming rubbery and unappetizing after thawing. It’s best to enjoy them fresh to experience that delightful creaminess!
What are some common issues when making deviled eggs?
Very! A common issue is overcooking the eggs, which can lead to a greenish ring around the yolk. To avoid this, boil just until firm, then plunge them into an ice bath for a quick cool—this will help keep your yolks vibrant yellow! Also, keep the filling creamy and well-adjusted for flavor balance.
Are Deviled Egg Chicks suitable for kids or those with allergies?
Absolutely! These fun appetizers are kid-friendly, and you can tailor them to meet dietary needs. For a gluten-free option, ensure your ingredients, like mayo and seasonings, are free from gluten. If there are allergies to common ingredients, such as eggs or dairy, consider using alternatives like avocado or hummus as a filling.
How can I enhance the visuals of my Deviled Egg Chicks?
For that extra wow factor, consider adding colorful vegetable garnishes like diced bell peppers or olives as accents! Arranging your chicks on a bed of greens and adding edible flowers around the platter elevates your presentation, making the delightful characters even more appealing during your Easter celebration.
Deviled Egg Chicks: Adorable Hatching Style for Easter Fun
Ingredients
Equipment
Method
- Boil six large eggs in cold water. Bring to a boil, then simmer for 10-12 minutes. Cool in ice bath for 5 minutes and peel. Slice in half lengthwise and remove yolks.
- In a mixing bowl, combine yolks with mayonnaise, Dijon mustard, salt, pepper, and turmeric. Mash until smooth and creamy.
- Fill each egg white half with the yolk mixture using a piping bag or spoon, slightly overfilling for a hatching effect. Arrange on a platter.
- Add carrot pieces for beaks and olive slices for eyes. Snip chives for hair on top of eggs.
- Cover the platter with plastic wrap and refrigerate for 30 minutes before serving to enhance flavors.
Leave a Reply