
Introduction to Honey Layer Cake
There’s something magical about a cake that brings people together, and this Honey Layer Cake does just that. I remember the first time I baked it; the sweet aroma of honey wafted through my kitchen, instantly lifting my spirits. This delightful dessert is not just a treat; it’s a quick solution for a busy day or a showstopper for special occasions. With its rich, creamy frosting and layers of honey-infused goodness, it’s bound to impress your loved ones. Trust me, once you try this recipe, it will become a staple in your baking repertoire.
Why You’ll Love This Honey Layer Cake
This Honey Layer Cake is a dream come true for any home cook. It’s incredibly easy to whip up, making it perfect for those busy weeknights or last-minute gatherings. The taste? Oh, it’s a delightful balance of sweetness and creaminess that will have everyone asking for seconds. Plus, the layers create a stunning presentation that’s sure to impress. You’ll love how this cake brings joy to any occasion, big or small.
Ingredients for Honey Layer Cake
Gathering the right ingredients is the first step to creating this delightful Honey Layer Cake. Here’s what you’ll need:
- All-purpose flour: The backbone of your cake, providing structure and texture.
- Baking soda and baking powder: These leavening agents help the cake rise, giving it that light, fluffy feel.
- Salt: Just a pinch enhances the flavors and balances the sweetness.
- Unsalted butter: Adds richness and moisture; make sure it’s softened for easy mixing.
- Granulated sugar: Sweetens the cake and contributes to its tender crumb.
- Honey: The star of the show! It infuses the cake with a natural sweetness and unique flavor.
- Large eggs: They bind the ingredients together and add moisture.
- Vanilla extract: A splash of this adds depth and warmth to the flavor profile.
- Heavy whipping cream: Essential for the luscious frosting that will crown your cake.
- Powdered sugar: This sweetens the frosting and gives it that perfect creamy texture.
For those looking to mix things up, consider these optional ingredients:
- Cocoa powder: Add a tablespoon for a chocolate twist that pairs beautifully with honey.
- Maple syrup: Swap out honey for a different sweetness profile if you’re feeling adventurous.
Exact measurements for these ingredients can be found at the bottom of the article, ready for printing!
How to Make Honey Layer Cake
Now that you have your ingredients ready, let’s dive into the fun part: making this scrumptious Honey Layer Cake! Follow these simple steps, and you’ll be on your way to baking bliss.
Step 1: Preheat and Prepare
First things first, preheat your oven to 350°F (175°C). While that’s heating up, grab three 9-inch round cake pans. Grease and flour them to ensure your cakes slide out easily once baked. This little step makes a world of difference!
Step 2: Mix Dry Ingredients
In a medium bowl, whisk together the all-purpose flour, baking soda, baking powder, and salt. This mix is crucial for the cake’s structure. Make sure there are no lumps; a smooth batter is key to a fluffy cake!
Step 3: Cream Butter and Sugar
In a large mixing bowl, cream the softened butter and granulated sugar together until it’s light and fluffy—about 3 to 4 minutes. This is where the magic begins! Once it’s fluffy, add in the honey and mix until well combined. The aroma will be heavenly!
Step 4: Add Eggs and Vanilla
Now, it’s time to incorporate the eggs. Add them one at a time, mixing well after each addition. This helps create a smooth batter. Don’t forget to stir in the vanilla extract for that extra layer of flavor!
Step 5: Combine Wet and Dry Ingredients
Gradually add the dry ingredients to the wet mixture. Mix until just combined; overmixing can lead to a dense cake. You want a light, airy texture, so be gentle here!
Step 6: Bake the Cake
Divide the batter evenly among the prepared cake pans. Bake in your preheated oven for 25 to 30 minutes. To check for doneness, insert a toothpick into the center. If it comes out clean, you’re good to go!
Step 7: Cool the Cakes
Once baked, allow the cakes to cool in the pans for about 10 minutes. Then, carefully transfer them to wire racks to cool completely. Patience is key here; a warm cake can be tricky to frost!
Step 8: Make the Frosting
While the cakes cool, let’s whip up that luscious frosting! In a large bowl, whip the heavy cream until soft peaks form. Gradually add the powdered sugar and vanilla extract, continuing to whip until stiff peaks form. This frosting is light and creamy, perfect for layering!
Step 9: Assemble the Cake
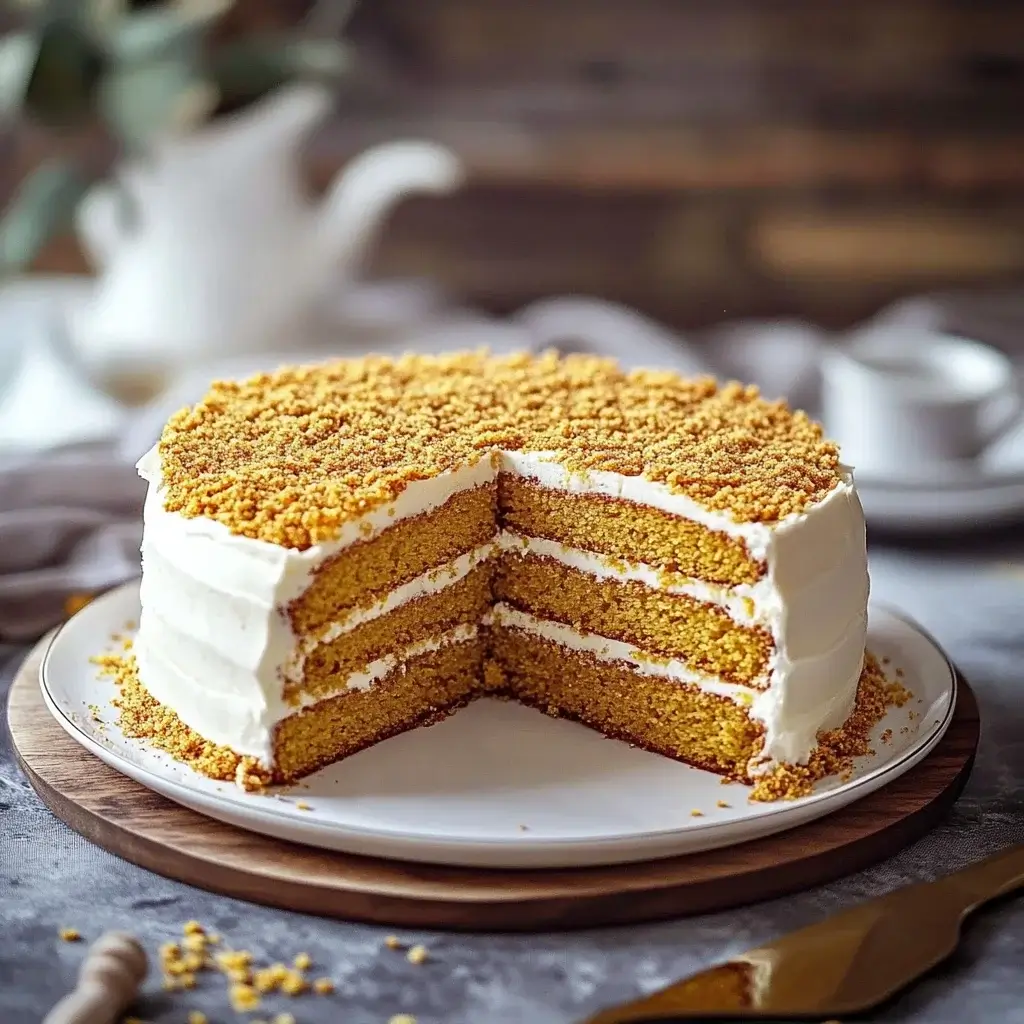
Once the cakes are completely cool, place one layer on a serving plate. Spread a generous layer of frosting on top, then repeat with the second layer. Finally, place the third layer on top and frost the top and sides of the cake with the remaining whipped cream. Chill the cake in the refrigerator for at least an hour before serving. This allows the flavors to meld beautifully!

Tips for Success
- Use room temperature ingredients for better mixing and a smoother batter.
- Don’t skip the chilling step; it helps the frosting set and flavors meld.
- For even layers, weigh your batter before dividing it among the pans.
- Experiment with different frostings, like cream cheese or chocolate, for a twist.
- Store leftovers in an airtight container to keep the cake fresh and moist.
Equipment Needed
- Mixing bowls: A set of various sizes is handy; you can use any large bowl if needed.
- Whisk: Essential for mixing; a fork can work in a pinch.
- Measuring cups and spoons: Accurate measurements are key; use a kitchen scale for precision.
- Spatula: Great for folding and spreading; a wooden spoon can also do the job.
- Oven mitts: Safety first! Any thick cloth will work if you’re in a bind.
Variations
- Chocolate Honey Layer Cake: Add a tablespoon of cocoa powder to the batter for a rich chocolate flavor that pairs beautifully with honey.
- Maple Honey Layer Cake: Substitute honey with maple syrup for a unique twist that brings a different sweetness profile to the cake.
- Nutty Addition: Fold in chopped nuts like walnuts or pecans into the batter for added texture and flavor.
- Fruit Layering: Incorporate fresh fruits like sliced strawberries or raspberries between the layers for a refreshing burst of flavor.
- Gluten-Free Option: Use a gluten-free all-purpose flour blend to make this cake suitable for those with gluten sensitivities.
Serving Suggestions
- Pair with a scoop of vanilla ice cream for a delightful contrast in temperature and texture.
- Serve alongside a cup of freshly brewed coffee or tea to enhance the cake’s flavors.
- Garnish with fresh berries or mint leaves for a pop of color and freshness.
- Present on a beautiful cake stand to elevate your dessert display.
FAQs about Honey Layer Cake
As you embark on your baking journey with this Honey Layer Cake, you might have a few questions. Here are some common queries that can help you along the way:
Can I use a different sweetener instead of honey?
Absolutely! Maple syrup is a great alternative that offers a unique flavor. Just keep in mind that it may slightly alter the texture.
How do I store leftover Honey Layer Cake?
Store any leftovers in an airtight container in the refrigerator. This will keep the cake fresh and moist for up to 3 days.
Can I freeze the Honey Layer Cake?
Yes, you can freeze the cake! Wrap it tightly in plastic wrap and then in aluminum foil. It can last up to 3 months in the freezer. Just thaw it in the fridge before serving.
What can I serve with Honey Layer Cake?
This cake pairs wonderfully with a scoop of vanilla ice cream or a cup of coffee. Fresh berries also make a lovely accompaniment!
Can I make this cake ahead of time?
Definitely! You can bake the layers a day in advance and frost them just before serving. This allows the flavors to meld beautifully.
Final Thoughts
Baking this Honey Layer Cake is more than just a culinary task; it’s an experience filled with joy and warmth. The sweet aroma that fills your kitchen, the anticipation as you layer the cake, and the smiles it brings to your loved ones are truly priceless. Each slice is a reminder of the simple pleasures in life, making it perfect for any occasion. Whether it’s a family gathering or a quiet evening at home, this cake is sure to create lasting memories. So, roll up your sleeves and dive into this delightful recipe—you won’t regret it!
Honey Layer Cake: A Delectable Recipe to Try Today!
Ingredients
Method
- Preheat the oven to 350°F (175°C). Grease and flour three 9-inch round cake pans.
- In a medium bowl, whisk together the flour, baking soda, baking powder, and salt. Set aside.
- In a large mixing bowl, cream the softened butter and granulated sugar together until light and fluffy, about 3-4 minutes. Add the honey and mix until well combined.
- Add the eggs one at a time, mixing well after each addition. Stir in the vanilla extract.
- Gradually add the dry ingredients to the wet mixture, mixing until just combined. Do not overmix.
- Divide the batter evenly among the prepared cake pans. Bake in the preheated oven for 25-30 minutes, or until a toothpick inserted into the center comes out clean.
- Allow the cakes to cool in the pans for 10 minutes before transferring them to wire racks to cool completely.
- For the frosting, whip the heavy cream in a large bowl until soft peaks form. Gradually add the powdered sugar and vanilla extract, continuing to whip until stiff peaks form.
- Once the cakes are completely cool, place one layer on a serving plate and spread a layer of frosting on top. Repeat with the second layer, then place the third layer on top. Frost the top and sides of the cake with the remaining whipped cream.
- Chill the cake in the refrigerator for at least 1 hour before serving to allow the flavors to meld.
Nutrition
Notes
- For a richer flavor, try adding a tablespoon of cocoa powder to the batter for a chocolate twist.
- You can also substitute the honey with maple syrup for a different sweetness profile.
Leave a Reply