
As I stood in my kitchen, fragrant memories of summer fairs danced around me, whispering about cotton candy skies and laughter. That’s exactly what inspired this whimsical Japanese Cotton Candy Cake Roll: A Pastel Dream You Can Bake at Home. Delightfully light and airy, this enchanting dessert is not just visually stunning; it’s a piece of cake to make! Perfect for celebrations or a cozy afternoon treat, it combines the fun of nostalgic flavor with the elegance of Japanese patisserie techniques. Plus, it’s vegetarian and a guaranteed crowd-pleaser, making it a sweet addition to any gathering. Are you ready to bring carnival magic into your home kitchen? Let’s roll!
Why You’ll Love This Dessert
Whimsical charm: The vibrant colors and playful flavors of cotton candy evoke childhood nostalgia that makes this cake a show-stopper at any event.
Easy to make: With simple steps and readily available ingredients, this recipe is designed for both novice bakers and seasoned pros looking to impress.
Versatile flavors: While it’s fluffy and sweet, you can easily swap the cotton candy extract for almond or vanilla for new taste sensations!
Perfect for any occasion: Whether you’re hosting a birthday party or enjoying a cozy afternoon treat, this cake rolls out smiles and delight with every slice.
Pair it with a refreshing drink like sparkling lemonade or serve it with a fresh fruit platter for an eye-catching presentation—just like my Lemon Blueberry Cheesecake bars! This Japanese Cotton Candy Cake Roll will surely become a cherished favorite!
Japanese Cotton Candy Cake Roll Ingredients
• Get ready to make your dreamy dessert!
For the Cake
- Cake Flour – Provides the structure and lightness essential for a fluffy cake; can be replaced with all-purpose flour, though the texture will differ.
- Sea Salt – Enhances the flavor of your cake; regular table salt works in a pinch.
- Whole Milk – Adds moisture and richness to the batter; swap in almond milk for a dairy-free alternative.
- Vegetable Oil – Keeps the cake moist and tender; melted coconut oil serves as a wonderful substitute.
- Granulated Sugar – Sweetens the cake beautifully; consider coconut sugar for a slightly different texture and taste.
- Cotton Candy Extract – Infuses the cake with that nostalgic flavor we all love; for a twist, vanilla or almond extract can be used instead.
- Egg Whites – Essential for creating the lightness and structure from meringue; no direct substitutes recommended for optimal results.
- Cream of Tartar – Stabilizes the egg whites during whipping; white vinegar or lemon juice can serve as suitable alternatives.
- Gel Food Coloring – Gives your cake that whimsical pastel hue; using liquid food coloring may affect the batter’s consistency.
For the Whipped Cream Filling
- Heavy Cream – Creates a rich and stable whipped cream filling; coconut cream is a great vegan substitute.
- Unflavored Gelatin – Ensures your whipped cream holds up beautifully; agar-agar is a great vegetarian alternative.
- Water – Activates the gelatin, helping to stabilize the filling; nothing else is needed here!
Embrace the delight of this Japanese Cotton Candy Cake Roll: A Pastel Dream You Can Bake at Home, where creativity and flavor come together in every whimsical slice!
Step‑by‑Step Instructions for Japanese Cotton Candy Cake Roll: A Pastel Dream You Can Bake at Home
Step 1: Preheat the Oven
Begin by preheating your oven to 325°F (165°C). While the oven warms up, line an 8×12-inch baking pan with parchment paper, ensuring it’s flat and without any wrinkles. This preparation will help the cake release easily once baked, creating a smooth, fluffy base for your Japanese Cotton Candy Cake Roll.
Step 2: Mix Cake Base
In a large mixing bowl, whisk together your wet ingredients: whole milk, vegetable oil, and granulated sugar until well combined. In another bowl, sift the cake flour and sea salt to incorporate air, ensuring a light texture. Gradually combine the dry ingredients with the wet mixture, stirring gently until smooth and homogenous. You’re building the foundation for the whimsical flavors ahead!
Step 3: Prepare the Meringue
Next, take out your mixing bowl and beat the egg whites with cream of tartar until they become frothy, using a hand mixer or stand mixer on medium speed. Gradually add in granulated sugar, continuing to whip until stiff peaks form—this should take about 3-5 minutes. Finish by adding a few drops of gel food coloring to create a delightful pastel hue, infusing the cake with both color and charm.
Step 4: Fold in the Meringue
Now it’s time to gently fold your meringue into the cake batter. Begin by adding one-third of the meringue to the batter, using a spatula to incorporate it without deflating the egg whites. Repeat this process two more times until evenly combined. Spread the batter into the prepared pan, smoothing the top evenly, and bake for 10-12 minutes until the cake is lightly golden and springs back when touched.
Step 5: Cool the Cake
Once baked, remove the cake from the oven and let it cool in the pan for about 5 minutes. Then, carefully flip the cake onto a wire rack, peeling off the parchment paper gently while it’s still warm. Allow the cake to cool completely, which should take around 30 minutes, ensuring it doesn’t get soggy when you add the filling.
Step 6: Make Whipped Cream Filling
While the cake cools, prepare the whipped cream filling. Start by blooming unflavored gelatin in water, then melt it over low heat until completely dissolved, allowing it to cool slightly. In a mixing bowl, whip the heavy cream and sugar until soft peaks form, then slowly add the melted gelatin and cotton candy extract, whipping again until stiff peaks return. This creamy filling will balance wonderfully with the light cake.
Step 7: Assemble the Roll
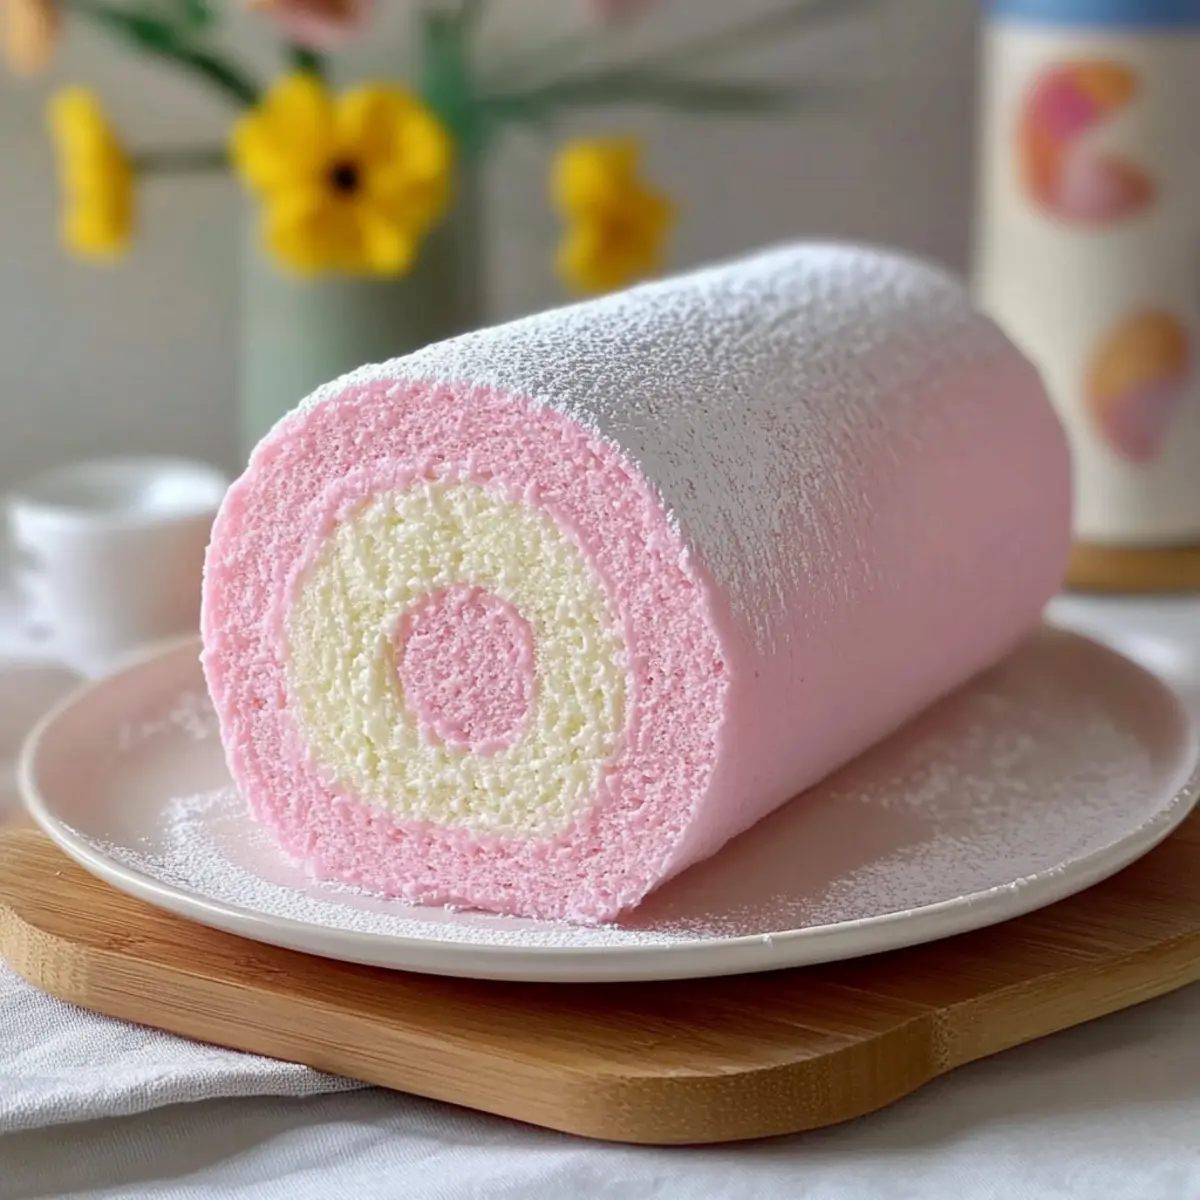
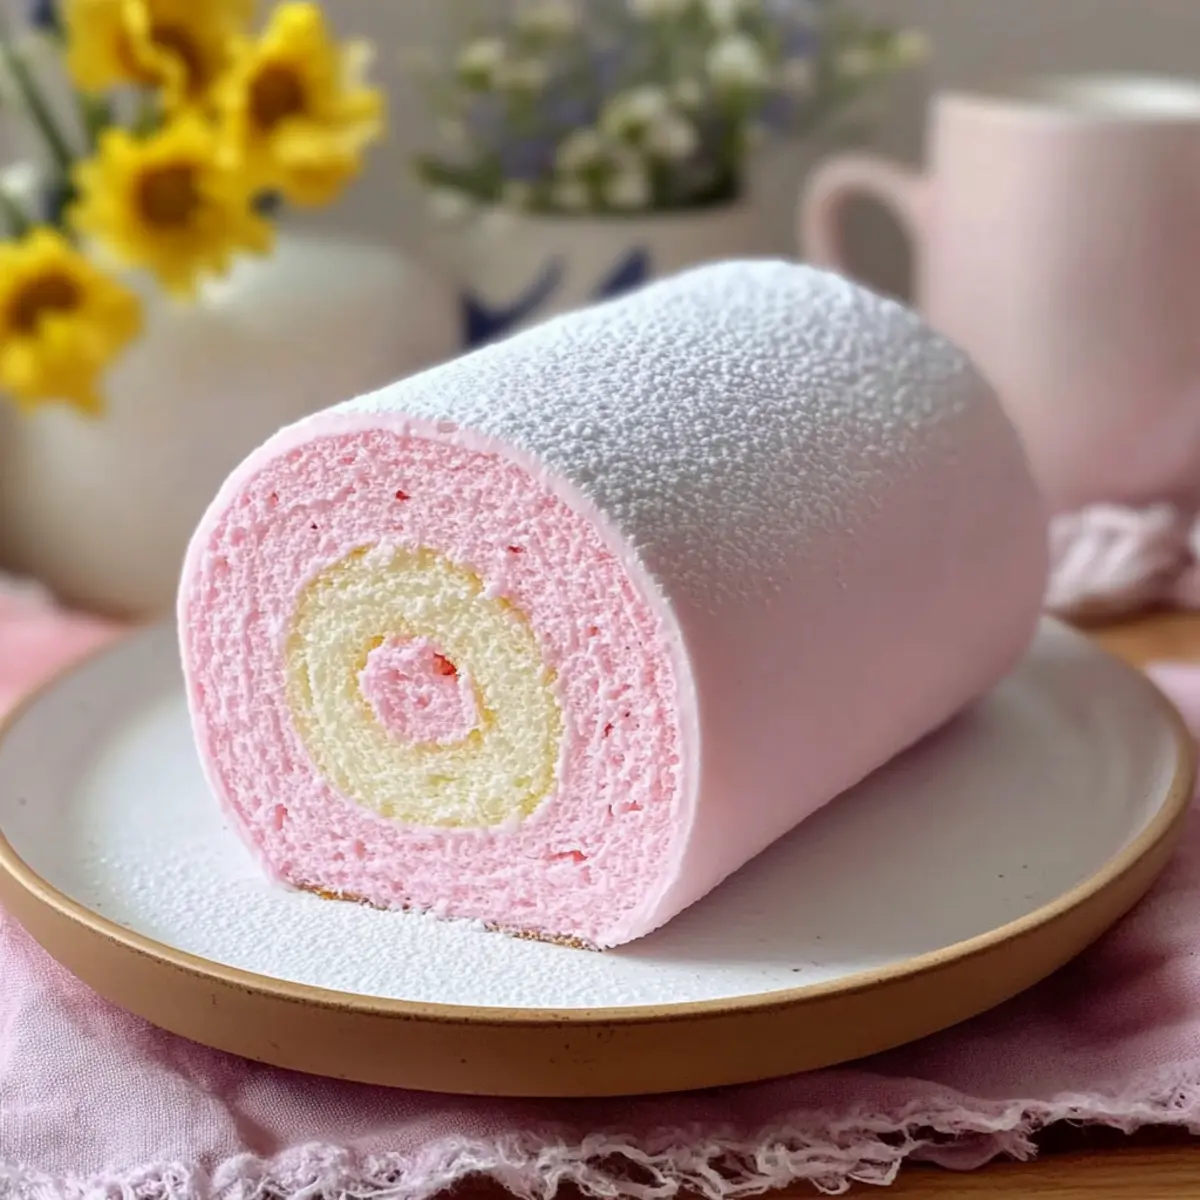
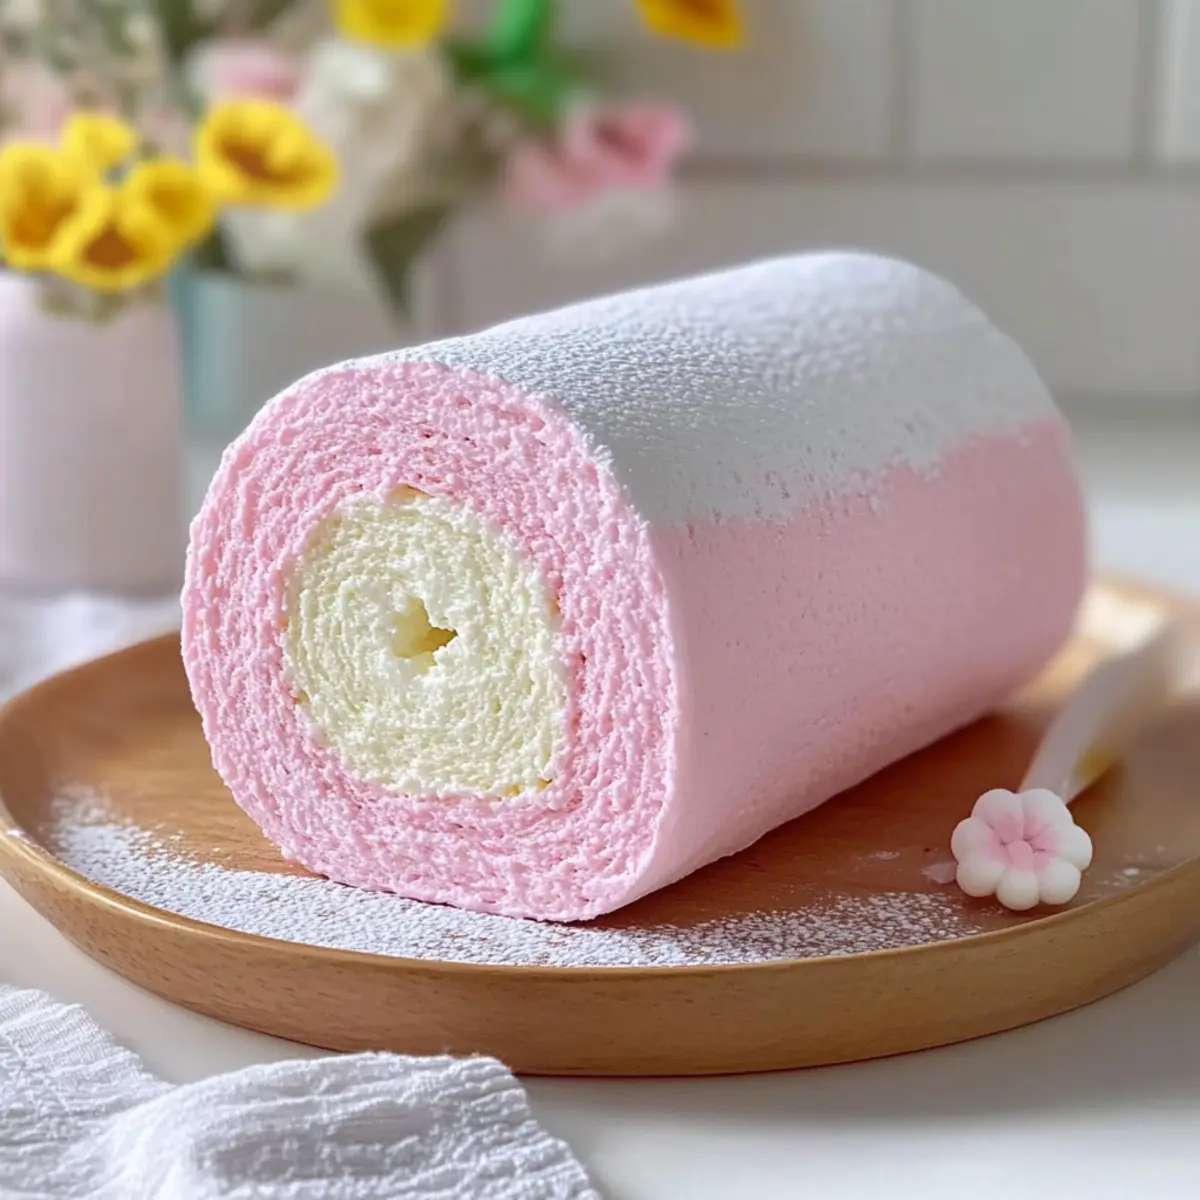
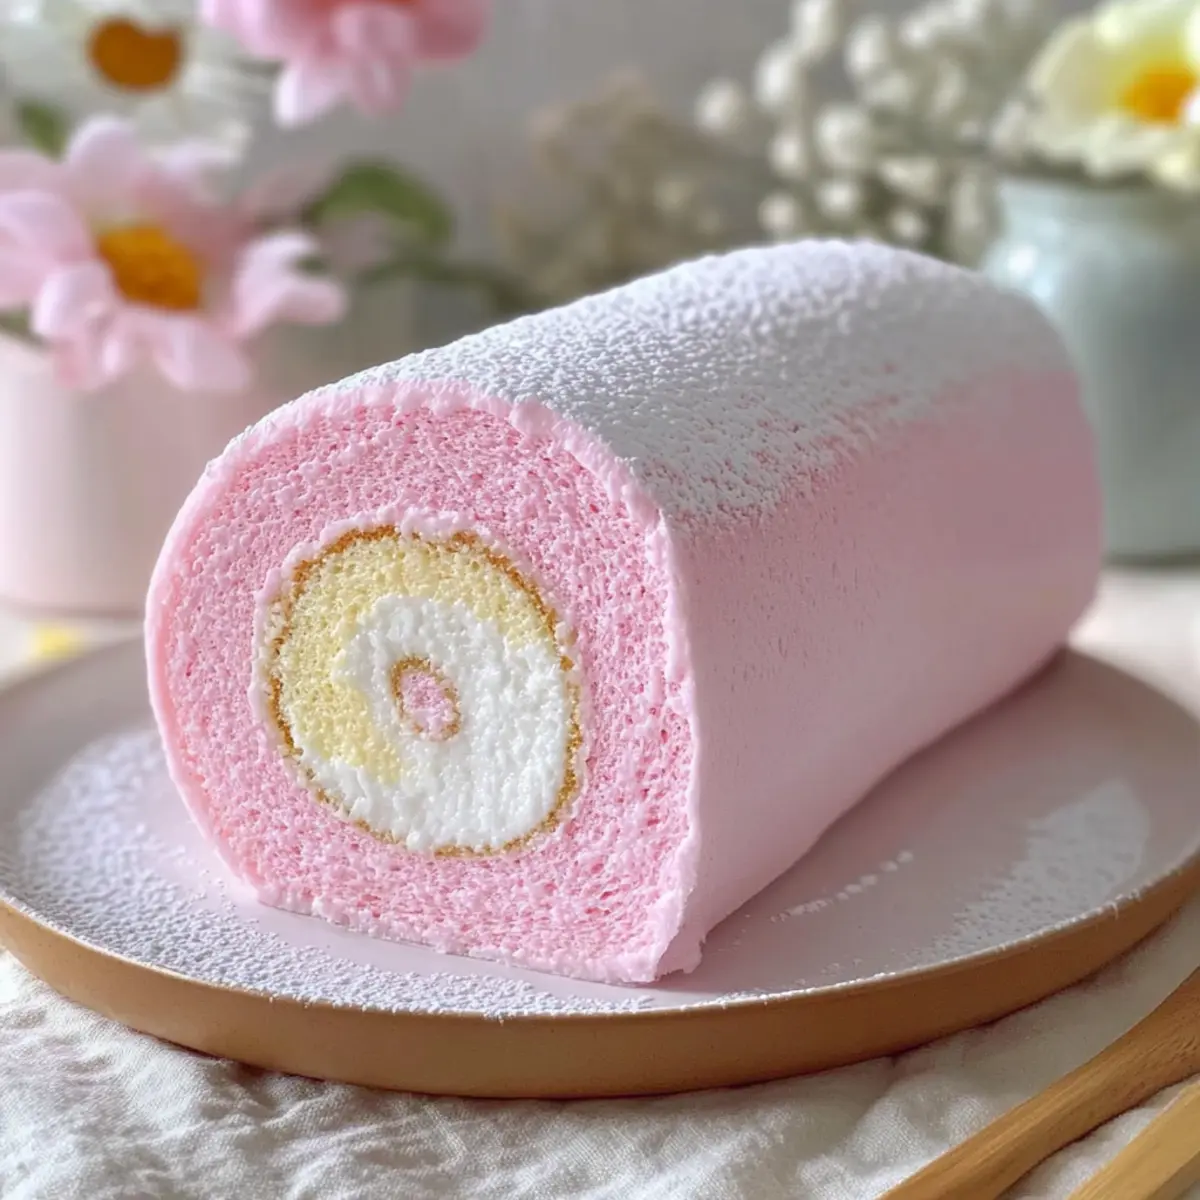
Spread the fluffy whipped cream filling evenly over the cooled cake, ensuring every corner is covered. Using the parchment paper as a guide, roll the cake tightly from one end to the other, creating a log shape. Wrap the rolled cake in plastic wrap and refrigerate for at least 1 hour to set firmly, making slicing easier and more visually appealing.
Step 8: Slice and Serve
After chilling, remove the Japanese Cotton Candy Cake Roll from the fridge and unwrap it. Trim the edges for a clean presentation, then slice the roll into rounds for serving. Each slice should reveal a pastel swirl that delights the eye. Serve alongside a refreshing beverage or fruit platter, and enjoy the whimsical treat that brings joy with every bite!
Storage Tips for Japanese Cotton Candy Cake Roll
-
Fridge: Store the cake roll in an airtight container in the fridge for up to 3 days to maintain its freshness and fluffy texture.
-
Freezer: Avoid freezing the Japanese Cotton Candy Cake Roll, as it can cause the airy texture and whipped cream filling to lose quality upon thawing.
-
Cutting: If you plan to serve the cake later, slice only the portion you need and keep the rest wrapped tightly to prevent drying out.
-
Reheating: If desired, allow slices to sit at room temperature for a few minutes before serving for the best flavor and texture.
Japanese Cotton Candy Cake Roll Variations
Get ready to unleash your creativity and bring playful flavors to life with this enchanting cake roll!
-
Almond Flavor: Swap out cotton candy extract for almond extract for a nutty twist that will surprise your taste buds.
-
Dairy-Free Delight: Use coconut cream instead of heavy cream for the filling to make a deliciously creamy vegan version.
-
Colorful Swirls: Get adventurous with pastel gel colors! Try layering different shades like mint green and lavender for a visually stunning treat.
-
Fruity Fun: Fold in small, diced strawberries or blueberries into the whipped cream filling before rolling for a fruity burst of flavor.
-
Chocolate Bliss: Drizzle melted chocolate on the whipped cream filling before rolling together for a sweet surprise in every slice.
-
Savory Spin: Add a pinch of cardamom or cinnamon to the batter for a warm spice note that’s perfect for cozy gatherings.
-
Extra Crunch: Toss in crushed graham crackers or buttery crumbs between the cake layers for an added texture twist you won’t be able to resist.
For those interested in more dessert inspirations, why not check out my delightful Strawberry Shortcake Ice Cream cake? It pairs beautifully with this whimsical creation, or consider the luscious flavors of my Coconut Cloud Cake as a perfect accompaniment. With these variations, let the fun begin in your kitchen!
What to Serve with Japanese Cotton Candy Cake Roll
Elevate your dessert experience with delightful pairings that harmonize beautifully with this pastel confection.
-
Jasmine Tea: This fragrant tea provides a light floral note, enhancing the cake’s sweetness and making for a sophisticated afternoon treat.
-
Sparkling Lemonade: The refreshing, fizzy nature of sparkling lemonade perfectly contrasts the cake’s airy texture and sweetness, creating a bright and uplifting pairing.
-
Fresh Fruit Platter: A colorful assortment of berries and melon adds a vibrant touch, balancing the sweetness of the cake and providing a refreshing crunch.
-
Vanilla Ice Cream: Rich and creamy, a scoop of vanilla ice cream elevates each slice, creating a delightful combination of flavors and temperatures worth savoring.
-
Cotton Candy Sticks: For fun and whimsy, serve traditional cotton candy on sticks alongside the cake. It enhances the overall theme while delighting both kids and adults!
-
Strawberry Sauce: Drizzle a luscious strawberry sauce over each slice for an added layer of fruitiness and a beautiful pop of color.
-
Mint Leaves: Garnish with fresh mint leaves for a burst of aromatic flavor that complements the cake’s sweetness, adding a lovely finishing touch.
-
Chai Latte: The spiced warmth of a chai latte pairs wonderfully with the lightness of the cake, creating a cozy, comforting drink that tempts your taste buds.
-
Sparkling Water: For a refreshing, non-sweet drink option, serve with sparkling water flavored with citrus slices; it cleanses the palate between bites of cake.
Make Ahead Options
The Japanese Cotton Candy Cake Roll is perfect for meal prep, saving you time on busy days while still delivering a delightful dessert! You can prepare the cake base and whipped cream filling up to 24 hours in advance. Simply bake the cake and let it cool completely before wrapping it tightly in plastic wrap; this will preserve its moisture. The whipped cream filling can be made in advance, too; just store it in an airtight container in the refrigerator. When you’re ready to serve, roll the cake with the filling (preferably chilled for a refreshing bite), slice, and enjoy this whimsical treat with minimal effort!
Expert Tips for the Best Japanese Cotton Candy Cake Roll
-
Egg Whites Matter: Ensure they are at room temperature for the best meringue stability. Cold egg whites can be hard to whip properly.
-
Gentle Folding: When incorporating meringue into the batter, fold gently to retain air. Overmixing can result in a dense cake instead of the desired fluffy texture.
-
Vibrant Colors: Use gel food coloring for a bright pastel hue without adding extra moisture, which can affect cake consistency.
-
Cool Completely: Allow the cake to cool fully before adding the whipped cream filling to prevent sogginess, ensuring a perfect slice.
-
Tight Rolling: When rolling the cake, use the parchment paper to guide you and wrap tightly to keep it moist and maintain texture during chilling.
With these tips, your Japanese Cotton Candy Cake Roll will not only look stunning but also taste divine!
Japanese Cotton Candy Cake Roll Recipe FAQs
What type of cake flour should I use for this recipe?
I recommend using cake flour for the best texture, as it provides the structure and lightness essential for a fluffy cake. If you can’t find cake flour, you can substitute it with all-purpose flour, although it might yield a slightly denser cake.
How should I store the Japanese Cotton Candy Cake Roll?
To keep your cake fresh, store it in an airtight container in the fridge for up to 3 days. Be sure to wrap it tightly if you’ve rolled it to avoid drying out. This way, you’ll maintain that delightful texture!
Can I freeze the Japanese Cotton Candy Cake Roll?
It’s best to avoid freezing this cake as the airy texture and whipped cream filling may lose their delightful quality when thawed. If you must, slice the roll, wrap each piece tightly in plastic wrap, and then place them in a freezer bag. You can freeze for up to 1 month, but I usually recommend enjoying it fresh!
What if my meringue isn’t achieving stiff peaks?
If your egg whites aren’t whipping to stiff peaks, make sure they’re at room temperature before you start. Also, ensure your mixing bowl and beaters are clean and free of grease, as any residue can prevent proper whipping. Whip on medium speed until you achieve that frothy stage, gradually adding sugar to help stabilize it.
Can children or pets eat this cake?
This dessert contains ingredients like whipped cream and sugar, which are generally safe for children. However, keep an eye on pets since ingredients like chocolate or certain flavorings can be harmful. If anyone has allergies, always check the labels on store-bought ingredients like gelatin or food coloring to ensure they’re safe for consumption.
How can I achieve vibrant colors in the cake without altering the texture?
Stick to gel food coloring, which provides vibrant hues without adding extra moisture that could affect the cake’s lightness. Liquid food coloring can alter the batter consistency, so I suggest using gel for eye-catching pastels!
Japanese Cotton Candy Cake Roll: A Pastel Dream to Bake
Ingredients
Equipment
Method
- Preheat your oven to 325°F (165°C) and line an 8x12-inch baking pan with parchment paper.
- In a large mixing bowl, whisk together whole milk, vegetable oil, and granulated sugar until well combined. In another bowl, sift cake flour and sea salt.
- Combine dry ingredients with wet mixture, stirring gently until smooth.
- Beat egg whites with cream of tartar until frothy; add granulated sugar until stiff peaks form, about 3-5 minutes. Add a few drops of gel food coloring.
- Gently fold meringue into the batter; spread into the prepared pan and bake for 10-12 minutes.
- Let the cake cool in the pan for 5 minutes, then flip onto a wire rack to cool completely, about 30 minutes.
- Prepare whipped cream filling by blooming gelatin in water, then melting it. Whip heavy cream until soft peaks form, then add gelatin and extract.
- Spread whipped cream filling over the cooled cake, roll tightly using parchment as a guide, wrap in plastic, and refrigerate for 1 hour.
- After chilling, slice and serve with a refreshing beverage or fruit platter.
Leave a Reply