
“Have you ever found yourself craving a comforting snack that’s just as fun to make as it is to eat? Enter my Loaded Cheesy Fries, the perfect companion for your cozy movie nights or lively game days. With just a few ingredients and minimal prep, these crowd-pleasing fries can be customized to suit any palate, making them an ideal choice for everyone—from picky eaters to adventurous foodies. In under 30 minutes, you can enjoy crispy fries topped with gooey cheese, savory bacon, and vibrant toppings that will transform your ordinary evening into a flavor celebration. Ready to dive in? Let’s whip up a dish that’s bound to steal the show!”
Why Are These Cheesy Fries Irresistible?
Loaded Cheesy Fries are the ultimate comfort food, guaranteed to satisfy your cravings. Quick and Easy to prepare, they come together in under 30 minutes, making them perfect for busy weeknights or spontaneous get-togethers. Customizable Toppings allow everyone to personalize their fries—whether you prefer crispy bacon bits or spicy jalapeños. Crowd-Pleaser status is assured; these cheesy delights are a hit with both kids and adults alike! For more cheesy goodness, check out our Cheesy Ground Beef Enchilada Skillet that’s sure to impress your guests.
Loaded Cheesy Fries Ingredients
For the Fries
• Frozen Thick-Cut French Fries – These provide a crispy base, which you can swap for sweet potato fries for a healthier twist.
• Olive Oil – 2 tablespoons help enhance crispiness; avocado oil works as a great substitute.
For the Toppings
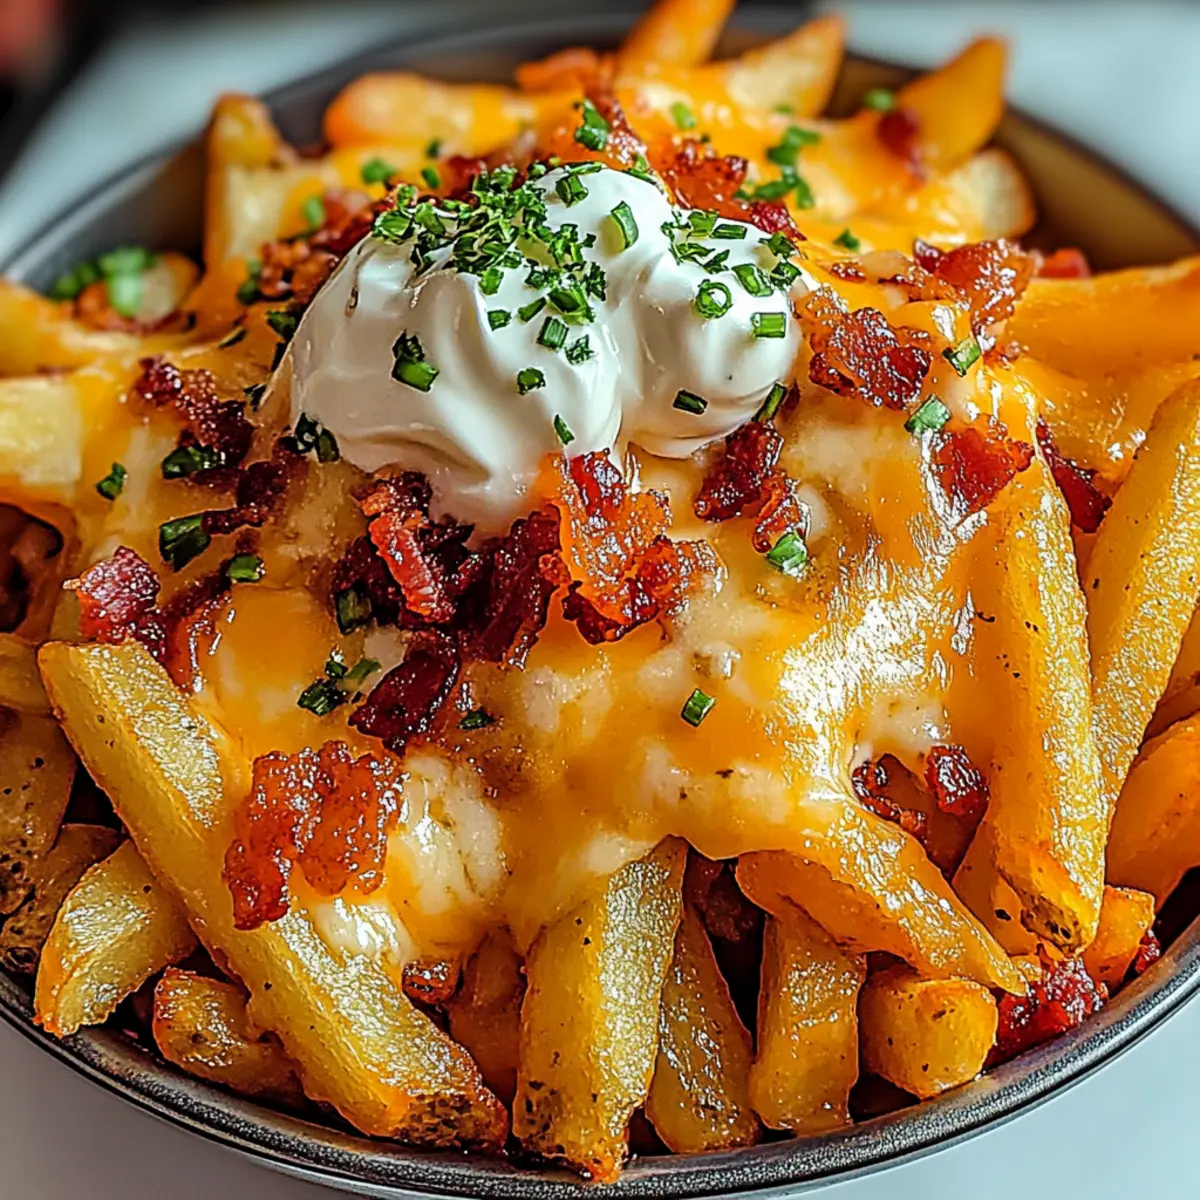
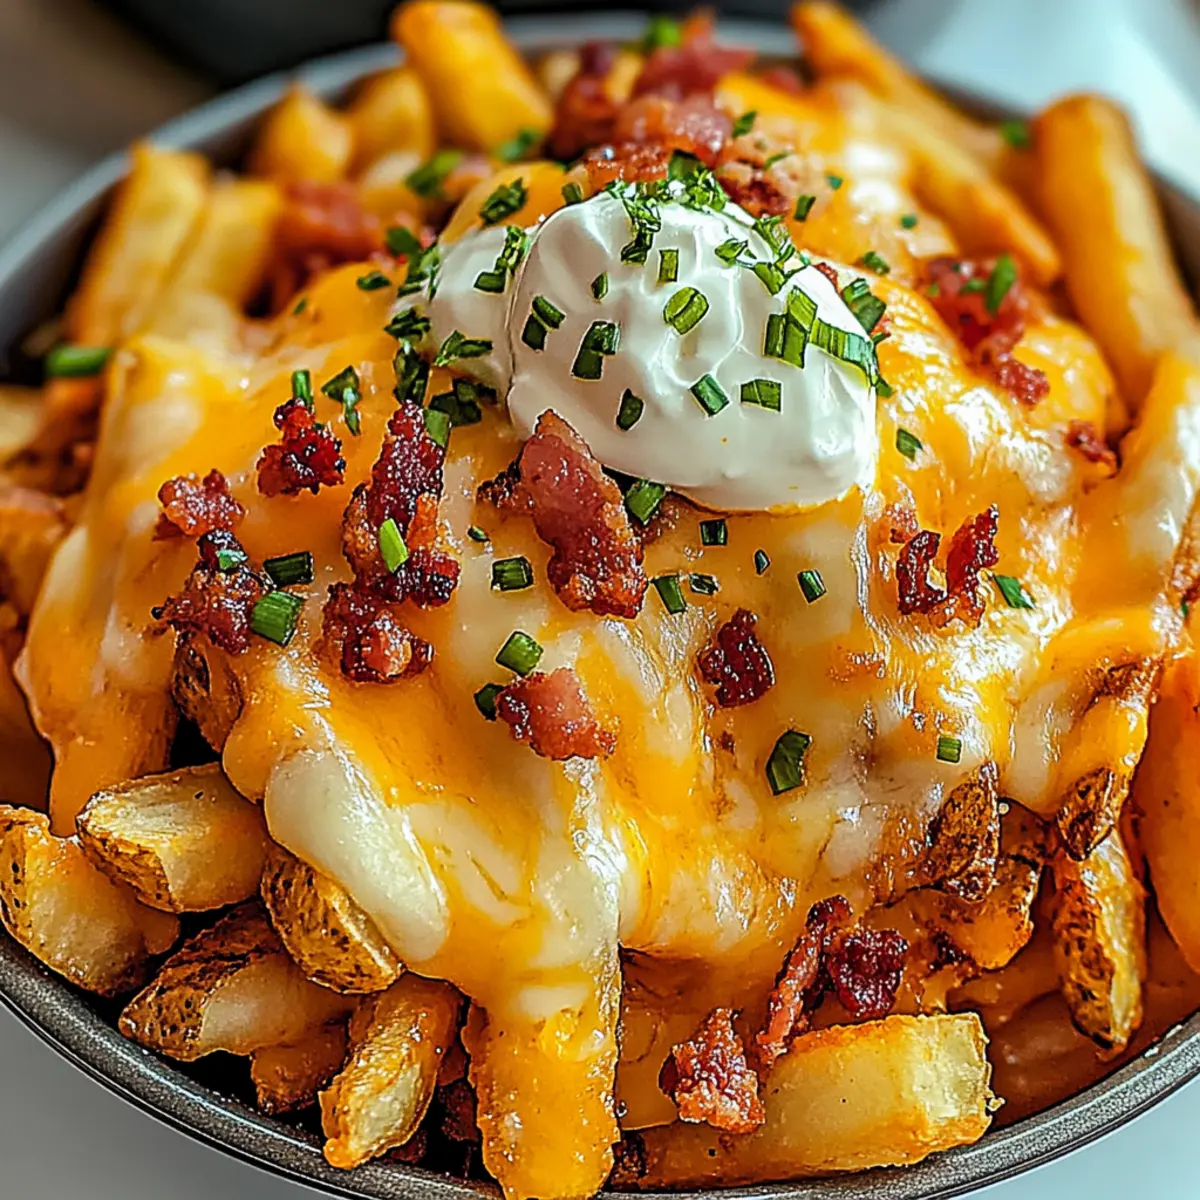
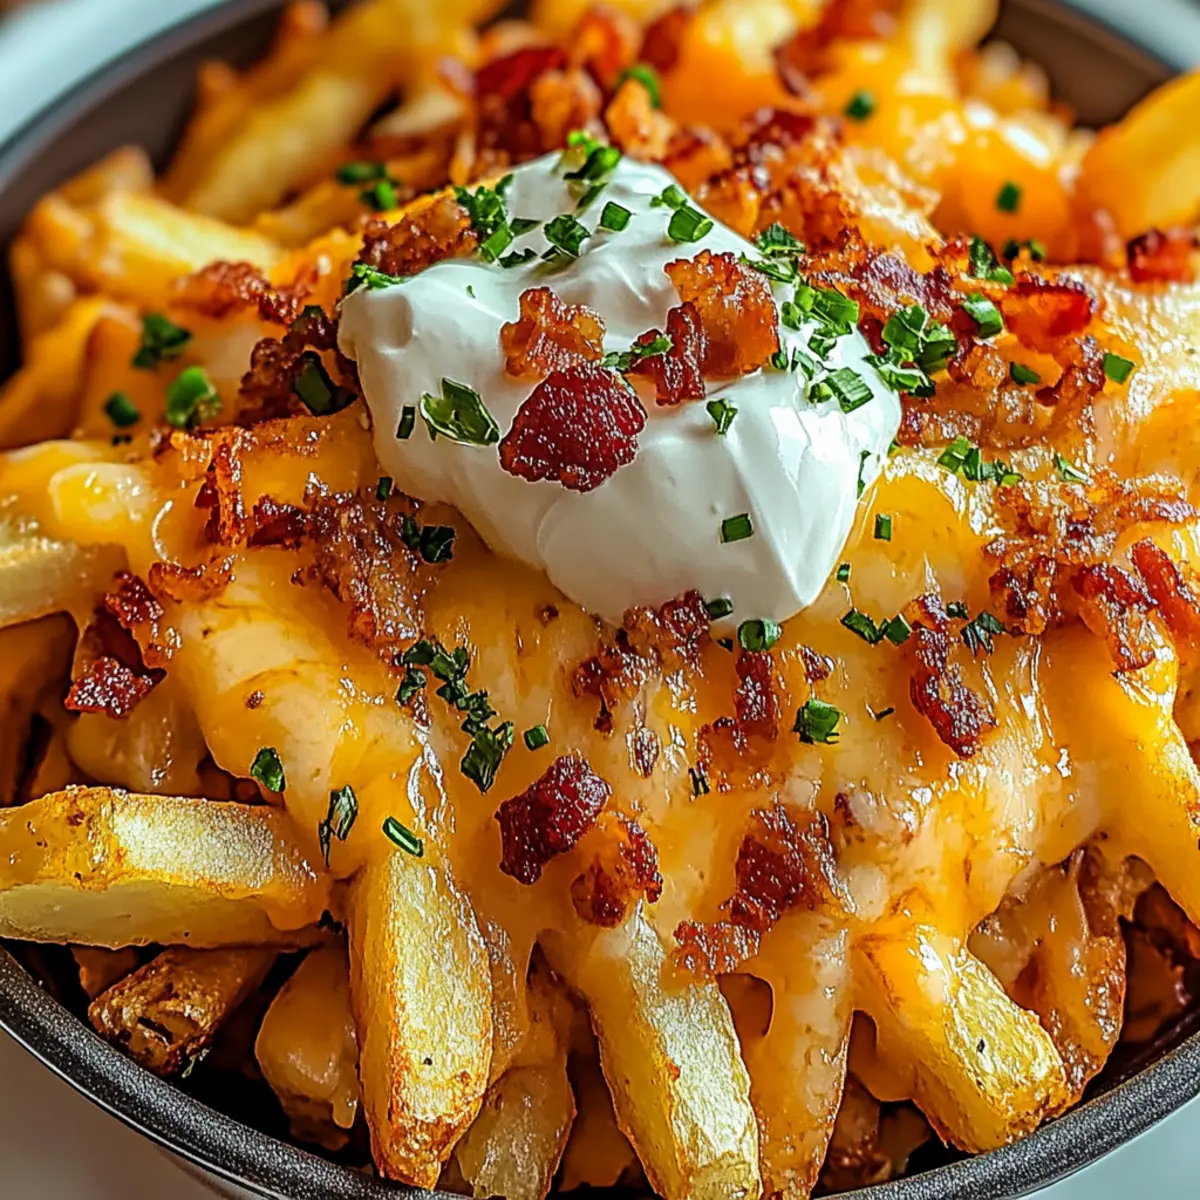
• Shredded Sharp Cheddar Cheese – 2 cups of melty bliss; try Monterey Jack for a creamier flavor experience.
• Crispy Bacon Bits – 1 cup adds a savory crunch; consider vegetarian bacon for a meat-free option.
• Sour Cream – 1 cup balances the flavors; Greek yogurt makes for a healthy alternative.
• Chopped Green Onions – 1/4 cup adds freshness; chives can be a delightful substitute if you prefer.
• Sliced Jalapeños – 1/2 cup optional to bring a spicy kick to the dish; banana peppers can be used for milder heat.
Indulge in these Loaded Cheesy Fries that are not only comfort food but also tailored for everyone’s taste buds!
Step‑by‑Step Instructions for Loaded Cheesy Fries
Step 1: Preheat the Oven
Begin by preheating your oven to 425°F (220°C). This temperature is key for achieving perfectly crispy Loaded Cheesy Fries. Ensuring the oven is fully heated will give your fries that delightful golden brown finish. While the oven warms up, you can prepare your baking sheet to get ready for the deliciousness ahead.
Step 2: Prepare the Fries
Spread the frozen thick-cut French fries in a single layer on a parchment-lined baking sheet. This is crucial to prevent sogginess and achieve that irresistible crunch. Make sure the fries are not crowded; they need space to crisp up beautifully while baking. Get ready to drizzle a touch of olive oil for enhanced flavor!
Step 3: Season the Fries
Drizzle the 2 tablespoons of olive oil evenly over the fries. Using your hands or a spatula, toss the fries to ensure they are well-coated, which will create that extra crispy texture we all crave in Loaded Cheesy Fries. The oil should glisten on the fries, prepping them for their delicious bake.
Step 4: Bake the Fries
Place the baking sheet in the preheated oven and bake the fries for 20 to 25 minutes. Halfway through baking, flip the fries for even cooking and ensure they turn golden and crispy all around. Keep an eye on them; they should look perfectly golden brown when ready to come out.
Step 5: Add the Cheese
Once the fries are golden, remove them from the oven and generously sprinkle 2 cups of shredded sharp cheddar cheese over the top. Return the loaded fries to the oven for an additional 5 minutes, watching closely as the cheese melts into gooey perfection. The sight of melting cheese will have your mouth watering!
Step 6: Top and Serve
Take your Loaded Cheesy Fries out of the oven—your kitchen will smell amazing! Now it’s time to get creative: add 1 cup of crispy bacon bits, 1 cup of sour cream, 1/4 cup of chopped green onions, and sliced jalapeños if you like a spicy kick. Serve immediately to enjoy the ultimate comfort food experience that everyone will love!

How to Store and Freeze Loaded Cheesy Fries
Fridge: Store leftover Loaded Cheesy Fries in an airtight container for up to 3 days. Reheat in the oven to restore some crispiness and enjoy their deliciousness again.
Freezer: To freeze, prepare the fries without toppings, then spread them out on a baking sheet to freeze individually before transferring to a freezer-safe bag or container. They can be kept for up to one month.
Reheating: Bake directly from frozen at 425°F (220°C) for about 25-30 minutes until heated through and crispy. Avoid the microwave to maintain that wonderful texture!
Serving Suggestions: Once reheated, feel free to top with fresh ingredients like green onions or jalapeños for a freshly made experience.
Loaded Cheesy Fries Variations & Substitutions
Get ready to unleash your creativity and customize your Loaded Cheesy Fries to your heart’s content!
- Sweet Potato Fries: Swap regular fries for sweet potato fries for a deliciously sweet and colorful twist.
- Dairy-Free Cheese: Use a dairy-free cheese alternative for a lactose-free version that still melts beautifully.
- Crunchy Toppings: Add crushed potato chips or tortilla chips on top for an extra layer of crunch and flavor.
- BBQ Delight: Drizzle with BBQ sauce before serving for a smoky flavor that pairs wonderfully with the cheesy goodness.
- Spicy Nacho Fries: Top with jalapeños and drizzle nacho cheese sauce over the fries for that classic nacho experience.
Explore different combinations and don’t hesitate to mix and match your favorite flavors! If you’re eager for more cheesy inspiration, be sure to check out our Cheesy Garlic Chicken Wraps or our Cheesy Chicken Broccoli Orzo for a delightful cheesy experience beyond the fries!
Expert Tips for Loaded Cheesy Fries
-
Spacing is Key: Ensure fries are evenly spaced on the baking sheet to achieve maximum crispiness and avoid sogginess.
-
Cheese Magic: For extra melty loaded cheesy fries, sprinkle cheese right after pulling fries from the oven for the best gooey texture.
-
Reheat Wisely: Avoid microwaving leftovers; instead, reheat in the oven for restored crispiness that will elevate your fries back to their original glory.
-
Mind the Broil: Consider broiling for a brief moment at the end to achieve a delectable crunch, but keep a close watch to prevent burning.
-
Topping Creativity: Experiment with diverse toppings such as herbs or different cheeses to make your loaded cheesy fries unforgettable; let your taste buds guide you!
What to Serve with Loaded Cheesy Fries
Pairing your crispy, cheesy fries with the right accompaniments can transform them from a snack into a full feast.
-
Hearty Chili: A warm, savory chili provides a perfect contrast to the cheesy fries and adds a comforting depth of flavor. Imagine scooping up a spoonful of chili while enjoying the crispy, cheesy goodness—it’s a match made in culinary heaven.
-
Crisp Side Salad: A light, vibrant salad balances the indulgence with fresh greens and zesty dressing. The crunch and acidity from tomatoes and cucumbers offer a refreshing palate cleanse between bites of rich fries.
-
Classic Cheeseburger: Serve alongside juicy, cheesy hamburgers for a true American comfort food experience. The combination of flavors and textures makes this duo a crowd-pleaser for any gathering or cozy night in.
-
Garlic Breadsticks: These buttery, garlicky delights complement the cheesy, savory fries perfectly. Not only will they soak up any extra cheese and toppings, but they also add a delightful chew that harmonizes beautifully with the crunchy fries.
-
Beer or Craft Soda: A chilled beer or fizzy soda enhances the experience and complements the saltiness of the fries. A robust ale can elevate the flavors, while a sweet soda provides a fun, refreshing contrast.
-
Chocolate Brownies: For dessert, indulge in fudgy chocolate brownies that offer a lucrative sweet finish. Their rich, gooey texture nicely contrasts the crispy fries, making a satisfying end to your meal transformation.
Enjoy creating a delightful spread that allows your Loaded Cheesy Fries to shine while bringing together the best flavors at your table!
Make Ahead Options
These Loaded Cheesy Fries are perfect for meal prep enthusiasts looking to save time on busy weeknights! You can prepare the fries (without toppings) and store them in an airtight container for up to 3 days in the refrigerator, ensuring they maintain their crispiness. Alternatively, bake them to crispy perfection and freeze the cooked fries for up to one month. Just make sure to cool them completely before freezing to avoid ice crystals. When you’re ready to enjoy, heat the fries in the oven until hot and crispy, then top with cheese and other toppings before serving. This way, you’ll have a delicious, comforting snack ready with minimal effort!
Loaded Cheesy Fries Recipe FAQs
How do I choose the best frozen fries for my Loaded Cheesy Fries?
Absolutely! Look for thick-cut frozen fries, as they offer greater crispiness and a satisfying texture. When selecting, check for those that are golden in color without dark spots—this indicates good quality. Brands that advertise “extra crispy” or “restaurant-style” typically yield the best results. If you’re feeling adventurous, sweet potato fries can be a nutritious alternative, adding a delightful sweetness to the mix.
How should I store leftover Loaded Cheesy Fries?
Very wise question! Store any leftovers in an airtight container for up to 3 days in the fridge. When you’re ready to enjoy them again, simply reheat in the oven at 350°F (175°C) until hot, about 10-15 minutes, to regain their delightful crunch!
Can I freeze Loaded Cheesy Fries?
Absolutely! Prepare the fries without any toppings, then spread them out on a baking sheet to freeze individually. Once frozen solid, transfer them to a freezer-safe bag or container, keeping them for up to one month. When you’re ready, you can bake them straight from frozen at 425°F (220°C) for about 25-30 minutes until they’re crispy and hot.
What can I do if my fries are soggy after baking?
No worries at all—this happens sometimes! If they turn out soggy, the likely culprit is overcrowding on the baking sheet. For the best results, ensure fries are spread out in a single layer, allowing hot air to circulate. If they’re already baked, try broiling them on high for 2-3 minutes, keeping a close watch to avoid burning. This will give them a quick crisp!
Are there any dietary considerations I should keep in mind?
Great question! If you have dietary allergies, consider using substitutes for common allergens: opt for gluten-free fries and check labels for dairy in cheese and sour cream. If serving to kids or those with specific dietary needs, vegetarian bacon and dairy-free cheese are excellent alternatives. Always be sure to check ingredients for allergens if you’re entertaining guests with dietary restrictions!
Loaded Cheesy Fries: The Crispy Comfort Food You Need
Ingredients
Equipment
Method
- Preheat your oven to 425°F (220°C).
- Spread the frozen thick-cut French fries in a single layer on a parchment-lined baking sheet.
- Drizzle the 2 tablespoons of olive oil evenly over the fries and toss to coat.
- Bake the fries for 20 to 25 minutes, flipping them halfway through.
- Once golden, sprinkle 2 cups of shredded cheese over the fries and return to the oven for 5 minutes.
- Add crispy bacon bits, sour cream, green onions, and jalapeños before serving.
Leave a Reply