
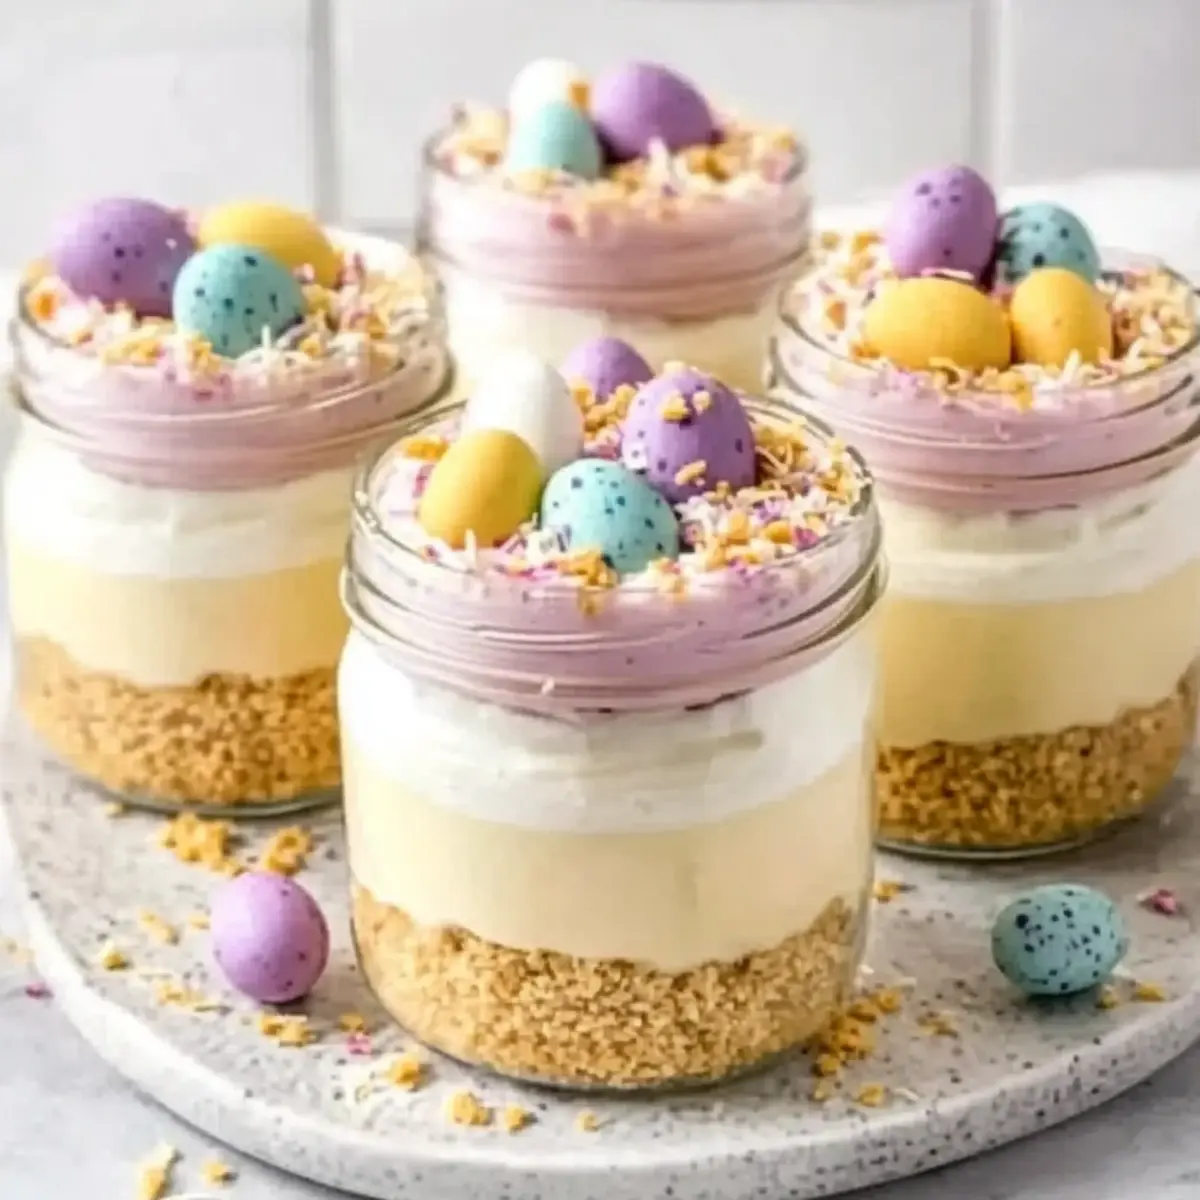
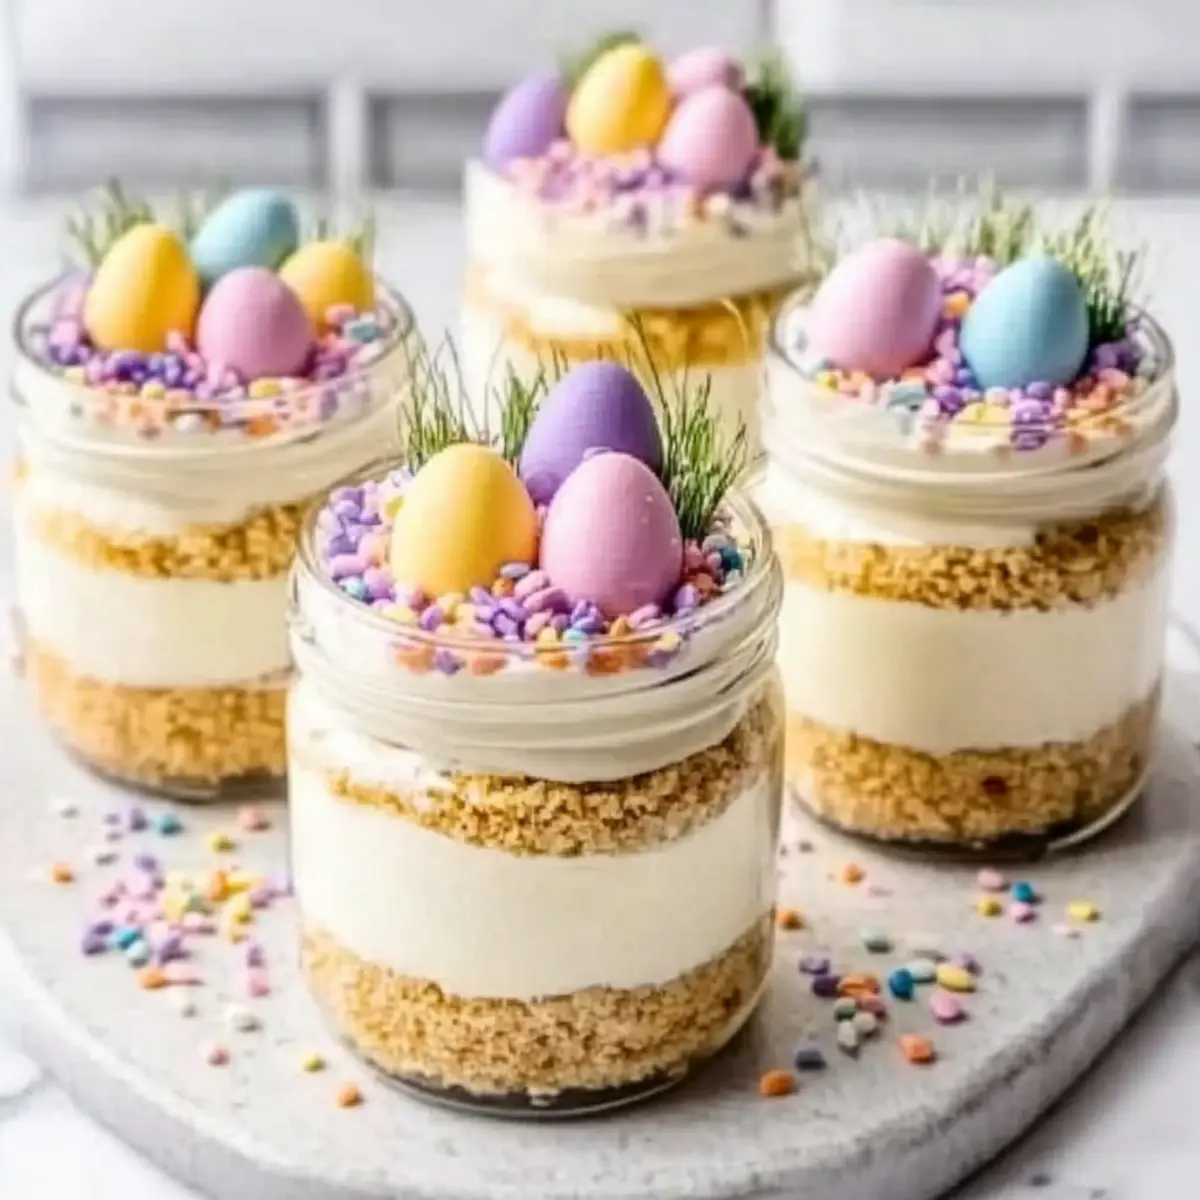
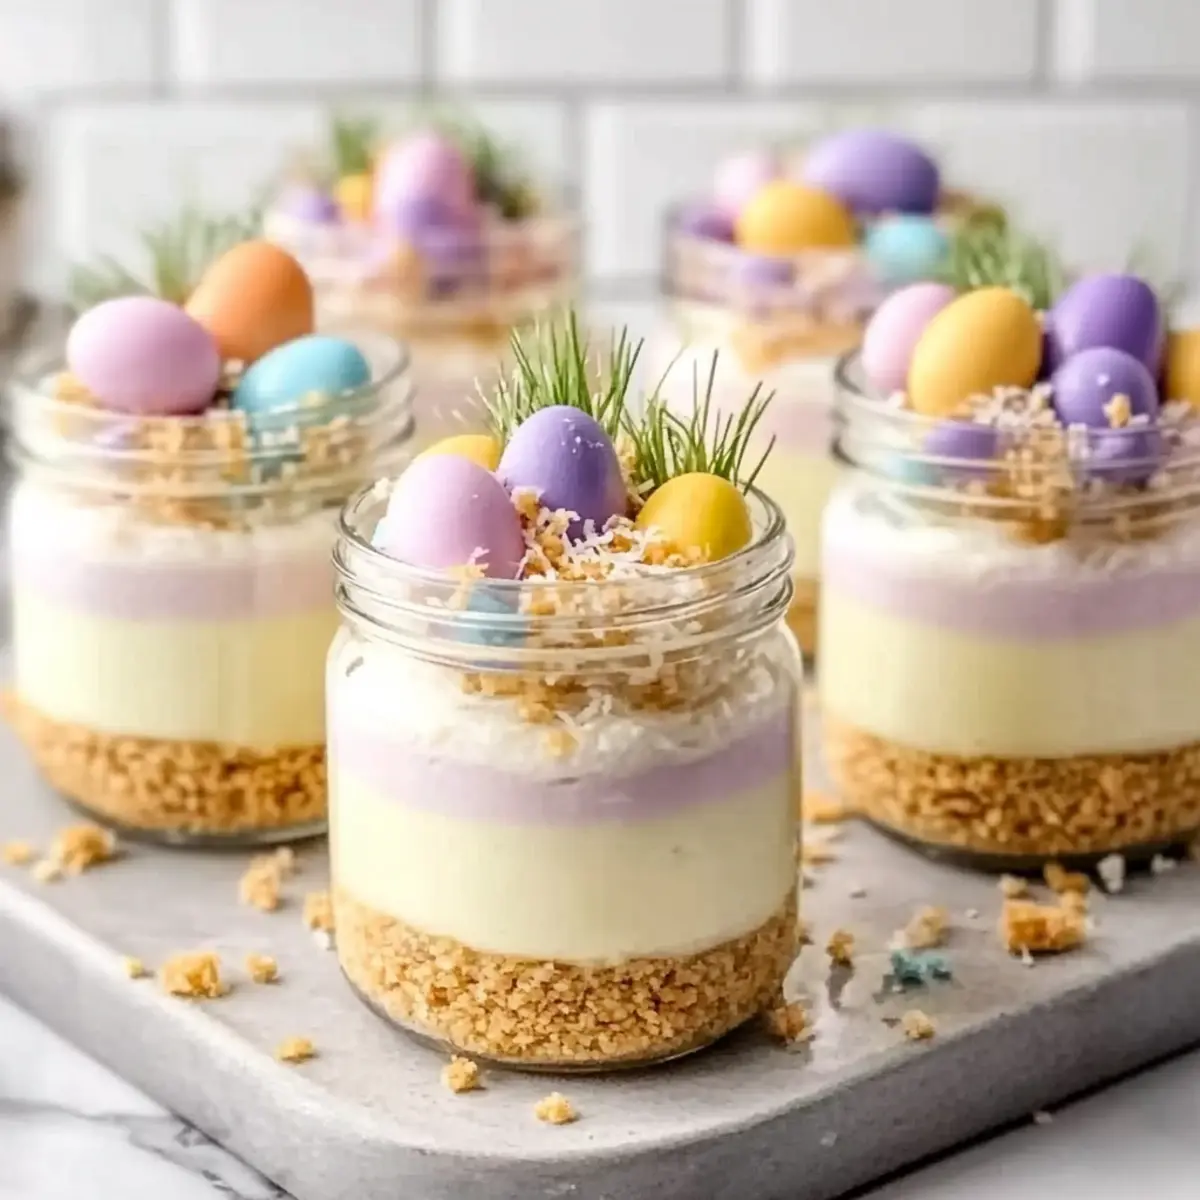
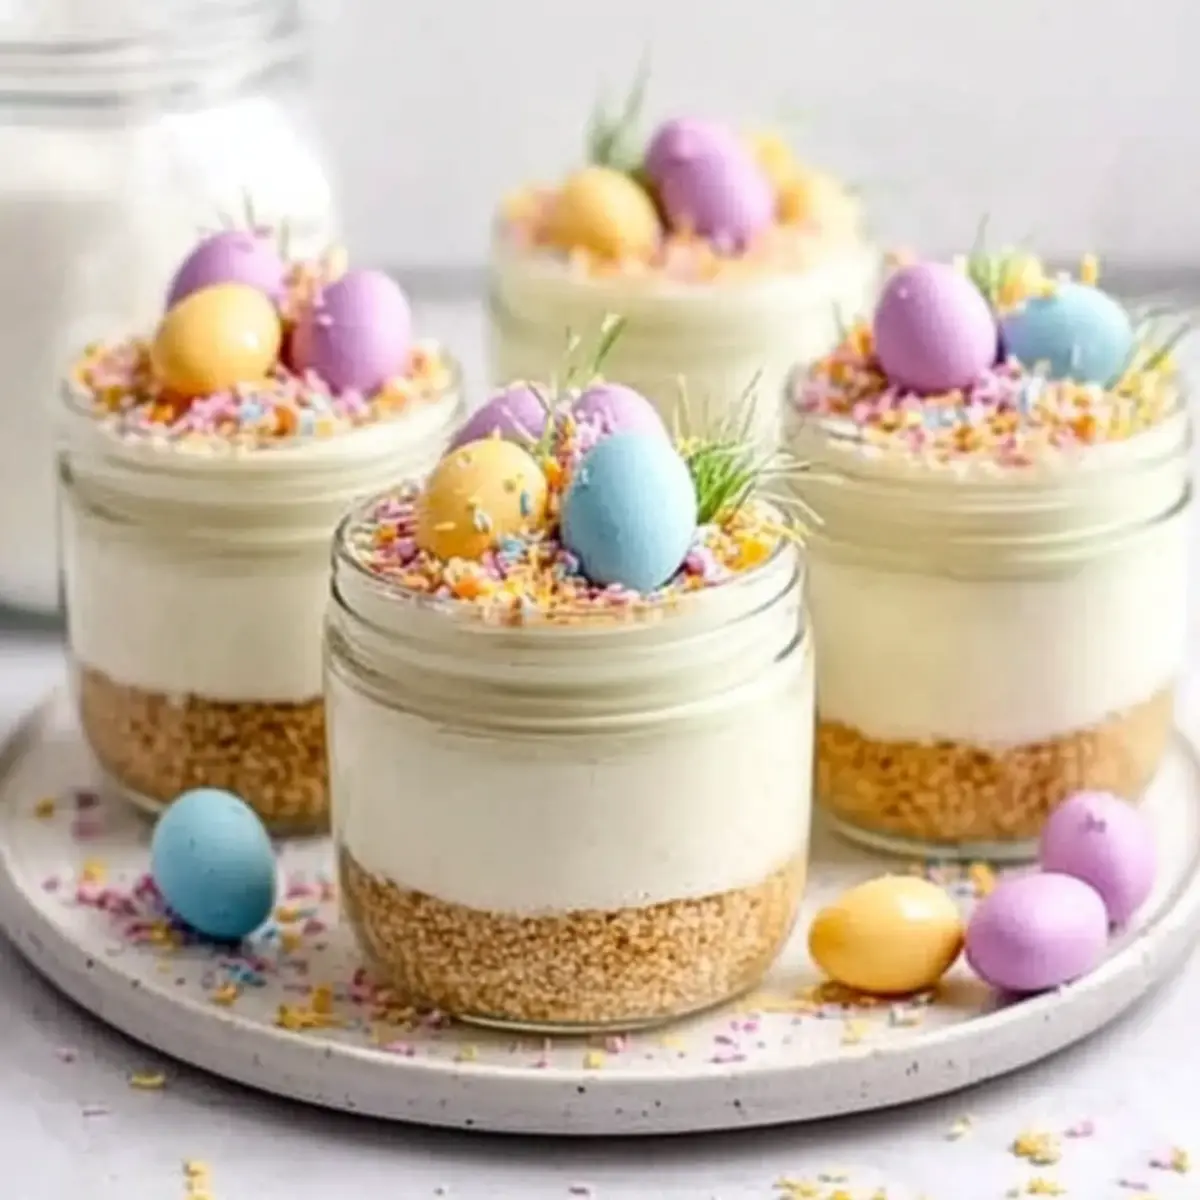
As the sun shines brighter and pastel colors begin to bloom, the spirit of spring inspires me to create something delightful in the kitchen. Today, I’m excited to share my Mini No-Bake Easter Cheesecake Jars—an enchanting twist on a classic dessert that requires no oven and brings joy to every gathering. These charming little jars not only combine a creamy filling with a crunchy graham cracker crust, but they also offer the ultimate convenience of being make-ahead, perfect for entertaining or an afternoon treat with the kiddos. With endless options for fun toppings, you can customize each jar to reflect your festive spirit. Curious about how to whip up these delightful treats? Let’s dive into the recipe and bring spring to your table!
Why Are Mini Easter Cheesecake Jars Perfect?
No-Bake Convenience: Say goodbye to oven stress! These Mini Easter Cheesecake Jars are quick to assemble, making them perfect for busy days.
Playful Customization: Add your favorite toppings like mini chocolate eggs or pastel sprinkles, transforming each jar into a personalized spring masterpiece.
Kid-Friendly Fun: Engage the whole family in decorating—this no-bake treat is sure to delight little hands and taste buds alike!
Make-Ahead Magic: Prepare them in advance and store in the fridge for up to 3 days, so you can enjoy stress-free entertaining.
Guilt-Free Indulgence: Lower the sugar for a tangier taste or swap with gluten-free cookies to cater to dietary needs, making them a versatile choice.
Experience the joy of spring with these delightful jars and don’t forget to check out other tempting ideas like Mini Lemon Blueberry Cheesecakes or our delicious Cheesecake Fruit Salad for more sweet inspirations!
Mini Easter Cheesecake Jars Ingredients
For the Crust
• Graham Cracker Crumbs – Provides the crust’s base for structure; substitute with digestive biscuits if desired.
• Unsalted Butter (melted) – Binds the crust together; using unsalted allows for better control of salt content.
• Sugar – Adds sweetness to the crust, enhancing the overall flavor.
• Pinch of Salt – Enhances flavor and balances sweetness for a delicious crust.
For the Filling
• Cream Cheese (softened) – Forms the creamy filling; ensure it’s just softened, not melted, for the perfect texture.
• Powdered Sugar – Sweetens the cheesecake filling; can reduce to 1/3 cup for a tangier taste.
• Vanilla Extract – Adds sweetness and depth to the flavor profile.
• Lemon Juice – Provides acidity to balance sweetness and enhance the overall taste.
• Cold Heavy Whipping Cream – Creates the light and fluffy texture of the filling.
For Decor & Toppings
• Gel Food Coloring (optional) – Use for tinting the filling in pretty pastel shades.
• Mini Chocolate Eggs or Jelly Beans – Cute decorative toppings perfect for a festive touch; consider using pastel sprinkles or shredded coconut dyed green for a “grass” effect.
Discover the joy of making these delightful Mini Easter Cheesecake Jars and customize them with your favorite toppings!
Step‑by‑Step Instructions for Mini Easter Cheesecake Jars
Step 1: Prepare the Crust
In a mixing bowl, combine 1 1/2 cups of graham cracker crumbs, 1/4 cup of sugar, a pinch of salt, and 1/2 cup of melted unsalted butter. Stir until the mixture resembles wet sand. Divide this delightful crust evenly among the bottoms of small jars, pressing firmly to create a solid base. You want it to hold together nicely when you scoop your cheesecake filling later.
Step 2: Whip Cream
In a chilled mixing bowl, pour 1 cup of cold heavy whipping cream. Using an electric mixer, whip the cream on medium-high speed until medium-stiff peaks form, which should take about 2-3 minutes. Set this light, airy concoction aside, ensuring it retains its fluffy texture. You’ll be folding it into the cheesecake mixture soon to make those creamy Mini Easter Cheesecake Jars extra delightful.
Step 3: Mix Cheesecake Filling
In another bowl, beat together 8 ounces of softened cream cheese, 1/2 cup of powdered sugar, 1 teaspoon of vanilla extract, and 2 tablespoons of lemon juice. Mix on medium speed for 1-2 minutes or until the mixture is smooth, creamy, and free of lumps. This is the heart of your Mini Easter Cheesecake Jars, providing that rich and delightful flavor that everyone loves.
Step 4: Combine Mixtures
Gently fold the whipped cream into the cheesecake filling in two additions, using a rubber spatula. Start by adding half of the whipped cream, carefully incorporating it until no white streaks remain, then repeat with the second half. It’s crucial to maintain the airy texture, as this will ensure your jars have a light and fluffy consistency.
Step 5: Color the Filling (optional)
If you wish to add a splash of springtime color, divide the cheesecake filling into small bowls. Add gel food coloring to each portion and mix until you achieve your desired pastel shades. This fun step enhances the appearance of your Mini Easter Cheesecake Jars, making them visually appealing for any festive occasion.
Step 6: Fill Jars
Using a piping bag or a spoon, carefully fill the jars with your cheesecake mixture, layering over the prepped crust. Be sure to leave some space at the top for the fun toppings you’ll add later. You want to create a beautiful layered effect, showcasing the deliciousness that awaits inside each jar of Mini Easter Cheesecake.
Step 7: Chill
Cover each jar with a lid or plastic wrap and refrigerate for at least 2 hours, but you can chill them for up to 24 hours if you’re preparing in advance. This step is essential, as it allows the cheesecake filling to set and the flavors to meld beautifully. When you’re ready to serve, the jars will be perfectly cold and ready for decoration.
Step 8: Decorate
Just before serving, bring out your jars and unleash your creativity! Top each jar with pastel shredded coconut dyed green for an enchanting “grass” effect, along with mini chocolate eggs or jelly beans for that festive touch. Let your imagination run wild as you make each Mini Easter Cheesecake Jar a unique celebration of spring!
Step 9: Serve
With your cheerful jars all decorated, it’s time to gather everyone around for a delightful treat! Serve your Mini Easter Cheesecake Jars cold, providing small spoons for easy enjoyment. Relish the smiles on everyone’s faces as they dig into these charming and beautifully layered desserts!
Expert Tips for Mini Easter Cheesecake Jars
-
Cream Cheese Care: Ensure the cream cheese is softened, not melted, to achieve the perfect creamy texture for your filling.
-
Whipping Wisdom: Whip the heavy cream to medium-stiff peaks. This provides the structure and lightness needed for your Mini Easter Cheesecake Jars.
-
Gentle Folding: Be cautious when folding the whipped cream into the cheesecake mixture; overmixing can deflate the air, resulting in a denser dessert.
-
Topping Timing: Add candy toppings just before serving to keep them crisp and vibrant, ensuring the festive look lasts until you enjoy each jar.
-
Flavor Balance: Adjust the sweetness of the filling by reducing powdered sugar for a tangier taste, making your Mini Easter Cheesecake Jars a delightful treat for all.
What to Serve with Mini Easter Cheesecake Jars
As you craft your delightful no-bake dessert, think about how to create a complete culinary experience that tantalizes the taste buds.
-
Fresh Fruit Salad: A medley of seasonal fruits adds brightness and balanced acidity, enhancing the overall sweetness of the cheesecake jars. A mix of berries, citrus, and kiwi brings spring to your plate!
-
Herbed Spring Salad: A crisp salad with mixed greens, baby spinach, and a light vinaigrette complements the richness of the jars, offering a refreshing contrast. Add sliced radishes and pear for a lovely crunch and sweetness!
-
Chocolate Covered Strawberries: These bite-sized treats bring an extra splash of elegance and indulgence to your dessert spread, playing beautifully off the creamy cheesecake. Their freshness adds a delightful twist!
-
Cute Bunny Cocktails: For adults, consider festive cocktails infused with lemon and berry flavors to celebrate this spring gathering. Their lively colors will create a joyful ambiance alongside your jars.
-
Mini Carrot Cake Cupcakes: These adorable cupcakes bring texture and spice to your dessert table, tying in the Easter theme while providing a delicious alternative for guests who prefer cake.
-
Lemonade or Iced Tea: Refreshing beverages like lavender lemonade or unsweetened iced tea pair wonderfully, cleansing the palate between bites of the sweet cheesecake. Opt for sparkling versions for an extra zing!
-
Pastel Macarons: For an elegant touch, serve these French delicacies in spring-inspired colors. Their light texture and variety of flavors present a whimsical addition that dazzles the senses!
Embrace the joy of spring with these delightful pairings, elevating your Mini Easter Cheesecake Jars into a charming festive centerpiece!
How to Store and Freeze Mini Easter Cheesecake Jars
Fridge: Keep these delightful Mini Easter Cheesecake Jars covered in the refrigerator for up to 3 days. This ensures they stay fresh and ready for your next sweet moment.
Freezer: For longer storage, freeze the jars without toppings. They’ll last for up to 1 month, allowing you to enjoy a taste of spring anytime.
Thawing: To enjoy, simply transfer the frozen jars to the fridge a few hours before serving. Avoid thawing at room temperature to maintain texture.
Reheating: These jars are best enjoyed cold, so skip the reheating process; simply dive in with a spoon and savor the creamy goodness!
Mini Easter Cheesecake Jars Customizations
Feel free to get creative and make these Mini Easter Cheesecake Jars your own with delicious twists that cater to your taste!
- Dairy-Free: Substitute cream cheese with a dairy-free version and swap heavy cream for coconut cream for a luscious dairy-free treat.
- Chocolate Indulgence: Use chocolate cookie crumbs for the crust and add cocoa powder to the filling for chocolate lovers. Top with chocolate-covered eggs for extra delight!
- Fruit Explosion: Layer in a homemade strawberry or raspberry compote for a refreshing fruity surprise that’ll brighten every jar.
- Nutty Crunch: Blend in some finely chopped nuts, like pecans or almonds, into the crust for added texture and flavor—making each bite even more satisfying.
- Flavor Boost: Incorporate citrus zest, like orange or lime, into your cheesecake filling for a zesty kick that contrasts beautifully with the creaminess.
- Spice It Up: Add a dash of cinnamon or nutmeg into the crust or filling for a warm spice note that’s perfect for spring celebrations.
- Tropical Twist: Fold in some crushed pineapple or mango puree for a fun tropical flair, letting you enjoy a little vacation with each jar.
- Gelatin Substitute: For a firmer texture, mix in a bit of gelatin to the filling for a sturdier cheesecake that holds its shape beautifully.
These delightful variations are just the beginning! If you’re feeling adventurous, check out how to create other fun treats like Lemon Blueberry Cheesecake or indulge in Fruity Pebbles Cheesecake Tacos. Enjoy experimenting in the kitchen!
Make Ahead Options
These Mini Easter Cheesecake Jars are a busy home cook’s best friend when it comes to meal prep! You can prepare the crust and filling up to 24 hours in advance. Simply crust the jars and whip up the cheesecake filling, then layer them together and refrigerate. This not only saves time but ensures the flavors meld beautifully. Just remember to top with your colorful candies and coconut “grass” right before serving to keep them fresh and vibrant. By following these make-ahead instructions, you can ensure that when it’s time to celebrate, your adorable Mini Easter Cheesecake Jars are just as delicious and festive as if they were made that day!
Mini Easter Cheesecake Jars Recipe FAQs
How do I select ripe ingredients for my Mini Easter Cheesecake Jars?
Absolutely! For the best flavor, ensure your cream cheese is at room temperature—this helps create a smooth filling. Check for fresh, unblemished lemons and vibrant-colored eggs if you’re using them. Your whipped cream should be heavy and cold for optimal whipping.
How should I store my Mini Easter Cheesecake Jars?
Very! Keep your jars covered in the fridge for up to 3 days. This preserves their freshness and taste. If you want to store them longer, place the jars in the freezer without any toppings, allowing you to savor spring flavors for up to 1 month.
Can I freeze Mini Easter Cheesecake Jars, and how do I do it?
Of course! To freeze, make sure the jars are completely sealed and free of toppings. Lay them flat in the freezer for optimal space saving and easy handling. When you’re ready to enjoy them, place them in the fridge to thaw for a few hours—this keeps their luscious texture intact.
What should I do if my whipped cream isn’t fluffy enough?
Don’t worry! If your whipped cream doesn’t whip to medium-stiff peaks, it may not have been cold enough or you may have overwhipped it. Next time, ensure your mixing bowl and beaters are chilled, and whip on a medium speed until it reaches the desired fluffiness. This makes all the difference!
Are there any dietary considerations for Mini Easter Cheesecake Jars?
Absolutely! If you’re concerned about gluten, simply use certified gluten-free graham crackers or cookie crumbs for the crust. Additionally, you can reduce the powdered sugar for a tangier flavor, catering to various taste preferences. Always check for allergies related to cream cheese or other ingredients, making adjustments as needed!
How can I make the Mini Easter Cheesecake Jars even more fun for kids?
Very! Engage your little chefs by allowing them to choose their favorite toppings! Set up a decorating station with mini chocolate eggs, colorful sprinkles, and whipped cream. This way, everyone can create their own personalized dessert masterpiece—perfect for a fun family activity!
Mini Easter Cheesecake Jars for a Delightfully Sweet Spring Treat
Ingredients
Equipment
Method
- In a mixing bowl, combine graham cracker crumbs, sugar, salt, and melted butter. Stir until resembling wet sand. Divide among jar bottoms, pressing firmly.
- In a chilled mixing bowl, pour cold heavy whipping cream and whip on medium-high until medium-stiff peaks form, about 2-3 minutes. Set aside.
- In another bowl, beat together cream cheese, powdered sugar, vanilla extract, and lemon juice until smooth and creamy.
- Gently fold the whipped cream into the cheesecake filling in two additions, maintaining the airy texture.
- Optional: Divide filling into bowls, add gel food coloring, and mix until desired pastel shades are achieved.
- Using a piping bag or spoon, fill jars with cheesecake mixture over the crust, leaving space for toppings.
- Cover and refrigerate for at least 2 hours or up to 24 hours to set.
- Before serving, decorate with shredded coconut and mini chocolate eggs or jelly beans.
- Serve cold with small spoons. Enjoy!
Leave a Reply