
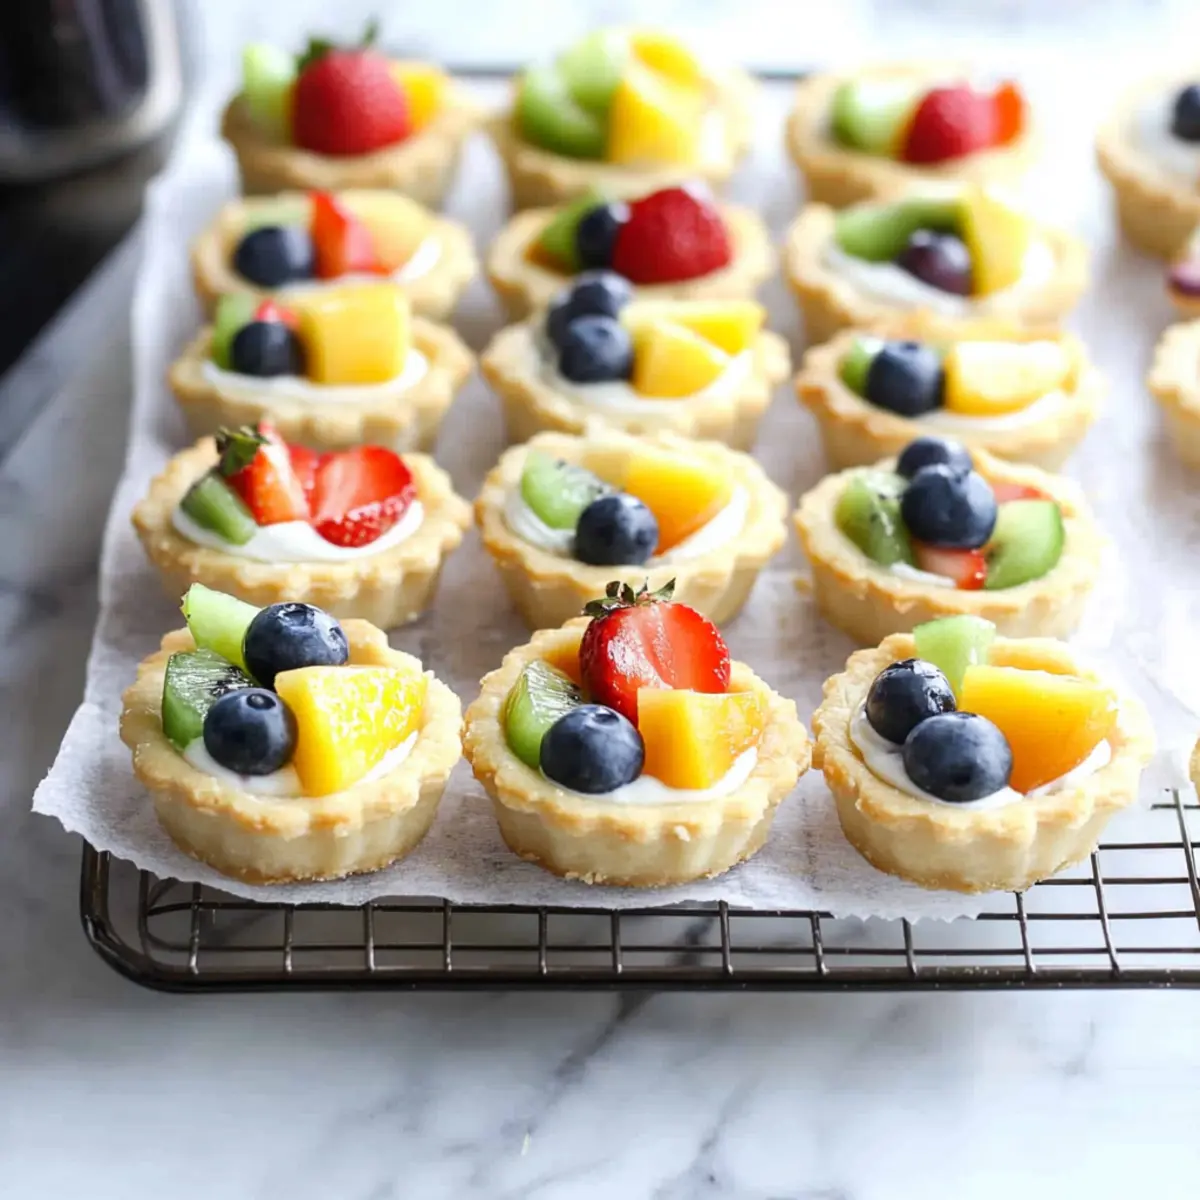
As the sun begins to warm the air and the blossoms burst into bloom, the thought of gathering friends for a sunny brunch becomes irresistible. Enter these Easy Mini Fruit Tarts, a delightful treat that’s not only visually stunning but also a total crowd-pleaser. The buttery sugar cookie crust provides a satisfying crunch that perfectly complements the smooth, creamy filling beneath a colorful array of fresh fruit. With minimal prep time, these bite-sized wonders are the ideal dessert to celebrate any occasion, from cozy gatherings to festive baby showers. Imagine the smiles and compliments you’ll receive as guests enjoy these delectable morsels. Ready to whip up a batch of joy? Let’s dive in!
Why Are Mini Fruit Tarts So Loved?
Bite-Sized Perfection: These tarts are the ultimate single-serving delight, making them effortless to enjoy at any gathering.
Visually Appealing: With vibrant colors from fresh fruit, they add an artistic flair to your table.
Quick and Easy: Ideal for busy hosts, prep is a snap—perfect for surprise guests or spontaneous celebrations.
Flavor Explosion: The combination of sweet crust and creamy filling is simply irresistible, complementing the juiciness of the fruit.
Versatile Treat: Whether for a brunch, a baby shower, or even a picnic, these Mini Fruit Tarts fit every occasion beautifully! Don’t forget to check out our Cheesecake Fruit Salad for another fruity delight.
Mini Fruit Tarts Ingredients
For the Crust
• All-purpose flour – 1 1/3 cups plus 1 tablespoon ensures a sturdy crust; gluten-free flour blend can be used as a substitute.
• Baking soda – 1/2 teaspoon is essential for slight puffing; no substitutions are needed.
• Baking powder – 1 teaspoon provides additional leavening for a light crust; stick with the classic formula.
• Butter – 1/2 cup softened gives richness and moisture; can be replaced with margarine or vegan butter for a dairy-free option.
• White sugar – 3/4 cup balances the crust’s sweetness against the fruit; consider coconut sugar for a less refined choice.
• Egg yolk – 1 yolk acts as a binding agent, enhancing moisture; can substitute with a flax egg for a vegan alternative.
• Vanilla extract – 1/2 teaspoon adds delightful flavor depth; try almond extract for a unique twist.
For the Filling
• Cream cheese – 8 oz block, softened, serves as the creamy base; Greek yogurt is a lighter alternative if desired.
• Powdered sugar – 2 cups provides sweetness and stability for the filling; powdered erythritol works for a sugar-free version.
• Lemon juice and zest – 1 teaspoon each brightens the filling’s flavor; this step can be omitted for simplicity.
For the Toppings
• Fresh fruit – Your choice of colorful mix (e.g., berries, kiwi, mango) brings joy to the tarts; using seasonal fruits can add variety and freshness!
Let these ingredients inspire you to create the most scrumptious Mini Fruit Tarts that will surely impress your guests!
Step‑by‑Step Instructions for Easy Mini Fruit Tarts
Step 1: Preheat your Oven
Begin by preheating your oven to 350°F (175°C) and greasing a mini-muffin tin with non-stick spray or butter to ensure the sugar cookie crusts release easily after baking. This initial step sets the stage for your Easy Mini Fruit Tarts, as a well-prepared baking environment is essential for achieving those lovely, golden tart shells.
Step 2: Cream Butter and Sugar
In a large mixing bowl, cream together 1/2 cup of softened butter and 3/4 cup of white sugar until the mixture turns light and fluffy, which should take about 3-4 minutes using an electric mixer. Visual cues to look for include a pale color and a creamy texture. This fluffy base will ensure your Mini Fruit Tarts have the rich flavor and texture that everyone loves.
Step 3: Add Egg Yolk and Vanilla
Next, incorporate 1 egg yolk and 1/2 teaspoon of vanilla extract into the creamed mixture, beating until fully combined and smooth. This should take an additional 1-2 minutes. The egg yolk adds moisture and richness, while the vanilla enhances the overall flavor of your Easy Mini Fruit Tarts.
Step 4: Combine Dry Ingredients
In a separate bowl, whisk together 1 1/3 cups plus 1 tablespoon of all-purpose flour, 1/2 teaspoon of baking soda, and 1 teaspoon of baking powder. Gradually add this dry mixture to the creamed mixture, mixing just until a crumbly dough forms. Be careful not to overmix; you want your crusts to remain tender and delicious.
Step 5: Shape the Dough
Roll the dough into 1 ½ inch balls and place each ball into the greased mini muffin wells. Gently flatten each ball with the palm of your hand to create space for the filling. This step is crucial as it shapes the base of your Mini Fruit Tarts, creating a lovely little well for that creamy filling.
Step 6: Bake the Crusts
Bake the shaped dough in your preheated oven for 8-10 minutes, or until the edges of the crusts turn golden brown. Keep an eye on them as they bake, since overbaking can lead to a tough texture. Once the crusts are beautifully golden, remove them from the oven and allow them to cool completely in the tin before gently removing.
Step 7: Prepare the Cream Cheese Filling
While the crusts cool, prepare the filling by blending 8 oz of softened cream cheese and 2 cups of powdered sugar until smooth and creamy. Add in 1/2 teaspoon of vanilla extract, along with 1 teaspoon of lemon juice and zest for a brightness that brings out the flavors of your Easy Mini Fruit Tarts. Ensure everything is well mixed.
Step 8: Assemble Your Tarts
Once the cookie shells have fully cooled, use a small spoon or piping bag to fill each tart shell with the cream cheese mixture. Be generous but careful to avoid overflowing. This step is the heart of your Mini Fruit Tarts, providing that luscious layer just beneath the fresh fruit.
Step 9: Top with Fresh Fruit
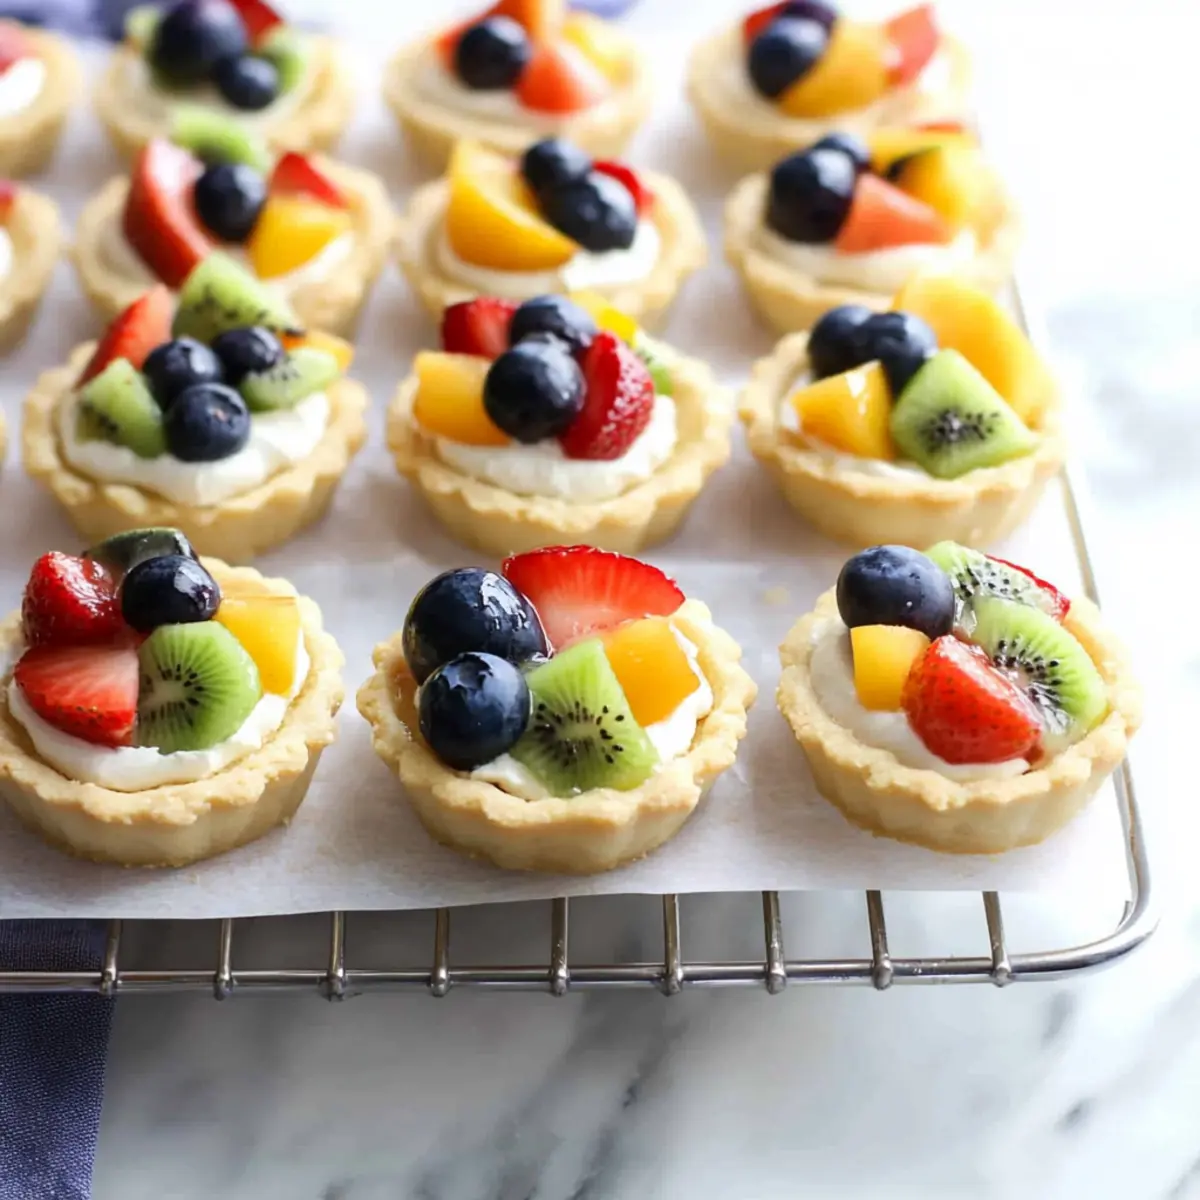
Now comes the fun part! Decorate your filled tarts with an assortment of fresh fruit like berries, kiwi, or mango, placing them artistically on top of the cream filling. The vibrant colors of the fruit not only enhance the taste but also make your Easy Mini Fruit Tarts visually stunning.
Step 10: Chill Before Serving
For the best freshness, place your completed Mini Fruit Tarts in the refrigerator until you’re ready to serve. A chilling time of at least 30 minutes allows the flavors to meld and the filling to set. When your guests arrive, they’ll be greeted by an enticing display of these sweet, charming desserts!
What to Serve with Easy Mini Fruit Tarts
Imagine the delight of pairing these colorful treats with complementary flavors, making your gatherings unforgettable.
- Fresh Mint Tea: The light, herbal notes of freshly brewed mint tea can elevate the sweetness of the tarts while refreshing your palate. Perfect for a warm afternoon.
- Vanilla Ice Cream: A scoop of creamy vanilla ice cream adds a lovely contrast to the fruity tarts, creating a delightful balance of textures and flavors.
- Cheese Platter: Serve with a variety of cheeses—think brie, goat cheese, or sharp cheddar—for a savory complement to the sweet tarts that excites the taste buds.
- Sangria: A chilled glass of sangria bursting with seasonal fruits enhances the festive spirit and offers a refreshing contrast to the sweetness of the tarts.
- Lemon Sorbet: The bright citrus notes of lemon sorbet cleanse the palate beautifully, creating a delightful harmony with the creamy filling.
- Chocolate-Dipped Strawberries: For an indulgent touch, add chocolate-dipped strawberries to the table. The richness of chocolate pairs perfectly with the lightness of the tarts.
- Pistachio Crumble: Sprinkle crushed pistachios over the tarts for an unexpected crunch and nutty flavor that complements the fresh fruits beautifully.
- Sparkling Water with Lime: Keep it simple with sparkling water garnished with lime slices. This refreshing option cleanses the palate between bites of your flavorful tarts.
- Coconut Cream Pudding: A small cup of luscious coconut cream pudding provides a tropical twist that enhances the fruity flavors of the tarts, perfect for brunch or dessert.
- Fruit Salad: A vibrant fruit salad with a hint of lime or mint adds a fresh burst of flavor, serving as a refreshing side to these delightful Mini Fruit Tarts.
Make Ahead Options
These Easy Mini Fruit Tarts are perfect for those busy weeknights and special occasions! You can bake the sugar cookie crusts up to 3 days in advance; simply store them in an airtight container at room temperature to maintain their delightful crunch. For the cream cheese filling, prepare it up to 24 hours ahead and refrigerate it in a separate container to prevent the crust from getting soggy. When you’re ready to serve, fill each tart shell with the cream cheese mixture and top with fresh fruit just before presentation. This simple prep makes those last-minute gatherings a breeze while ensuring your Mini Fruit Tarts are just as delicious and visually appealing!
Expert Tips for Mini Fruit Tarts
Avoid Tough Dough: Stop mixing as soon as a crumbly dough forms to keep your crust tender—overmixing leads to toughness!
Room Temperature Ingredients: Use room temperature butter and cream cheese for a smoother batter and creamier filling, enhancing the overall taste of the Mini Fruit Tarts.
Proper Greasing: Make sure to thoroughly grease the mini muffin tins to prevent sticking; this ensures a successful release of your tarts once baked.
Chill for Freshness: Refrigerate the filled tarts for at least 30 minutes before serving to improve flavor melding and help the filling set perfectly.
Fresh Fruit Prepping: If using frozen fruit, allow it to fully thaw and drain excess moisture to avoid a soggy tart.
How to Store and Freeze Mini Fruit Tarts
Fridge: Store uneaten Mini Fruit Tarts in the refrigerator for up to 2 days in an airtight container to keep the crust fresh and the filling creamy.
Freezer: If you have leftover crusts, you can freeze them separately for up to 1 month. Fill them just before serving to maintain optimal taste and texture.
Reheating: For best results, do not reheat the filled tarts as this can affect the texture of the cream filling and fruit toppings. Enjoy them chilled!
Preparation: Consider preparing the crusts ahead of time; you can bake them and store them in the fridge for up to 3 days before filling with the cream cheese mixture and fresh fruit.
Mini Fruit Tarts Variations & Substitutions
Feel free to get creative with these Mini Fruit Tarts; there are endless possibilities to customize this delightful treat!
-
Graham Cracker Crust: Replace the sugar cookie crust with a graham cracker crust for a different taste that adds a hint of nostalgia.
-
Dairy-Free Delight: Use vegan butter and a plant-based cream cheese alternative to make these tarts suitable for a dairy-free diet without sacrificing flavor.
-
Seasonal Fruits: Swap out the suggested toppings for seasonal fruits, such as peaches or apples in the fall, to keep your tarts fresh and exciting.
-
Lemon-Lime Zest: Add lime juice and zest instead of lemon for a zesty twist that brightens the tarts in a whole new way.
-
Flavor Infusion: Mix a tablespoon of fruit preserves into the cream cheese filling before topping with fresh fruit for an extra layer of flavor to surprise your taste buds.
-
Whipped Cream Layer: Top the cream cheese filling with a generous dollop of whipped cream before adding fresh fruit for a light and airy texture.
-
Nutty Crust: Incorporate ground almonds or hazelnuts into the sugar cookie crust for a delightful nutty flavor and added crunch.
-
Spice It Up: Add a dash of cinnamon or nutmeg to your crust for a warm spice that pairs beautifully with the sweetness of the fruit.
For more delightful fruit recipes, don’t miss our Patriotic Fruit Flag and Mini Lemon Blueberry Cheesecakes. Enjoy experimenting!

Mini Fruit Tarts Recipe FAQs
How do I choose the best fruit for my mini tarts?
Absolutely! Opt for fresh, ripe fruit that showcases vibrant colors and variety. Look for fruits that are firm and juicy without dark spots. Berries, kiwi, and mango are great choices! If you want to switch things up, try seasonal fruits like peaches or even apples in the fall.
How should I store the mini fruit tarts?
For the best flavor and texture, store uneaten Mini Fruit Tarts in an airtight container in the refrigerator for up to 2 days. This keeps the crust fresh and the filling creamy. If you want to make them ahead, consider prepping the crusts only and storing them separately.
Can I freeze the crusts for later use?
Yes! You can freeze the baked crusts for up to 1 month. Just be sure to let them cool completely before placing them in an airtight container or freezer bag. When you’re ready to enjoy, fill them with the cream cheese mixture and fresh fruit just before serving for the best taste!
What do I do if my crust is too tough?
To prevent tough crusts, ensure you stop mixing as soon as your dough comes together—this will keep your Mini Fruit Tarts tender. If your dough has already become tough, reshape it into a ball and roll it out again, but ensure you minimize handling to maintain texture.
Are these mini tarts suitable for someone with allergies?
Great question! These Mini Fruit Tarts contain common allergens such as eggs and dairy. For a vegan and allergen-friendly option, substitute the egg yolk with a flax egg (1 tablespoon of flaxseed meal mixed with 2.5 tablespoons of water) and use dairy-free cream cheese. Always check for individual ingredient allergies before serving.
Can I make the cream filling ahead of time?
Yes, you can prepare the cream cheese filling a day in advance! Store it in an airtight container in the fridge. Just give it a good stir before filling the cooled crusts. This is a wonderful time-saver for your gathering!

Irresistibly Easy Mini Fruit Tarts with Sugar Cookie Crust
Ingredients
Equipment
Method
- Preheat your oven to 350°F (175°C) and grease a mini-muffin tin.
- In a large mixing bowl, cream together softened butter and white sugar until light and fluffy.
- Incorporate egg yolk and vanilla extract into the creamed mixture, beating until smooth.
- In a separate bowl, whisk together all-purpose flour, baking soda, and baking powder, then add to creamed mixture until crumbly.
- Roll the dough into 1 ½ inch balls and place each ball in the greased mini muffin wells, flattening each ball.
- Bake for 8-10 minutes until edges turn golden brown. Allow to cool completely.
- Blend softened cream cheese and powdered sugar until smooth, then mix in vanilla extract and lemon juice and zest.
- Fill each cooled tart shell with the cream cheese mixture using a small spoon or piping bag.
- Decorate with fresh fruit on top of the cream filling.
- Chill the tarts in the refrigerator for at least 30 minutes before serving.
Leave a Reply