
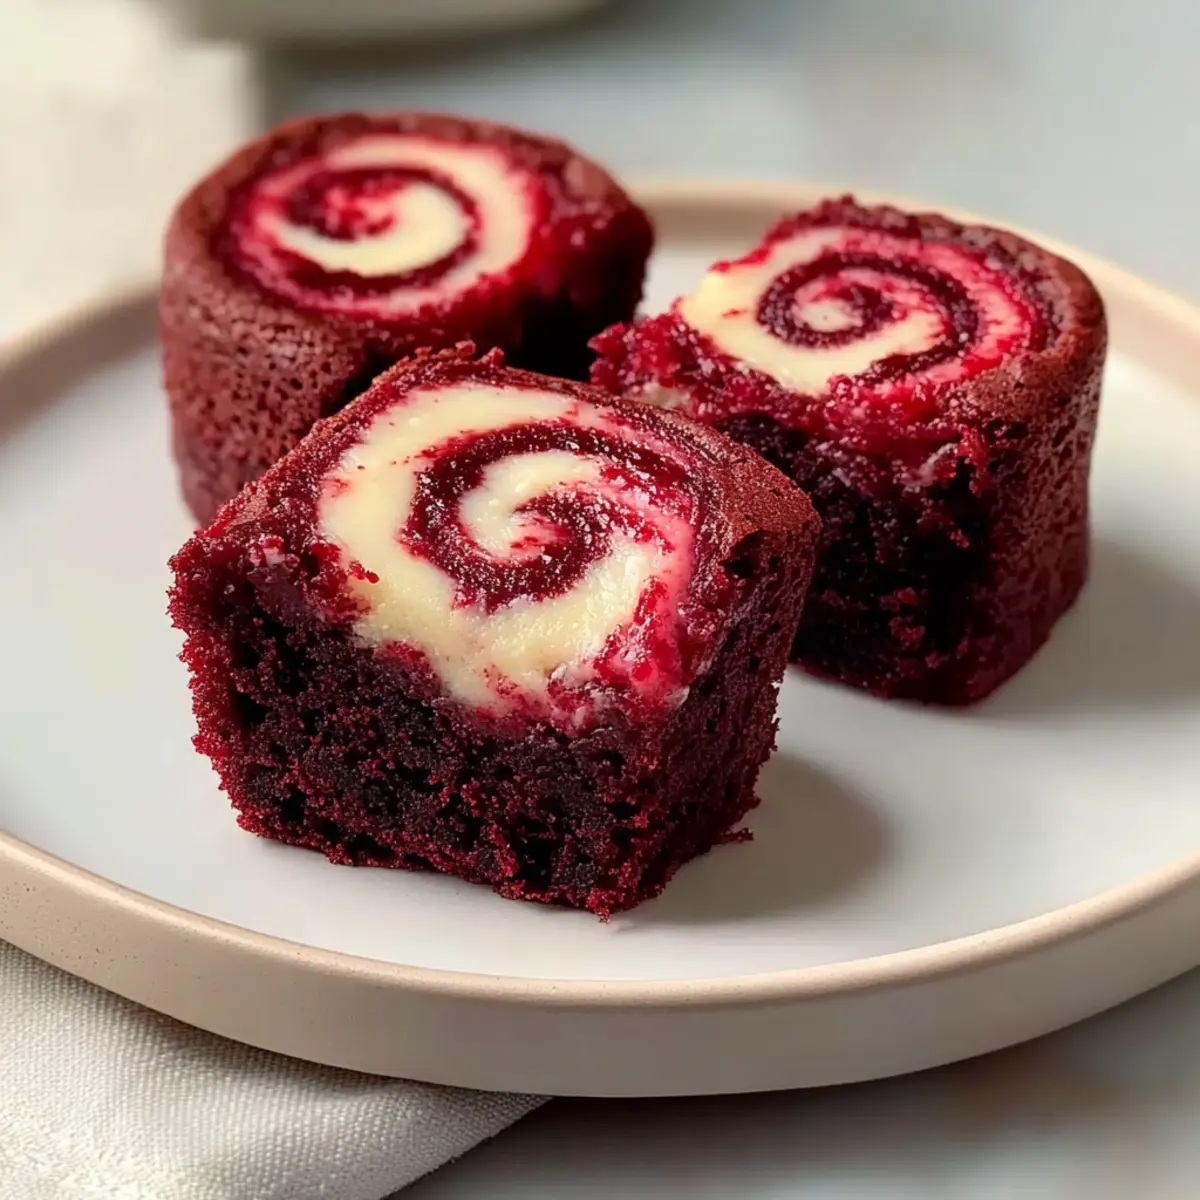
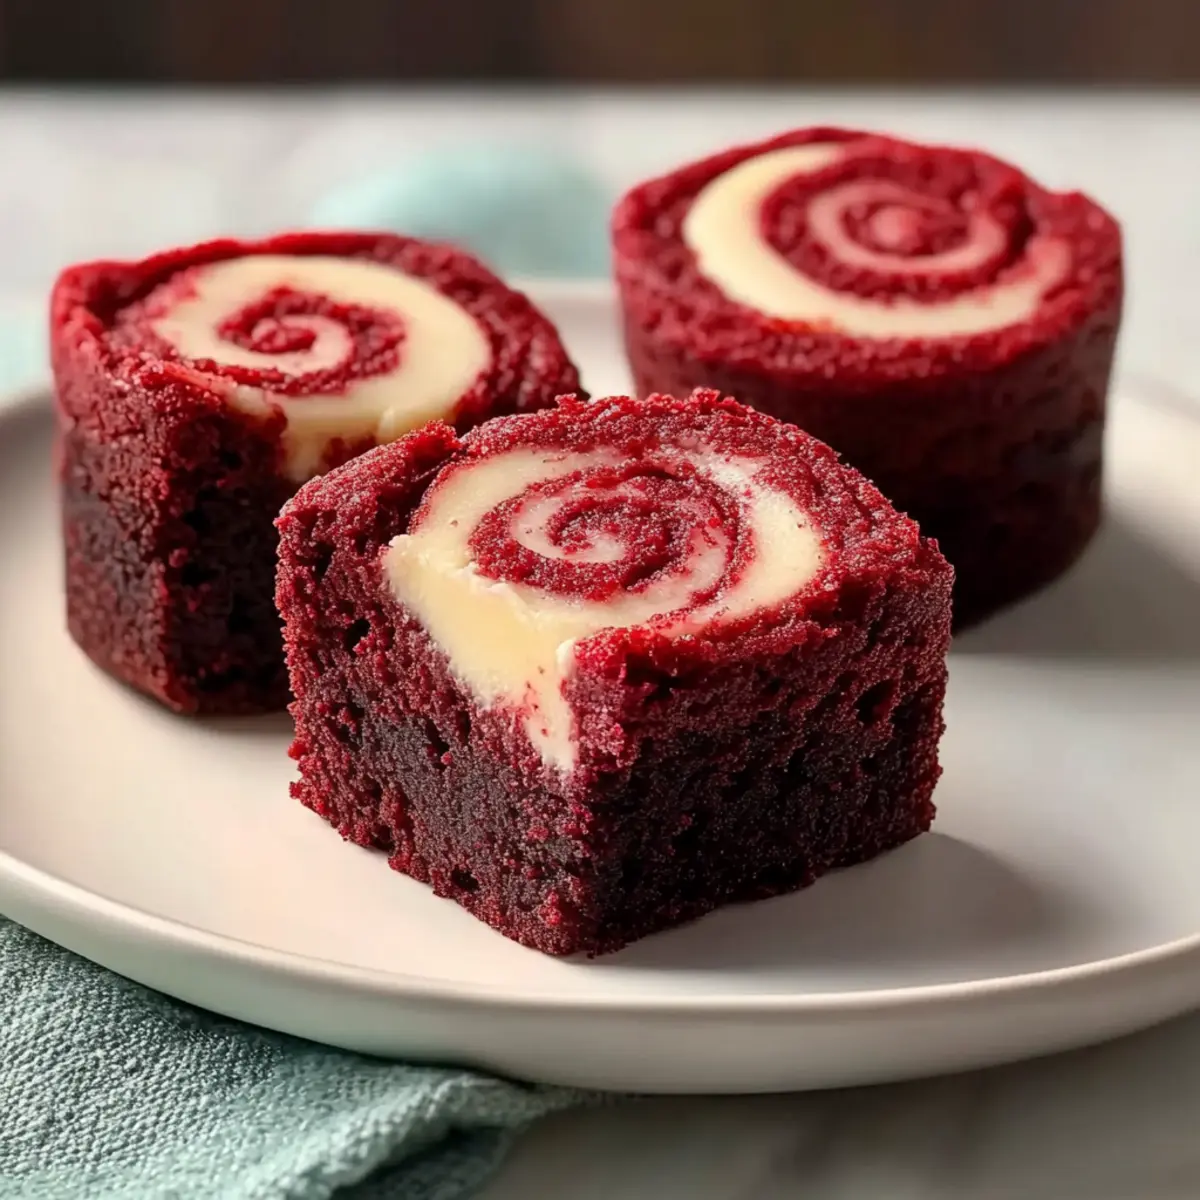
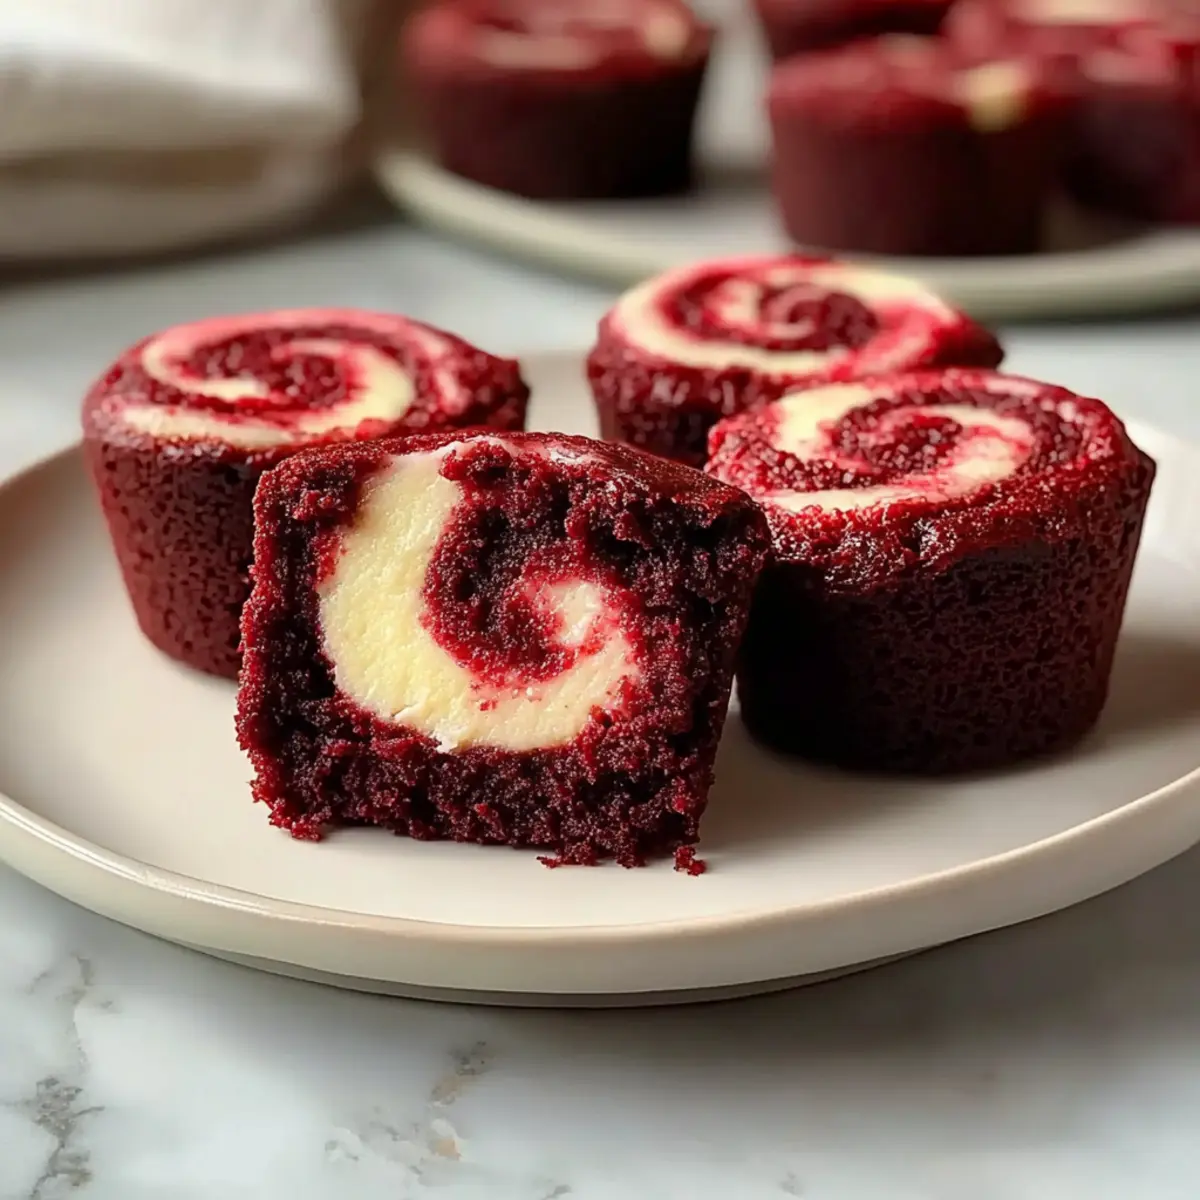
The unmistakable scent of warm, chocolatey goodness wafts through the kitchen as I pull a batch of these Red Velvet Brownie Bites from the oven. It’s a dessert that beautifully combines the rich, fudgy texture of a classic brownie with a luscious cream cheese swirl, making each bite a delightful experience. These treats are not only incredibly easy to whip up, but they also shine as a family-friendly dessert that impresses without demanding too much time. Perfect for satisfying sweet cravings on a busy day or adding a touch of elegance to a gathering, you’ll soon find that they’re a must-bake. Curious to discover how a simple mix of ingredients can transform into such an indulgent treat? Let’s dive into this recipe!
Why Are Red Velvet Brownie Bites a Must-Try?
Exquisite Taste: These bites are a delightful fusion, blending rich chocolate with a tangy cream cheese swirl that elevates any dessert table.
Simple to Make: With minimal skills required, you can whip up these treats in no time—perfect for baking with family or surprising guests.
Versatile Presentation: Serve them dusted with powdered sugar or alongside fresh berries for a touch of elegance, making them ideal for any occasion!
Perfectly Portion-Controlled: Their mini size helps manage sweet cravings, allowing you to enjoy a decadent treat without guilt.
Crowd Favorite: These Red Velvet Brownie Bites are bound to impress everyone, making them a go-to snack for parties and family gatherings. If you love sweet indulgences, you might also enjoy our Brownie Mix Cookies for an easy fix!
Red Velvet Brownie Bites Ingredients
For the Brownie Batter
- Unsalted Butter – Adds richness and moisture; make sure to melt it gently.
- Granulated Sugar – Provides sweetness and helps create a fudgy texture; brown sugar works well for deeper flavor.
- Cocoa Powder – Essential for that rich chocolatey flavor and color; opt for natural cocoa for traditional red velvet.
- Vanilla Extract – Adds aromatic sweetness; pure vanilla extract is highly recommended for the best flavor.
- Red Food Coloring – Gives the brownies their signature red hue; consider gel food coloring for a vibrant shade.
- Salt – Balances sweetness and enhances overall flavor; a small amount is crucial in baked goods.
- Espresso Powder – Intensifies chocolate flavor without coffee taste; can be omitted if you don’t have it on hand.
- Vinegar – Contributes to the red velvet flavor and aids in leavening; white or apple cider vinegar suits the recipe well.
- Eggs – Provide structure and moisture; use room temperature eggs for better mixing.
- All-Purpose Flour – Forms the brownie structure; gluten-free flour is a great substitute for a gluten-free option.
For the Cream Cheese Swirl
- Cream Cheese – Creates a luxurious cheesecake swirl that complements the fudgy brownie; a dairy-free cream cheese can make it non-dairy.
- Additional Sugar – Enhances the sweetness of the cream cheese filling; adjust based on personal preference.
- Egg Yolk – Adds richness to the filling; gently fold it into the cream cheese mixture for a smooth consistency.
These Red Velvet Brownie Bites are truly a treat that brings warmth and joy to any occasion.
Step‑by‑Step Instructions for Creamy Red Velvet Brownie Bites with Cheesecake Swirl
Step 1: Preheat and Prepare the Pan
Preheat your oven to 350°F (175°C) while you prepare your baking pan. Grease a mini muffin pan thoroughly using cooking spray or melted butter to ensure the brownie bites release easily once baked. This step is crucial for as you want each Creamy Red Velvet Brownie Bite to come out beautifully intact.
Step 2: Sift the Cocoa Powder
In a medium mixing bowl, sift the cocoa powder to eliminate any lumps for a smooth brownie mixture. This helps achieve the rich, velvety texture of the brownie base. Take a moment to appreciate the deep chocolate color, which is a sign that your Red Velvet Brownie Bites will be irresistibly delicious.
Step 3: Combine the Ingredients
Melt the unsalted butter gently in a saucepan or microwave, then transfer it to a large mixing bowl. Stir in the granulated sugar, cocoa powder, vanilla extract, red food coloring, salt, espresso powder, and vinegar until everything is well combined. This mixture should have a glossy finish, signaling that you’re on the right track towards the ultimate brownie batter.
Step 4: Add the Eggs
Add the eggs one at a time into the rich mixture, mixing thoroughly after each addition. This step is important as it adds structure to the brownies. The batter should become smoother and slightly thicker, indicating that your Creamy Red Velvet Brownie Bites will be tender and fudgy once baked.
Step 5: Fold in the Flour
Gently fold in the all-purpose flour into the brownie batter until just combined. Be careful not to overmix, as this can lead to a tougher texture. You want to see little streaks of flour remaining in the batter which will blend in perfectly during baking, ensuring a soft and decadent treat.
Step 6: Prepare the Cream Cheese Filling
In a separate bowl, beat the cream cheese with the additional sugar until smooth and creamy. Once combined, fold in the egg yolk gently to enhance the richness of the cream cheese swirl. The mixture should be free of lumps, lending a luxurious texture to complement your brownie bites.
Step 7: Layer the Batter and Filling
Fill each mini muffin cup halfway with brownie batter, then add a generous dollop of the cream cheese filling on top. Finally, seal each cup with more brownie batter, ensuring they are filled almost to the top. This layering technique is what makes your Creamy Red Velvet Brownie Bites visually appealing and delicious!
Step 8: Create the Swirl
Using a toothpick or skewer, gently swirl through the layers to create a marbling effect. This not only enhances the visual allure of your brownies but also mixes the flavors beautifully. Be careful to maintain distinct layers, which will result in that delightful tangy swirl in every bite.
Step 9: Bake the Brownie Bites
Place the muffin pan in the preheated oven and bake for approximately 12 minutes. Keep an eye on them as they bake; the tops should be set and slightly springy, while the centers may appear soft. This balance is key to achieving the perfect fudgy texture in your Creamy Red Velvet Brownie Bites.
Step 10: Cool Before Serving
Once baked, allow the brownie bites to cool in the pan for about 5 minutes before transferring them to a wire rack. This short cooling time will help them firm up and make it easier to remove them from the pan without crumbling. Let them cool completely for the best flavor before indulging.
Make Ahead Options
These Red Velvet Brownie Bites are perfect for meal prep, allowing you to enjoy a delightful treat with minimal last-minute effort! You can prepare the brownie batter and cream cheese filling up to 24 hours in advance, storing them separately in airtight containers in the refrigerator. To maintain their quality, make sure to cover the containers well to prevent drying out. When you’re ready to bake, simply fill the mini muffin cups, layer with the cream cheese filling, and swirl as directed. Bake them fresh for about 12 minutes, and you’ll have deliciously indulgent brownie bites that taste just as fantastic as if they were made that day!
Red Velvet Brownie Bites Variations & Substitutions
Feel free to explore these delightful variations that will make your Red Velvet Brownie Bites even more irresistible!
-
Nutty Delight: Add chopped walnuts or pecans into the brownie batter for a satisfying crunch that contrasts beautifully with the creamy swirl.
-
Colorful Swirl: Swap out red food coloring for vibrant gel colors like blue or green to match different festivities, making your treats festive and fun!
-
Flour Alternative: Substitute half of the all-purpose flour with almond flour for a gluten-free version, adding a nutty flavor and an enticing texture.
-
Dairy-Free Option: Use dairy-free cream cheese in the swirl for a completely vegan version, ensuring everyone can enjoy this indulgent treat.
-
Chocolate Chips: Mix in semi-sweet or dark chocolate chips into the brownie batter for an extra gooey chocolate burst with every bite!
-
Espresso Boost: For a stronger coffee flavor, increase the espresso powder or add a splash of brewed coffee to the batter, intensifying that chocolate richness.
-
Fruity Twist: Swirl in some raspberry or strawberry preserves into the cream cheese layer for a fruity contrast that brings a lovely tartness to the brownies.
-
Spicy Kick: For those who love a little heat, add a pinch of cayenne pepper or a dash of chili powder to the brownie batter to create a surprising depth of flavor.
Have fun experimenting with these ideas, and don’t forget you can pair your delicious brownies with fresh berries or even serve them with a scoop of ice cream! If you’re in the mood for more sweet treats, check out our delectable Pumpkin Swirl Brownies for a twist on fall flavors!
How to Store and Freeze Red Velvet Brownie Bites
Fridge: Store your Red Velvet Brownie Bites in an airtight container for up to 5 days. This keeps them fresh and moist, ready to satisfy your cravings anytime!
Freezer: For longer storage, freeze individual brownie bites in a single layer on a baking sheet, then transfer to an airtight container or freezer bag for up to 3 months.
Reheating: To enjoy, simply defrost in the fridge overnight or gently warm them in the microwave for 10-15 seconds for that freshly-baked taste!
Tip: Always ensure your Brownie Bites are cooled completely before storing to maintain their delicious texture and flavor!
What to Serve with Red Velvet Brownie Bites
Indulging in these mini delights opens a world of delightful pairings perfect for dessert or any gathering.
-
Creamy Vanilla Ice Cream: The cool, creamy texture contrasts beautifully with the fudgy brownies, creating a harmonious blend of flavors.
-
Fresh Berries: Sweet, tart berries like raspberries or strawberries add a refreshing burst and color, enhancing the richness of the brownies. Serve them alongside for guests to enjoy or on top for a more elegant presentation.
-
Chocolate Whipped Cream: This luscious topping brings a light airiness to the rich brownie bites, elevating each bite into an irresistible dessert dream.
-
Espresso or Coffee: The bold flavors of coffee complement the rich chocolate and cream cheese, creating a delightful balance that warms the soul.
-
Milkshake: A classic chocolate milkshake pairs deliciously, providing a playful and nostalgic touch that enhances the brownie experience.
-
Powdered Sugar Dusting: A light dusting of powdered sugar not only adds a touch of elegance but also balances sweetness, making each bite even more delightful.
-
Chocolate Drizzle: A rich chocolate sauce drizzled over the brownie bites adds extra decadence and a beautiful visual appeal.
-
Hot Fudge Sauce: For those who love everything chocolate, a warm fudge sauce provides a gooey indulgence that takes these bites to the next level of deliciousness.
-
Homemade Caramel Sauce: The sweet and buttery notes of caramel contrast perfectly with the cocoa richness, adding depth and decadence to your dessert table.
Expert Tips for Red Velvet Brownie Bites
-
Check Doneness Early: Start checking your brownie bites a couple of minutes before the baking time is up; you want them set but still soft in the center.
-
Grease Well: Ensure your mini muffin pan is well-greased to avoid sticking; you can use baking spray or melted butter for easy removal of the brownie bites.
-
Avoid Overmixing: When folding in the flour, mix gently until just combined; overmixing can lead to tougher brownies.
-
Achieve Perfect Swirls: Use a toothpick to create gentle swirls in the cream cheese filling, allowing the layers to remain distinct for a beautiful presentation in your Red Velvet Brownie Bites.
-
Cool Properly: Let the brownie bites cool before removing them from the pan to prevent crumbling; cooling in the pan helps them hold their shape better.

Red Velvet Brownie Bites Recipe FAQs
How do I choose ripe ingredients for Red Velvet Brownie Bites?
Absolutely! For the best flavor and texture, choose fresh ingredients. Make sure the butter is fresh and creamy, and that the eggs are at room temperature for better mixing. When using cream cheese, ensure it’s not past its expiration date, as fresh cream cheese will create a smoother swirl.
How should I store leftover Red Velvet Brownie Bites?
Very! Store your brownie bites in an airtight container at room temperature for up to 3 days, or in the refrigerator for up to 5 days. Keeping them in the fridge not only extends their freshness but also makes for a cool, lush bite that’s perfect for satisfying cravings!
Can I freeze Red Velvet Brownie Bites?
Absolutely, freezing is a great option! To freeze, first let the brownie bites cool completely. Then, arrange them in a single layer on a baking sheet and place in the freezer until solid. Once frozen, transfer the bites to an airtight container or freezer bag. They can be stored this way for up to 3 months. When you’re ready to enjoy them, simply thaw in the fridge overnight or microwave for 10-15 seconds to enjoy their fresh-baked taste!
What if my ganache swirls didn’t turn out well?
Don’t worry! If your swirls didn’t come out as distinct as you hoped, it could be due to over-mixing. Next time, use gentle, circular motions with a toothpick to create beautiful ribbons in the cream cheese filling without blending it completely into the brownie batter. Remember, practice makes perfect, and they’ll still taste delicious!
Are there any dietary restrictions to consider with these brownie bites?
Very! The Red Velvet Brownie Bites contain gluten and dairy. If you have gluten intolerance, you can use a gluten-free flour blend. For those avoiding dairy, there are excellent dairy-free cream cheese alternatives available that work beautifully. Always check label ingredients if you or your guests have allergies.
These Red Velvet Brownie Bites are not just a treat; they’re a versatile, delicious dessert that everyone can enjoy!
Delicious Red Velvet Brownie Bites with Creamy Swirl
Ingredients
Equipment
Method
- Preheat your oven to 350°F (175°C) and grease a mini muffin pan.
- Sift the cocoa powder in a medium mixing bowl to eliminate lumps.
- Melt the unsalted butter and combine with sugar, cocoa powder, vanilla extract, red food coloring, salt, espresso powder, and vinegar.
- Add the eggs one at a time, mixing thoroughly after each addition.
- Gently fold in the all-purpose flour until just combined.
- Beat the cream cheese with additional sugar until smooth; fold in the egg yolk.
- Fill each mini muffin cup halfway with brownie batter, add cream cheese filling, then top with more brownie batter.
- Gently swirl through layers with a toothpick.
- Bake for approximately 12 minutes until tops are set.
- Cool in the pan for 5 minutes before transferring to a wire rack.
Leave a Reply