
Introduction to Tuna Rice Balls
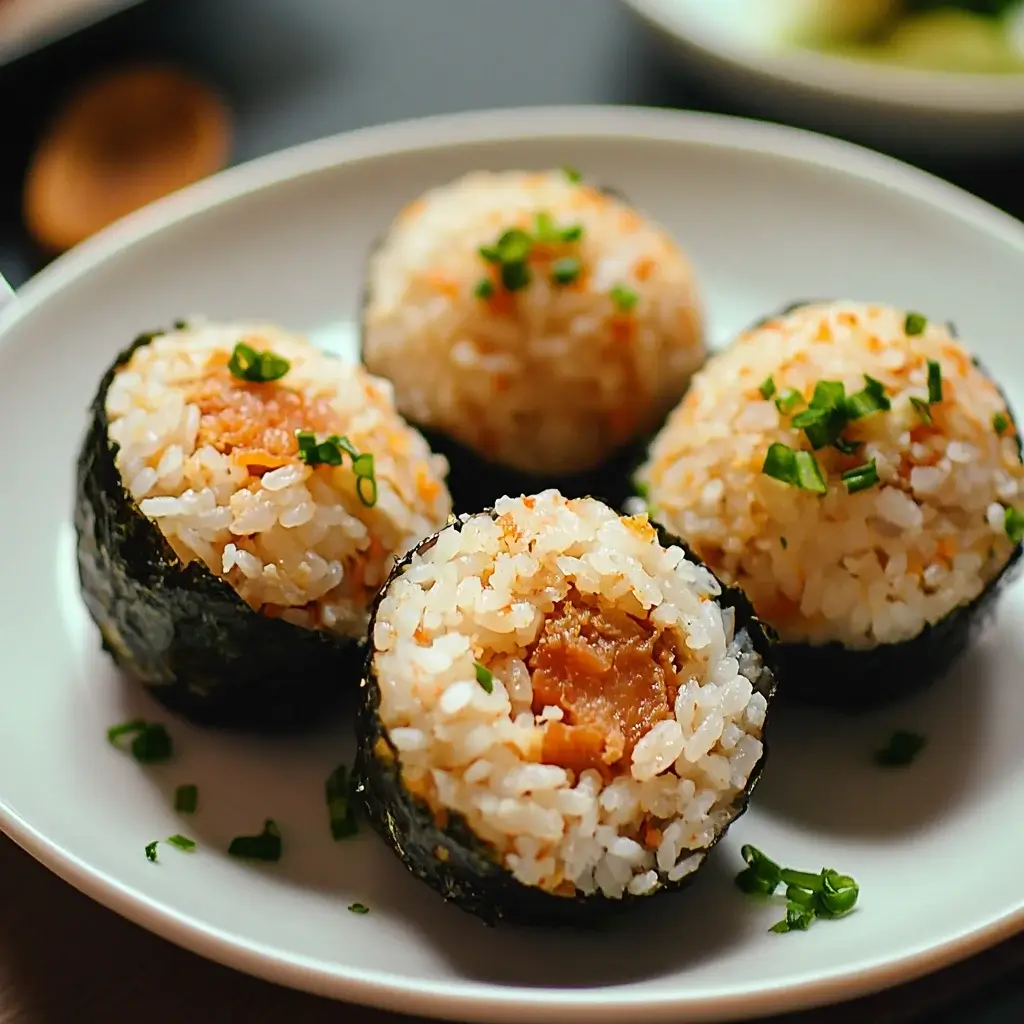
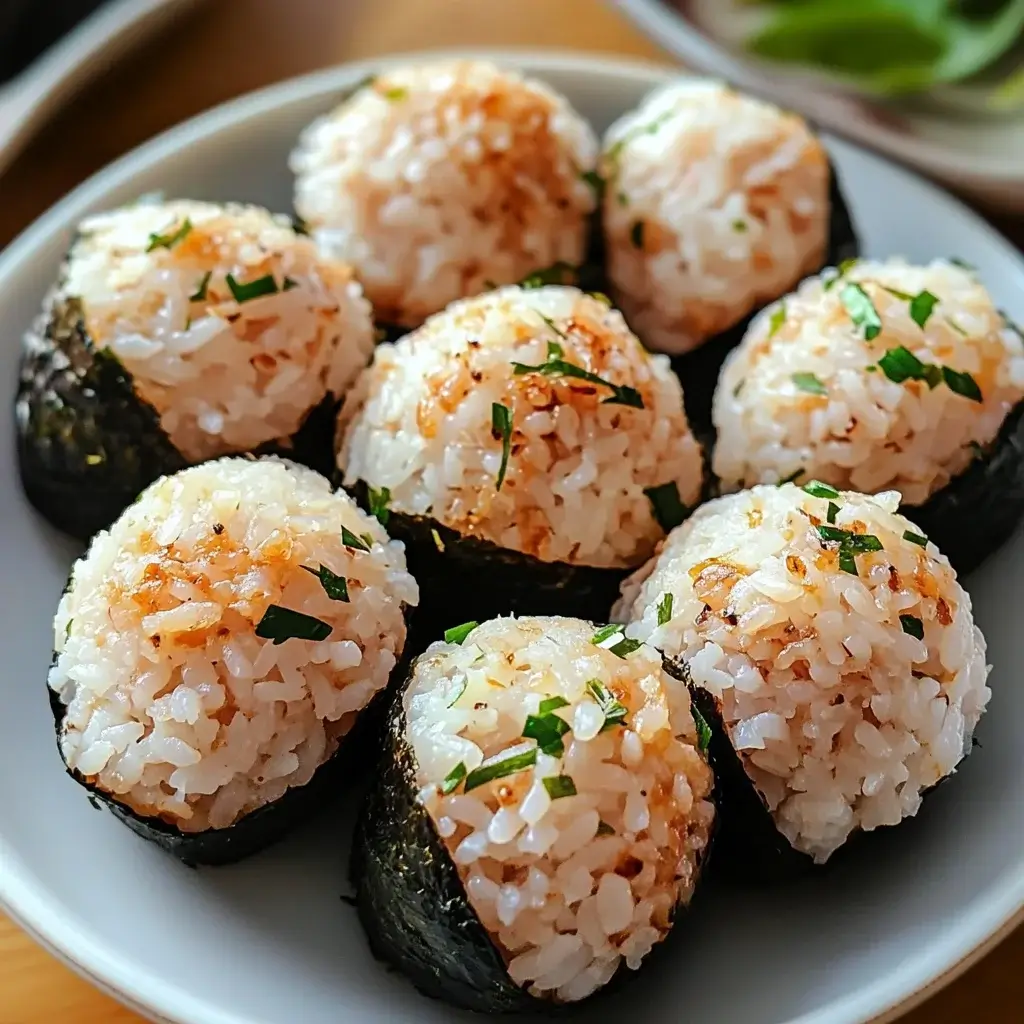
Inspired by the simplicity of Japanese onigiri, these Tuna Rice Balls are a quick, tasty, and protein-packed snack you can take anywhere. Made with seasoned rice and filled with savory tuna, they’re shaped into satisfying handheld triangles or spheres—ideal for lunchboxes, road trips, or healthy bites on the go. Whether you’re new to rice balls or a seasoned pro, this version is simple and seriously delicious.
Dip them in soy sauce or enjoy plain—either way, they’re a fun twist on traditional tuna dishes.
Why You’ll Love This Recipe:
-
Only a few simple, wholesome ingredients.
-
Portable, packable, and perfect for meal prep.
-
Great way to use pantry staples like canned tuna.
-
Customizable with fillings and seasonings.
-
Kid-friendly and lunchbox approved.
Ingredients for Tuna Rice Balls
Don’t overthink it—these few ingredients go a long way.
- Cooked white rice: The base of our rice balls, it provides a hearty texture. Make sure it’s cooled for easy handling.
- Tuna in water: This canned staple adds protein and flavor. Drain it well to avoid excess moisture.
- Mayonnaise: A creamy binder that brings everything together. It adds richness and a touch of tang.
- Soy sauce: This adds a savory depth to the mix. A little goes a long way in enhancing the overall flavor.
- Sesame oil: Just a splash gives a nutty aroma that elevates the dish. It’s a key player in Japanese cuisine.
- Green onions: These add a fresh crunch and a pop of color. Finely chopped, they blend beautifully into the mixture.
- Shredded carrots: For a hint of sweetness and extra texture, these are a great addition. They also brighten up the dish visually.
- Panko breadcrumbs: These provide a delightful crunch when rolled around the rice balls. They’re lighter and crispier than regular breadcrumbs.
- Salt and pepper: Essential seasonings to taste. Adjust according to your preference for flavor.
- Nori sheets: Optional, but wrapping a strip around each rice ball adds an authentic touch and extra flavor.
For exact measurements, check the bottom of the article where you can find everything listed for easy printing. Feel free to get creative with your ingredients—this recipe is all about making it your own!
How to Make Tuna Rice Balls
Step 1: Combine Ingredients
Start by grabbing a large bowl. Toss in the cooled white rice, drained tuna, and mayonnaise. Add the soy sauce and sesame oil for that umami kick. Then, sprinkle in the finely chopped green onions and shredded carrots. Season with salt and pepper to taste. Mix everything together until it’s well combined. You want a cohesive mixture that holds together nicely.
Step 2: Shape the Rice Balls
Now comes the fun part! Wet your hands with a little water to prevent sticking. Take about two tablespoons of the mixture and roll it into a ball. Don’t worry about making them perfect; a little rustic charm adds character. Repeat this process until you’ve shaped all the mixture into delightful little rice balls. It’s like crafting edible art!
Step 3: Add Crunch with Panko
For an extra layer of texture, roll each rice ball in panko breadcrumbs. This step is optional, but trust me, it’s worth it. The panko adds a satisfying crunch that contrasts beautifully with the creamy filling. Just gently press the breadcrumbs onto the rice balls to ensure they stick. You’ll love the crispy bite!
Step 4: Optional Nori Wrap
If you’re feeling adventurous, grab some nori sheets. Cut them into strips and wrap a piece around each rice ball. This not only enhances the flavor but also gives your Tuna Rice Balls an authentic Japanese touch. Plus, it looks pretty impressive when serving!
Step 5: Serve or Chill
Finally, it’s time to enjoy your creation! You can serve the Tuna Rice Balls immediately for a fresh snack. Alternatively, refrigerate them for up to an hour. This allows the flavors to meld together beautifully. Either way, you’re in for a treat that’s both delicious and satisfying!
Tips for Success
- Use cold, leftover rice for the best texture. It holds together better.
- Don’t skip the panko! It adds a delightful crunch that elevates the dish.
- Experiment with flavors—try adding sriracha for a spicy kick.
- Keep your hands wet while shaping to prevent sticking.
- Chill the rice balls for a bit before serving to enhance the flavors.
Equipment Needed
- Large mixing bowl: Essential for combining ingredients. A sturdy pot can work in a pinch.
- Measuring spoons: For accurate ingredient portions. You can use regular spoons if needed.
- Plastic wrap: Handy for covering the rice balls if you’re chilling them.
- Cookie sheet: Great for laying out the rice balls before serving.
Variations
- Spicy Tuna Rice Balls: Add a teaspoon of sriracha or wasabi to the mixture for a fiery kick.
- Salmon or Chicken Substitute: Swap out tuna for canned salmon or chicken for a different flavor profile.
- Vegetarian Option: Replace tuna with mashed avocado or chickpeas for a plant-based twist.
- Herb Infusion: Mix in fresh herbs like cilantro or basil for an aromatic touch.
- Cheesy Delight: Incorporate shredded cheese into the mixture for a creamy, cheesy version.
Serving Suggestions
- Pair Tuna Rice Balls with a light soy sauce or spicy mayo for dipping.
- Serve alongside a fresh cucumber salad for a refreshing contrast.
- Complement with a chilled green tea or a crisp lager.
- Garnish with sesame seeds or extra green onions for a pop of color.
FAQs about Tuna Rice Balls
Can I use brown rice instead of white rice for Tuna Rice Balls?
Absolutely! Brown rice adds a nutty flavor and extra fiber. Just make sure it’s cooked and cooled before mixing.
How long can I store Tuna Rice Balls in the fridge?
You can keep them in the fridge for up to 24 hours. Just make sure they’re in an airtight container to maintain freshness.
Can I freeze Tuna Rice Balls?
Yes, you can freeze them! Just wrap each rice ball tightly in plastic wrap and store them in a freezer-safe bag. They’ll last for about a month.
What can I serve with Tuna Rice Balls?
These rice balls pair wonderfully with a light dipping sauce, like soy sauce or spicy mayo. A side of fresh veggies or a salad complements them nicely.
Are Tuna Rice Balls suitable for kids?
Definitely! They’re a fun and nutritious snack that kids usually love. You can even let them help shape the rice balls for a fun cooking activity!
Final Thoughts
Creating Tuna Rice Balls is more than just a cooking task; it’s an experience filled with joy and creativity. Each bite is a reminder of how simple ingredients can come together to create something truly delightful. Whether you’re enjoying them as a quick snack or serving them at a gathering, these little rice balls are sure to impress. Plus, the versatility of this recipe means you can adapt it to suit your taste. So roll up your sleeves, gather your ingredients, and let the fun begin in your kitchen. You won’t regret it!
Tuna Rice Balls: Discover the Perfect Easy Recipe!
Ingredients
Method
- In a large bowl, combine the cooled rice, drained tuna, mayonnaise, soy sauce, sesame oil, green onions, shredded carrots, salt, and pepper. Mix well until all ingredients are evenly incorporated.
- Wet your hands with water to prevent sticking. Take about 2 tablespoons of the mixture and form it into a ball. Repeat until all the mixture is shaped into balls.
- Roll each rice ball in panko breadcrumbs for added crunch, if desired.
- If using nori, wrap a strip around each rice ball for extra flavor and presentation.
- Serve immediately or refrigerate for up to 1 hour before serving to allow flavors to meld.
Nutrition
Notes
- For a spicy kick, add a teaspoon of sriracha or wasabi to the mixture.
- Substitute canned salmon or chicken for the tuna for a different flavor profile.
Leave a Reply