
Introduction to Zebra Cookies
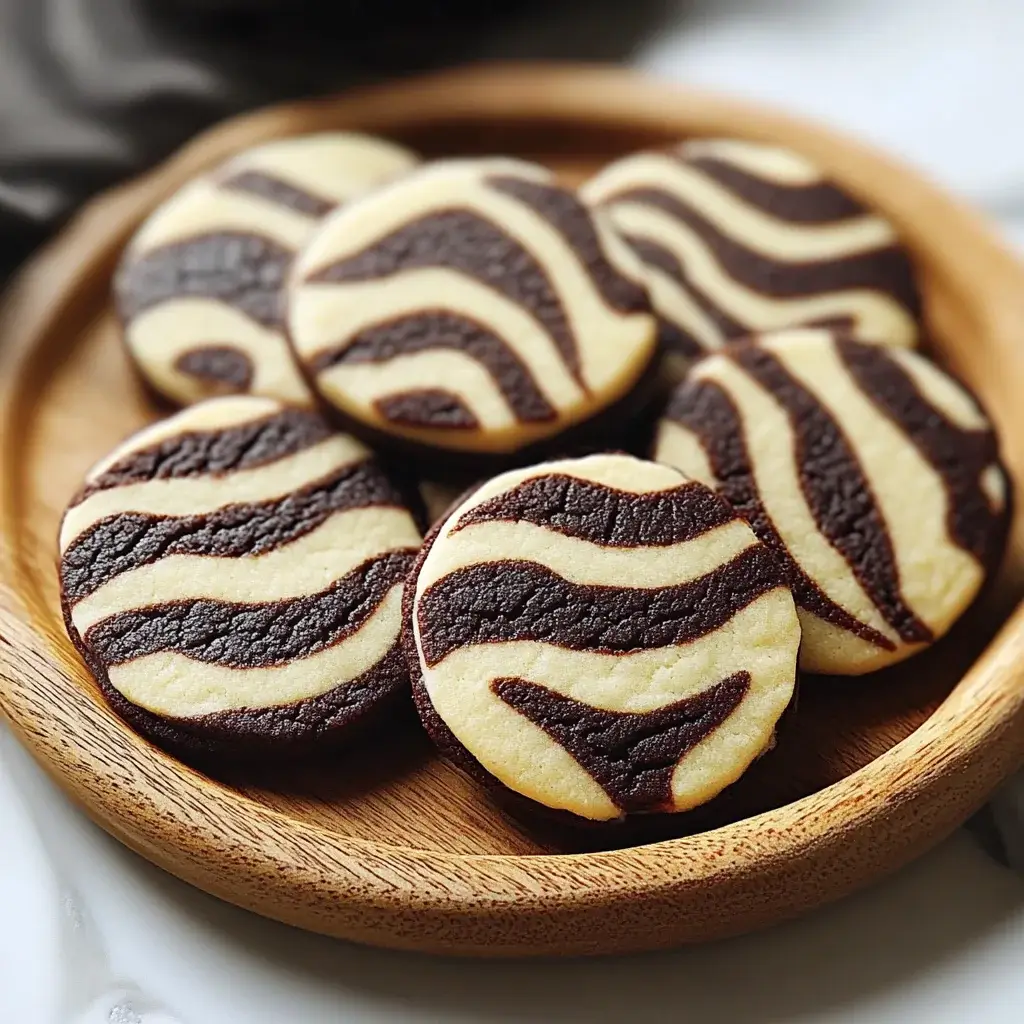
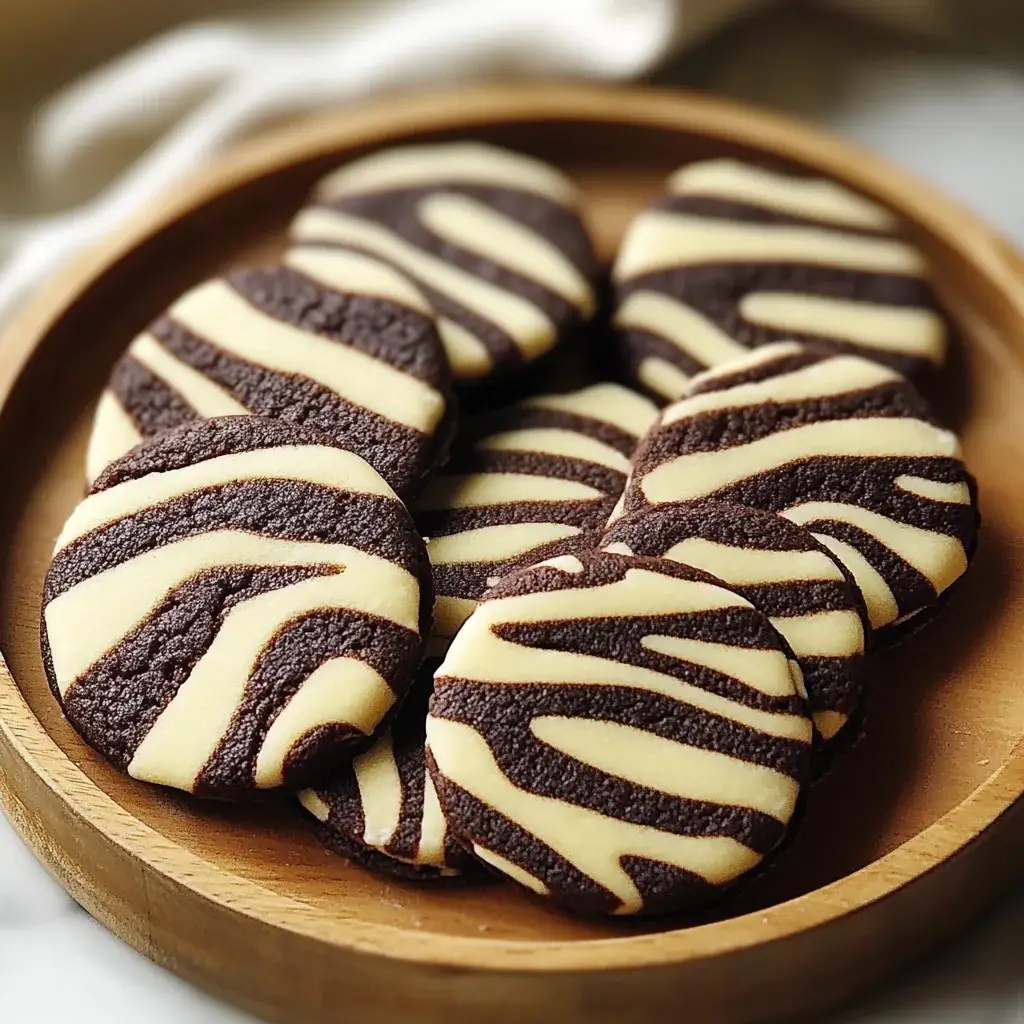
Zebra Cookies are not only delicious—they’re downright adorable. These fun black-and-white treats feature chocolate and vanilla dough twisted together for a playful pattern that resembles zebra stripes. The cookies are soft in the middle with just the right amount of crisp around the edges, making them a hit with kids and adults alike. No fancy tools required—just a love for baking and a little creative flair.
Why You’ll Love This Recipe:
-
Perfect for gifting, holidays, or cookie swaps.
-
Fun to make with kids or for themed parties.
-
Soft, buttery texture with a chocolatey finish.
-
Freezer-friendly and easy to batch.
-
Whimsical and unique—yet simple to make.
Ingredients for Zebra Cookies
These items bring bold flavor with zero fuss.
- Unsalted butter: This is the base of your dough, providing richness and flavor. Make sure it’s softened for easy mixing.
- Granulated sugar: Sweetness is key! This helps create that light, fluffy texture we all love in cookies.
- Large egg: Eggs add moisture and act as a binding agent, ensuring your cookies hold together beautifully.
- Vanilla extract: A splash of vanilla enhances the flavor, making your cookies taste homemade and delicious.
- All-purpose flour: The backbone of your cookie dough, giving it structure. You can use whole wheat flour for a healthier twist.
- Baking powder: This leavening agent helps your cookies rise, giving them that perfect texture.
- Salt: Just a pinch balances the sweetness and enhances the overall flavor.
- Unsweetened cocoa powder: This is what gives your cookies their rich chocolate flavor and those beautiful stripes.
- Powdered sugar: Used for the glaze, it adds a sweet finishing touch that makes these cookies irresistible.
- Milk: A little milk in the glaze helps achieve the right consistency for drizzling over your cookies.
For those looking to experiment, consider swapping vanilla extract for almond extract for a unique flavor profile. And if you want to sneak in some nutrition, substituting half of the all-purpose flour with whole wheat flour is a great option. You can find all the exact measurements at the bottom of the article, ready for printing!
How to Make Zebra Cookies
Now that you have your ingredients ready, it’s time to bring these Zebra Cookies to life! Follow these simple steps, and you’ll be on your way to baking a batch of these delightful treats.
Step 1: Preheat and Prepare
First things first, preheat your oven to 350°F (175°C). This is crucial for achieving that perfect bake. While the oven warms up, line a baking sheet with parchment paper. This will prevent your cookies from sticking and make cleanup a breeze.
Step 2: Cream Butter and Sugar
In a large bowl, cream together the softened butter and granulated sugar until the mixture is light and fluffy. This step is essential for creating a tender texture in your cookies. You want to incorporate air into the mixture, so don’t rush it!
Step 3: Add Egg and Vanilla
Next, beat in the large egg and vanilla extract until everything is well combined. This adds moisture and a lovely flavor to your dough. The aroma of vanilla will fill your kitchen, making it feel like a cozy bakery!
Step 4: Mix Dry Ingredients
In another bowl, whisk together the all-purpose flour, baking powder, and salt. This ensures that the leavening agents are evenly distributed throughout the dough. A well-mixed dry mixture is key to achieving consistent cookies.
Step 5: Combine Wet and Dry Mixtures
Gradually add the dry ingredients to the wet mixture, mixing until just combined. Be careful not to overmix; you want your cookies to be tender and soft, not tough. A few flour streaks are okay—trust me!
Step 6: Create Chocolate Dough
Now, divide the dough in half. In one half, mix in the unsweetened cocoa powder until it’s fully incorporated. This is where the magic happens! The cocoa gives your cookies their signature stripes and rich chocolate flavor.
Step 7: Shape the Cookies
Take a tablespoon of each dough and roll them into balls. Place one vanilla ball and one chocolate ball next to each other on the prepared baking sheet. This is where the fun begins! You’re creating those beautiful zebra stripes that will wow everyone.
Step 8: Flatten and Bake
Gently flatten the dough balls together with your hand. Repeat this with the remaining dough, spacing the cookies about 2 inches apart on the baking sheet. Bake in the preheated oven for 10-12 minutes, or until the edges are lightly golden. Your kitchen will smell heavenly!
Step 9: Cool and Glaze
Once baked, allow the cookies to cool on the baking sheet for a few minutes before transferring them to a wire rack. This helps them set perfectly. Finally, drizzle the glaze made from powdered sugar and milk over the cooled cookies for that sweet finishing touch.
Tips for Success
- Make sure your butter is softened to room temperature for easy mixing.
- Don’t skip the parchment paper; it prevents sticking and makes cleanup a breeze.
- For even baking, rotate your baking sheet halfway through the baking time.
- Let the cookies cool completely before glazing for a neater finish.
- Experiment with different extracts for unique flavor twists!
Equipment Needed
- Baking sheet: A standard baking sheet works well, but a silicone baking mat can be a great alternative for easy cleanup.
- Parchment paper: Essential for preventing sticking; aluminum foil can be used in a pinch.
- Mixing bowls: A set of various sizes is handy; you can also use any large bowl you have.
- Electric mixer: A hand mixer is perfect, but a whisk and some elbow grease will do the trick too!
- Wire rack: Ideal for cooling cookies; a plate can work if you don’t have one.
Variations
- Nutty Delight: Add chopped nuts like walnuts or pecans to the dough for a crunchy texture and added flavor.
- Chocolate Chip Twist: Mix in semi-sweet chocolate chips to the chocolate dough for an extra chocolatey experience.
- Gluten-Free Option: Substitute all-purpose flour with a gluten-free flour blend to make these cookies suitable for gluten-sensitive friends.
- Minty Fresh: Incorporate a few drops of peppermint extract into the vanilla dough for a refreshing minty flavor.
- Fruit Infusion: Add dried fruits like cranberries or cherries to the dough for a sweet and tangy twist.
Serving Suggestions
- Pair Zebra Cookies with a tall glass of cold milk for a classic treat.
- Serve them alongside a scoop of vanilla ice cream for an indulgent dessert.
- For a festive touch, arrange cookies on a colorful platter with fresh fruit.
- Drizzle extra glaze on top for an eye-catching presentation.
FAQs about Zebra Cookies
Can I make Zebra Cookies ahead of time?
Absolutely! You can prepare the dough in advance and refrigerate it for up to 3 days. Just let it sit at room temperature for a few minutes before shaping and baking. This is a great way to save time on busy days!
What can I substitute for unsweetened cocoa powder?
If you don’t have cocoa powder on hand, you can use Dutch-processed cocoa for a milder flavor. Alternatively, you can try carob powder for a caffeine-free option, though it will change the taste slightly.
How do I store leftover Zebra Cookies?
Store your Zebra Cookies in an airtight container at room temperature for up to a week. If you want to keep them fresh longer, you can freeze them for up to three months. Just make sure to separate layers with parchment paper to prevent sticking!
Can I use a different type of flour?
Yes! You can substitute half of the all-purpose flour with whole wheat flour for added nutrition. For a gluten-free version, use a gluten-free flour blend, and adjust the baking time as needed.
What’s the best way to glaze the cookies?
For a neat glaze, use a fork or a piping bag to drizzle the glaze over the cooled cookies. This not only looks great but also allows for even distribution of sweetness!
Final Thoughts
Baking Zebra Cookies is more than just a recipe; it’s an experience that brings joy to both the baker and those lucky enough to enjoy them. The delightful combination of chocolate and vanilla creates a flavor that dances on your taste buds, while the striking stripes make them a visual treat. Whether you’re sharing them at a gathering or enjoying them with a cup of coffee, these cookies are sure to spark smiles and warm memories. So, roll up your sleeves, embrace the process, and let the sweet aroma fill your kitchen. Happy baking!
Zebra Cookies: Discover How to Bake Delicious Treats!
Ingredients
Method
- Preheat your oven to 350°F (175°C) and line a baking sheet with parchment paper.
- In a large bowl, cream together the softened butter and granulated sugar until light and fluffy.
- Beat in the egg and vanilla extract until well combined.
- In another bowl, whisk together the flour, baking powder, and salt.
- Gradually add the dry ingredients to the wet mixture, mixing until just combined.
- Divide the dough in half. In one half, mix in the cocoa powder until fully incorporated.
- Take a tablespoon of each dough and roll them into balls. Place one vanilla ball and one chocolate ball next to each other on the prepared baking sheet.
- Gently flatten them together with your hand. Repeat with the remaining dough, spacing the cookies about 2 inches apart.
- Bake in the preheated oven for 10-12 minutes, or until the edges are lightly golden.
- Allow the cookies to cool on the baking sheet for a few minutes before transferring them to a wire rack to cool completely.
- In a small bowl, mix the powdered sugar and milk to create a glaze. Drizzle the glaze over the cooled cookies.
Nutrition
Notes
- For a fun twist, try adding a teaspoon of almond extract instead of vanilla for a different flavor profile.
- You can also substitute half of the all-purpose flour with whole wheat flour for added nutrition.
Leave a Reply