
Crispy edges meet chewy centers in these delightful chocolate oat cookies, which are a total game changer for anyone chasing a quick homemade treat. With only four simple ingredients, this cookie recipe proves that you don’t need a long list of items to create something truly delicious. Not only are they gluten-free, but the quick prep time means that you can whip up a batch in no time at all—perfect for those unexpected visitors or a late-night craving. These cookies offer a guilt-free indulgence that will satisfy any sweet tooth while leaving you feeling good about what you’re eating. So, are you ready to fill your kitchen with the irresistible aroma of fresh-baked cookies? Let’s dive into this easy recipe!

Why are Chocolate Oat Cookies a Must-Try?
Simplicity: With just four ingredients, these cookies are quick to prepare, making them perfect for even the busiest of days.
Guilt-Free Treat: Gluten-free and made with wholesome ingredients, indulge without the worry!
Versatile: Swap out peanut butter for almond butter, or drizzle in some maple syrup for a vegan twist—endless possibilities await.
Crowd-Pleaser: Serve them at parties or enjoy as an after-school snack, and watch everyone swoon over these chewy delights!
Perfect with Drinks: Pair these cookies with a tall glass of milk or a warm cup of coffee to elevate your treat time.
Ready to explore even more delicious ideas? Don’t forget to check out my easy Beef Bok Choy Stir Fry for a complete meal to accompany your sweet treat!
Chocolate Oat Cookie Ingredients
Unlock the secret to delicious cookies with just four essential ingredients!
For the Base
- Oats – Provide structure and heartiness; quick oats can create a smoother texture.
- Peanut Butter – Acts as a binding agent with rich flavor; almond butter is a great nut-free substitute.
- Honey – Offers natural sweetness and moisture; opt for maple syrup for a vegan alternative.
- Chocolate Chips – Add delightful bursts of sweetness; use dark chocolate for a richer taste or dairy-free chips for a vegan twist.
Step‑by‑Step Instructions for 4-Ingredient Chewy Chocolate Oat Cookies
Step 1: Preheat the Oven
Begin by preheating your oven to 350°F (175°C) and lining a baking sheet with parchment paper. This ensures that your cookies will bake evenly and release easily after they’re done. A properly preheated oven is crucial for the perfect texture, so give it about 10 minutes to reach the right temperature while you prepare the cookie dough.
Step 2: Mix the Ingredients
In a large mixing bowl, combine the oats, peanut butter, honey, and chocolate chips. Stir with a spatula or spoon until all ingredients are thoroughly mixed and sticky. You want to achieve a cohesive dough that can hold its shape but is still easy to scoop. This step is important for ensuring that your 4-ingredient chewy chocolate oat cookies come together beautifully.
Step 3: Scoop the Dough
Use a tablespoon or cookie scoop to portion out the dough onto your prepared baking sheet. Leave about two inches of space between each scoop to allow for spreading during baking. Aim for evenly-sized portions to ensure consistent cooking time across all your cookies. Your unbaked cookies should look plump and inviting, ready to hit the oven.
Step 4: Bake the Cookies
Place the baking sheet in your preheated oven and bake for 10–12 minutes. Watch for the edges to turn a light golden brown while the centers remain slightly soft, as they will continue to firm up while cooling. Avoid opening the oven door too often to maintain an even temperature; this will help achieve that perfect chewy texture in your chocolate oat cookies.
Step 5: Cool the Cookies
Once baked, remove the baking sheet from the oven and let the cookies cool on the sheet for about 5 minutes. This allows them to set properly and makes them easier to transfer. You’ll notice the cookies will still appear a little under-baked—this is ideal for maintaining a chewy texture which is the hallmark of these delightful 4-ingredient chewy chocolate oat cookies.
Step 6: Transfer to Wire Rack
After 5 minutes, gently transfer the cookies to a wire rack to cool completely. This final cooling step helps them develop their ideal texture—crisp on the edges and soft in the middle. Enjoy the mouthwatering aroma wafting through your kitchen as you watch them cool, knowing that your delicious batch of cookies is just moments away from being devoured!
Storage Tips for Chocolate Oat Cookies
Room Temperature: Store cookies in an airtight container at room temperature for up to 7 days. This will keep them fresh and chewy for whenever you need a sweet treat.
Fridge: If you prefer, you can also refrigerate the cookies, where they’ll stay fresh for about 10 days. Just make sure to keep them sealed to prevent them from drying out.
Freezer: For longer storage, freeze the cookies in a single layer on a baking sheet until solid, then transfer them to an airtight container or freezer bag. They’ll last up to 2 months.
Reheating: When ready to enjoy your frozen chocolate oat cookies, simply thaw them at room temperature or warm them in the microwave for about 10-15 seconds to bring back that fresh-baked taste!
Make Ahead Options
These 4-Ingredient Chewy Chocolate Oat Cookies are perfect for meal prep enthusiasts! You can mix the cookie dough up to 24 hours in advance and store it in an airtight container in the refrigerator. This method keeps the ingredients fresh and allows the flavors to meld beautifully. For an even longer option, pre-scoop the dough onto a baking sheet and freeze the individual portions for up to 3 months. Just transfer them to a baking sheet when you’re ready to bake and add a minute or two to the baking time. When it’s time to enjoy, simply bake the cookies straight from the freezer, and you’ll still have those chewy, delightful treats with minimal effort!
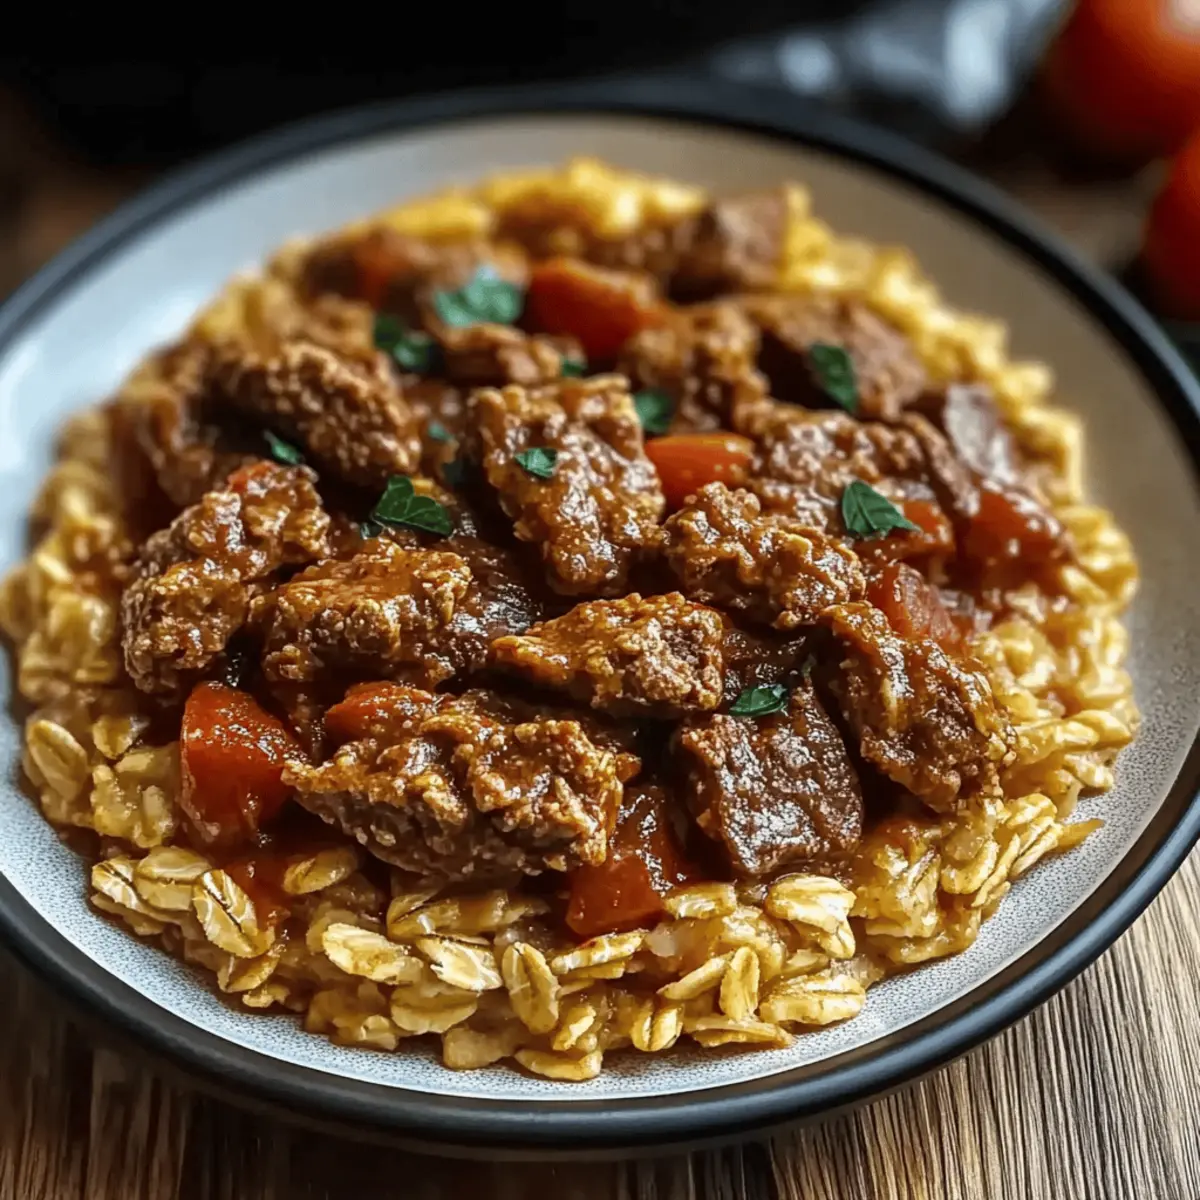
Beef Giouvetsi Recipe Variations
Feel free to get creative with this delightful Greek dish, and let your taste buds guide you!
-
Gluten-Free Pasta: Swap traditional orzo with gluten-free alternatives like quinoa or rice-based pasta for a hearty dish without gluten.
-
Vegetable Boost: Add chopped spinach or zucchini to the mixture during cooking for extra nutrients and a burst of color.
-
Herb Infusion: Toss in fresh herbs like parsley or dill for that vibrant, aromatic flavor that enhances every single bite.
-
Spicy Kick: For those who crave heat, incorporate chili flakes or a diced jalapeño to give your Beef Giouvetsi an exciting twist.
-
Tomato Version: Replace half of the beef broth with crushed tomatoes for a tangy flavor that melds beautifully with the stew.
For more ways to make the most of your cooking, you might enjoy preparing a comforting Cabbage Beef Bake alongside this dish!
-
Cheesy Delight: Sprinkle some feta or a blend of cheeses on top before serving for a delightful, creamy finish that takes this dish over the top.
-
Slow-Cooked Sensation: Try cooking this dish in a slow cooker for a few hours on low to deepen the flavors and tenderize the beef even more.
These simple swaps and additions keep your meals exciting, and you’ll find endless ways to love this classic recipe!
What to Serve with 4-Ingredient Chewy Chocolate Oat Cookies
Imagine sinking your teeth into chewy chocolate oat cookies, while pairing them with delightful sides that enhance their sweet charm.
-
Tall Glass of Milk: The classic duo! Creamy milk balances the sweetness of the cookies and creates a nostalgic experience.
-
Rich Coffee: A warm cup of coffee complements the sweetness perfectly, adding depth and enhancing the chocolatey flavors.
-
Fresh Berries: The tartness of strawberries or raspberries provides a refreshing contrast, adding a burst of freshness to each bite.
-
Yogurt Parfait: Layer these delicious cookies with creamy yogurt and some granola for a sweet yet wholesome breakfast treat, perfect to start your day.
-
Vanilla Ice Cream: Serve the cookies à la mode. The cold, creamy ice cream against the warm cookies creates an irresistible dessert experience.
-
Chocolate Drizzle: Add a dash of melted chocolate on top for extra indulgence, turning each cookie into a beautiful, decadent treat.
With these pairings, you’re sure to elevate your chocolate oat cookies into a memorable feast for friends and family!
Expert Tips for Chocolate Oat Cookies
-
Ingredient Quality: Use natural peanut butter for better binding and flavor. Avoid processed versions that can affect texture and taste.
-
Watch the Baking Time: Keep a close eye on the cookies in the oven. They should look slightly under-baked when pulled out to ensure a chewy center.
-
Cool Properly: Allow cookies to cool on the baking sheet for about 5 minutes before transferring to a wire rack; this helps them set without crumbling.
-
Consistent Sizing: Scoop the cookie dough in uniform sizes to ensure even baking. Using a cookie scoop can help you achieve this effortlessly.
-
Storage Tips: Store leftover cookies in an airtight container at room temperature for up to a week, or freeze them for later enjoyment to keep them fresh.
Remember, with these expert tips, your 4-ingredient chocolate oat cookies will be a hit every time!

Chocolate Oat Cookies Recipe FAQs
How do I choose the right oats for this recipe?
Absolutely! For the best texture, use rolled oats, as they provide a lovely chew. If you’re looking for a smoother cookie, quick oats are a great substitute. Just be sure you pick gluten-free oats if you need them to be entirely gluten-free, as regular oats can sometimes be cross-contaminated.
How should I store my chocolate oat cookies?
To keep your cookies fresh, store them in an airtight container at room temperature for up to 7 days. If you want to extend their shelf life, consider refrigerating them, where they’ll last about 10 days. Just remember to keep them sealed to maintain their chewy goodness!
Can I freeze chocolate oat cookies?
Absolutely! To freeze your cookies, start by laying them in a single layer on a baking sheet and place them in the freezer until solid—about 1 to 2 hours works wonders. Once frozen, transfer them to an airtight container or zip-top freezer bag and store them for up to 2 months. When you’re ready to enjoy, simply thaw them at room temperature or warm them in the microwave for about 10-15 seconds!
What if my cookies turn out too dry or crumbly?
If your cookies end up too dry, they might have been baked a tad too long. Keep an eye on them in the oven, aiming for a slight under-bake for that chewy, gooey center we all crave. If this happens next time, consider adding a sprinkle of water to your dough, or slightly increasing the peanut butter for extra moisture.
Are these cookies suitable for those with nut allergies?
Very! You can easily make these cookies nut-free by swapping the peanut butter for sunflower seed butter or a soy nut butter. Just be sure to read ingredient labels carefully to ensure there are no cross-contamination issues if allergies are a concern.
Can I use different sweeteners instead of honey?
Absolutely! If you want a vegan-friendly alternative, maple syrup is an excellent choice that will impart a lovely flavor, too. You could also experiment with agave nectar or coconut nectar, adjusting the amount slightly as these are typically a bit more liquid than honey. Just keep in mind that each sweetener might slightly alter the texture!

Savory Beef Giouvetsi Recipe That Wows with Every Bite
Ingredients
Equipment
Method
- Preheat your oven to 350°F (175°C).
- In a large pot, heat olive oil over medium heat and sauté onions until translucent.
- Add minced garlic and beef, cooking until browned.
- Stir in thyme, oregano, salt, and pepper, followed by beef broth.
- Bring to a boil, then reduce heat and add orzo.
- Cover and let simmer for 20 minutes or until orzo is tender.
- Transfer mixture to a baking dish and bake for 30 minutes.
- Let it cool slightly before serving.
Leave a Reply