
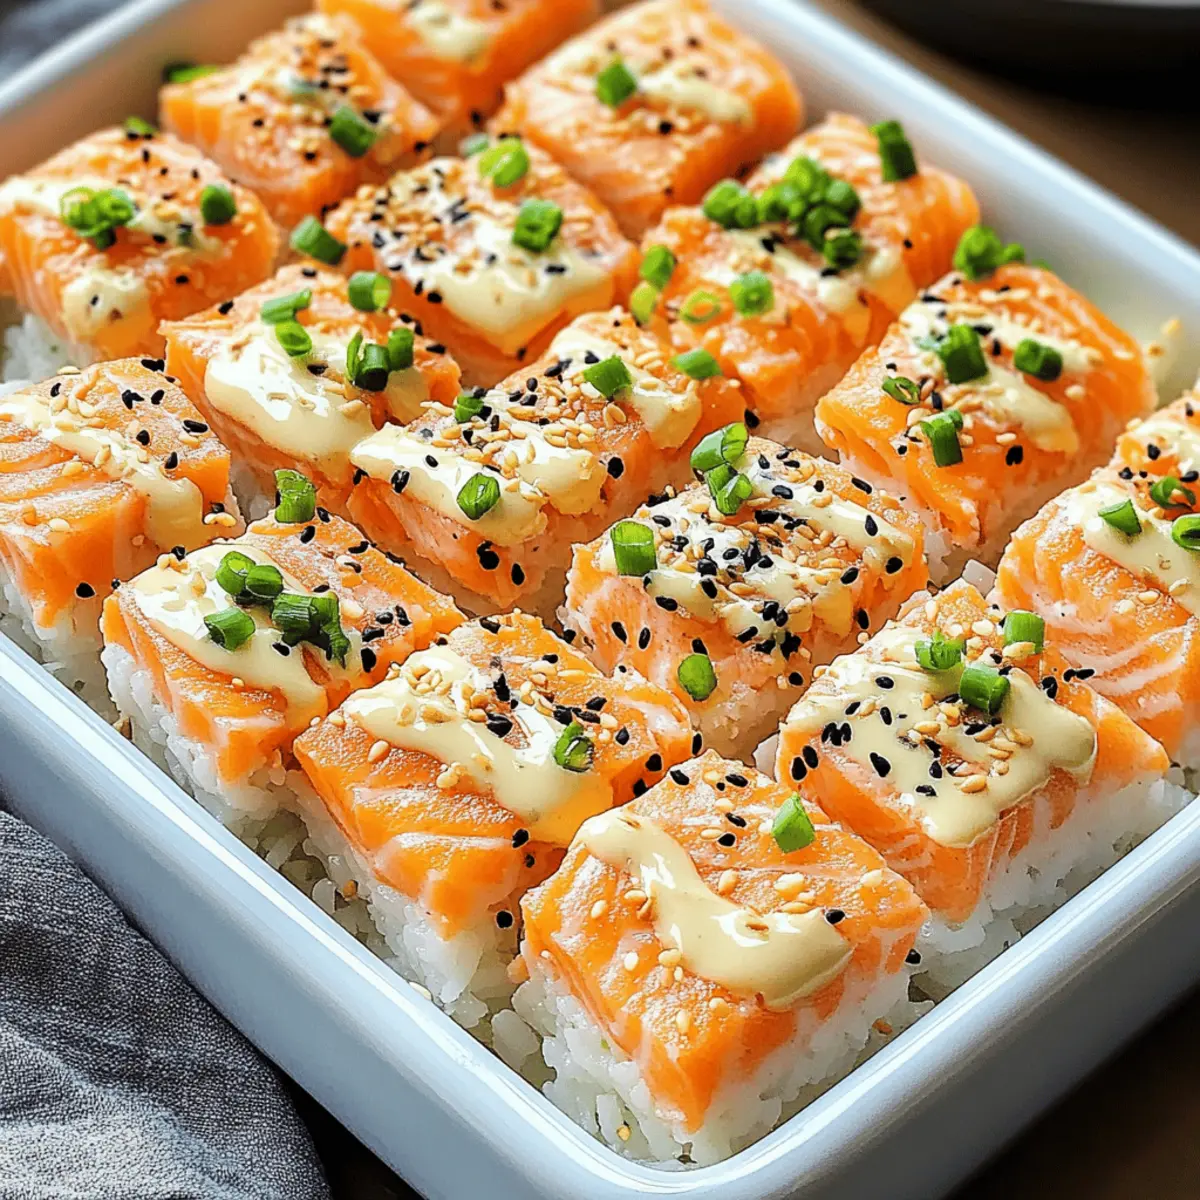
Sinking my teeth into a warm, creamy Salmon Sushi Bake is nothing short of a culinary hug. This delightful comfort food beautifully marries the richness of salmon with a hint of sriracha and the satisfying bite of vinegared sushi rice, topped with a sprinkle of furikake for that umami kick. What I love most about this dish is how effortlessly it accommodates different tastes—whether you’re serving a family craving a cozy dinner or entertaining friends with a unique spin on sushi. Plus, it’s not only quick to whip up, but it also opens the door to endless variations, making it a budget-friendly option that’s perfect for anyone looking to escape the fast-food grind. Are you curious to discover how to bring this delicious dish to life?
Why You’ll Adore This Salmon Sushi Bake?
Simplicity at Its Best: The Salmon Sushi Bake is a breeze to make, with straightforward steps and basic ingredients.
Customizable Flavor Profiles: You can easily adjust spice levels and ingredients, whether you go for the classic recipe or try variations like a Spicy Tuna Sushi Bake, offering delightful options for everyone.
Comforting Creaminess: Each bite combines a luscious, creamy texture with savory salmon and umami-rich furikake, creating an indulgent experience for your taste buds.
Perfect for Family Dinners: This dish is kid-friendly and makes for an easy, crowd-pleasing option when hosting friends, ensuring everyone leaves satisfied.
Quick Preparation: It requires minimal time to prep, making mealtime stress-free—a great escape from the fast-food routine.
Ready to enjoy this delightful twist on a classic? Pair it with refreshing sides or even Savory Salmon Tartare for a complete dining experience!
Salmon Sushi Bake Ingredients
Dive into the world of flavors with our Salmon Sushi Bake!
For the Base
- Skinless Salmon Fillet – Provides the main protein and savory flavor; use leftover grilled salmon or canned salmon for convenience.
- Cooked Sushi Rice – Forms the comforting foundation of the dish; substitute with cauliflower rice for a low-carb option.
- Seasoned Rice Vinegar – Adds tang that elevates the rice; regular rice vinegar can replace it with a bit of sugar and salt to enhance flavor.
For the Creamy Mixture
- Kewpie Mayonnaise – A creamy, slightly sweet ingredient essential for the authentic taste; regular mayonnaise works as a suitable alternative.
- Sriracha – Adds spice and color, adjust according to your heat preference for the perfect balance.
- Soy Sauce – Introduces umami depth; opt for gluten-free soy sauce if needed.
- Chopped Green Onions – Provides a fresh crunch; feel free to omit for a simpler flavor.
- Diced Cucumber – Contributes a crisp texture; diced bell peppers can be a great substitute.
- Cream Cheese – Acts as a delicious creamy binder; swap for dairy-free cream cheese to meet vegan needs.
- Furikake Seasoning – Adds an essential umami kick; it’s optional, but highly recommended for a truly authentic flavor.
For Serving
- Roasted Seaweed (nori) – Perfect for scooping up the bake; lettuce leaves can be a low-carb alternative.
- Optional Toppings – Enhance the dish’s flavor and presentation with avocado slices or a drizzle of unagi sauce.
Get ready to enjoy crafting this Salmon Sushi Bake—a comforting dish that will bring smiles to your family’s faces!
Step‑by‑Step Instructions for Salmon Sushi Bake
Step 1: Preheat the Oven
Begin by preheating your oven to 400°F (200°C). This step is crucial as it ensures that your Salmon Sushi Bake cooks evenly and achieves that delightful golden top. While the oven heats up, gather your ingredients to have everything ready for assembly, making the cooking process smoother.
Step 2: Bake the Salmon
Place your skinless salmon fillet on a foil-lined baking sheet, ensuring it’s well spaced out. Bake the salmon in the preheated oven for about 12-15 minutes, or until it flakes easily with a fork. Once done, remove it from the oven and let it cool slightly before flaking it into a bowl to mix with other ingredients.
Step 3: Prepare the Sushi Rice
While the salmon bakes, mix the cooked sushi rice with seasoned rice vinegar in a large bowl. Stir well until all the rice is coated and fluffy; this will give your dish a tasty, tangy undertone. Once combined, layer the seasoned rice evenly in an 8×8-inch greased baking dish, pressing it down gently for a compact base.
Step 4: Combine the Creamy Mixture
In a separate bowl, mix the flaked salmon with Kewpie mayonnaise, sriracha, soy sauce, chopped green onions, diced cucumber, and cream cheese. Stir thoroughly until everything is well incorporated, creating a deliciously creamy filling for your Salmon Sushi Bake. The colors and aromas should be inviting at this stage!
Step 5: Assemble the Bake
Spread the creamy salmon mixture evenly over the sushi rice layer in your baking dish. Use a spatula to smooth it out and ensure an even distribution of flavors. Sprinkle furikake seasoning generously on top for that signature umami kick, adding a touch of brilliance to your Salmon Sushi Bake.
Step 6: Bake Again
Place the assembled dish back in the oven and bake for an additional 10 minutes. Keep an eye on it; you want the top to be warmed through and slightly golden. The delightful aroma will fill your kitchen, whetting everyone’s appetite while you await the finished dish.
Step 7: Garnish and Serve
Once out of the oven, let your Salmon Sushi Bake cool for a minute before garnishing it with fresh avocado slices and a drizzle of unagi sauce or extra sriracha for added flavor. Serve it warm alongside nori squares for scooping—a delightful presentation that invites everyone to dig into this comforting dish.

Salmon Sushi Bake Variations & Substitutions
Elevate your Salmon Sushi Bake by adding your personal touch—let your culinary creativity shine!
-
Spicy Tuna Sushi Bake: Replace the salmon with fresh or canned tuna for a flavorful twist. It’s a great way to change things up while keeping that comforting texture intact.
-
Shrimp Tempura Bake: Use chopped cooked shrimp instead of salmon, offering a delightful crunch and seafood flavor you’ll love. This variation adds a completely new dimension to your sushi bake.
-
Vegetarian Sushi Bake: Swap out seafood for seasoned tofu, mushrooms, and edamame for a delicious plant-based version. Perfect for family members who prefer a meat-free meal without sacrificing taste!
-
Low-Carb Sushi Bake: Replace traditional sushi rice with cauliflower rice or a mix of riced vegetables for a healthier, low-carb option. You won’t even miss the carbs with all the creamy goodness!
-
Keto-Friendly: For a completely keto experience, use cream cheese as the base and swap rice for riced cauliflower mixed with cheese. A satisfying option for those looking to cut down on carbs without losing flavor.
-
Add a Flavor Burst: Incorporate ingredients like jalapeños or pickled ginger into your creamy salmon mix for an extra zing. A little added kick can take your dish to the next level!
-
Layer with Vegetables: Toss in cooked spinach or shredded carrots in your salmon mixture for added nutrition and color. It’s an excellent way to sneak in more veggies for the little ones!
Explore these fun variations, and when you’re ready for another flavorful journey, try pairing it with Bang Bang Salmon for an exciting meal experience!
What to Serve with Salmon Sushi Bake
Sinking into a comforting meal doesn’t get easier than with this warm, creamy delight, perfect for your family or friends.
-
Crispy Edamame: These lightly salted, tender green beans provide a delightful crunch and added protein, balancing out the creamy textures of the bake.
-
Miso Soup: The warmth and umami of miso soup create a soothing harmony with the rich flavors of the bake, enhancing your overall dining experience.
-
Seaweed Salad: This refreshing salad offers a tangy taste and a gentle chew, making it a perfect companion, while also providing a burst of nutrients.
-
Pickled Vegetables: A plate of assorted pickles adds a zesty crunch that cuts through the dish’s richness, awakening the palate and bringing additional flavor dimensions.
-
Sautéed Bok Choy: The tender, slightly bitter greens contrast beautifully with the creamy bake, bringing a burst of freshness and excellent texture to your meal.
-
Chilled Sake: For a delightful pairing, a glass of chilled sake enhances the flavors of the dish—try a fruity junmai or a floral ginjo for a refreshing sip.
-
Dessert Option: Conclude your meal with a sweet touch, like mochi ice cream, which offers a delightful chewy texture that echoes the sushi theme, while satisfying your sweet tooth.
Adding these delightful sides and sips will elevate your Salmon Sushi Bake experience to something truly extraordinary!
How to Store and Freeze Salmon Sushi Bake
Fridge: Store leftovers in an airtight container for up to 3 days. Make sure it’s completely cooled before sealing to maintain the creamy texture.
Freezer: For longer storage, freeze the bake in portions wrapped tightly in plastic wrap and then in foil for up to 2 months. Thaw overnight in the fridge before reheating.
Reheating: Reheat in the oven at 350°F (175°C) for 15-20 minutes or until warmed through. Alternatively, microwave individual portions for 2-3 minutes, stirring halfway to heat evenly.
Make-Ahead: Feel free to prepare the salmon mixture and sushi rice up to a day in advance. Store them separately in the fridge and assemble just before baking for a fresh taste.
Make Ahead Options
These Salmon Sushi Bake instructions are perfect for busy home cooks looking to streamline their meal prep! You can prepare the sushi rice, mix it with seasoned rice vinegar, and chill it up to 24 hours in advance, ensuring your flavors blend beautifully. Additionally, the creamy salmon mixture can be assembled and stored in the fridge for up to 3 days, preventing any loss in quality. Just remember to cover the dish tightly to keep it fresh. When you’re ready to serve, simply layer the salmon mixture over the chilled rice and bake as directed—this will yield just as delicious results, saving you precious time on busy weeknights!
Expert Tips for Salmon Sushi Bake
-
Use Fresh Salmon: Choose the freshest skinless salmon fillet for the best flavor and texture. Avoid overcooking; it should flake easily without being dry.
-
Layer Evenly: Spread the sushi rice and salmon mixture uniformly to ensure each bite is bursting with flavor, avoiding dry spots and uneven taste.
-
Adjust Spice Levels: Consider the preferences of your guests, especially kids. Start with less sriracha and add more for those who enjoy a kick; this ensures the Salmon Sushi Bake is enjoyable for everyone.
-
Use Quality Rice: Sushi rice is essential for that authentic texture. If you’re using cauliflower rice as a substitute, ensure it’s well-seasoned to maintain the dish’s integrity.
-
Let It Rest: After baking, allow your Salmon Sushi Bake to sit for a couple of minutes before serving. This helps the flavors meld and makes it easier to scoop with nori.
-
Explore Variations: Don’t hesitate to try different fillings, such as shrimp or veggies, to suit your family’s taste preferences. The versatility of the Salmon Sushi Bake makes it a fun and customizable dish!
Salmon Sushi Bake Recipe FAQs
What type of salmon should I use for the Salmon Sushi Bake?
Absolutely! Fresh skinless salmon fillets are recommended for the best flavor and texture; however, leftover grilled salmon or canned salmon work perfectly as convenient alternatives. Just ensure that the salmon is cooked through before adding it to your bake for that ideal creamy consistency.
How should I store leftover Salmon Sushi Bake?
Leftovers can be stored in an airtight container in the refrigerator for up to 3 days. Make sure to let it cool completely before sealing it up to keep its creamy texture intact. If you find yourself with more leftovers than you can eat, it’s a wonderful dish that freezes beautifully!
Can I freeze Salmon Sushi Bake?
Certainly! To freeze, portion your Salmon Sushi Bake into individual servings and wrap each portion tightly in plastic wrap, followed by foil to prevent freezer burn. It will keep well in the freezer for up to 2 months. Just remember to thaw overnight in the fridge before reheating for the best results!
How can I reheat Salmon Sushi Bake without drying it out?
Reheat gently in the oven at 350°F (175°C) for about 15-20 minutes, covered with foil to maintain moisture. Alternatively, you can microwave individual portions for 2-3 minutes, but stir halfway through to ensure even heating. This way, you’ll revive that wonderful creamy texture without making it dry!
Is the Salmon Sushi Bake gluten-free?
Yes! You can easily make it gluten-free by using gluten-free soy sauce in the recipe. For those with allergies, always check that all your other ingredients, like the mayonnaise and furikake, are labeled gluten-free as well. This dish is fully adaptable for dietary needs, so everyone can enjoy it!
What are some common troubleshooting tips for this recipe?
If your Salmon Sushi Bake isn’t turning out as expected, one common issue might be uneven baking. Make sure to layer your ingredients evenly, and always check that your salmon is fully cooked through and flaky before mixing. If you’re adjusting spice levels, start small and add gradually; it’s easier to add heat than to tone it down!

Savory Salmon Sushi Bake for Effortless Family Comfort
Ingredients
Equipment
Method
- Preheat your oven to 400°F (200°C).
- Place your skinless salmon fillet on a foil-lined baking sheet and bake for about 12-15 minutes, or until it flakes easily.
- Mix the cooked sushi rice with seasoned rice vinegar in a large bowl and layer it evenly in an 8x8-inch greased baking dish.
- Combine the flaked salmon with Kewpie mayonnaise, sriracha, soy sauce, chopped green onions, diced cucumber, and cream cheese in a separate bowl.
- Spread the creamy salmon mixture over the sushi rice layer in your baking dish and sprinkle furikake seasoning on top.
- Bake the assembled dish for an additional 10 minutes.
- Let cool for a minute before garnishing with avocado slices and unagi sauce, then serve warm with nori squares.
Leave a Reply