
As I flipped through my fridge, a rainbow of fresh vegetables caught my eye, and just like that, I was inspired to whip up a quick, satisfying meal: Grilled Veggie Wraps Recipe! These delightful wraps are a canvas for whatever crispy goodness you have on hand, making them not only customizable but also a perfect fit for vegans and vegetarians alike. You’ll marvel at how effortlessly you can incorporate healthy, vibrant ingredients into your day. Plus, with their light yet filling nature, they make for a fantastic lunch or dinner option that won’t leave you feeling weighed down. Curious to see how to create this colorful dish that’s both nutritious and oh-so-simple to prepare? Let’s dive into the delicious details!
Why Make Grilled Veggie Wraps?
Flavorful, Healthy Delight: Packed with colorful veggies, this recipe transforms ordinary produce into a robust dish that tantalizes your taste buds.
Quick and Easy: Perfect for busy days, these wraps can be assembled in minutes, making them an ideal choice for lunch or dinner.
Customizable to Your Taste: Swap in seasonal veggies or your favorite spreads for a unique twist each time you make it!
Great for Everyone: Whether you’re a vegan, vegetarian, or just looking for a healthy option, these wraps cater to all dietary preferences without sacrificing flavor.
Crowd-Pleasing Appeal: Serve them alongside a side salad or some sweet potato fries for an inviting meal that everyone will love! If you’re in the mood for more light and filling recipes, check out my Cajun Grilled Chicken or Cozy Chicken Veggies!
Grilled Veggie Wraps Recipe Ingredients
For the Wraps
• Tortillas – 4 large whole wheat or flour tortillas serve as the sturdy base for your flavorful wraps.
For the Vegetables
• Bell Peppers – 1 red, 1 yellow, and 1 green, sliced into strips to add a delightful sweetness and vibrant color. Any color bell pepper can be used for variety!
• Zucchini – 1 large, cut into thin rounds; this adds moisture and a mild flavor. You can easily substitute it with squash if desired.
• Red Onion – 1 medium, sliced into rings, providing a sharp and crunchy bite. Swap with yellow onion for a gentler sweetness.
• Mushrooms – 1 cup of button or cremini, sliced; their umami richness enhances the overall flavor. For a heartier crunch, use portobello mushrooms.
For the Freshness
• Spinach or Arugula – 2 cups of fresh leaves contribute a burst of freshness and lightness; feel free to use any leafy green you prefer.
• Avocado – 1 ripe, sliced, delivering creamy richness that pairs beautifully with the veggies; tahini can be a fantastic nutty substitute for a vegan option.
Flavor Enhancers
• Garlic – 2 cloves, minced for a fragrant kick that elevates the taste; garlic powder is a great alternative if fresh isn’t on hand.
• Olive Oil – 2 tablespoons to help grill the vegetables and infuse them with flavor; avocado oil works as a higher smoke point substitute.
• Balsamic Vinegar – 1 tablespoon adds a tangy sweetness to balance the savory notes; you can swap it for lemon juice for a brighter twist.
• Cumin and Paprika – 1 teaspoon each for a warm, complex depth; try using smoked paprika for a touch of smokiness.
• Salt and Pepper – to taste, essential for enhancing all flavors in the wrap.
For Spreading & Finishing Touches
• Hummus (optional for vegans) or Greek Yogurt (optional for vegetarians) – spread on tortillas for added moisture and flavor; feel free to use any preferred spread, like tahini.
• Cheese – 1 cup of crumbled feta or goat cheese (optional for vegetarians) adds a tangy, creamy element; simply omit for a vegan delight.
Let’s get cooking and transform these vibrant ingredients into delicious Grilled Veggie Wraps that everyone will rave about!
Step‑by‑Step Instructions for Grilled Veggie Wraps Recipe
Step 1: Preheat the Grill
Start by preheating your grill to medium-high heat, around 400°F (200°C). This essential step ensures your vegetables will have a beautiful char and cook evenly. While waiting for the grill to heat up, gather your fresh ingredients and equipment, including a large bowl to toss the veggies.
Step 2: Prepare the Vegetable Mixture
In a large bowl, combine your sliced bell peppers, zucchini rounds, red onion rings, and mushrooms. Drizzle with olive oil, add minced garlic, balsamic vinegar, and sprinkle salt, pepper, cumin, and paprika. Toss everything until the vegetables are well coated with the marinade, ensuring each piece is flavorful and ready for grilling.
Step 3: Grill the Vegetables
Place the coated vegetable mixture directly on the preheated grill grates. Grill for 4 to 5 minutes per side, flipping until they are tender and have nice grill marks. Keep an eye on them to prevent excessive charring, and once done, remove the veggies from the grill and let them rest for a moment to retain their vibrant colors and flavors.
Step 4: Warm the Tortillas
While the grilled veggies are cooling slightly, warm your tortillas. Place them on the grill for about 30 seconds on each side or until they are pliable and slightly toasted. This simple step will enhance their flavor and make them easier to roll.
Step 5: Assemble the Wraps
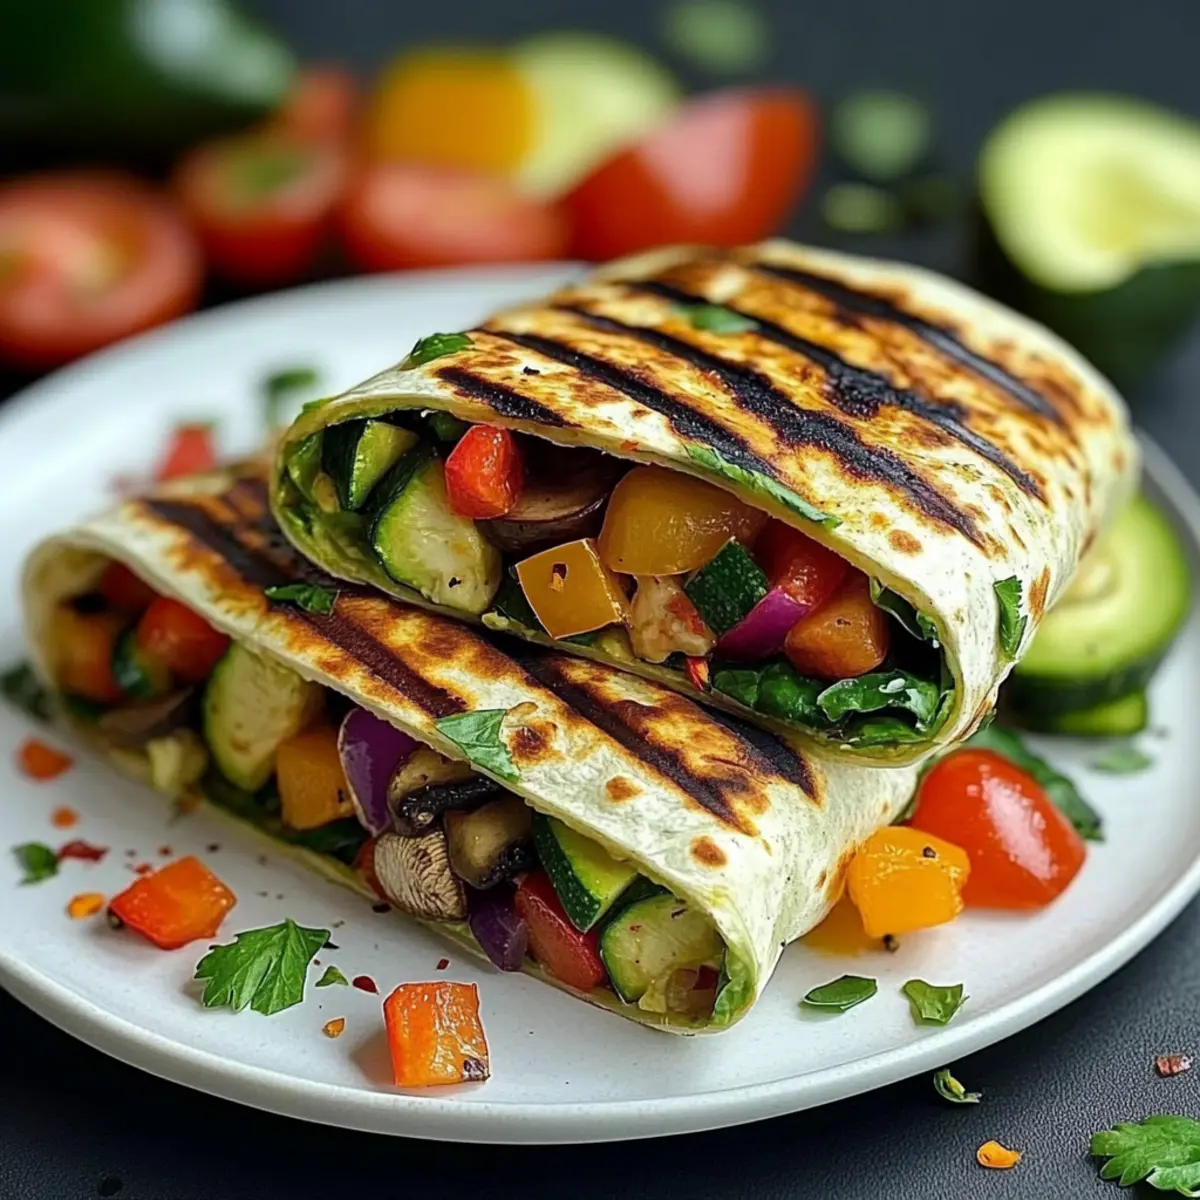
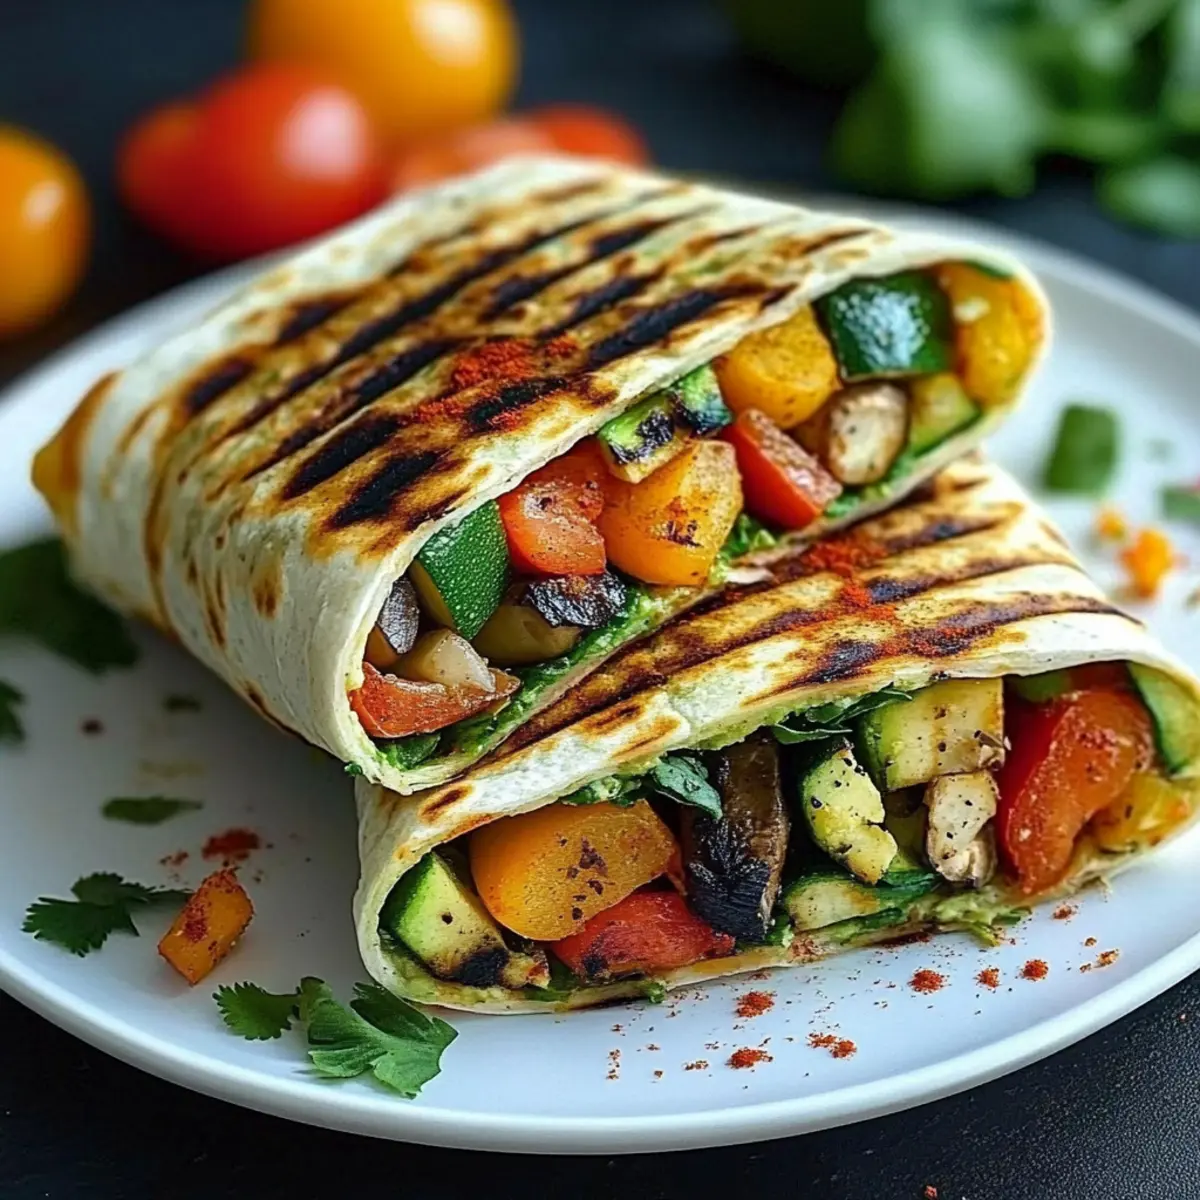
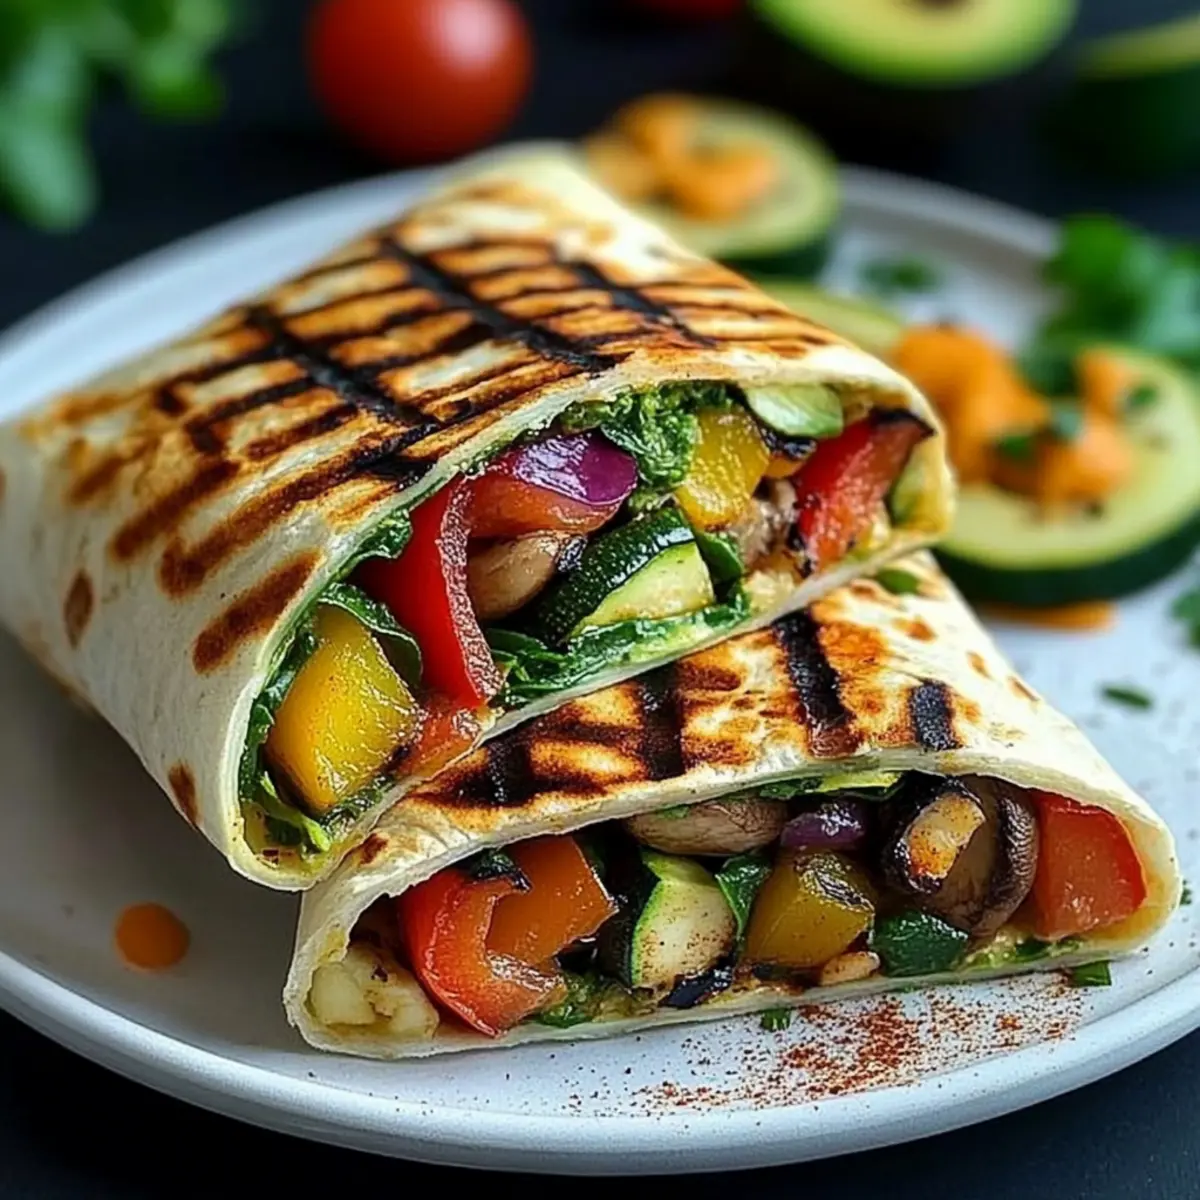
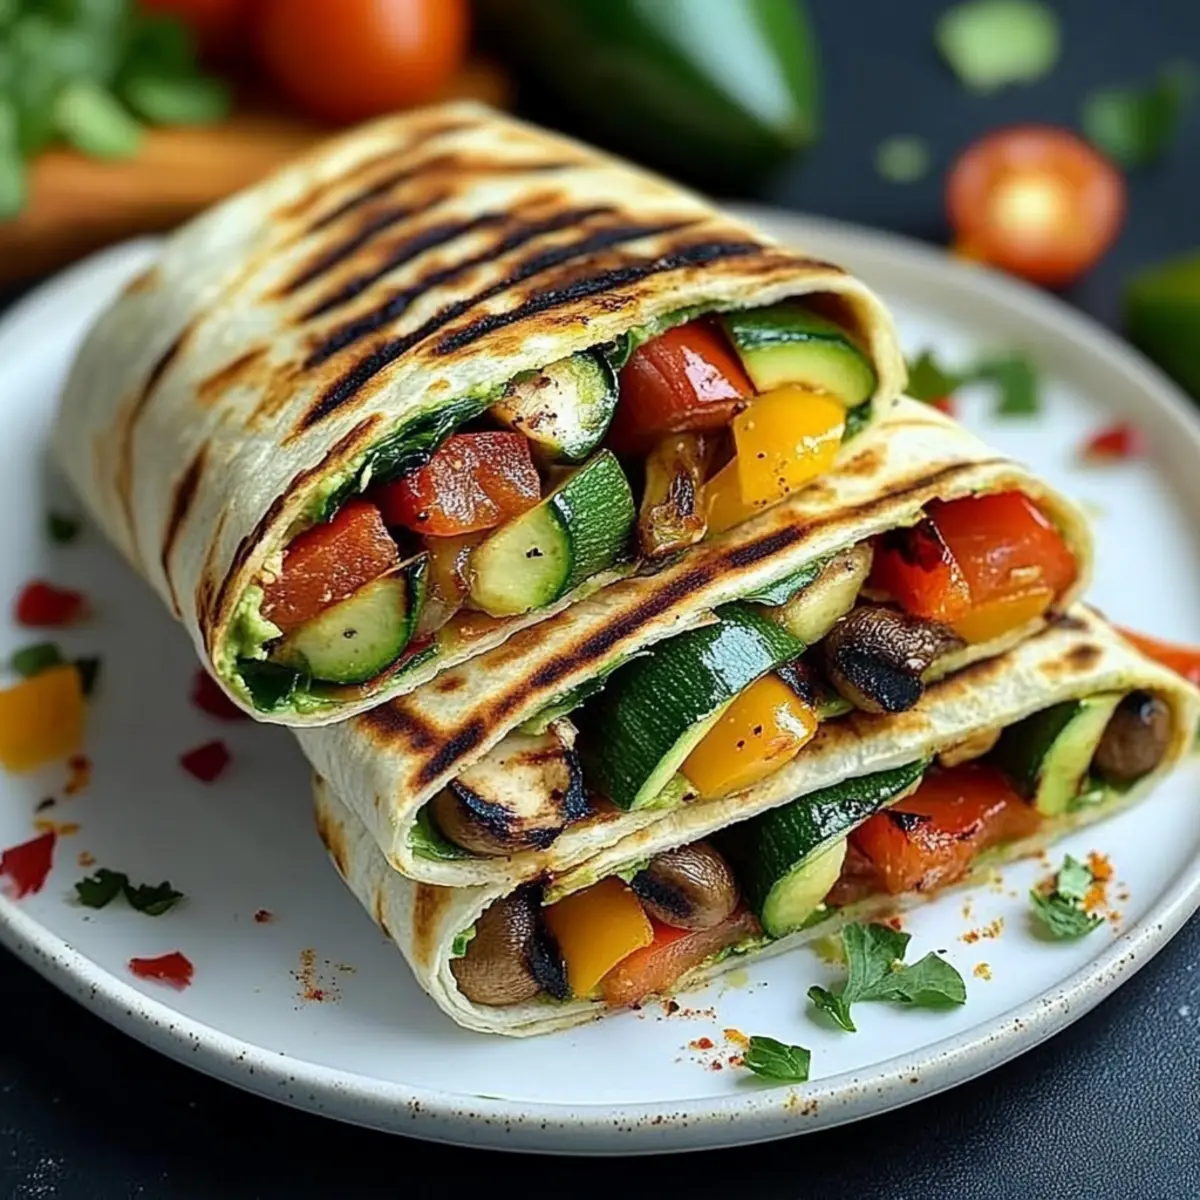
Now it’s time to create your Grilled Veggie Wraps! Spread a generous amount of hummus or Greek yogurt onto each tortilla. Layer with a handful of fresh spinach or arugula, followed by a generous portion of the grilled veggies and slices of creamy avocado for that perfect finish.
Step 6: Roll and Serve
Once your ingredients are beautifully layered, roll each tortilla tightly, tucking in the sides as you go. Slice the wrap in half for easier handling, and serve them immediately while warm. These Grilled Veggie Wraps are not only colorful but also packed with nutrients that everyone will enjoy!
How to Store and Freeze Grilled Veggie Wraps
Fridge: Wrap tightly in foil or place in an airtight container; they’ll stay fresh for up to 2 days. Reheat in a skillet or microwave before enjoying.
Freezer: If you want to freeze your wraps, make sure to wrap them individually in plastic wrap and then place in a freezer bag; they can be stored for up to 1 month.
Reheating: When ready to enjoy, thaw overnight in the fridge if frozen, then reheat in a skillet or wrap in foil and place in a preheated oven for about 10–15 minutes.
Make-Ahead Tip: Preparing these Grilled Veggie Wraps ahead of time is a great option; they are perfect for quick meals on busy days!
What to Serve with Grilled Veggie Wraps?
Round out your meal with delightful pairings that enhance the colorful flavors of your grilled veggie wraps.
-
Crispy Sweet Potato Fries: These savory bites add a satisfying crunch that complements the soft wraps beautifully. Plus, their slight sweetness offers a contrast that tantalizes the palate!
-
Mixed Green Salad: A fresh salad with a tangy vinaigrette cuts through the richness of avocado, providing a light and healthy side that balances the meal perfectly.
-
Quinoa Salad: Packed with protein, this nutty salad adds texture and depth. Tossed with lemon and herbs, it complements the grilled veggies nicely while enhancing the dish’s nutritional profile.
-
Roasted Chickpeas: Crunchy, flavorful chickpeas bring a delightful crunch to your meal. Seasoned with smoked paprika or cumin, they echo the spices in the wraps, creating harmonious flavors.
-
Fresh Fruit Skewers: Bright and juicy fruit skewers offer a refreshing palate cleanser. Their natural sweetness can balance the savory elements of the wraps, making for a perfectly rounded meal experience.
-
Chilled Cucumber Soup: This light and refreshing soup cools the senses and pairs well with the warm grilled wraps, providing a delightful contrast in temperature.
-
Herbal Iced Tea: A refreshing beverage with mint or basil will uplift your meal, making every bite of your grilled veggie wraps feel even more vibrant.
-
Dark Chocolate Mousse: For dessert, a creamy chocolate mousse can be the perfect luxurious finish. Its richness enhances the lightness of the wraps, leaving everyone satisfied after the meal.
Make Ahead Options
These Grilled Veggie Wraps are perfect for busy meal prep enthusiasts! You can prepare the grilled vegetable mixture up to 3 days in advance. Simply grill the veggies as directed, let them cool, and then store them in an airtight container in the refrigerator. The tortillas can also be warmed and wrapped, keeping them soft for up to 24 hours when stored in a separate airtight container. When you’re ready to serve, just spread your hummus or Greek yogurt on the tortillas, add the cold grilled veggies and fresh avocado, roll them up, and enjoy delicious wraps that are still just as flavorful and vibrant!
Grilled Veggie Wraps Recipe Variations
Dive into a world of flavors and customize your grilled veggie wraps to embody your tastes and preferences!
- Seasonal Swaps: Replace veggies with seasonal offerings like roasted carrots, asparagus, or butternut squash for a twist.
- Creamy Alternatives: Swap hummus or Greek yogurt for a rich tzatziki or a zesty spicy salsa to elevate the flavors.
- Protein Packed: Add cooked quinoa, chickpeas, or lentils to your wraps for an extra punch of protein and heartiness.
- Spice it Up: Incorporate fresh herbs like basil or cilantro, or sprinkle in red pepper flakes for added heat.
- Dairy-Free Delight: For a vegan option, omit cheese and try a cashew cream or nutritional yeast for that cheesy essence.
- Smoky Notes: Experiment with smoked paprika or chipotle powder for enhanced depth and a delightful smoky bite.
- Flavorful Greens: Switch out spinach or arugula with kale or cabbage for an added crunch and distinct flavor profile.
- Wrap It Right: Explore different tortillas like spinach, sundried tomato, or gluten-free varieties to enhance presentation and taste.
These variations are designed to inspire creativity and ensure your grilled veggie wraps remain exciting with every bite! If you’re looking for different flavor profiles, try out my Grilled Cowboy Butter Chicken or bring in new flavors with Grilled Chimichurri Chicken!
Expert Tips for Grilled Veggie Wraps
Even Slicing: Ensure all vegetables are sliced evenly for uniform cooking. This helps each ingredient grill perfectly without any undercooked or burnt pieces.
Grill Watch: Keep an eye on the veggies while grilling to prevent excessive charring. You want that delicious char flavor, not burnt bits in your Grilled Veggie Wraps recipe!
Flavor Boost: For added protein, consider including cooked quinoa or chickpeas in the wrap. They not only enhance nutrition but also add a satisfying texture.
Wrap Storage: If making ahead, wrap tightly in foil before storing in the fridge for up to 2 days. This keeps them fresh and ready to grab for meals!
Vegetable Swap: Feel free to swap in seasonal vegetables based on what’s available or your preferences. Broccoli or roasted carrots can bring a delightful twist to your wraps!
Grilled Veggie Wraps Recipe FAQs
How do I select ripe vegetables for my Grilled Veggie Wraps?
Absolutely! Look for bell peppers that are firm and glossy, free of dark spots or blemishes. A ripe avocado should yield slightly when gently squeezed but should not feel mushy, indicating perfect creaminess when sliced. For zucchini, choose ones that are firm with smooth skin, avoiding those with soft spots.
What are the best storage methods for leftover Grilled Veggie Wraps?
Very! To store your wraps in the fridge, wrap them tightly with foil or place them in an airtight container. They will stay fresh for up to 2 days. If you’re looking to make them ahead, I often prepare them in advance and just reheat when ready to eat! Just remember that reheating in a skillet or microwave helps retain their vibrant flavors.
Can I freeze Grilled Veggie Wraps? If so, how?
Yes, you can! To freeze, individually wrap each assembled wrap in plastic wrap and then place them in a heavy-duty freezer bag. This way, they can last for up to 1 month. When you’re ready to enjoy them, simply thaw in the fridge overnight, then reheat in a skillet or wrap in foil and bake in a preheated oven at 350°F (175°C) for about 10–15 minutes.
What should I do if the veggies in my Grilled Veggie Wraps are overcooked?
Don’t worry, it happens even to the best of us! If you find your veggies are too soft, simply chop them into smaller pieces and incorporate them into a salad or grain bowl instead. Next time, keep a close eye on them while grilling to achieve that perfect char without losing texture!
Are there any dietary considerations I should keep in mind when making Grilled Veggie Wraps?
Good question! For those with allergies, ensure to check for sensitivities to ingredients like garlic or dairy if using cheese. Also, for a nut-free version, be cautious with any spreads or toppings that may contain nuts. The great thing is the recipe is easily adaptable; you can easily omit or substitute any ingredient to fit various dietary needs.
Can I substitute ingredients in the Grilled Veggie Wraps?
Absolutely! The wraps are wonderfully customizable. You can swap any veggie based on what’s in season or your preference—try roasted carrots or sweet potatoes for a different flavor profile! Additionally, feel free to change up the spreads or even the type of cheese to make the recipe uniquely yours.
Grilled Veggie Wraps Recipe: A Flavorful, Healthy Delight
Ingredients
Equipment
Method
- Preheat your grill to medium-high heat, around 400°F (200°C).
- In a large bowl, combine sliced bell peppers, zucchini rounds, red onion rings, and mushrooms. Drizzle with olive oil, add minced garlic, balsamic vinegar, and sprinkle with salt, pepper, cumin, and paprika. Toss to coat the vegetables.
- Place the coated vegetable mixture directly on the grill. Grill for 4 to 5 minutes per side, flipping until tender and marked. Remove and let rest.
- Warm your tortillas on the grill for about 30 seconds on each side until pliable.
- Spread hummus or Greek yogurt on each tortilla. Layer with fresh spinach or arugula, grilled veggies, and creamy avocado.
- Roll each tortilla tightly, slice in half, and serve immediately.
Leave a Reply