
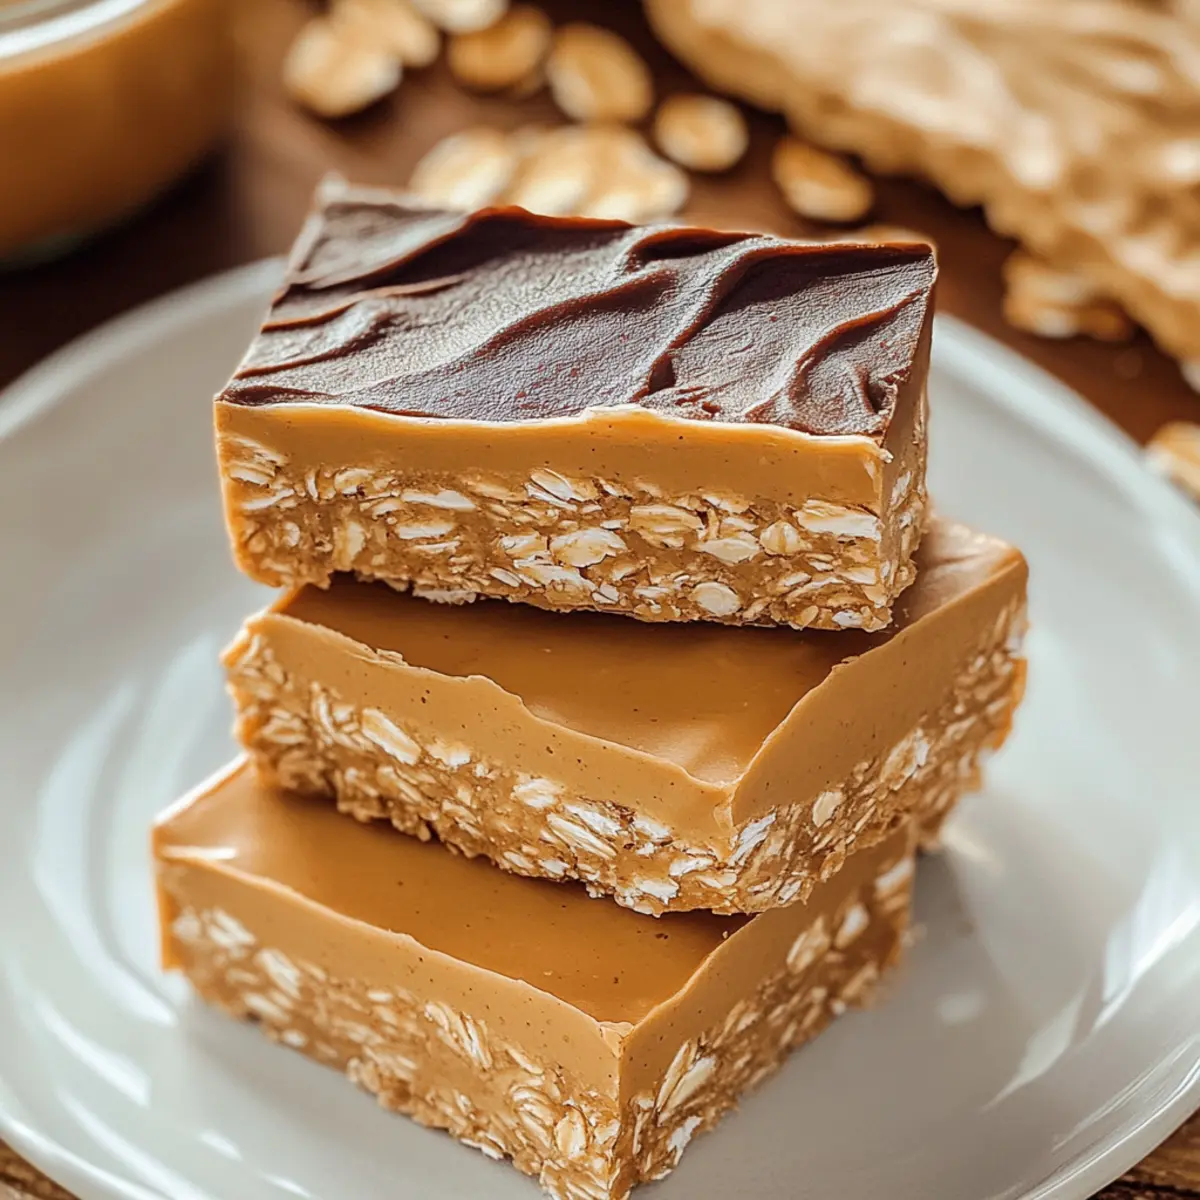
As I stood in my kitchen on a lazy afternoon, the sweet, nutty aroma of peanut butter wafted through the air, instantly lifting my mood. That’s when I stumbled upon the idea for these No-Bake Peanut Butter Protein Bars—a delightful fusion of simplicity and nutrition. With just four ingredients, this recipe is perfect for anyone seeking a quick snack that’s high in protein and low in sugar. Not only are these bars an easy treat to whip up, but they also allow for endless customization, making them the ultimate solution for your snack cravings. Picture indulging in a delicious, chewy treat that fuels your body without the guilt of processed options. Are you ready to dive into the world of homemade goodness?
Why Are No-Bake Peanut Butter Bars Amazing?
Simplicity at Its Finest: With just four basic ingredients, these bars come together in a snap—perfect for busy days.
Customizable Delight: You can mix and match flavors, adding chocolate chips or dried fruits to suit your taste!
Health-Conscious Treat: High in protein and low in sugar, they’re a guilt-free indulgence that satisfies your cravings without compromising your diet.
No Baking Required: Forget the oven! Simply mix, chill, and enjoy—ideal for those hot summer days.
Great for Everyone: Whether you’re prepping for a workout or enjoying an afternoon snack, these bars cater to various dietary needs, including a vegan option.
Once you try these No-Bake Peanut Butter Protein Bars, you may find yourself adding them to your weekly meal prep, just like my favorite Garlic Butter Steak or Peanut Butter Chicken recipes!
No-Bake Peanut Butter Protein Bars Ingredients
For the Base
- Peanut Butter – a creamy or chunky base that provides healthy fats and protein, making every bite indulgent.
- Oats – these rolled oats provide structure and fiber; for a gluten-free option, substitute with almond flour.
For the Sweetness
- Honey or Maple Syrup – acts as a natural sweetener and binds the bars together; choose honey for stickiness or maple syrup for a vegan alternative.
For the Protein Boost
- Protein Powder – enhances the protein content; use either whey protein or a plant-based option to fit your dietary needs.
Feel free to get creative! These No-Bake Peanut Butter Protein Bars are your canvas for customization, blending in extra flavors or toppings to make them truly yours.
Step‑by‑Step Instructions for No-Bake Peanut Butter Protein Bars
Step 1: Mix Ingredients
In a large mixing bowl, combine 1 cup of creamy or chunky peanut butter, 2 cups of rolled oats, 1/2 cup of honey (or maple syrup for a vegan option), and 1 scoop of protein powder. Stir the mixture vigorously for about 2-3 minutes until all ingredients are well incorporated, and you achieve a thick, sticky consistency. Ensure there are no dry oats visible for the best texture in your no-bake peanut butter protein bars.
Step 2: Press into Pan
Line an 8×8 inch baking pan with parchment paper, allowing some overhang for easy removal later. Transfer the peanut butter mixture into the pan and, using a spatula or the back of a spoon, firmly press the mixture down to create an even layer about 1 inch thick. Aim for a compact and smooth surface, as this will help your bars hold together well once set.
Step 3: Chill
Place the baking pan into the refrigerator and allow the mixture to chill for at least 1 hour, preferably longer. This chilling period is essential for the bars to firm up and hold their shape. As you wait, imagine the delicious chewy texture you’ll soon enjoy in your homemade no-bake peanut butter protein bars.
Step 4: Cut and Serve
Once the bars are pleasantly firm to the touch, remove the pan from the refrigerator. Using the parchment paper overhang, lift the entire block of bars out of the pan and place it on a cutting board. Use a sharp knife to cut the chilled mixture into squares or rectangles, depending on your preferred size. Each piece should showcase the chunky, nutty goodness of your no-bake peanut butter protein bars, ready to be enjoyed or stored for later.
What to Serve with No-Bake Peanut Butter Protein Bars
Delight in creating a full meal experience that pairs perfectly with your homemade treats.
- Fresh Fruit Salad: A mix of vibrant seasonal fruits adds a juicy contrast; their sweetness balances the nutty bars beautifully.
- Greek Yogurt with Honey: Creamy and tangy yogurt complements the chewy bars, nourishing you with protein and probiotics.
- Veggies and Hummus: The crunch of fresh veggies with creamy hummus brings a fresh element that enhances your snacking adventure.
- Nutty Granola: Sprinkling some homemade granola over yogurt creates delightful texture and flavor harmony, making your snack feel special.
- Smoothie Bowl: Blend up a refreshing smoothie and top it with chia seeds and coconut; this invigorating combo pairs wonderfully with the bars!
- Protein Shake: A simple, delicious shake can add an extra boost of energy, perfect for post-workout recovery alongside your protein bars.
- Herbal Tea: A warm cup of soothing herbal tea complements the sweetness of your bars, making for a cozy, relaxing treat.
- Dark Chocolate: A piece of rich dark chocolate could elevate your snack by adding indulgent flavors that wonderfully contrast with the protein bars.
- Coconut Macaroons: These chewy treats have a hint of sweetness and a tender texture that feels harmonious with each bite of your bars.
Make Ahead Options
These No-Bake Peanut Butter Protein Bars are perfect for meal prep enthusiasts! You can mix the ingredients up to 24 hours in advance. Simply combine the peanut butter, oats, honey (or maple syrup), and protein powder in a bowl, then press the mixture into the lined baking pan. Cover and refrigerate the prepared mixture to maintain freshness. When you’re ready to enjoy, take the pan out, chill for at least one hour, cut them into bars, and they’ll be just as delicious as if you made them on the spot! This way, you’ll have a nutritious, homemade snack at your fingertips, ready for busy days ahead.
No-Bake Peanut Butter Protein Bars Variations
Feel free to let your creativity soar while making these delightful protein bars; there are so many wonderful ways to customize them!
-
Flavor Additions: Add in a handful of dark chocolate chips or dried fruits like cranberries for a bit of sweetness and fun texture.
-
Nut-Free Version: Swap peanut butter for sunflower seed butter to cater to those with nut allergies while still keeping the taste amazing.
-
Vegan Option: Replace honey with maple syrup and choose dairy-free chocolate chips for drizzling. This way everyone can enjoy!
-
Crunchy Twist: Mix in some crisp rice cereal or chopped nuts to bring an extra layer of crunchiness in each bite, balancing the chewy texture beautifully.
-
Protein Boost: Consider adding some chia seeds or flaxseeds. They not only enhance nutrition but also provide a delightful nutty flavor.
-
Spiced Up: Sprinkle in some cinnamon or a pinch of sea salt for a warm, inviting flavor that’ll make them irresistible!
-
Chocolate-Dipped Delight: After chilling, dip half of each bar in melted chocolate for a decadent treat. They’ll be a hit for an indulgent dessert!
-
Get Fruity: Incorporate pureed bananas or nut butters for a fruity twist. This adds moisture and a subtly sweet flavor, making them even more irresistible.
These variations will not only elevate your No-Bake Peanut Butter Protein Bars but also keep each snack exciting and new. Whether you pair them with a cold glass of almond milk or a steaming cup of coffee, they promise to satisfy your cravings without the guilt of fast food. If you’re craving something heartier, try my delicious Garlic Butter Beef or the comforting Cowboy Butter Chicken. Enjoy your culinary journey!
Storage Tips for No-Bake Peanut Butter Protein Bars
Fridge: Store your bars in an airtight container in the refrigerator for up to one week. This will keep them fresh and delicious, ready for snacking whenever you crave a bite of those no-bake peanut butter protein bars.
Freezer: For longer storage, these bars freeze beautifully! Wrap them individually in plastic wrap and then place them in a freezer-safe container for up to three months. Thaw in the fridge overnight before enjoying.
Reheating: If you prefer a warm treat, microwave each bar for about 10-15 seconds. This warms them through, enhancing the melty peanut butter flavor without making them soggy.
Wrapping: To maintain freshness, ensure each bar is tightly wrapped or stored separately to prevent any freezer burn or drying out.
Expert Tips for No-Bake Peanut Butter Protein Bars
• Mix Thoroughly: Ensure all ingredients are fully combined to prevent crumbly bars. A good mix creates a sticky bond that holds everything together.
• Adjust Consistency: If the mixture feels too dry, add a splash of water or a touch more honey to achieve the right texture for your no-bake peanut butter protein bars.
• Chill Properly: Don’t rush the chilling process; allowing ample time in the refrigerator helps the bars solidify properly and results in a better texture.
• Topping Options: Drizzle melted dairy-free chocolate on top or add crushed nuts for an extra flavor dimension that elevates your no-bake peanut butter protein bars.
• Cut With Care: Use a sharp knife to slice the chilled bars. A clean cut ensures neat squares or rectangles that look as good as they taste!
No-Bake Peanut Butter Protein Bars Recipe FAQs
What type of peanut butter should I use?
Absolutely! You can use either creamy or chunky peanut butter based on your texture preference. Creamy will give you a smoother bar, while chunky adds delightful little bites of peanuts. Just ensure it’s natural, without added sugar or hydrogenated oils, for the healthiest option.
How should I store the bars, and how long will they last?
Store your No-Bake Peanut Butter Protein Bars in an airtight container in the refrigerator for up to one week. This keeps them fresh and ready for snacking at a moment’s notice. If you’d like to enjoy them later, you can also freeze them for longer storage, up to three months!
Can I freeze these protein bars? If so, how?
Yes, these bars freeze beautifully! To freeze, wrap each bar individually in plastic wrap and place them in a freezer-safe container or bag. This prevents freezer burn and keeps them delicious. When you’re ready to enjoy, thaw them overnight in the refrigerator before devouring.
What can I do if the mixture is too dry?
No worries! If you find the mixture is too dry and crumbly, simply add a small amount of water or an extra tablespoon of honey or maple syrup. Stir well until you’ve reached a sticky consistency. This will help hold your No-Bake Peanut Butter Protein Bars together perfectly.
Are there any allergy considerations for this recipe?
Certainly! If you’re catering to nut allergies, you can easily make a nut-free version by substituting peanut butter with sunflower seed butter. Additionally, if anyone has a gluten intolerance, be sure to use certified gluten-free oats to ensure everyone can enjoy these delicious bars!
Can these bars be customized for different diets?
Very! You can customize these bars to suit various dietary preferences. For a vegan option, simply replace honey with maple syrup and choose dairy-free chocolate toppings. Feel free to mix in other ingredients like protein powder, seeds, or even dried fruits for added nutrition or flavor. The more, the merrier!
No-Bake Peanut Butter Protein Bars: Simple, Healthy, Delicious
Ingredients
Equipment
Method
- In a large mixing bowl, combine peanut butter, rolled oats, honey (or maple syrup), and protein powder. Mix vigorously for 2-3 minutes until well combined.
- Line an 8x8 inch baking pan with parchment paper. Press the mixture into the pan evenly to create a 1 inch thick layer.
- Chill the mixture in the refrigerator for at least 1 hour to firm up.
- Lift the bars out of the pan using the parchment paper and cut into squares or rectangles for serving.
Leave a Reply