
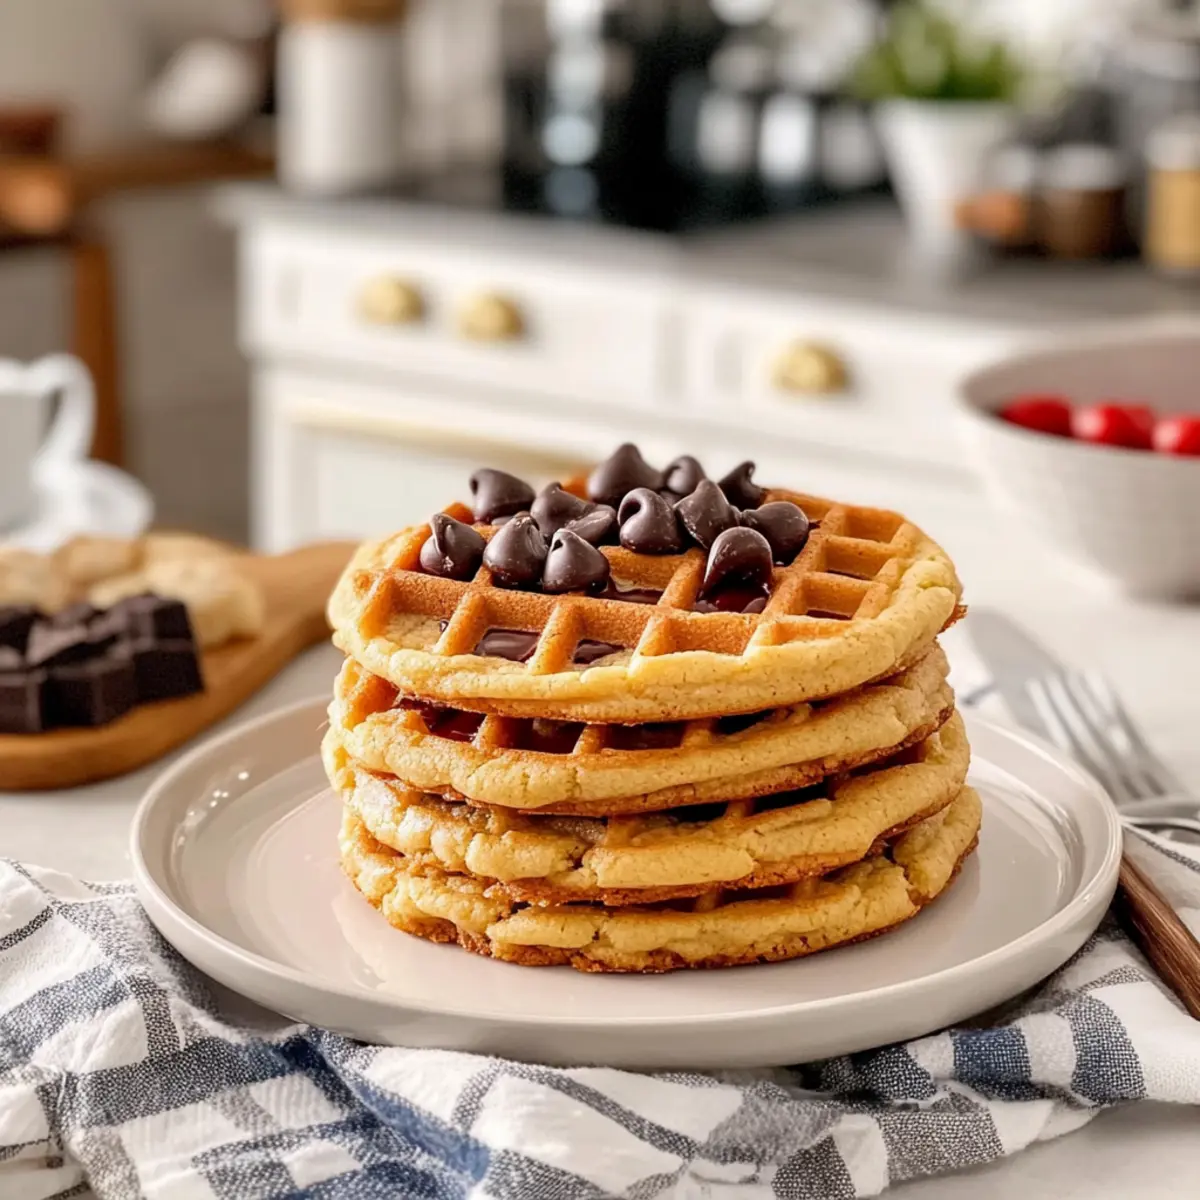
As the smell of vanilla and melted chocolate wafts through my kitchen, I can’t help but feel a rush of nostalgia. These Classic Chocolate Chip Cookies have a way of making everything feel right in the world, whether it’s a rainy afternoon or a bustling holiday gathering. This go-to recipe is not only easy to whip up but also offers a deliciously comforting snack that brings families together to share moments of joy. The balance of soft, gooey chocolate tucked inside a perfectly golden, slightly crisp exterior is truly irresistible. What’s even better? They’re versatile enough to accommodate any sweet tooth—feel free to experiment with dark chocolate or crunchy nuts for a fun twist! Ready to bake and create some magic? Let’s dive into the cookie dough.
Why Are These Cookies So Irresistible?
Nostalgic Comfort: These Classic Chocolate Chip Cookies bring back fond memories of childhood baking days, evoking warmth and familiarity with every bite.
Quick Prep Time: You can whip these up in under 30 minutes, making them perfect for spontaneous cravings or last-minute gatherings.
Versatile Options: Whether you prefer semisweet, dark, or even white chocolate chips, this recipe invites you to get creative—add in nuts or swap chocolate types to suit your taste!
Perfect for Sharing: Their golden edges and soft centers make them an instant crowd-pleaser at parties, bake sales, or just a cozy day at home.
Easy to Store: Leftovers? No problem! These cookies store beautifully, meaning you can savor the delight beyond the baking day.
Classic Chocolate Chip Cookie Ingredients
• For the delectable dough, gather these essentials:
For the Batter
- All-Purpose Flour – Provides structure; substitute with a gluten-free blend for a gluten-free version.
- Unsalted Butter – Adds richness and moisture; use margarine for a dairy-free option.
- Granulated Sugar – Sweetens and contributes to the cookie’s spread; consider brown sugar for a chewier texture.
- Brown Sugar – Enhances flavor and moisture; light or dark brown sugar can be used based on your preference.
- Eggs – Binds ingredients and adds moisture; try a flax egg for a vegan version.
- Vanilla Extract – Adds depth of flavor; swap for almond extract to change things up.
- Baking Soda – Acts as a leavening agent; baking powder is a suitable alternative.
- Salt – Balances sweetness and enhances flavor; kosher salt works well as a substitute.
For the Chocolate Goodness
- Chocolate Chips – The star of the show for flavor and texture; opt for dark chocolate for a richer taste, or swap with nuts for added crunch.
These classic chocolate chip cookie ingredients come together beautifully, promising a nostalgic treat that delights your senses!
Step‑by‑Step Instructions for Classic Chocolate Chip Cookies
Step 1: Preheat and Prepare
Begin by preheating your oven to 350°F (175°C) and lining two baking sheets with parchment paper. This will ensure easy cleanup and prevent sticking. While the oven heats up, gather all your ingredients and equipment, including a large mixing bowl, a whisk, and a spatula, to streamline your cookie-making process.
Step 2: Cream the Butter and Sugars
In a large mixing bowl, combine softened unsalted butter, granulated sugar, and brown sugar. Use an electric mixer on medium speed to cream them together until the mixture is light and fluffy, about 2-3 minutes. The sugars should be well incorporated, creating a smooth texture that hints at the blissful cookies to come.
Step 3: Add Eggs and Vanilla
Next, beat in the eggs one at a time, allowing each egg to blend into the mixture fully before adding the next, followed by a teaspoon of vanilla extract. Mix until everything is just combined. The mixture should appear glossy and slightly thicker—a perfect base for your classic chocolate chip cookies.
Step 4: Mix the Dry Ingredients
In a separate medium bowl, whisk together the all-purpose flour, baking soda, and salt. This step is vital for evenly distributing the leavening agent and seasoning throughout the dough. Gradually add this dry mixture to the creamed butter and sugar mixture, mixing on low speed until just combined to avoid overworking the dough.
Step 5: Fold in the Chocolate Chips
Now, gently fold in the chocolate chips using a spatula or wooden spoon. If you’re feeling adventurous, this is the perfect moment to mix in optional ingredients like nuts. The dough should be thick and studded with chocolatey goodness, ready to transform into warm, decadent cookies.
Step 6: Scoop the Dough
Using a cookie scoop or a tablespoon, drop rounded balls of dough onto the prepared baking sheets. Space them about two inches apart, as they will spread while baking. The irresistible aroma of chocolate chip cookies will soon fill your kitchen!
Step 7: Bake to Perfection
Place the baking sheets in the preheated oven and bake the cookies for 10-12 minutes. Watch closely as the edges turn golden brown while the centers remain soft and slightly puffed. This creates the perfect balance between chewy and crisp for your classic chocolate chip cookies.
Step 8: Cool and Enjoy
Once baked, remove the cookies from the oven and allow them to cool on the baking sheets for about 5 minutes. This resting time helps them set before transferring them to wire racks to cool completely. Your delicious classic chocolate chip cookies are ready to be shared and savored!
Expert Tips for Classic Chocolate Chip Cookies
- Butter Matters: Ensure your unsalted butter is at room temperature for optimal creaming; this guarantees a light and fluffy texture.
- Don’t Over-Mix: Avoid tough cookies by mixing just until the flour is incorporated; you want a soft dough!
- Watch the Bake Time: Keep an eye on the cookies as they bake; they should be golden at the edges but slightly soft in the center for that perfect chewy finish.
- Cooling is Crucial: Let cookies cool on the baking sheet for about 5 minutes before transferring them to wire racks. They firm up while cooling, so resist the urge to dig in immediately!
- Creative Variations: Feel free to swap in dark chocolate chips or nuts for an enticing twist on this classic chocolate chip cookie recipe!
- Storage Tips: Store your cookies in an airtight container at room temperature for up to a week, ensuring they stay soft and delicious.
Storage Tips for Classic Chocolate Chip Cookies
Room Temperature: Store your cookies in an airtight container at room temperature for up to 1 week to keep them soft and delicious.
Fridge: If you prefer a chewier texture, refrigerate the cookies in an airtight container for up to 2 weeks. Just let them come to room temperature before enjoying.
Freezer: For longer storage, freeze the cookies in a single layer on a baking sheet, then transfer to an airtight freezer bag for up to 3 months. Thaw at room temperature before serving.
Reheating: To enjoy warm cookies again, reheat individual cookies in the microwave for about 10-15 seconds, or in a preheated oven at 350°F (175°C) for about 5 minutes. This brings back that delightful melt-in-your-mouth experience!
What to Serve with Classic Chocolate Chip Cookies
Indulging in freshly baked chocolate chip cookies is delightful, but pairing them with the perfect accompaniments can elevate your experience to new heights.
- Refreshing Milk: Nothing beats the classic duo of cookies and milk. The cold creaminess perfectly balances the warm, gooey cookies.
- Rich Coffee: A robust cup of coffee complements the sweetness of the cookies, making it an ideal afternoon pick-me-up.
- Vanilla Ice Cream: Serve a warm cookie over a scoop of vanilla ice cream for a decadent dessert that melts in your mouth.
- Fresh Berries: A side of tart strawberries or juicy raspberries adds a burst of freshness that brightens the sweet cookies.
- Nutty Granola: Crunchy granola sprinkled on top enriches the cookie experience with extra texture and nutty flavor.
Pair your warm chocolate chip cookies with these scrumptious options for an unforgettable treat that brings cozy, nostalgic vibes into every bite!
Classic Chocolate Chip Cookie Variations
Feel free to let your imagination run wild with these delightful twists that will add a special touch to your classic chocolate chip cookies!
-
Nutty Delight: Stir in chopped walnuts or pecans for a beautiful crunch that contrasts beautifully with the soft, gooey centers. The addition of nuts adds a lovely depth, enhancing each bite.
-
Dark Chocolate Lovin’: Swap semisweet chocolate chips for dark chocolate chips to amplify the flavor and richness. Dark chocolate brings a sophisticated chocolaty depth that’s simply irresistible.
-
Oatmeal Twist: Add rolled oats into the cookie dough for a chewy oatmeal chocolate chip hybrid. The oats lend a hearty texture, making each cookie wonderfully filling.
-
Coconut Craze: Mix in shredded coconut to create a tropical flair in your cookies. The sweet, chewy texture of coconut pairs blissfully with the chocolate chips.
-
Spicy Kick: Sprinkle in a pinch of cinnamon or cayenne for a warm spice that adds a surprising kick. This twist introduces an unexpected layer of flavor that’s sure to please adventurous palates.
-
Almond Joy: Swap vanilla extract for almond extract and add almond slivers for cookies reminiscent of your favorite candy bar. The nutty notes of almond elevate these cookies to a new level of deliciousness.
-
Zesty Orange: Incorporate orange zest into the dough for a refreshing, citrusy flavor that brightens the chocolate experience. The zing from the citrus is refreshing and adds a delightful complexity.
Remember, these variations allow you to customize your cookies to your heart’s content! Whether it’s a cozy family evening or a potluck gathering, you’ll have a batch that’s uniquely yours. If you’re interesting in learning how to store your cookies perfectly, check out our tips on Storage Tips for Classic Chocolate Chip Cookies!
Make Ahead Options
These Classic Chocolate Chip Cookies are a fantastic choice for meal prep enthusiasts looking to save time during busy weeks! You can prepare the cookie dough up to 24 hours in advance; simply mix the ingredients and refrigerate the dough in an airtight container. This not only allows the flavors to meld beautifully but also keeps the cookies just as delicious when baked fresh. Another option is to scoop and freeze the dough balls; they can be stored for up to 3 months. When you’re ready to enjoy them, bake directly from the freezer, adding an additional minute or two to the baking time for splendid, warm cookies without the hassle!
Classic Chocolate Chip Cookies Recipe FAQs
What kind of chocolate chips should I use for the best flavor?
Absolutely! The type of chocolate chips can significantly impact the taste of your cookies. I recommend using semisweet chocolate chips for a classic flavor. However, feel free to experiment with dark chocolate chips for a richer taste or even white chocolate chips for a sweeter alternative—it’s all about personal preference!
How do I store my cookies for maximum freshness?
To keep your cookies soft and delightful, store them in an airtight container at room temperature for up to 1 week. I often layer parchment paper between layers of cookies to prevent them from sticking together. If you want a chewier texture, refrigerate them for up to 2 weeks in a sealed container.
Can I freeze the cookie dough?
Yes, you can! To freeze the cookie dough, scoop rounded tablespoons of dough onto a baking sheet lined with parchment paper. Freeze them until solid, then transfer the cookie dough balls to an airtight freezer bag, where they can last for up to 3 months. When you’re ready to bake, just bake straight from frozen—add a couple more minutes to the baking time for perfect cookies!
Why did my cookies turn out flat?
Very! Flat cookies can happen for a few reasons. Ensure your butter is softened but not melted, as melted butter can cause excess spread. Also, check that your baking soda is fresh—old baking soda can lead to cookies that don’t rise as they should. Lastly, avoid over-mixing the dough after adding the flour, as this can cause a tougher texture and flattening.
Can I make these cookies vegan or gluten-free?
Of course! For a vegan version, substitute eggs with a flax egg (1 tablespoon ground flaxseed mixed with 2.5 tablespoons water, left to sit until thickened) and use dairy-free margarine instead of butter. To make them gluten-free, replace the all-purpose flour with a gluten-free flour blend designed for baking, and ensure your chocolate chips are also gluten-free.
Thick & Fluffy Belgian Waffles That Will Change Your Breakfast Game
Ingredients
Equipment
Method
- Preheat your oven to 350°F (175°C) and line two baking sheets with parchment paper.
- In a large mixing bowl, cream together softened unsalted butter, granulated sugar, and brown sugar until light and fluffy.
- Beat in the eggs one at a time followed by the vanilla extract until just combined.
- In a separate bowl, whisk together all-purpose flour, baking soda, and salt. Gradually mix this into the wet ingredients.
- Gently fold in the chocolate chips.
- Drop rounded balls of dough onto the prepared baking sheets, spaced about two inches apart.
- Bake for 10-12 minutes until the edges are golden and the centers soft.
- Allow to cool on the baking sheets for about 5 minutes before transferring them to wire racks.
Leave a Reply