
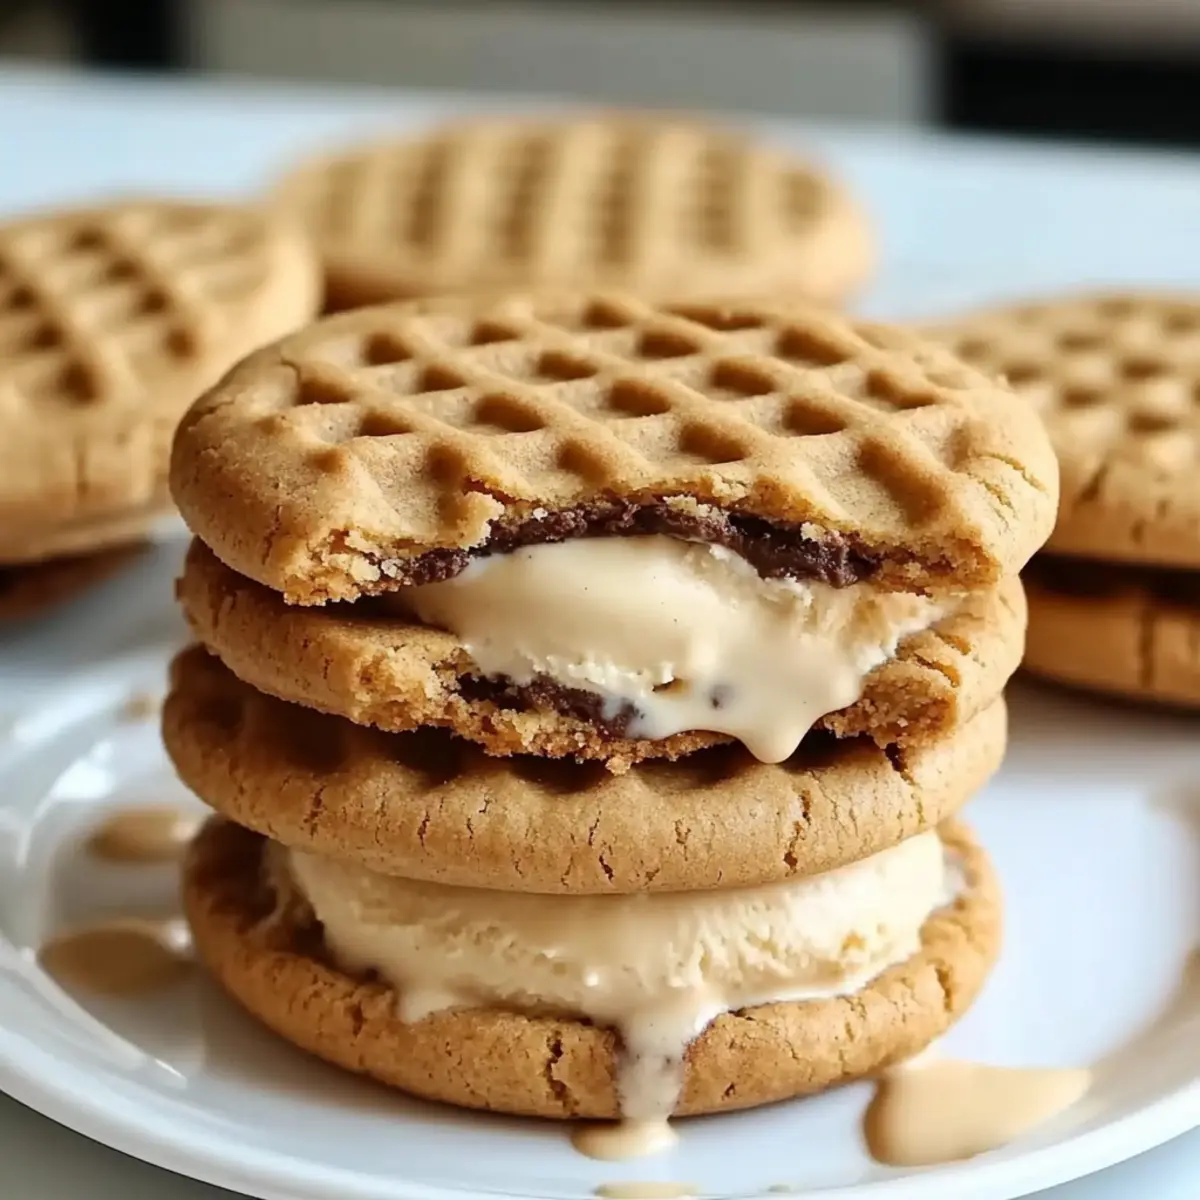
As summer settles in, the air becomes filled with the sweet anticipation of warm days and indulgent treats. Today, I’m excited to share a delightful twist on a classic favorite: Cookie Butter Ice Cream Sandwiches. This playful dessert perfectly marries the soft, chewy texture of freshly baked cookies with the creamy goodness of ice cream. With 26 creative flavor combinations to choose from, these sandwiches aren’t just easy to assemble—they’re guaranteed to sprinkle joy at any gathering. Whether you’re hosting a summer bash or simply treating yourself after a long day, you’ll find the perfect flavor to delight your taste buds. Curious about how to whip up these delicious creations? Let’s dive into the world of cookie butter bliss!
Why Love Cookie Butter Ice Cream Sandwiches?
Irresistible Flavor: A captivating blend of cookie butter and ice cream creates a taste explosion that’s both nostalgic and delightful.
Endless Customization: With 26 unique flavor combinations, you can mix and match your favorites to suit any palate or occasion.
Quick and Easy: These sandwiches are simple to whip up, making them perfect for last-minute gatherings or spontaneous treats.
Summer Refreshment: The creamy, chill of ice cream paired with warm, soft cookies makes these a refreshing favorite on hot days.
Crowd-Pleasing Delight: Bring joy to any party or picnic; these are sure to be a hit among kids and adults alike!
Looking for more delicious ideas? Try making a batch of Garlic Butter Beef as a savory complement to these sweet sandwiches!
- Cookie Butter Ice Cream Sandwich Ingredients
Cookie Butter Ice Cream Sandwich Ingredients
- For the Cookies
- Cookie Butter – Adds a rich, spiced flavor that’s a delightful twist.
- Flour – Structural base; substitute with gluten-free flour for a gluten-free version.
- Sugar – Sweetness and texture; use brown sugar for a deeper caramel flavor.
- Butter – Provides moisture and richness; swapping for coconut oil makes it dairy-free.
- Egg – Binds the ingredients together; you can replace it with a flax egg for a vegan option.
- Baking Powder/Soda – Acts as a leavening agent; ensure freshness for the best rise.
- Salt – Enhances sweetness; don’t skip this ingredient for a balanced flavor.
- For the Filling
- Ice Cream – Creamy filling that adds coldness; consider using cookie dough ice cream for a fun twist!
- For Toppings
- Chocolate Chips, Crushed Cookies, or Nuts – Add texture and extra flavor; perfect for personalizing your sandwiches.
- Caramel or Chocolate Sauce – Drizzle on top for an added indulgence; pairs wonderfully with cookie butter.
Make these delightful cookie butter ice cream sandwiches your go-to summer treat, and enjoy the joy of creating unique combinations that will make your taste buds dance!
Step‑by‑Step Instructions for Cookie Butter Ice Cream Sandwiches
Step 1: Prep the Cookie Dough
In a large mixing bowl, cream together the softened butter and sugar until light and fluffy, about 3 minutes. Gradually add in the cookie butter, then the egg, mixing until well combined. In a separate bowl, whisk together the flour, baking powder, and salt before gradually adding this dry mixture to the wet mixture. Stir until just combined, avoiding overmixing.
Step 2: Bake the Cookies
Preheat your oven to 350°F (175°C) and line a baking sheet with parchment paper. Using a cookie scoop, drop rounded tablespoons of dough onto the prepared sheet, leaving space between each scoop. Bake for 10-15 minutes until the edges start to turn golden and the centers are set but still soft. Remove them from the oven and let them cool on the sheet for a few minutes before transferring them to a wire rack.
Step 3: Cool the Cookies
Once your cookies are out of the oven, allow them to cool completely on the wire rack. This cooling process is essential for easy assembly, ensuring that the cookies are structural enough to handle the creamy filling without breaking apart. Aim for about 20 minutes for them to cool down.
Step 4: Assemble the Sandwiches
Once your cookies have cooled, it’s time to create your delicious Cookie Butter Ice Cream Sandwiches. Take one cookie, place a generous scoop of your favorite ice cream in the center, and gently press another cookie on top. Be careful not to squish too hard, ensuring the ice cream fills the space between.
Step 5: Freeze the Sandwiches
To set your sandwiches, place them in an airtight container or wrap each one individually in plastic wrap. Freeze for at least 30 minutes, allowing the ice cream to firm up and meld with the cookies, making each bite a delightful contrast of textures.
Step 6: Serve and Enjoy
After chilling, your Cookie Butter Ice Cream Sandwiches are ready to serve! You can drizzle them with chocolate or caramel sauce for an extra treat. Enjoy these delightful sandwiches at your next summer gathering or as a sweet reward after a long day; they are sure to be a hit with everyone!
Make Ahead Options
These Cookie Butter Ice Cream Sandwiches are perfect for meal prep enthusiasts! You can prepare the cookie dough up to 24 hours in advance by refrigerating it in an airtight container, which helps to enhance the flavors. Additionally, the cookies can be baked and stored in the refrigerator for up to 3 days before assembling the sandwiches, ensuring they’ll stay fresh and delicious. When you’re ready to serve, simply scoop your favorite ice cream between two cookies and freeze the assembled sandwiches for about 30 minutes for the best texture. This way, you’ll have a delightful treat on hand with minimal effort on busy weeknights!
Expert Tips for Cookie Butter Ice Cream Sandwiches
-
Chill Dough First: Allowing the cookie dough to chill for at least 30 minutes results in thicker, chewier cookies that won’t spread too much while baking.
-
Don’t Overbake: Keep a close eye on your cookies; overbaking can lead to hard edges. Aim for a golden-brown edge while the center remains soft and slightly underbaked.
-
Mix Ice Cream Well: If using homemade ice cream, allow it to soften slightly before scooping for easier assembly. This ensures a perfect fill for your cookie butter ice cream sandwiches.
-
Use Quality Ingredients: The flavor of your cookies and ice cream matters; opt for high-quality cookie butter and your favorite ice cream for the best taste.
-
Experiment with Toppings: Consider adding crushed cookies, nuts, or drizzles of chocolate sauce between the layers for added crunch and flavor contrast in your cookie butter ice cream sandwiches.
Storage Tips for Cookie Butter Ice Cream Sandwiches
Room Temperature: These sandwiches are best enjoyed fresh but can sit at room temperature for up to 1 hour before the ice cream starts to soften too much.
Fridge: If stored in the refrigerator, cookie butter ice cream sandwiches can last for up to 3 days. Keep them in an airtight container to maintain softness.
Freezer: To store them longer, wrap each sandwich individually in plastic wrap and freeze for up to 2 weeks. This prevents freezer burn and keeps them delightful for your snack cravings.
Reheating: When ready to enjoy, let them sit at room temperature for a few minutes or microwave for 10 seconds if you prefer a slightly softened cookie butter ice cream sandwich.
What to Serve With Cookie Butter Ice Cream Sandwiches
Elevate your dessert experience with these delightful pairings that perfectly complement the creamy, spiced goodness of cookie butter ice cream sandwiches.
- Fresh Berries: Juicy strawberries or blueberries add a bright, tart contrast, balancing the sweetness of the cookies and ice cream.
- Chocolate Sauce: A warm, rich drizzle enhances the flavors, creating a luscious finish that adds indulgence to every bite.
- Roasted Nuts: Crunchy almonds or pecans provide a lovely texture and nutty flavor that pairs beautifully with the creamy filling.
- Caramel Sauce: Drizzle this golden liquid gold over your sandwiches for an added layer of sweetness that’ll have your taste buds dancing.
For a refreshing kick, serve with a chilled glass of milk—its creamy nature perfectly enhances the delightful warmth of the cookies. Consider pairing these sandwiches with a scoop of vanilla ice cream on the side for an extra treat!
Cookie Butter Ice Cream Sandwich Variations
Feel free to get creative and add your own spin to these delicious ice cream sandwiches!
- Gluten-Free: Use a gluten-free flour blend to make these sandwiches suitable for those with gluten sensitivities without sacrificing flavor.
- Dairy-Free Delight: Swap out regular ice cream for coconut milk or almond milk-based ice creams for a refreshing dairy-free option.
- Nutty Bonus: Add a dollop of almond or peanut butter on the ice cream before sandwiching it between the cookies for an extra layer of flavor and crunch.
- Exotic Flavors: Try using pistachio or mango ice cream instead of traditional flavors to give an exotic twist to your sandwiches!
- Cookie Crumble: Roll the edges of your assembled ice cream sandwiches in crushed cookies or sprinkles for an added texture and festive look.
- Fruit Fusion: Incorporate seasonal fruits like fresh strawberries or raspberries into the ice cream mixture for a burst of sweetness and color. Mixed berry ice cream is a fantastic choice!
- Extra Spice: Add a pinch of cinnamon or nutmeg to your cookie dough for a spiced flavor boost that pairs perfectly with the cookie butter ice cream.
- Choco-Mint Madness: Use mint chocolate chip ice cream instead of regular ice cream for a refreshing, minty twist that will make your taste buds sing.
Feeling inspired? You might also enjoy whipping up some delightful Cream Pie Cookies or try these Peanut Butter Chicken for a flavor-packed meal alongside these sweet treats!
Cookie Butter Ice Cream Sandwiches Recipe FAQs
How do I select the right cookie butter?
Absolutely! When choosing cookie butter, look for a rich, creamy texture with minimal additives. A brand that’s made primarily from ground cookies and brown sugar will yield the best flavor. Be sure to check the label for allergens if you have any dietary restrictions.
What’s the best way to store leftover ice cream sandwiches?
For optimal freshness, wrap each cookie butter ice cream sandwich individually in plastic wrap and place them in an airtight container before freezing. This method allows them to keep well for up to 2 weeks without freezer burn while retaining their tasty texture.
Can I freeze cookie butter ice cream sandwiches, and if so, how?
Very! To freeze, first assemble the sandwiches, then wrap each one in plastic wrap or place them in a single layer in an airtight container. Freeze for up to 2 weeks. To enjoy, let them sit at room temperature for a few minutes before indulging, or microwave for just 10 seconds to soften slightly.
What if my cookies turned out too hard?
Watch the baking time closely; cookies should be golden on the edges but still soft in the center. If they do turn out hard, try gently reheating them in the microwave for just a few seconds. For your next batch, consider chilling the dough for 30 minutes before baking; this helps create chewier cookies.
Are there any dietary considerations for cookie butter ice cream sandwiches?
Absolutely! You can customize these sandwiches for dietary needs. Use gluten-free flour for those avoiding gluten, or substitute coconut oil for butter to make it dairy-free. For a vegan option, replace the egg with a flax egg (1 tablespoon of ground flaxseed mixed with 2.5 tablespoons of water, let sit for 5 minutes). Always check ingredient labels for allergens.
Can I use homemade ice cream for the filling?
Very much! Using homemade ice cream adds a personal touch. Just allow it to soften at room temperature for 10-15 minutes before scooping to ensure easy assembly. This will make it a delightful and creamy filling for your cookie butter ice cream sandwiches.

Cookie Butter Ice Cream Sandwiches
Ingredients
Equipment
Method
- In a large mixing bowl, cream together the softened butter and sugar until light and fluffy, about 3 minutes. Gradually add in the cookie butter, then the egg, mixing until well combined. In a separate bowl, whisk together the flour, baking powder, and salt before gradually adding this dry mixture to the wet mixture. Stir until just combined, avoiding overmixing.
- Preheat your oven to 350°F (175°C) and line a baking sheet with parchment paper. Using a cookie scoop, drop rounded tablespoons of dough onto the prepared sheet, leaving space between each scoop. Bake for 10-15 minutes until the edges start to turn golden and the centers are set but still soft. Remove them from the oven and let them cool on the sheet for a few minutes before transferring them to a wire rack.
- Once your cookies are out of the oven, allow them to cool completely on the wire rack. This cooling process is essential for easy assembly, ensuring that the cookies are structural enough to handle the creamy filling without breaking apart. Aim for about 20 minutes for them to cool down.
- Once your cookies have cooled, it’s time to create your delicious Cookie Butter Ice Cream Sandwiches. Take one cookie, place a generous scoop of your favorite ice cream in the center, and gently press another cookie on top.
- To set your sandwiches, place them in an airtight container or wrap each one individually in plastic wrap. Freeze for at least 30 minutes.
- After chilling, your Cookie Butter Ice Cream Sandwiches are ready to serve! You can drizzle them with chocolate or caramel sauce for an extra treat.
Leave a Reply