
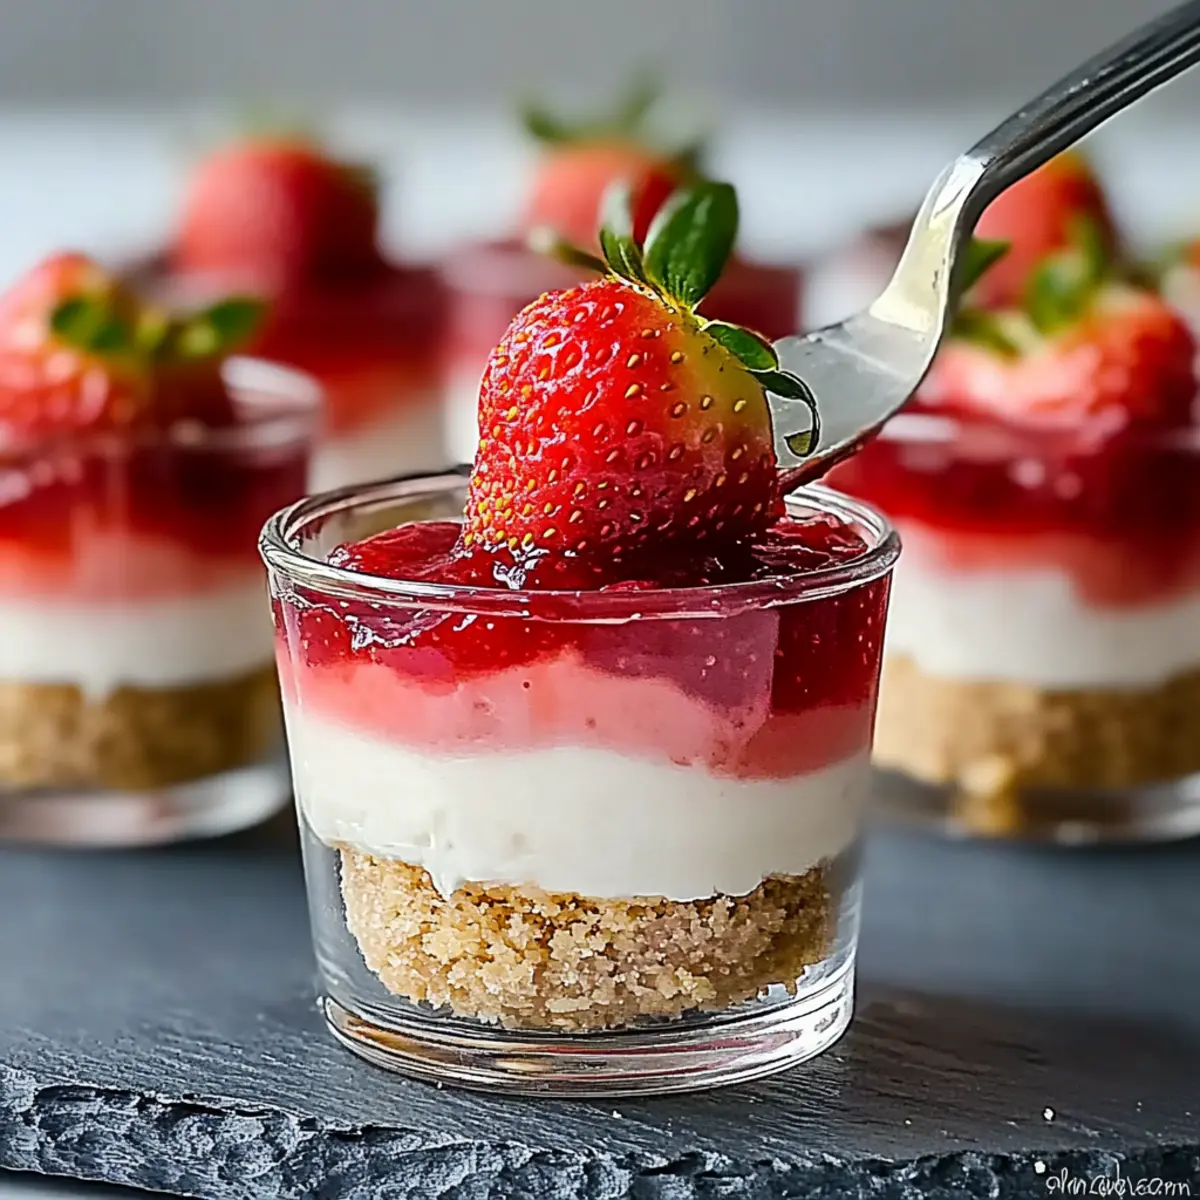
As I rummaged through my pantry, a delightful mix of nostalgia and cravings washed over me—my childhood love for strawberry desserts was calling! That’s when I decided to whip up these No-Bake Strawberry Cheesecake Cups. Perfect for those sunny afternoons, this recipe requires minimal effort and yields an impressive, no-fuss treat that’s both refreshing and customizable. With a creamy filling made from luscious cream cheese and a crunch from the graham cracker crust, each bite is a summer symphony. Plus, they’re gluten-free-friendly! Whether you’re hosting a gathering or simply satisfying your sweet tooth, these delightful cups bring joy without the hassle. Curious about the magic of no-bake treats? Let’s dive in!
Why are No-Bake Strawberry Cheesecake Cups irresistible?
Effortless Preparation: The beauty lies in the simplicity—no oven required! Just mix, chill, and enjoy this delightful dessert.
Customizable Flavors: Have fun experimenting! Swap out strawberry jam for raspberry or add chocolate chips for a decadent twist.
Perfect for Any Occasion: Whether it’s a summer BBQ or a cozy family dinner, these cheesecake cups are a hit that everyone will adore.
Crowd-Pleasing Appeal: Light and airy, they tantalize the taste buds while maintaining a beautiful presentation—perfect for impressing guests!
Gluten-Free Options Available: With simple tweaks, you can cater to dietary needs without sacrificing flavor. Try using gluten-free graham crackers to make everyone happy!
Treat yourself to this blissful delight—just like I do with my Lemon Blueberry Cheesecake Bars or Key Lime Cheesecake!
No-Bake Strawberry Cheesecake Cups Ingredients
For the Crust
• Graham Cracker Crumbs – A crunchy base for your cups; finely crushed for a smoother texture.
• Dark Brown Sugar – Adds a caramel-like sweetness to the crust that complements the filling.
• Unsalted Butter – Binds the crumbs together and enhances the flavor of the crust.
For the Creamy Filling
• Full-Fat Cream Cheese – The star of the dessert; use room temperature for easy blending.
• Granulated Sugar – Sweetens the cream cheese mixture; adjusts the sweetness as needed.
• Powdered Sugar – Ensures a smooth texture and sweet finish to the whipped cream.
• Sour Cream – Enhances the tangy flavor of the filling, making it more delicious.
• Pure Vanilla Extract – Adds delightful depth to the mixture and complements the strawberries.
• Heavy Whipping Cream – Creates a light and airy whipped topping that makes this dessert irresistible.
For the Topping
• Additional Heavy Whipping Cream – Ensures a fluffy layer on top; whip to stiff peaks.
• Additional Powdered Sugar – Sweetens the topping; adjust for your preference.
• Extra Vanilla Extract – Enhances the flavor of the whipped topping beautifully.
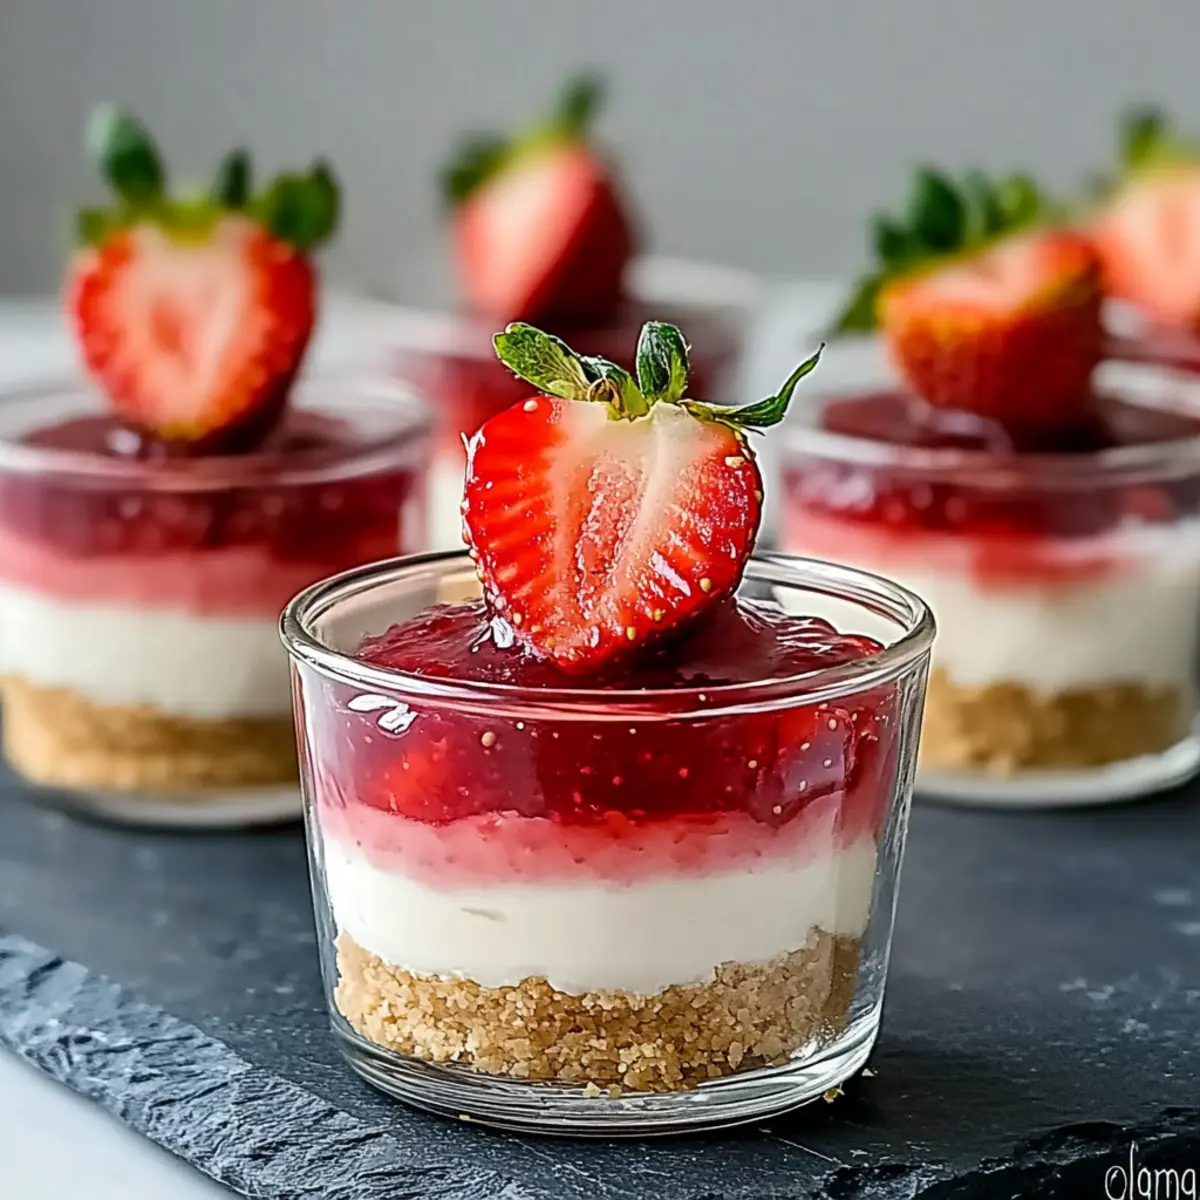
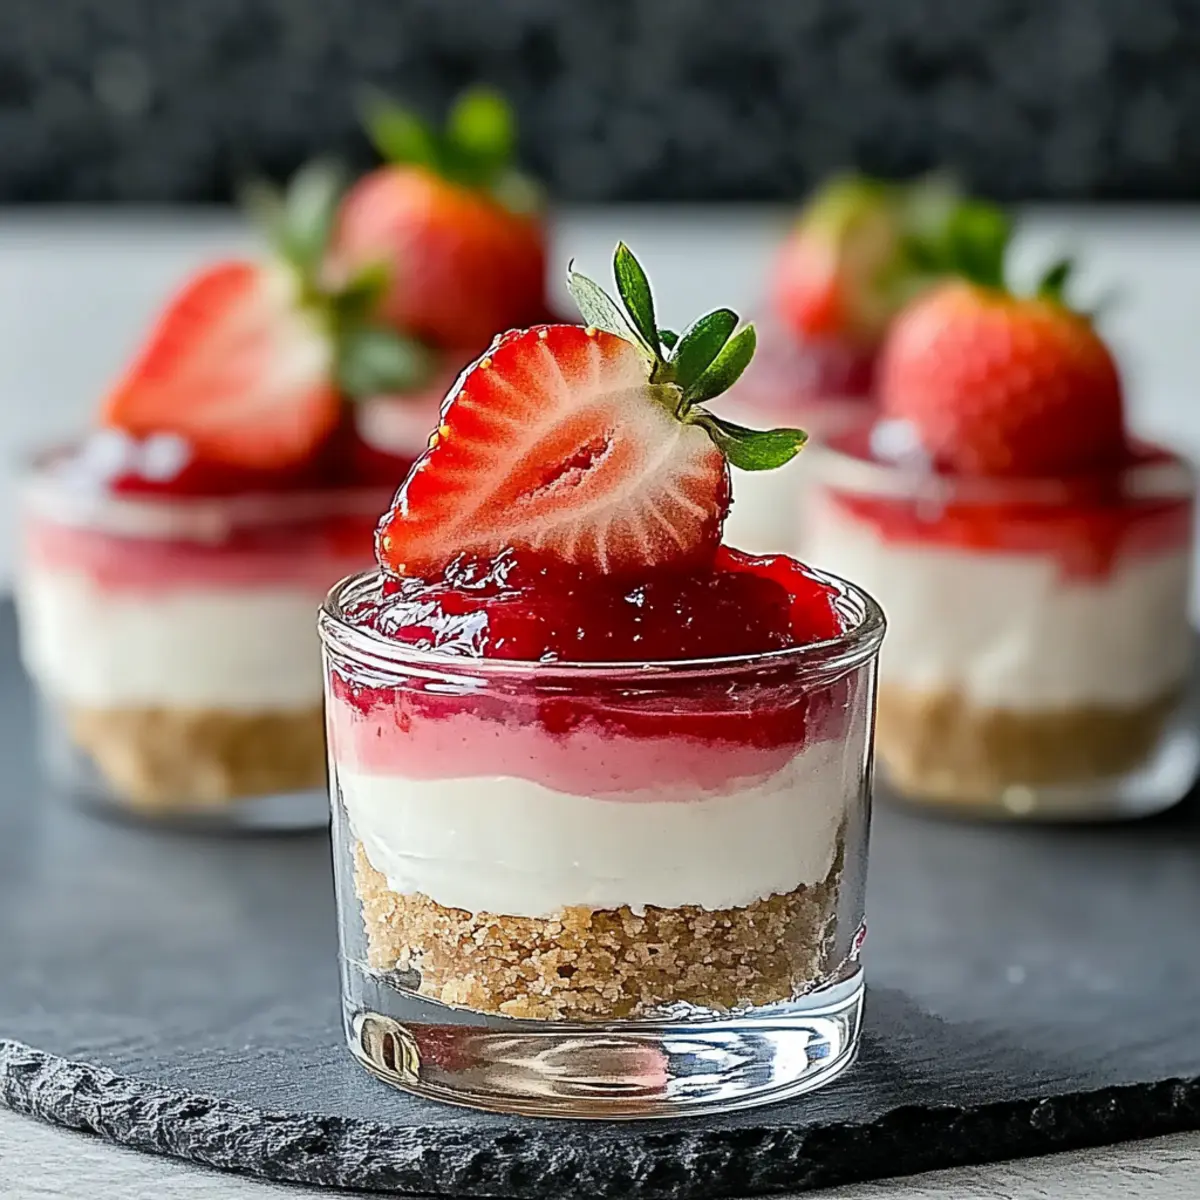
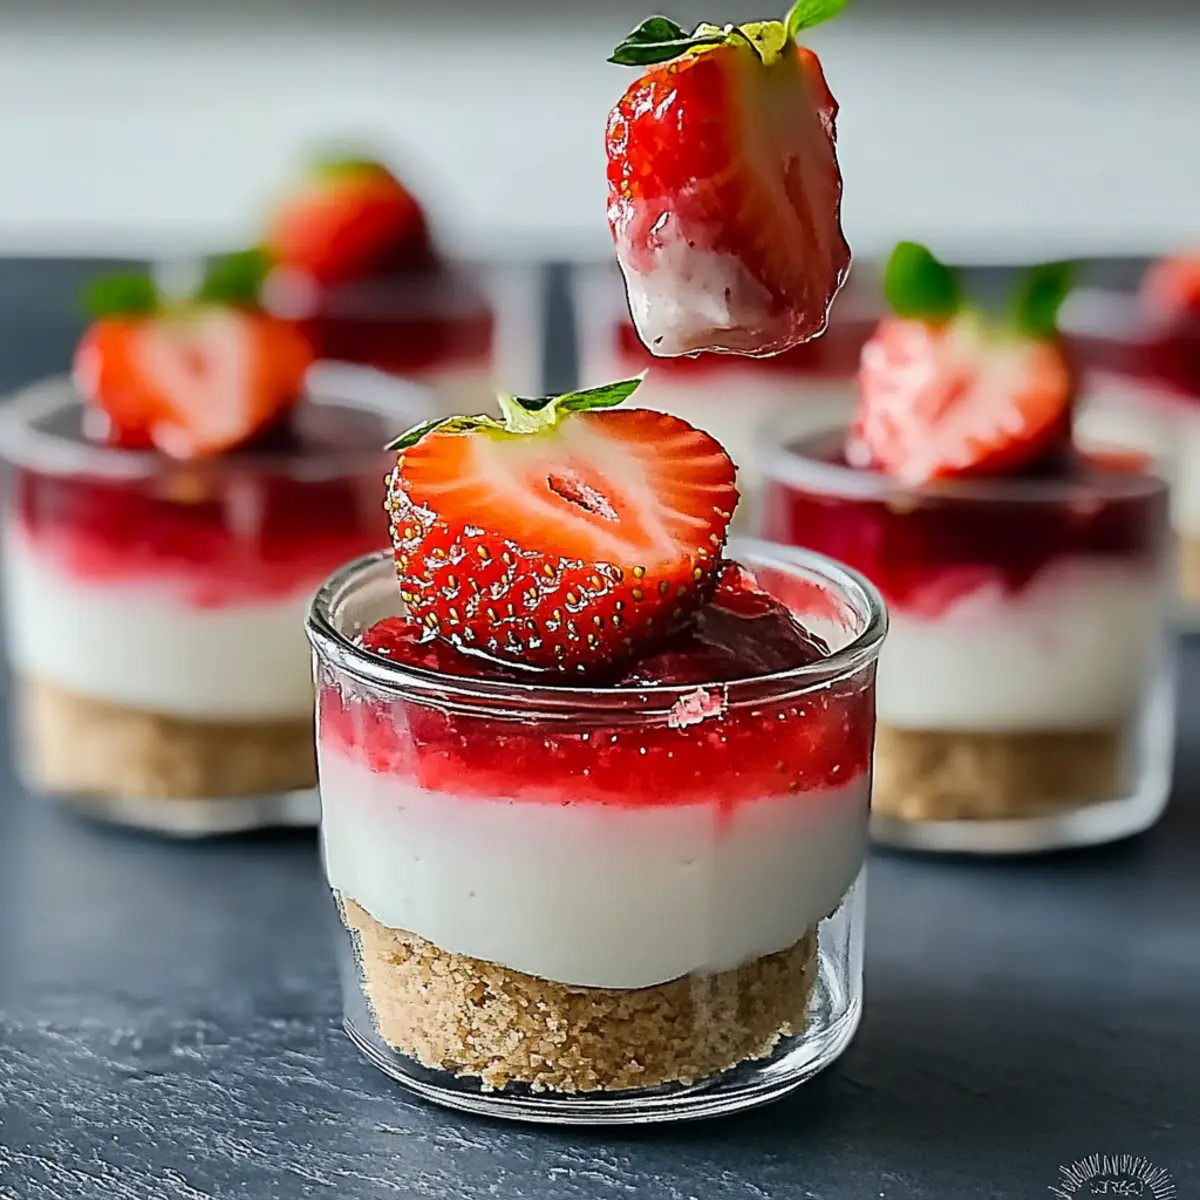
• Strawberry Jam – A sweet, fruity burst; opt for high-quality jam for the best flavor.
• Sliced Strawberries (optional) – Adds freshness and color for a beautiful presentation.
• Dark Chocolate (optional) – Chopped or drizzled to elevate this no-bake strawberry cheesecake cups recipe with decadence.
Get ready to indulge in these delightful No-Bake Strawberry Cheesecake Cups that are perfect for any occasion!
Step‑by‑Step Instructions for No-Bake Strawberry Cheesecake Cups
Step 1: Make the Crust
In a medium bowl, combine crushed graham cracker crumbs, melted unsalted butter, and dark brown sugar until the mixture resembles wet sand. Grab six serving cups and divide the crust mixture evenly among them, pressing it down firmly to form a solid base. Set this aside while you prepare the delicious filling for your No-Bake Strawberry Cheesecake Cups.
Step 2: Whip the Cream
In a chilled mixing bowl, pour in ½ cup of heavy whipping cream. Using an electric mixer, beat the cream on medium-high speed until stiff peaks form, which should take about 3-5 minutes. Once whipped to perfection, cover the bowl and refrigerate the whipped cream to keep it cold while you create the creamy cheesecake mixture.
Step 3: Prepare Cream Cheese Filling
In another large bowl, beat room temperature full-fat cream cheese and granulated sugar with a mixer on medium speed until smooth and creamy. Add in sour cream, powdered sugar, and pure vanilla extract, mixing until just combined—be careful not to overmix, as the filling should remain light and airy. This creamy mixture will be the star of your No-Bake Strawberry Cheesecake Cups.
Step 4: Combine Ingredients
Gently fold the chilled whipped cream into the cream cheese mixture using a spatula. This should be done carefully to maintain the airiness of the whipped cream. Once well combined, spoon approximately one-sixth of the cheesecake filling into each cup over the prepared crust, creating a beautiful layer that will elevate your dessert.
Step 5: Chill
Cover the cups with plastic wrap and place them in the refrigerator. Allow the No-Bake Strawberry Cheesecake Cups to chill for 4-6 hours, or overnight if you can wait. This step is crucial for the cups to set properly, resulting in a light and creamy texture that delights every palate.
Step 6: Add Jam
Once the cheesecake filling is set, take the cups out of the refrigerator. Spoon about 2 tablespoons of high-quality strawberry jam into each cup on top of the cheesecake layer. Use a small knife or skewer to gently swirl the jam into the filling, creating a beautiful marbled effect that adds both color and flavor to your dessert.
Step 7: Top with Whipped Cream
Retrieve the remaining heavy whipping cream from the refrigerator and place it in a mixing bowl. Beat it with additional powdered sugar and vanilla extract until you achieve stiff peaks. Pipe the fluffy whipped cream on top of the jam layer in each cup for a lovely presentation. The whipped cream adds a light layer that complements the rich cheesecake beautifully.
Step 8: Garnish
Finish off your No-Bake Strawberry Cheesecake Cups with fresh strawberry slices and optional dark chocolate shavings or drizzle. This final touch not only enhances the visual appeal but also adds an extra layer of flavor. Serve immediately or store in the refrigerator until you’re ready to share this delightful treat with family and friends.
What to Serve with No-Bake Strawberry Cheesecake Cups
Elevate your dessert experience by pairing these delightful treats with complementary flavors and textures that delight the senses.
-
Fresh Berries: Serve an assortment of berries like blueberries or raspberries to enhance the fruity notes and add bright color to your plate. Their natural tartness beautifully balances the sweetness of the cheesecake.
-
Mint-Infused Water: Hydrate with refreshing mint-infused water, its coolness providing a delightful contrast to the smooth cheesecake. Infuse some cucumber slices for an extra twist!
-
Chocolate Drizzled Biscuits: Offer crispy chocolate-drizzled biscuits for a textural crunch, and the rich chocolate pairs splendidly with the cheesecake’s creaminess, elevating each bite.
-
Creamy Vanilla Ice Cream: A scoop of creamy vanilla ice cream alongside these cheesecake cups creates a dreamy combination of temperatures and textures, perfect for cooling off on a warm day.
-
Lemon Sorbet: The zesty lemon sorbet adds a bright, refreshing palate cleanser that cuts through the richness of the cheesecake, offering a vibrant and tangy contrast.
-
Sparkling Lemonade: Cool down with sparkling lemonade, its bubbly fizz and citrusy bite amplifying the fruity essence of your cheesecake cups—a delightful sip that adds festivity to any gathering!
No-Bake Strawberry Cheesecake Cups Variations
Feel free to make this recipe your own and let your taste buds lead the way!
- Berry Medley: Swap strawberry jam for mixed berry jam for a vibrant flavor twist. Each cup will deliver delicious bursts of berries.
- Citrus Zing: Add a tablespoon of lemon juice to the filling for a refreshing zing. It brightens the flavor and pairs beautifully with strawberries!
- Chocolate Lovers: Mix in dark chocolate chips or top with a chocolate drizzle for a rich and decadent experience. Chocolate and strawberries are a classic match!
- Gluten-Free Delight: Use gluten-free graham crackers for the crust without losing flavor. Everyone can enjoy these delectable desserts!
- Banana Cream Style: Layer in sliced bananas with the cheesecake filling for a delightful twist that adds creaminess and flavor depth.
- Nutty Crunch: Add crushed nuts to the graham cracker crust for added texture and flavor. Pecans or almonds work wonderfully, giving an extra crunch in every bite.
- Tropical Flavor: Replace strawberry jam with coconut cream and top with toasted coconut flakes. It’s like a vacation in a cup!
- Spiced Dreams: Incorporate a pinch of cinnamon into the crust or filling; it brings a warm, comforting flavor that can surprise your taste buds.
And while you’re experimenting, don’t forget to check out my delightful Cheesecake Fruit Salad or indulge in some Fruity Pebbles Cheesecake for more inspiration!
Make Ahead Options
These No-Bake Strawberry Cheesecake Cups are perfect for busy weeknights or preparing for gatherings! You can make the crust and cheesecake filling up to 24 hours in advance, allowing the flavors to meld beautifully. Simply prepare the crust and filling as described, then assemble the cups and refrigerate them to set for 4-6 hours or overnight. To maintain their quality, keep them covered with plastic wrap until ready to serve. Just before serving, add the strawberry jam and top with whipped cream to ensure they remain light and fluffy. This way, you can enjoy delicious, impressive desserts with minimal effort!
Expert Tips for No-Bake Strawberry Cheesecake Cups
• Ingredient Quality: Use high-quality ingredients, especially full-fat cream cheese and fresh strawberries, for the best flavor in your No-Bake Strawberry Cheesecake Cups.
• Chill Time: Patience is key! Ensure you refrigerate your cheesecake cups for at least 4-6 hours or overnight to achieve the perfect creamy texture.
• Gentle Folding: When combining the whipped cream with the cream cheese mixture, use gentle, sweeping motions to keep the filling light and airy—this prevents density and enhances the dessert.
• Room Temperature Cream Cheese: For a smooth and creamy filling, make sure your cream cheese is at room temperature before mixing; this ensures even blending and avoids lumps.
• Jam Swirling: When adding the strawberry jam, use a skewer or knife to create a swirl; don’t mix it in completely—this will provide a beautiful marbled effect in your No-Bake Strawberry Cheesecake Cups.
Storage Tips for No-Bake Strawberry Cheesecake Cups
Fridge: Store the cups covered in an airtight container in the refrigerator to maintain freshness. They will typically stay good for up to 5 days.
Make-Ahead: These no-bake strawberry cheesecake cups can be prepared a day in advance, allowing the flavors to meld beautifully while chilling overnight.
Reheating: No need to reheat! Enjoy them chilled straight from the fridge for the ultimate refreshing treat.
Freezer: If desired, freeze the cups in an airtight container for up to 2 months; however, the texture may slightly change after freezing and thawing.
No-Bake Strawberry Cheesecake Cups Recipe FAQs
What is the best way to select ripe strawberries for the cheesecake?
Absolutely! Look for strawberries that are vibrant red and firm to the touch. Avoid ones with dark spots or signs of decay. A little sweetness can also be tested by your nose; ripe strawberries will have a sweet aroma.
How should I store leftover No-Bake Strawberry Cheesecake Cups?
Store the cups in an airtight container in the refrigerator. They should stay fresh for about 3 to 5 days. If you plan to eat them later, it’s best to avoid adding any fresh garnishes until serving to keep the topping looking appealing.
Can I freeze the No-Bake Strawberry Cheesecake Cups?
Yes, you can! To freeze, place the cups in an airtight container or wrap them tightly with plastic wrap. They can be frozen for up to 2 months. When you’re ready to enjoy, transfer them to the refrigerator to thaw overnight before serving. Please note that the texture may change slightly after freezing.
What should I do if my cheesecake filling is too dense?
Very! If your filling turns out dense, it may be due to overmixing. To fix this, gently fold the whipped cream into the cream cheese mixture rather than mixing vigorously. If it’s too late and it’s already dense, you can try incorporating a tablespoon of extra whipped cream or sour cream to lighten it up.
Can this recipe be adapted for gluten-free diets?
Definitely! To make gluten-free No-Bake Strawberry Cheesecake Cups, simply substitute traditional graham crackers for gluten-free versions, which are now widely available. Check the ingredients of the other components as well, ensuring they are gluten-free.
Can I use different types of fruit preserves?
Of course! Get creative with your toppings! While strawberry jam is delicious, raspberry, blueberry, or even peach preserves can provide fantastic flavor variations. Just be sure to use high-quality preserves for the best outcome.
No-Bake Strawberry Cheesecake Cups: A Refreshing Delight
Ingredients
Equipment
Method
- In a medium bowl, combine crushed graham cracker crumbs, melted unsalted butter, and dark brown sugar until the mixture resembles wet sand. Press the mixture firmly into the serving cups to form a base.
- In a chilled mixing bowl, beat ½ cup of heavy whipping cream on medium-high speed until stiff peaks form, about 3-5 minutes. Refrigerate the whipped cream until needed.
- In another large bowl, beat the room temperature cream cheese and granulated sugar until smooth. Add sour cream, powdered sugar, and vanilla extract, mixing until just combined.
- Gently fold the whipped cream into the cream cheese mixture using a spatula. Spoon 1/6 of the filling into each cup over the crust.
- Cover the cups and chill in the refrigerator for 4-6 hours or overnight.
- Once set, spoon about 2 tablespoons of strawberry jam into each cup and swirl gently for a marbled effect.
- Beat the remaining heavy whipping cream with additional powdered sugar and vanilla extract until stiff peaks form. Pipe this whipped cream on top of the jam layer.
- Garnish with sliced strawberries and optional dark chocolate shavings. Serve immediately or store in the fridge.
Leave a Reply