
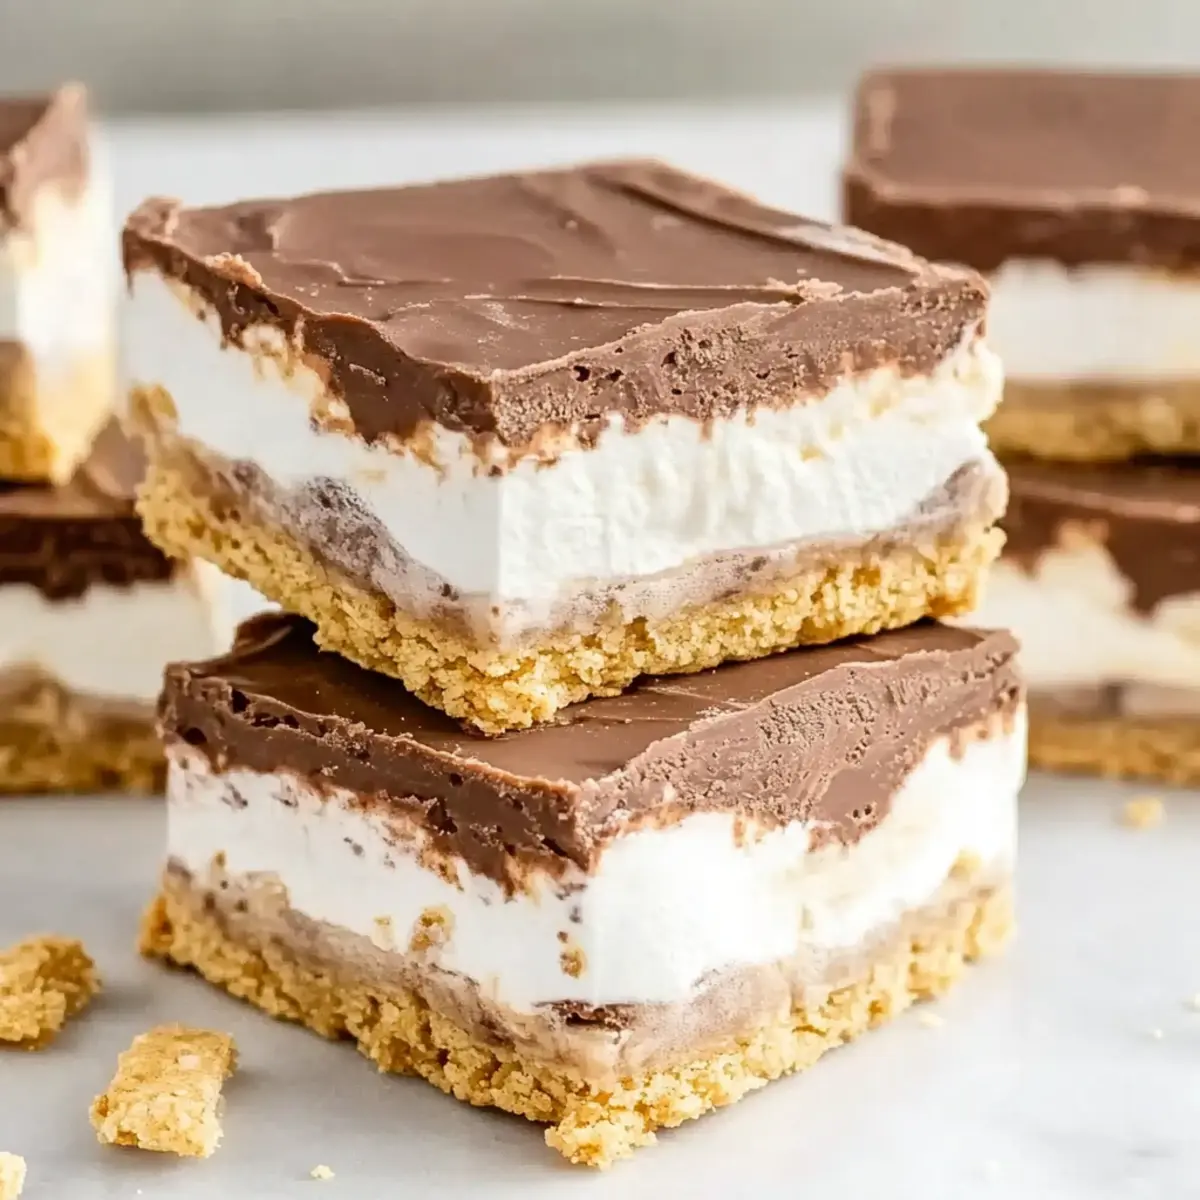
As summer rolls in, I can almost hear the laughter and crackling of campfire flames, painting a perfect picture of warm nights filled with sweet memories. This is precisely why I’m thrilled to share my No-Bake Frozen S’mores Bars, a delightful twist on our childhood favorite. These bars combine luscious layers of creamy chocolate pudding and fluffy marshmallow fluff, all nestled between crunchy graham crackers. Best of all, they’re a breeze to whip up—perfect for spontaneous gatherings with loved ones or a refreshing treat after a long day. With no baking required, these frozen desserts not only save you time but also guarantee smiles all around. Curious about how you can customize this deliciousness to suit your taste? Let’s dive in!
Why are Frozen S’mores Bars a Must-Try?
Nostalgic Flavor: These bars bring back cherished campfire memories with every bite, blending the classic tastes of chocolate, marshmallow, and graham cracker into a refreshing summer treat.
No-Bake Convenience: No need to turn on the oven! It’s a hassle-free recipe allowing you to enjoy a delightful dessert without the heat of cooking.
Versatile Creations: Customize with your favorite add-ins—think peanut butter or flavored pudding mixes—to make these bars uniquely your own.
Crowd-Pleasing Treat: Perfect for gatherings, these decadent dessert bars are sure to impress guests of all ages, making them a go-to for summer parties.
Quick to Prepare: With just a few simple steps, you can whip up a batch in no time, leaving you free to savor those sunny days! If you love easy summer treats, you might also want to check out these refreshing Blueberry Cheesecake Bars, which are just as delightful.
Frozen S’mores Bars Ingredients
For the Base
• Graham Crackers – Provide a delicious crunch and structure; swap for gluten-free graham crackers to cater to dietary needs.
For the Filling
• Chocolate Pudding – The rich, decadent layer that captures the essence of s’mores; use instant pudding for easy preparation or opt for vegan chocolate pudding for a dairy-free option.
• Marshmallow Fluff – Adds a sweet, airy texture; store-bought is quick, but homemade whipped topping can be used for a fresher taste with a slight variation in texture.
• Whipped Topping – Contributes a light creaminess; for a more decadent version, try using homemade whipped cream, noting it may affect the overall texture slightly.
Optional Toppings
• Crushed Nuts – Sprinkle for an extra crunch, enhancing flavor and texture; feel free to use your favorite nut variety.
• Chocolate Drizzle – Drizzle on top for a beautiful presentation and added chocolatey goodness; it elevates these Frozen S’mores Bars to a gourmet treat!
With these ingredients, you’re well on your way to creating a frozen dessert that evokes summer memories and delights everyone who takes a bite.
Step‑by‑Step Instructions for Frozen S’mores Bars
Step 1: Prepare the Chocolate Pudding
In a medium bowl, whisk together your chocolate pudding mix and milk according to package instructions. Stir vigorously until the mixture thickens, about 2 minutes. Once ready, let it set for 5 minutes. This creamy layer will be the heart of your Frozen S’mores Bars, adding rich chocolate flavor.
Step 2: Create the Base Layer
Grab a 9×9-inch baking dish and line the bottom with half of the graham crackers, breaking them as necessary to fill any gaps. Press them down gently to create an even base. This structure will anchor the layers of your delicious Frozen S’mores Bars, making them easy to slice later on.
Step 3: Spread the Chocolate Pudding
Once the pudding is fully set, pour it over the layer of graham crackers. Use a spatula to spread it evenly, reaching all corners of the dish. The smooth, luscious pudding should be about half an inch thick, creating a beautiful contrast against the crispy crackers below.
Step 4: Add the Marshmallow Fluff
Next, take the marshmallow fluff and dollop it over the chocolate pudding layer. Carefully spread it out with the spatula, ensuring a nice, thick layer. The marshmallow fluff adds a light, sweet touch, imbuing your Frozen S’mores Bars with that classic s’mores flavor.
Step 5: Top with Remaining Graham Crackers
Take the remaining half of your graham crackers and layer them on top of the marshmallow fluff. Press them down gently to ensure they stick well. This final layer will form the lid of your bars, encapsulating all the deliciousness inside and adding a satisfying crunch when you slice into them later.
Step 6: Freeze Until Solid
Cover the entire dish with plastic wrap or foil and place it in the freezer. Allow the bars to freeze for at least 6 hours or overnight if you can wait. You want them to be firm and set, providing that perfect texture when you cut into your Frozen S’mores Bars.
Step 7: Softening for Serving
When you’re ready to enjoy your treat, remove the Frozen S’mores Bars from the freezer. Let them sit at room temperature for 10-15 minutes. This allows the bars to soften slightly, making slicing easier and ensuring that each bite has that delightful creamy texture.
Step 8: Slice and Serve
Using a sharp knife, carefully slice the bars into squares or rectangles, as desired. For a finishing touch, consider drizzling with melted chocolate or sprinkling crushed nuts. Serve these delightful Frozen S’mores Bars to family and friends, and get ready for the compliments to roll in!
How to Store and Freeze Frozen S’mores Bars
Fridge: Keep the bars in an airtight container for up to 3 days. This retains their freshness and prevents any loss of flavor.
Freezer: Wrap individual bars in plastic wrap or foil, then place them in a freezer-safe container. They can be stored for up to 3 months, ensuring you always have a delicious treat on hand.
Serving Tips: Before serving, let the bars thaw at room temperature for 10-15 minutes, allowing them to soften slightly for that perfect texture.
Reheating: While you typically won’t need to reheat Frozen S’mores Bars, if desired, place them in a microwave for just a few seconds to soften before serving.
What to Serve with Frozen S’mores Bars?
As you prepare to indulge in these delightful frozen treats, consider pairing them with complementary flavors and textures that will elevate your dessert experience.
- Classic Vanilla Ice Cream: The smooth creaminess of vanilla ice cream beautifully balances the rich chocolate layers, adding a refreshing contrast.
- Fresh Berries: Juicy strawberries or raspberries add a pop of sweetness and tartness, enhancing the overall flavor profile when served alongside.
- Chocolate Sauce: Drizzle warm chocolate sauce over the bars for an added layer of decadence that appeals to true dessert lovers. Each gooey bite will be pure bliss!
- Whipped Cream: A dollop of whipped cream brings an extra lightness and creaminess, providing a delightful finish to each slice of your Frozen S’mores Bars.
- Coconut Flakes: Toasted coconut adds an unexpected tropical twist, enhancing both the flavor and texture while giving a nod to the summery vibes.
- Mint Infused Water: Refreshing mint infusion in your water can cleanse the palate perfectly between bites, balancing the rich dessert with something light and refreshing.
- Coffee or Espresso: A cup of coffee or a shot of espresso makes an excellent accompaniment, as the slight bitterness complements the sweetness of the bars.
- Chocolate-Covered Pretzels: For a fun textural contrast, serve these sweet and salty treats alongside the bars to provide that delightful crunch and extra flavor surprise!
- Fruit Salad: A light fruit salad with melons and citrus not only looks inviting but offers a fresh, juicy bite that pairs beautifully with the frozen bars.
With these delicious options, you can create a perfect dessert spread that will have everyone reaching for more!
Frozen S’mores Bars Variations
Feel free to get creative with your Frozen S’mores Bars; let your taste buds guide you on this delightful journey!
-
Peanut Butter Twist: Mix creamy peanut butter into the chocolate pudding layer for a nutty flavor explosion that complements the sweetness beautifully.
-
Nutella Layer: For a chocolate lover’s dream, replace chocolate pudding with Nutella mixed with whipped cream for a decadent twist. The flavors mesh perfectly for a rich treat!
-
Fruit Addition: Swap marshmallow fluff with fresh berries like strawberries or raspberries. This fruity contrast not only adds color but brings a refreshing zing to each bite.
-
Flavorful Pudding: Use flavored pudding mixes, like vanilla or banana, to add a unique twist to the classic flavor. These variations change the vibe completely, which is delightful during summer!
-
Add Crunch: Incorporate crushed nuts or toffee bits into the chocolate layer for added texture and flavor. Imagine the delicious crunch that complements the creamy pudding perfectly!
-
Chocolate Drizzle: Drizzle melted chocolate over the top before freezing for an elegant extra layer of chocolatey goodness. It not only looks fabulous but enhances the chocolate experience!
-
Spice it Up: Sprinkle a pinch of cinnamon or cayenne pepper in the marshmallow layer for a surprising kick! This warm spice adds an unexpected depth that’ll have your guests wanting more.
Be sure to try out these ideas for your next outdoor party, creating the perfect centerpiece dessert while also pairing seamlessly with other treats like these refreshing Blueberry Cheesecake Bars!
Make Ahead Options
These Frozen S’mores Bars are ideal for meal prep and can save you precious time during busy summer days! You can prepare the layers in advance by making the chocolate pudding and storing it in the refrigerator for up to 24 hours. Additionally, the assembled bars can be frozen for up to 3 months, wrapped tightly in plastic wrap to maintain their texture and flavor. When you’re ready to serve, simply remove them from the freezer and let them sit at room temperature for 10-15 minutes before slicing for perfectly clean edges. This way, you’ll have a delicious and delightful dessert ready to impress your family and friends with minimal last-minute effort!
Expert Tips for Frozen S’mores Bars
• Layer Carefully: Aim for even layers when assembling. Uneven layers can lead to messy slicing. Clean cuts ensure beautiful presentation of your Frozen S’mores Bars.
• Check Freezing Time: Make sure to freeze for at least 6 hours. If under-frozen, bars may be too soft to slice neatly. Patience is key for success!
• Select the Right Pudding: Opt for instant chocolate pudding for reliability, as it thickens rapidly. If you make your own, be aware of how the texture changes when frozen.
• Use Quality Graham Crackers: Choose sturdy graham crackers to maintain crunch. Faded or stale ones may crumble too easily, impacting the texture of your Frozen S’mores Bars.
• Softening Before Serving: Allow bars to sit at room temperature for 10-15 minutes before slicing. This ensures a perfect, creamy texture that’s easy to enjoy!
Frozen S’mores Bars Recipe FAQs
What type of graham crackers should I use for Frozen S’mores Bars?
Absolutely! Regular graham crackers provide the ideal structure and crunch. If you’re gluten-free, you can easily substitute with gluten-free graham crackers, which work just as well and keep the integrity of this delightful no-bake dessert.
How should I store Frozen S’mores Bars, and how long will they last?
Great question! Store your Frozen S’mores Bars in an airtight container in the fridge for up to 3 days for optimal freshness. For longer storage, wrap individual bars in plastic wrap or foil and place them in a freezer-safe container; they can last up to 3 months in the freezer.
Can I freeze Frozen S’mores Bars, and how do I do that?
Yes, indeed! To freeze your Frozen S’mores Bars, start by wrapping each bar individually in plastic wrap or aluminum foil. Then, place them in a freezer-safe container or a resealable freezer bag. Lay them flat in the freezer to maintain their shape. They’re perfect for those spontaneous sweet cravings and can be stored for up to 3 months. When ready to enjoy, simply let them sit at room temperature to soften for 10-15 minutes before indulging!
What if my chocolate pudding layer is too thin?
Very much a common issue! If your chocolate pudding layer is thinner than you’d like, allow it to set for a longer time per the package instructions—usually around 5 to 10 minutes does the trick. Make sure to whisk well to avoid lumps. If making your own pudding, ensure it’s thick enough before layering; letting it cool until it thickens is essential for structure.
Are there any dietary considerations for Frozen S’mores Bars?
Absolutely! If you’re catering to special dietary needs, you can easily modify this recipe. Use a vegan chocolate pudding mix for a dairy-free option. Marshmallow fluff is already typically gluten-free, but double-check the label; some brands may contain gluten. For nut allergies, feel free to omit any add-ins like crushed nuts. Enjoy creating a version that everyone can love!
Irresistible Frozen S'mores Bars: A Fun No-Bake Delight
Ingredients
Equipment
Method
- Prepare the Chocolate Pudding: In a medium bowl, whisk together chocolate pudding mix and milk according to package instructions. Stir until thickened, about 2 minutes. Let it set for 5 minutes.
- Create the Base Layer: Line the bottom of a 9x9-inch baking dish with half of the graham crackers, breaking to fit. Press down gently to form an even base.
- Spread the Chocolate Pudding: Pour the pudding over the graham crackers and spread evenly with a spatula.
- Add the Marshmallow Fluff: Dollop marshmallow fluff over the pudding and spread it evenly.
- Top with Remaining Graham Crackers: Layer remaining graham crackers on top of the marshmallow fluff and press gently.
- Freeze Until Solid: Cover with plastic wrap or foil and freeze for at least 6 hours or overnight.
- Softening for Serving: Let bars sit at room temperature for 10-15 minutes before serving.
- Slice and Serve: Using a sharp knife, slice into squares or rectangles and optionally drizzle with chocolate or sprinkle nuts.
Leave a Reply