
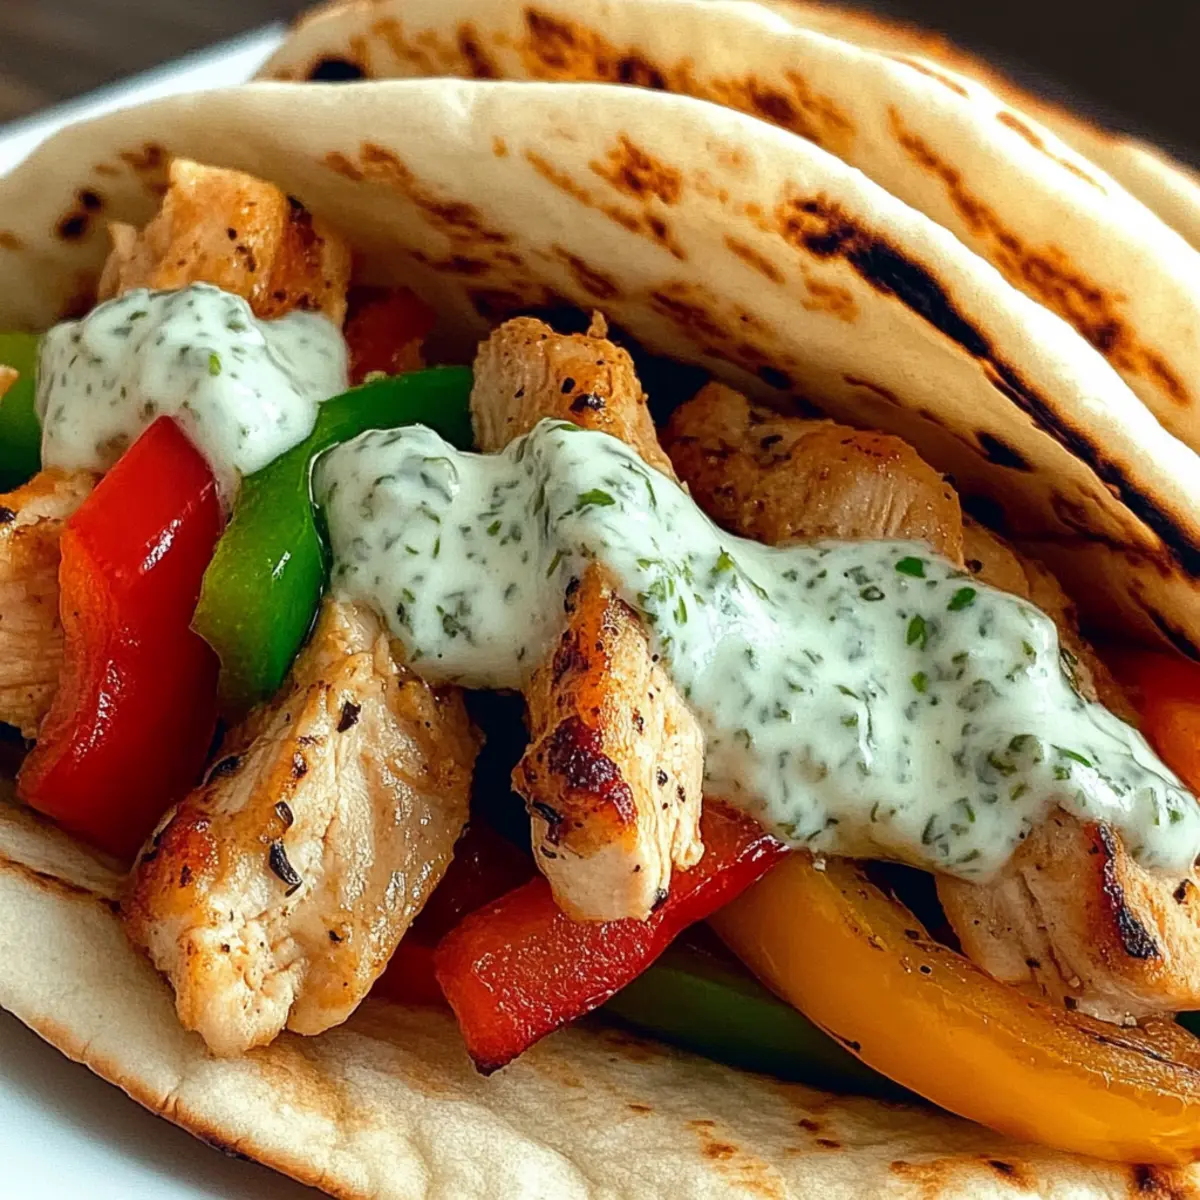
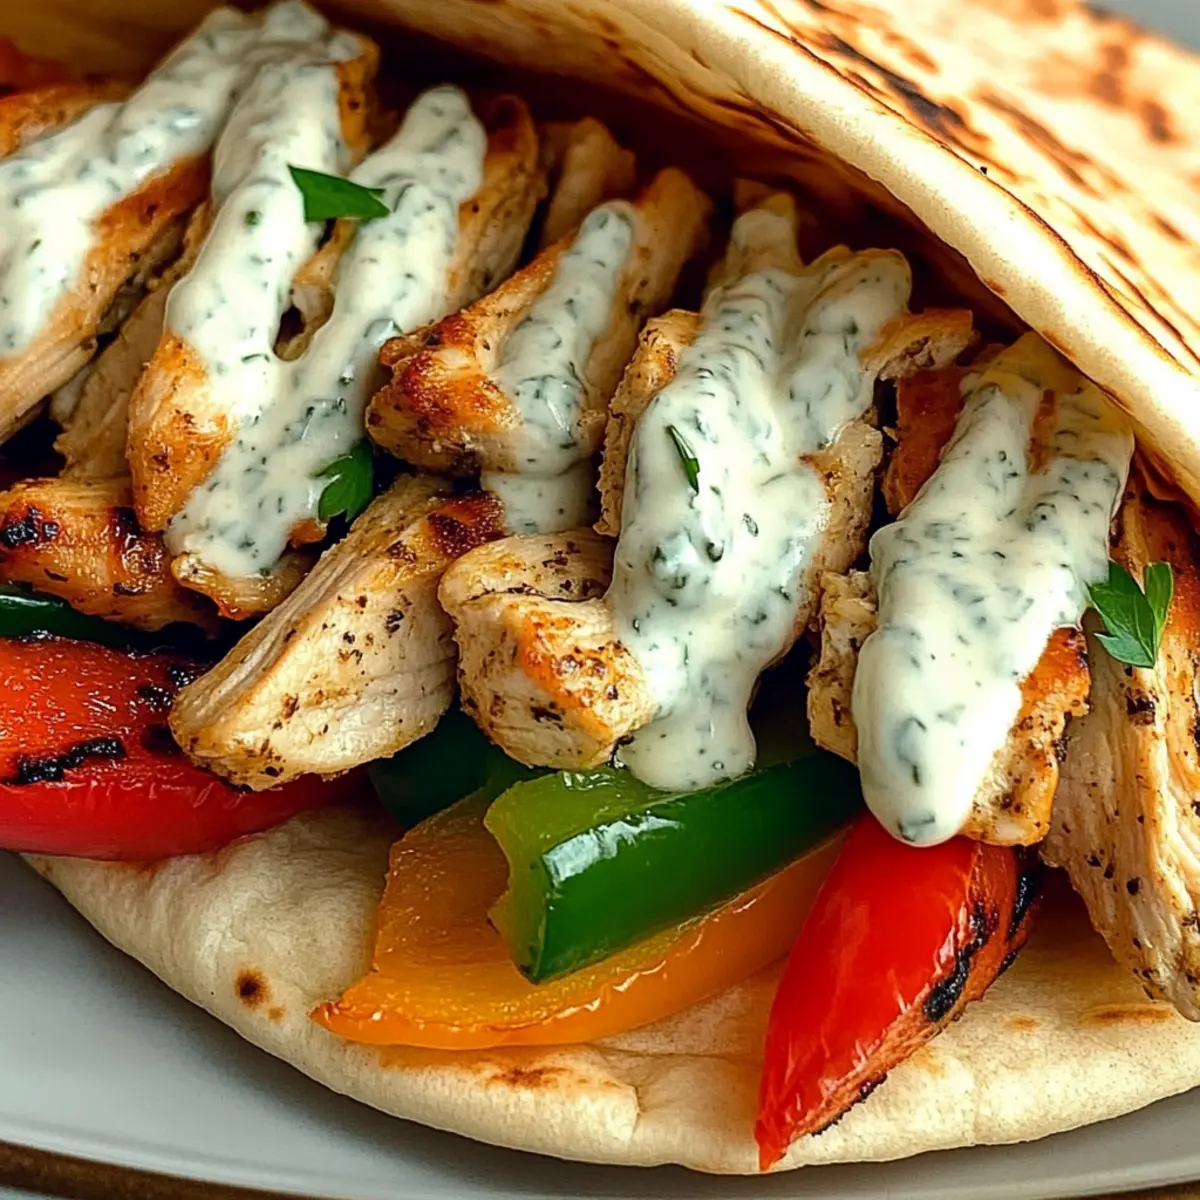
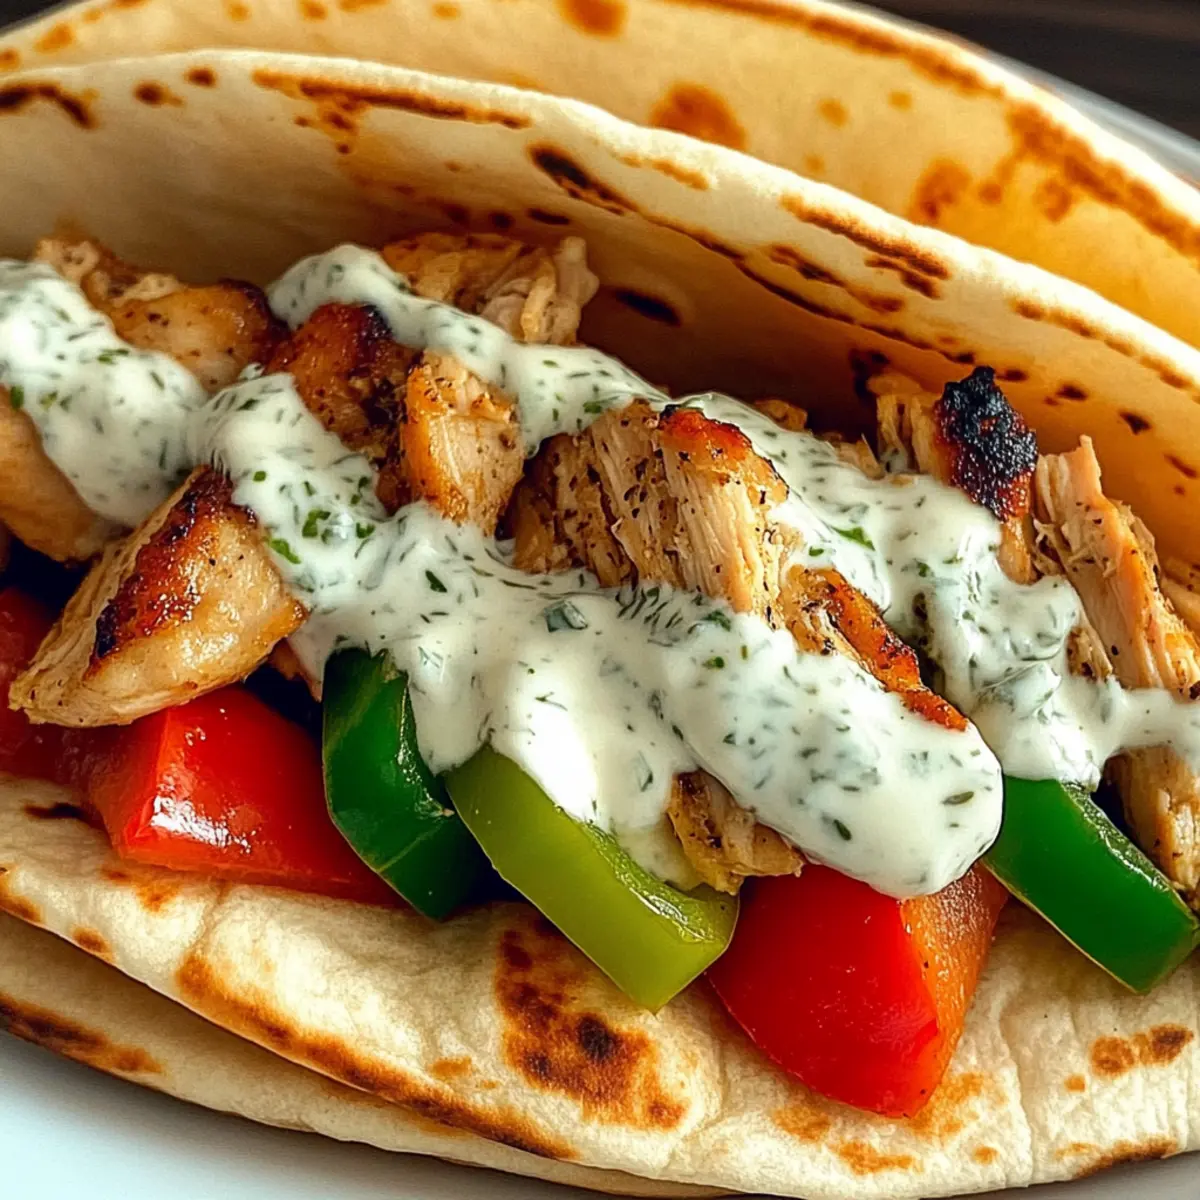
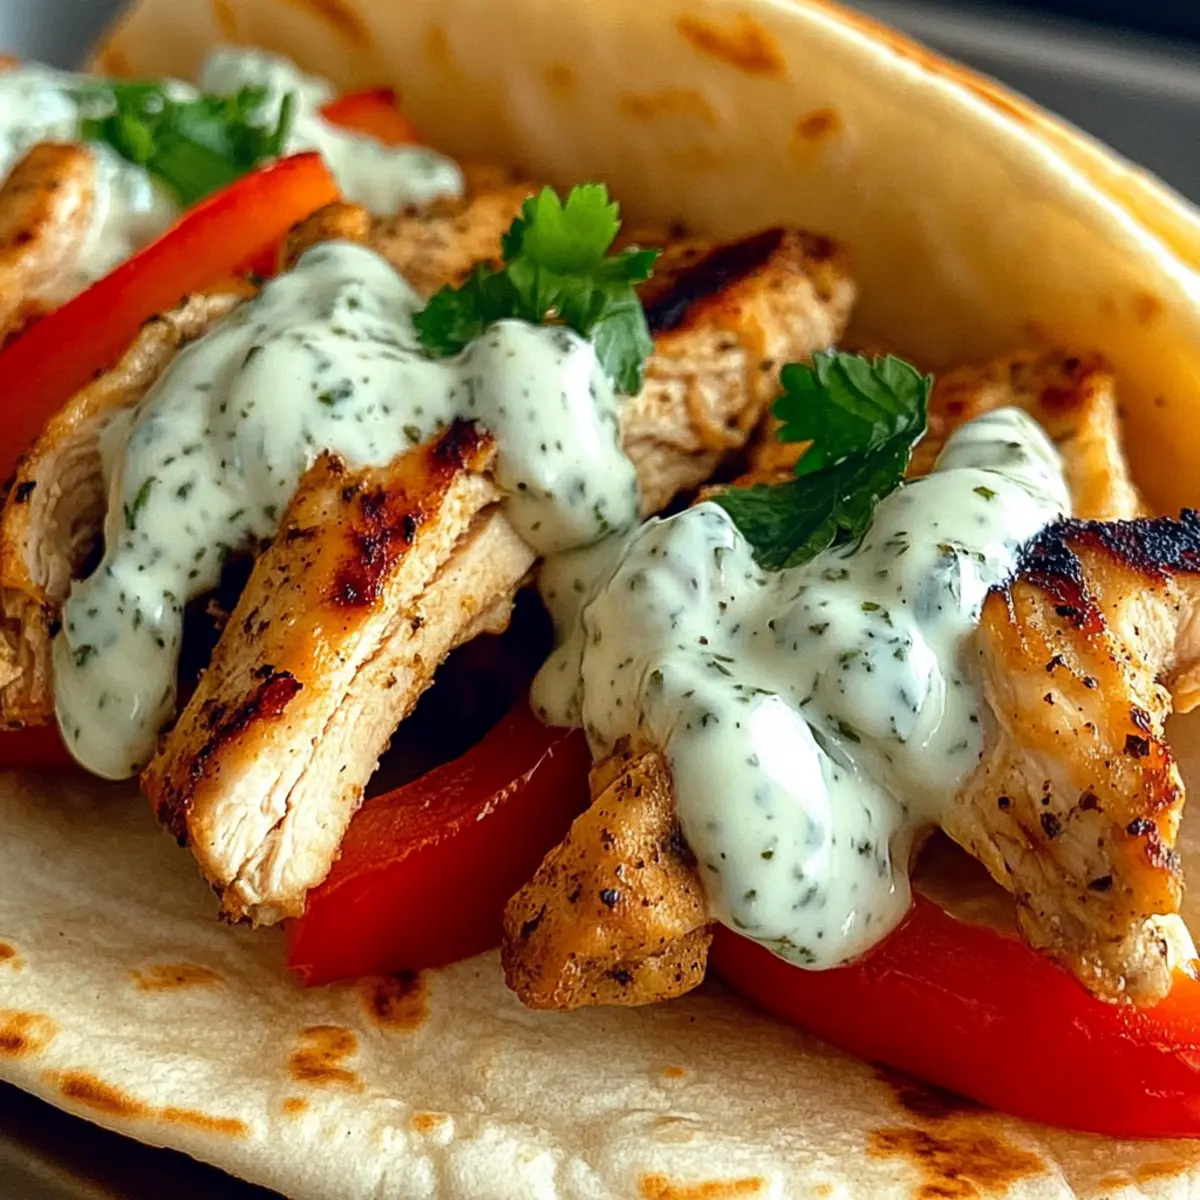
The oven’s warm embrace invited me in, promising a culinary adventure that would turn my dining table into a vibrant feast. If you’re anything like me, you often dream of homemade meals that outshine takeout, and that’s exactly what the Easy Better Than Takeout Sheet Pan Chicken Pitas with Herby Ranch Sauce deliver. In just 20 minutes, you’ll have crispy, juicy chicken nestled in warm pita pockets, drizzled with a zesty ranch sauce that adds a refreshing twist. Not only is this dish a total crowd-pleaser, but it also offers a quick prep solution for busy nights. Plus, with gluten-free options available, everyone can enjoy this flavorful delight. Ready to elevate your weeknight dinner game and impress yourself and your loved ones? Let’s dive into this recipe that’s sure to have you saying goodbye to takeout for good!
Why Are These Pitas So Amazing?
Uniqueness at its finest: These Sheet Pan Chicken Pitas reimagine your favorite takeout in a delightful homemade version. Quick and easy: You can whip this up in just 20 minutes—perfect for busy weeknights! Flavor explosion: The herby ranch sauce adds a zesty twist that is simply irresistible. Crowd-pleaser: Everyone at the table, including picky eaters, will be begging for seconds! For an even heartier option, try pairing these pitas with a fresh side salad or sweet potato fries. Diet-friendly: Gluten-free options ensure that everyone gets to join in on the deliciousness! Enjoy the taste of takeout without the hassle!
Sheet Pan Chicken Pita Ingredients
For the Chicken
• Boneless, Skinless Chicken Breasts – this is your go-to protein for a juicy, tender base.
• Olive Oil – keeps the chicken moist while helping it achieve that crispy finish.
• Seasonings – a blend of your favorites adds depth and excitement to your chicken.
For the Pitas
• Pita Bread – use traditional or swap for gluten-free pita or lettuce wraps to cater to dietary needs.
For the Veggies
• Bell Peppers – provide a sweet crunch and vibrant color; try other roasted veggies for variety.
For the Herby Ranch Sauce
• Sour Cream or Greek Yogurt – a creamy base that balances out the spices and fresh herbs.
• Fresh Herbs – parsley, dill, or chives elevate the flavor profile; mix it up to find your perfect combo!
• Spices – the right mix of garlic powder, onion powder, or paprika can jazz up your ranch sauce.
This dish brings together all the best flavors in a quick-to-make meal that’s even better than takeout!
Step‑by‑Step Instructions for Easy Better Than Takeout Sheet Pan Chicken Pitas with Herby Ranch Sauce
Step 1: Preheat the Oven
Begin by preheating your oven to 375°F (190°C). This temperature ensures your chicken cooks evenly while achieving that delicious crispness. A hot oven is essential for the best results, so take a moment to let it fully heat up before proceeding.
Step 2: Prepare the Chicken
While the oven is heating, cut your boneless, skinless chicken breasts into bite-sized pieces. In a mixing bowl, toss the chicken with olive oil and your favorite seasonings until evenly coated. The oil helps to lock in moisture and flavor, setting the stage for your tasty Sheet Pan Chicken Pitas.
Step 3: Slice the Vegetables
Next, wash and slice the bell peppers into thin strips. Their sweet crunch will contrast beautifully with the juicy chicken. If you’d like to add other vegetables, this is the time to prepare them as well. You want an array of colors to brighten up your sheet pan and add extra nutrients!
Step 4: Arrange on the Sheet Pan
Spread the seasoned chicken and sliced bell peppers evenly on a large sheet pan, making sure not to overcrowd the pieces. This helps them roast properly and achieve that perfect crunch. Use parchment paper for easy cleanup if you wish, and feel free to shake the pan slightly to arrange everything evenly.
Step 5: Bake for Perfect Crispness
Place the sheet pan in the preheated oven and bake for 10-12 minutes. For even cooking, shake the pan halfway through. You’ll know the chicken is done when it turns golden brown and the internal temperature reaches 165°F (74°C). The vibrant colors of the peppers should also be softened but still bright.
Step 6: Prepare the Herby Ranch Sauce
While the chicken and peppers are baking, prepare your herby ranch sauce. In a bowl, combine sour cream or Greek yogurt with freshly chopped herbs and your chosen spices. Mix well until you achieve a smooth consistency. This sauce will elevate your Sheet Pan Chicken Pitas with a creamy, flavorful kick.
Step 7: Assemble the Pitas
Once the chicken and bell peppers are cooked to perfection, remove the sheet pan from the oven. Warm your pita bread briefly, then layer with the succulent chicken and peppers. Drizzle generously with the herby ranch sauce, topping with additional herbs if desired for extra flavor.
Step 8: Serve Immediately
Serve your Easy Better Than Takeout Sheet Pan Chicken Pitas right away while everything is warm and fresh. Pair them with a side salad or some sweet potato fries for a complete meal that’s sure to impress your loved ones. Enjoy this homemade takeout alternative!
What to Serve with Easy Better Than Takeout Sheet Pan Chicken Pitas
Transform your sheet pan chicken pitas into a feast with delightful sides and drinks that elevate every bite!
-
Crispy Sweet Potato Fries: Their natural sweetness and crispy texture make a superb contrast to the savory chicken and creamy ranch.
-
Fresh Side Salad: A vibrant mix of greens, cherry tomatoes, and cucumbers adds a refreshing crunch that complements the richness of the dish.
-
Garlic Herb Roasted Vegetables: Seasonal roasted veggies enhance flavor and nutrition, introducing a colorful and wholesome element to your meal.
-
Zesty Coleslaw: The tangy crunch of coleslaw offers an additional delightful bite, balancing the creamy herby ranch sauce perfectly.
-
Mediterranean Couscous: Fluffy couscous with olives, feta, and herbs brings a Mediterranean flair, beautifully pairing with the inspired flavors of your pitas.
-
Sparkling Lemonade: A bubbly, citrusy drink cuts through the richness, refreshing your palate while completing your meal experience.
Explore these mouthwatering pairings to create a complete dining experience that will have everyone coming back for more!
How to Store and Freeze Sheet Pan Chicken Pitas
Fridge: Store leftovers in an airtight container for up to 3 days. This helps maintain flavor and freshness while keeping the chicken tender.
Freezer: For long-term storage, freeze the cooked chicken and peppers in a freezer-safe bag for up to 3 months. Avoid freezing the pitas and ranch sauce separately to preserve texture.
Reheating: To reheat, bake in the oven at 350°F (175°C) for 10-15 minutes until warmed through. This method keeps the chicken and pitas nice and crispy, just like when freshly made!
Assembly Tip: When ready to enjoy, assemble your pitas with freshly made ranch sauce for the best flavor experience.
Sheet Pan Chicken Pitas Variations
Feel free to let your creativity shine in the kitchen by customizing these delicious pitas to suit your tastes!
-
Herb Swap: Use fresh basil or cilantro instead of parsley for a fresh flavor twist—perfect for warm summer evenings at the table.
-
Spice It Up: Add a pinch of cayenne or smoked paprika to the chicken for an extra kick! This little boost elevates your dish, making it unforgettable.
-
Veggie Fusion: Mix in kale or spinach with the bell peppers for extra color and nutrients. The crunch of the peppers paired with the greens is a match made in heaven!
-
Dairy-Free: Substitute Greek yogurt with a plant-based yogurt alternative to make the herby ranch sauce dairy-free. You still get that creamy texture without compromising flavor.
-
Protein Variety: Swap chicken for turkey or crispy tofu for a new take on your pitas. Each protein brings its own unique taste and benefits, offering a fresh dining experience!
-
Zesty Citrus: Add a splash of lemon or lime juice to the herby ranch sauce for a bright citrus twist. The zing pairs beautifully with the savory chicken.
-
Crunch Factor: Introduce pickled red onions or sliced radishes as a topping to add extra crunch and tanginess. These vibrant additions make your meal even more sensational.
If you’re in the mood for more delicious variations, check out these delightful recipes: Cajun Grilled Chicken for a bold twist, or perhaps try Grilled Chicken Salad for a more refreshing option. Enjoy exploring your kitchen!
Expert Tips for Sheet Pan Chicken Pitas
• Avoid Overcrowding: Ensure chicken and peppers are spread out; overcrowding can lead to sogginess instead of crispiness.
• Prep Ahead: For an efficient dinner, consider marinating the chicken and making the herby ranch sauce a day in advance, stored separately.
• Check Doneness: Use a meat thermometer to confirm chicken reaches 165°F (74°C) for safe, juicy results.
• Customize Veggies: Feel free to mix in other vegetables like zucchini or mushrooms. Experiment for unique flavor combinations in your Sheet Pan Chicken Pitas.
• Reheating Leftovers: To keep the toppings fresh, reheat in the oven at 350°F (175°C) for 10-15 minutes rather than the microwave.
Make Ahead Options
These Easy Better Than Takeout Sheet Pan Chicken Pitas with Herby Ranch Sauce are perfect for meal prep enthusiasts! You can marinate the chicken in olive oil and your favorite seasonings up to 24 hours in advance, which not only enhances the flavor but also saves you precious cooking time. The herby ranch sauce can also be prepared ahead and stored in the refrigerator for up to 3 days. To ensure their crispiness, it’s best to bake the chicken and bell peppers fresh when you’re ready to serve; simply toss everything onto a sheet pan and roast for about 10-12 minutes after preheating the oven. Just remember to layer the pitas and drizzle on the sauce immediately after baking for restaurant-quality results!
Easy Better Than Takeout Sheet Pan Chicken Pitas with Herby Ranch Sauce Recipe FAQs
What type of chicken is best for this recipe?
I recommend using boneless, skinless chicken breasts for their moisture and flavor. Cut them into bite-sized pieces for the best cooking results and a more enjoyable eating experience.
How should I store leftovers?
Store any leftovers in an airtight container in the fridge for up to 3 days. This will help maintain the flavor and keep the chicken tender. Just make sure to keep the sauce separate until you’re ready to eat!
Can I freeze the cooked chicken and pitas?
Absolutely! To freeze, place the cooled cooked chicken and bell peppers in a freezer-safe bag, and they’ll last for up to 3 months. I suggest avoiding the freezing of the pitas and ranch sauce separately to maintain quality. When you’re ready to enjoy, simply reheat the chicken in the oven at 350°F (175°C) for 10-15 minutes.
How do I ensure the pitas stay crispy when reheating?
For the best texture when reheating, place the pitas in the oven rather than the microwave. Bake at 350°F (175°C) for about 10-15 minutes until warmed through. This method will keep them crispy and delicious, just like when you first made the Easy Better Than Takeout Sheet Pan Chicken Pitas!
Can I make this dish gluten-free?
Absolutely! Just swap out regular pita bread for gluten-free pitas, or use lettuce wraps instead. This way, everyone can enjoy this fantastic meal without worries about dietary restrictions!
Crispy Sheet Pan Chicken Pitas with Herby Ranch Sauce Magic
Ingredients
Equipment
Method
- Preheat your oven to 375°F (190°C).
- Cut the chicken into bite-sized pieces and toss with olive oil and seasonings.
- Wash and slice the bell peppers into thin strips.
- Spread the chicken and bell peppers evenly on a large sheet pan.
- Bake for 10-12 minutes until chicken is golden brown and internal temperature reaches 165°F (74°C).
- Prepare the herby ranch sauce by mixing sour cream or Greek yogurt with herbs and spices.
- Warm the pita bread, then layer with chicken and bell peppers, drizzling with ranch sauce.
- Serve immediately with a side salad or sweet potato fries.
Leave a Reply