
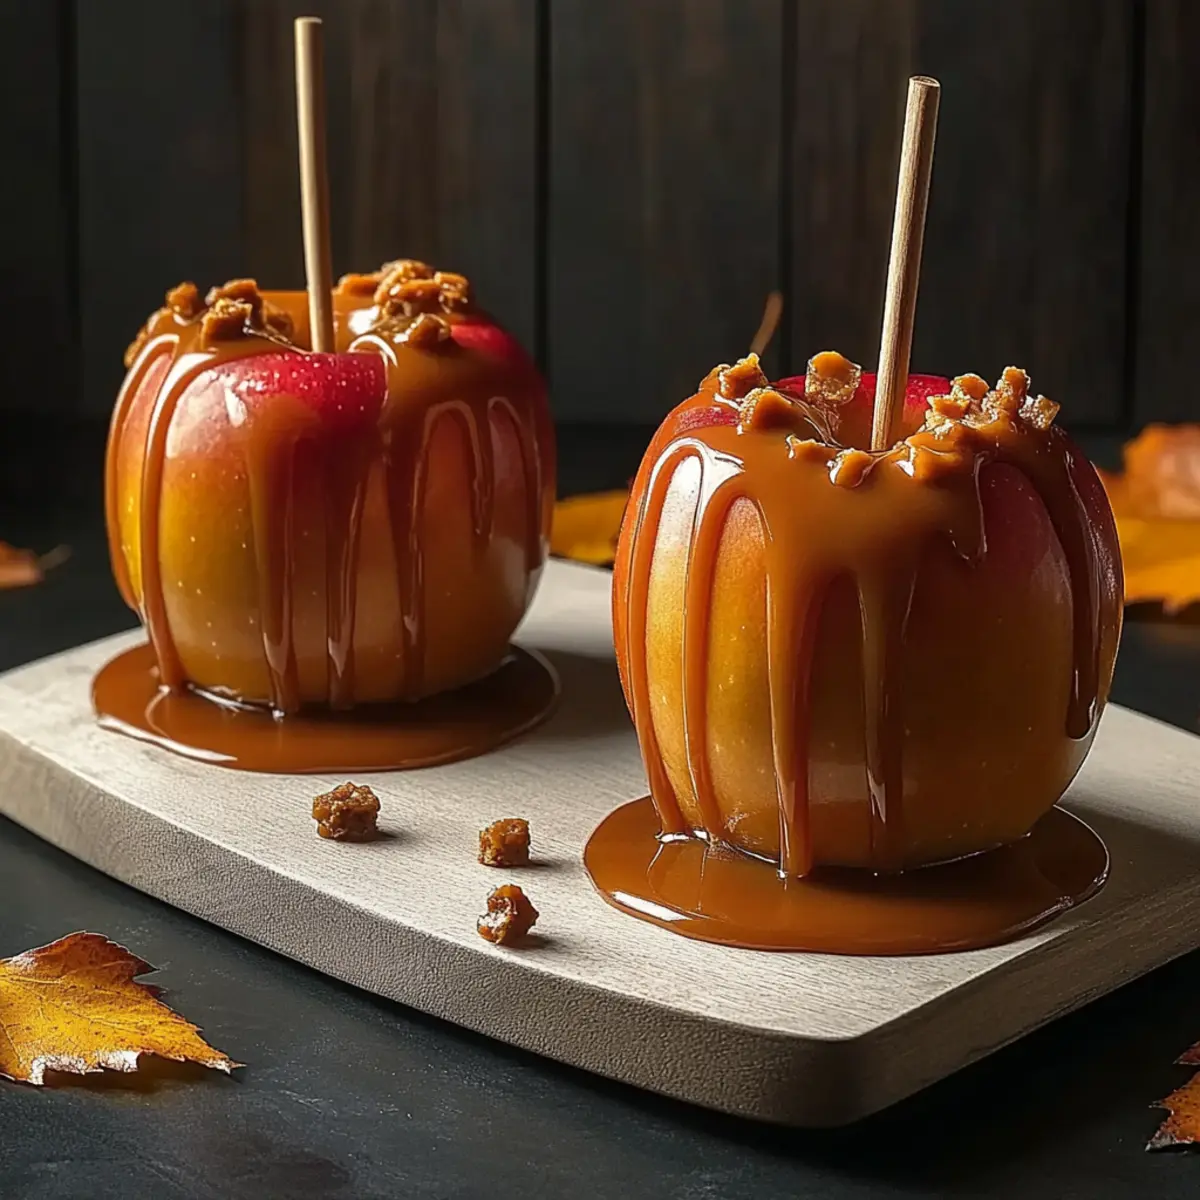
As the cool air of autumn rolls in, there’s nothing quite like the aroma of sweet caramel melting over crisp, tart Granny Smith apples. This Classic Caramel Apple recipe is your ticket to creating those nostalgic fall treats that bring smiles to both young and old. With just a few easy steps, you can whip up a batch of these customizable delights that are perfect for sharing at gatherings or enjoying with loved ones. Plus, they’re a fun way to get the kids involved in the kitchen! Imagine the joy on their faces as they dip their apples into warm caramel, rolling them in toffee bits and other toppings to create their own sweet masterpieces. Ready to make memories with each luscious bite? Let’s dive into this simple yet irresistible recipe!
Why are caramel apples a fall favorite?
Nostalgic Experience: There’s something magical about biting into a caramel apple that takes you back to crisp fall days and fun fairs. Customizable Delights: You can easily tailor each apple with various toppings like toffee bits or chocolate. Kid-Friendly Fun: This recipe is perfect for getting kids involved, creating joyful kitchen memories together. Easy Technique: Even beginner cooks will impress with this simple method! Serve them alongside a warm cup of cider or check out our Salted Caramel Banana recipe for a sweet pairing. Perfect Party Treats: These caramel apples are an eye-catching, delicious addition to any autumn gathering!
Caramel Apple Ingredients
• Everything you need for this delicious recipe!
For the Apples
- Granny Smith Apples – Provide tartness and crunch; freshness is key for the best flavor.
- Wooden Craft Sticks – Used to hold apples for easy dipping; ensure they’re sturdy for support.
For the Caramel
- Granulated Sugar – The main sweetener for caramel that balances flavor; you can experiment with light brown sugar for a richer taste.
- Light Corn Syrup – Prevents crystallization in caramel; honey or golden syrup can be used as substitutes but may alter the texture.
- Water – Helps dissolve sugar and is essential for starting the caramel process.
- Heavy Cream – Creates a rich texture in caramel; half-and-half can be used for a lighter version but may modify flavor.
- Unsalted Butter – Adds creaminess and flavor depth; replace with margarine for a dairy-free version, though flavor will differ.
- Vanilla Extract – Enhances the overall taste; using quality extract ensures the best flavor infusion.
- Sea Salt – Balances the sweetness; consider flaked sea salt for added texture.
For Coating and Topping
- Toffee Bits – For coating the caramel apples, adding a sweet crunch; crushed nuts or sprinkles can be substitutes if desired.
Step‑by‑Step Instructions for Classic Caramel Apples
Step 1: Prepare the Apples
Begin by washing and thoroughly drying the Granny Smith apples to remove any wax. Insert a sturdy wooden craft stick into the top of each apple, pushing it about two-thirds in for proper support. This step is key to ensuring easy dipping in caramel later. Once all sticks are in place, set the apples aside on a clean surface.
Step 2: Line the Baking Sheet
Next, line a baking sheet with parchment paper to prevent the caramel from sticking once the apples are dipped. This will create a perfect setting area for your delicious caramel apples. Make sure the paper is smooth and flat, as this will help keep your finished treats looking pristine.
Step 3: Cook the Caramel Mixture
In a heavy-bottomed saucepan, combine granulated sugar, light corn syrup, and water over medium heat. Stir gently until the sugar is fully dissolved, which should take about 4–5 minutes. As the mixture heats, watch for it to begin bubbling gently, indicating that you’re ready for the next step.
Step 4: Monitor the Temperature
Once the sugar mixture is bubbling, stop stirring and attach a candy thermometer to the side of the saucepan. Continue cooking the caramel until it reaches a temperature of 245°F (118°C). This precise temperature is crucial as it ensures a perfect chewy texture in your caramel apple coating.
Step 5: Add the Cream
While the caramel cooks, slightly warm the heavy cream in a separate container—this helps it blend smoothly. Once the caramel reaches 245°F, carefully add the warmed heavy cream to the saucepan. Be prepared for bubbling and steam—it’s natural! Stir gently to combine, continuing on low heat for another minute.
Step 6: Incorporate Flavors
Now, remove the saucepan from heat and quickly stir in unsalted butter, vanilla extract, and a pinch of sea salt. Mix until everything is well combined and the butter has melted, creating a glossy and rich caramel sauce. Allow the mixture to cool slightly for 2-3 minutes before dipping your apples.
Step 7: Dip the Apples
Hold each apple by the stick and dip it into the warm caramel, ensuring an even coating by twisting the apple as you lift it out. Let any excess caramel drip back into the saucepan, creating a beautiful layer. If you choose, roll the caramel-coated apple in toffee bits or your preferred topping for extra crunch and flavor.
Step 8: Set the Apples
Carefully place the dipped caramel apples upright on the parchment-lined baking sheet. Allow them to set at room temperature for about 1 hour. This helps the caramel firm up and gives each apple that irresistible glossy finish, ready for sharing and enjoying!
Make Ahead Options
These Classic Caramel Apples are perfect for busy home cooks looking to save time! You can prepare the caramel sauce up to 3 days in advance—just store it in an airtight container in the refrigerator. When you’re ready to dip the apples, rewarm the caramel gently over low heat until it’s pourable. Additionally, you can wash and dry the Granny Smith apples a day ahead, keeping them in the fridge to maintain their crunch and prevent browning. On the day of serving, simply attach the sticks and dip the apples into your pre-prepared caramel, then let them set. This way, you’ll enjoy delicious caramel apples with minimal effort!
What to Serve with Classic Caramel Apples?
Indulging in these sweet, gooey delights is a sensory pleasure, and pairing them with complementary dishes can elevate your fall experience.
-
Hot Apple Cider: A warm cup of spiced apple cider enhances the cozy vibe while balancing the sweetness of the caramel apples. The cinnamon notes offer a comforting touch that pairs perfectly with each delicious bite.
-
Vanilla Ice Cream: Creamy vanilla ice cream is the perfect contrast to the chewy caramel and crisp apple. The cool, creamy texture melts in your mouth and makes each caramel apple moment feel extra indulgent.
-
Spiced Nuts: Crunchy spiced nuts, such as candied pecans or walnuts, add a lovely contrast in texture and flavor. Their nuttiness pairs brilliantly with the sweetness of the caramel, making for a delightful snack combo.
-
Pumpkin Soup: A warm bowl of velvety pumpkin soup adds a savory balance to the sweet treats. Its rich, earthy flavors and creamy texture are perfect for enhancing a cozy fall gathering.
-
Cheese Plate: Serving a variety of cheeses, like sharp cheddar or tangy goat cheese, adds sophistication. The savory notes of the cheese beautifully cut through the sweetness of the caramel, creating a well-rounded snack.
-
Maple-Walnut Coffee: Enjoy your caramel apples with a warming cup of maple-walnut coffee, bringing together nutty flavors with sweet maple undertones. It complements the caramel’s richness, making every bite feel like a cozy autumn hug.
-
Chocolate Dipped Pretzels: The salty crunch of chocolate dipped pretzels makes for an excellent dessert companion. Their contrast of flavors keeps your taste buds engaged as you savor the caramel apple.
-
Chocolate Milkshake: A thick and creamy chocolate milkshake offers delicious decadence. The combination of flavors is a dreamy pairing with the caramel apple, perfect for a fun fall treat that delights both kids and adults.
Expert Tips for Classic Caramel Apples
-
Dry Apples Well: Ensure your apples are completely dry before dipping; any moisture can prevent the caramel from adhering properly.
-
Use a Candy Thermometer: This tool is essential for achieving the perfect caramel texture. Overheating leads to burnt caramel, ruining your delicious treat.
-
Do Not Stir After Boiling: Once the sugar mixture reaches a boil, refrain from stirring to prevent crystallization, which can affect the caramel’s smoothness.
-
Rewarm for Dipping: If the caramel starts to thicken too much, gently rewarm it on low heat to maintain the perfect dipping consistency for your caramel apples.
-
Work Quickly: When you dip the apples, do so swiftly to ensure that the caramel clings evenly, resulting in that satisfying glossy finish your caramel apple deserves.
Caramel Apple Variations & Substitutions
Feel free to explore new flavors and textures with these delightful variations that will elevate your classic caramel apples!
-
Sweeter Apple Choices: Use Honeycrisp or Fuji apples for a sweeter, juicier bite that complements the caramel beautifully.
-
Chocolate Drizzle: Add a decadent touch by melting chocolate to drizzle over the finished caramel apples; it creates a rich contrast.
-
Nutty Crunch: Roll your caramel apples in chopped pecans or almonds for an added texture that brings a delightful crunch.
-
Spicy Kick: Sprinkle a bit of cayenne pepper or cinnamon on top of the caramel to give your apples a surprising and warm kick.
-
Dairy-Free Option: Substitute coconut cream for heavy cream and margarine for butter to create a deliciously creamy, dairy-free caramel.
-
Pudding Coating: For a fun twist, dip apples into vanilla pudding before the caramel for a unique layered flavor experience!
-
Gourmet Finishes: Top with flaky sea salt, or try a combination of crushed pretzels and toffee bits for an exciting sweet-savory finish that will impress guests.
For another tasty treat, check out our Salted Caramel Banana recipe, perfect for satisfying that sweet tooth. Enjoy creating your own signature combinations!
How to Store and Freeze Caramel Apples
-
Room Temperature: Caramel apples can be kept at room temperature for up to 2 days. Store them in a cool, dry place away from direct sunlight to maintain their freshness.
-
Fridge: For longer storage, place them in the fridge. They remain best when consumed within 5 days. Seal them in an airtight container to prevent the caramel from becoming sticky or losing its shine.
-
Freezer: While it’s possible to freeze caramel apples, it can affect their texture. If needed, wrap tightly in plastic wrap and store in a freezer-safe container for up to 2 months. Thaw in the refrigerator before serving.
-
Reheating: If the caramel becomes too hard after refrigeration, gently reheat in a microwave for 10-15 seconds, just until soft enough for a tasty dip. Enjoy your caramel apple treats!
Classic Caramel Apples Recipe FAQs
How do I choose the best apples for caramel apples?
Absolutely! For the best flavor and crunch, go for fresh, firm Granny Smith apples. Their tartness balances the sweetness of the caramel beautifully. Look for apples that are bright green with no dark spots. If you prefer a sweeter taste, Honeycrisp or Fuji apples are excellent alternatives.
How should I store leftover caramel apples?
Very! To maintain freshness, store leftover caramel apples in the refrigerator in an airtight container. They are best consumed within 5 days. If you notice any stickiness, simply wipe them with a dry cloth before eating to restore a neat appearance.
Can I freeze caramel apples?
Yes, you can freeze them, but keep in mind that the texture may change. To freeze, wrap each caramel apple tightly in plastic wrap and place in a freezer-safe container. They can be stored for up to 2 months. When you’re ready to enjoy, thaw them in the refrigerator for several hours, then serve.
What should I do if my caramel turns grainy?
If your caramel becomes grainy, it’s usually due to crystallization. To fix this, gently reheat the caramel over low heat, stirring continuously until smooth. If you find yourself having trouble, adding a small amount of water can help reintroduce moisture and fix the texture.
Are caramel apples safe for pets?
It’s best to keep caramel apples away from your pets. The sugar and other ingredients like chocolate can be harmful to animals. Always secure your treats out of their reach and opt for pet-friendly snacks instead if you want to share the joy.
Can I customize my caramel apples?
The more the merrier! You can absolutely make these treats your own. Try rolling your caramel-coated apples in nuts, sprinkles, or even crushed pretzels for an extra crunch. Get creative with toppings that reflect your personal taste or seasonal themes!
Irresistible Caramel Apple Recipe for Cozy Fall Evenings
Ingredients
Equipment
Method
- Begin by washing and thoroughly drying the Granny Smith apples to remove any wax. Insert a sturdy wooden craft stick into the top of each apple, pushing it about two-thirds in for proper support.
- Next, line a baking sheet with parchment paper to prevent the caramel from sticking once the apples are dipped.
- In a heavy-bottomed saucepan, combine granulated sugar, light corn syrup, and water over medium heat. Stir gently until the sugar is fully dissolved, about 4–5 minutes.
- Once the sugar mixture is bubbling, stop stirring and attach a candy thermometer. Continue cooking until it reaches 245°F (118°C).
- Slightly warm the heavy cream in a separate container. Once the caramel reaches 245°F, carefully add the warmed heavy cream.
- Remove from heat and stir in unsalted butter, vanilla extract, and a pinch of sea salt. Allow the mixture to cool slightly for 2-3 minutes.
- Hold each apple by the stick and dip it into the warm caramel, ensuring an even coating. Roll in toffee bits or preferred topping if desired.
- Carefully place the dipped caramel apples upright on the parchment-lined baking sheet. Allow them to set at room temperature for about 1 hour.
Leave a Reply