
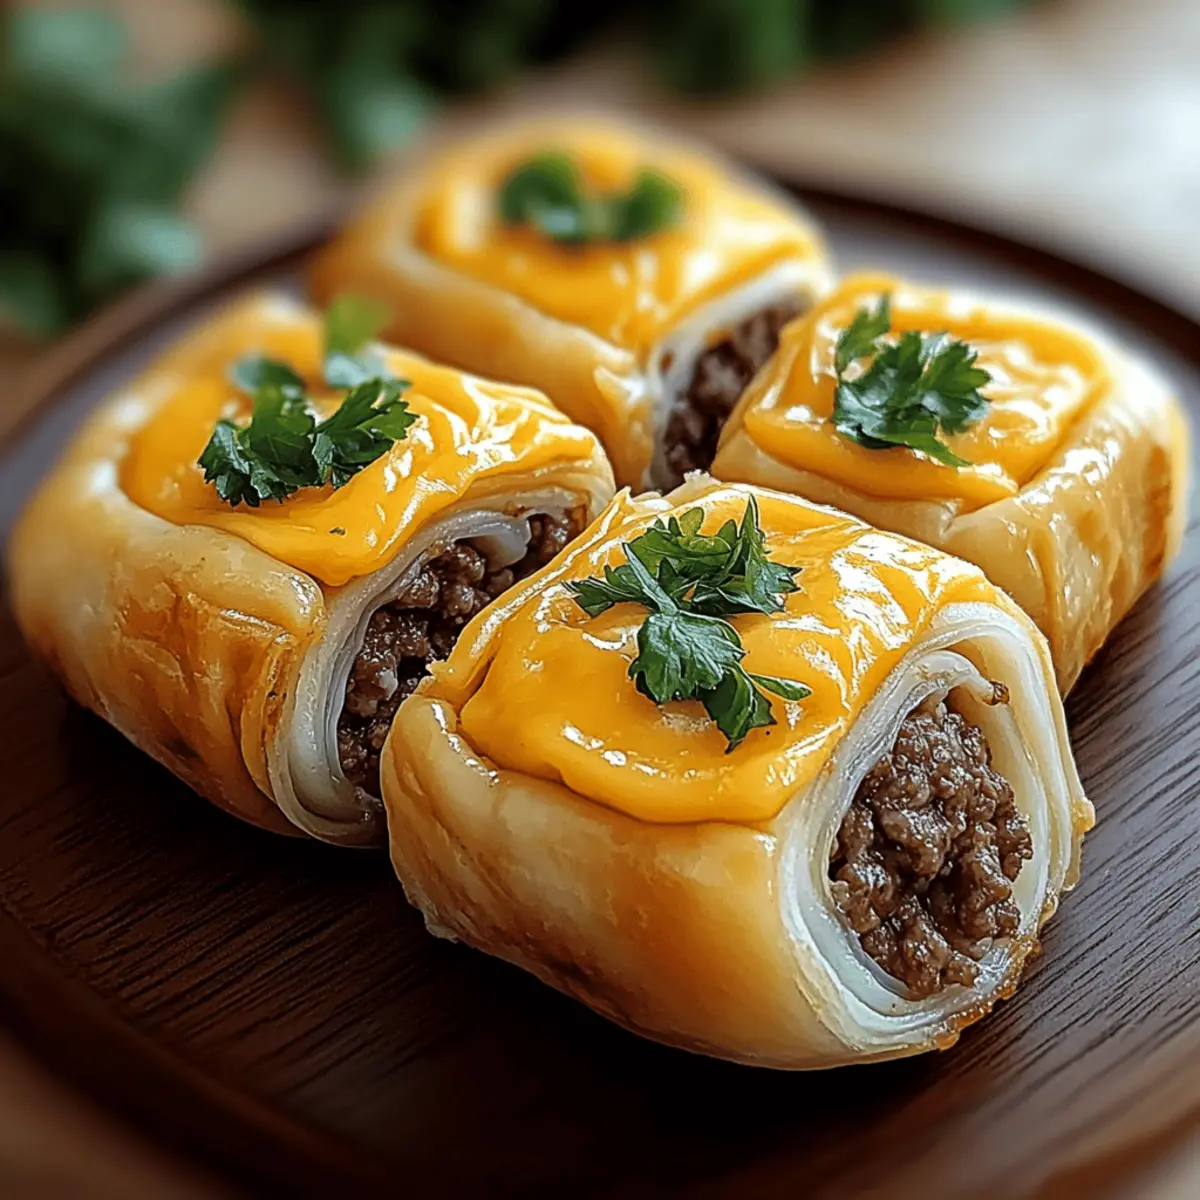
On a day when every minute counts, I found the perfect solution for our game day snacking dilemma: Cheesy Garlic Butter Beef Cheeseburger Rollups! These delightful treats are not just finger food; they come packed with customizable flavors to please every palate. Picture crispy, golden exteriors giving way to savory beef and melted cheese satisfaction with each bite. The beauty of these rollups lies in their minimal prep time and easy-to-follow steps, allowing you to whip up a crowd-pleasing snack without sacrificing your precious game-watching moments. Whether you’re serving them at a lively gathering or enjoying a cozy night in, these rollups are a hassle-free joy for everyone. Curious about how you can make them your own? Let’s dive into the recipe!

Why Love These Cheeseburger Rollups?
Customization at Its Finest: Tailor your rollups with jalapeños, bacon, or an assortment of cheeses to create your perfect bite.
Crispy and Cheesy: Enjoy a delightful crunch on the outside while the gooey cheese and flavorful beef fill each roll, offering a scrumptious experience!
Quick & Easy: With minimal prep time and simple instructions, you’ll spend less time cooking and more time enjoying your game day gatherings.
Crowd-Pleasing Treat: These rollups are sure to impress family and friends, making them the ultimate finger food for any occasion.
Perfect for Meal Prep: Make them ahead of time, and simply bake when you’re ready. Need a quick snack? Check out more game day snacks for effortless entertaining!
Cheeseburger Rollups Ingredients
• Dive into making the most delicious Cheeseburger Rollups with these key ingredients!
For the Filling
• Lean Ground Beef – Provides the savory filling; feel free to substitute with ground turkey for a lighter option.
• Salt – Enhances flavor; don’t skip it for that perfect taste!
• Black Pepper – Adds mild heat; use freshly cracked for an extra kick.
• Garlic Powder – Offers depth of flavor; fresh garlic can be substituted for a richer taste.
• Smoked Paprika – Introduces subtle smokiness; great for an extra layer of flavor.
• Worcestershire Sauce – Adds umami and tang to the beef; it’s a game-changer!
For the Cheese
• Shredded Cheddar Cheese – Brings creaminess; try pepper jack for a spicy twist!
For the Dough
• Refrigerated Crescent Roll Dough – A convenient base for rollups; can be swapped with gluten-free dough if needed.
For the Garlic Butter Topping
• Unsalted Butter – Adds richness; substitute with olive oil for a healthier option.
• Garlic (minced) – Boosts flavor in the butter mixture, enhancing the overall taste.
• Fresh Parsley (chopped) – Enhances freshness and visual appeal; don’t forget this final touch!
Optional Additions
• Pickles – For classic cheeseburger flavor; they add a delightful crunch.
• Jalapeños – For a spicy kick; perfect for adventurous eaters.
• Different Cheeses – Experiment with mozzarella or Swiss for unique flavors.
• Crumble Bacon – For indulgence, bacon takes these rollups to the next level!
Dipping Sauces
• Mustard and Ketchup – These classic accompaniments complement the rollups perfectly.
With these ingredients on hand, you’re all set to create your own personalized Cheeseburger Rollups that everyone will adore!
Step‑by‑Step Instructions for Cheeseburger Rollups
Step 1: Preheat and Prepare
Preheat your oven to 375°F (190°C) and line a baking sheet with parchment paper to prevent sticking. This sets the stage for golden perfection as your Cheeseburger Rollups bake. Preparing your workspace in advance will help streamline the cooking process and keep everything organized.
Step 2: Brown the Beef
In a large skillet over medium heat, add your lean ground beef and cook until browned and no longer pink, about 5-7 minutes. Be sure to drain any excess fat for a lighter filling. As the beef browns, enjoy the savory aroma filling your kitchen—it’s a hint of the deliciousness to come!
Step 3: Season the Beef
Once cooked through, season the beef with salt, black pepper, garlic powder, smoked paprika, and Worcestershire sauce. Stir well and let it cook for an additional 1-2 minutes to allow the flavors to meld. Your Cheeseburger Rollups will shine with this enhanced flavor profile, elevating your game day snack!
Step 4: Unroll the Dough
Take your refrigerated crescent roll dough and unroll it on a clean surface. Carefully separate the dough into triangles, ensuring they’re ready to be filled. This dough serves as the perfect base for your rollups, creating a delightful crispy exterior as they bake.
Step 5: Fill the Rollups
Spoon the seasoned beef mixture onto the wide end of each triangle, ensuring you get an even portion on each piece. Then sprinkle shredded cheddar cheese over the beef to create that ooey-gooey goodness. This step transforms each rollup into a delicious explosion of flavors, just like a classic cheeseburger!
Step 6: Roll and Place
Starting from the wide end, gently roll each triangle toward the pointed tip, tucking in the filling as you go. Place each roll seam-side down on your prepared baking sheet. Visualize the beautiful rows of Cheeseburger Rollups lining your baking sheet, ready to transform into crunchy delights!
Step 7: Prepare the Garlic Butter
In a small saucepan, melt unsalted butter over low heat, then stir in the minced garlic and chopped parsley. Brush this flavorful garlic butter mixture generously over the tops of the rollups. This topping not only adds richness but also creates a gorgeous golden hue as they bake.
Step 8: Bake to Perfection
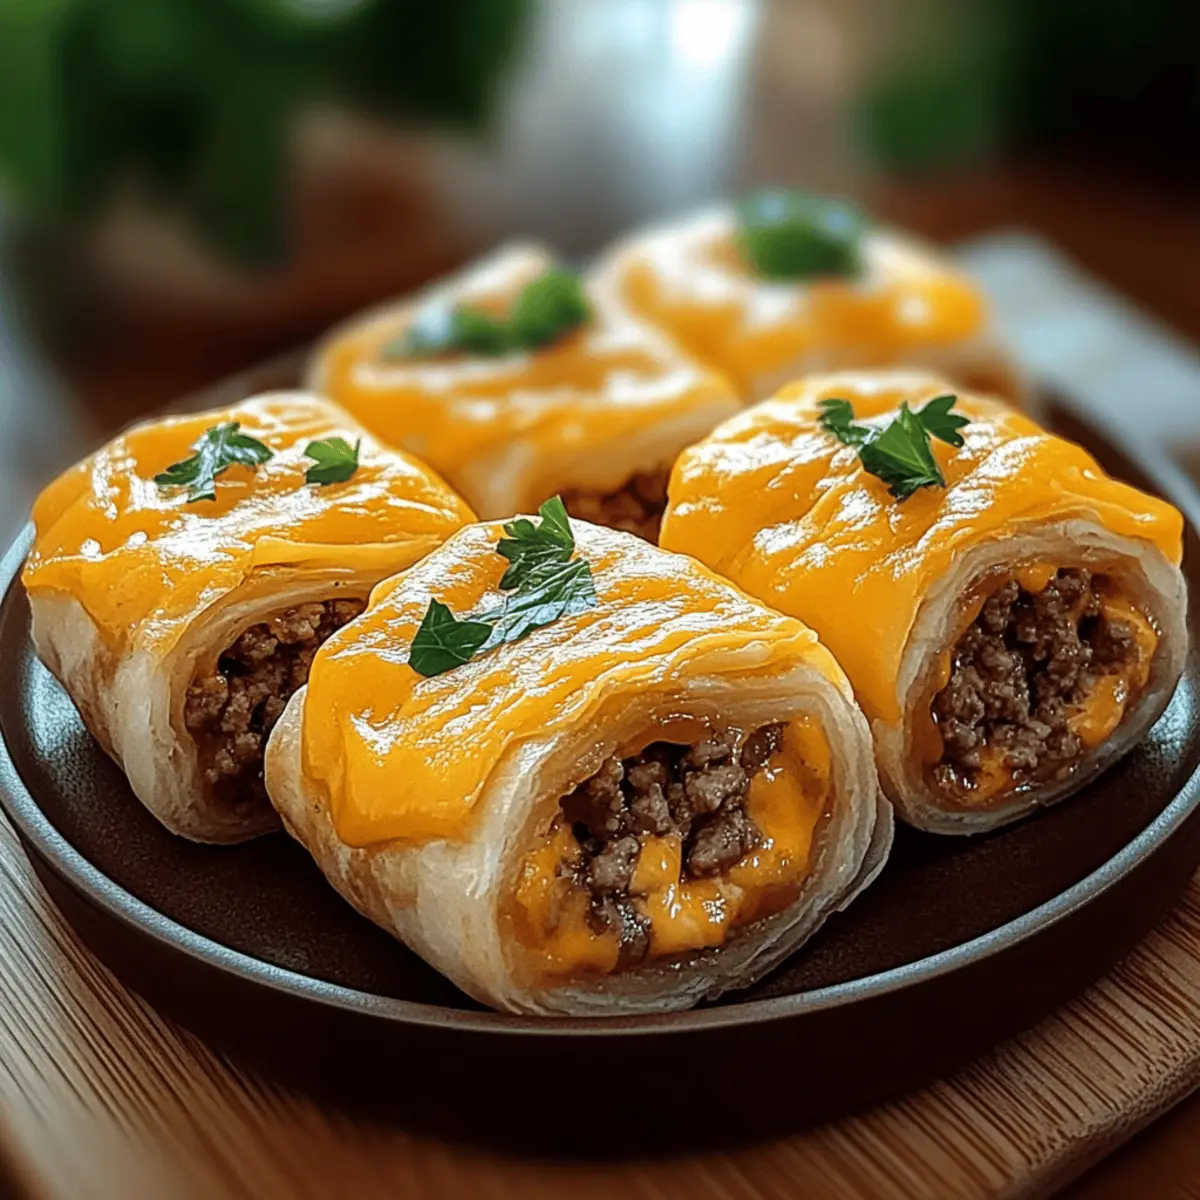
Place the baking sheet in the preheated oven and bake for 12-15 minutes. Keep an eye on them until they are puffed and golden brown, and the cheese is bubbling out, creating a mouthwatering allure. The anticipation will build as the enticing aroma fills your home!
Step 9: Serve and Enjoy
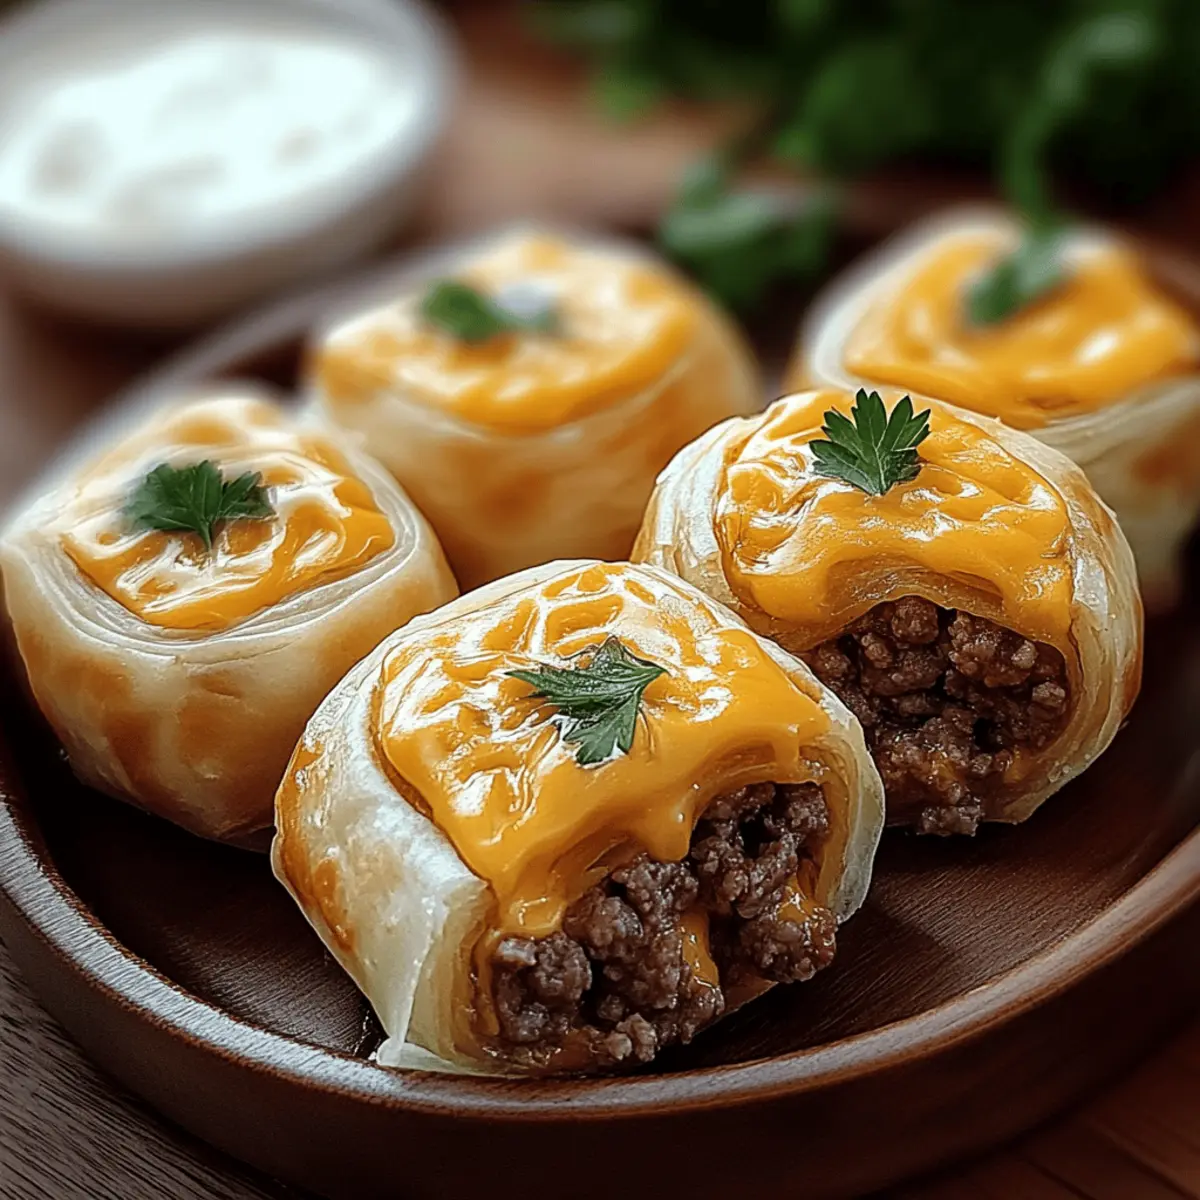
Once baked, remove the Cheeseburger Rollups from the oven and let them cool for a minute. Serve warm alongside dipping sauces like mustard and ketchup for that classic touch. Your family and friends will dive into these tasty rollups, making them the star of any gathering!
Expert Tips for Cheeseburger Rollups
-
Fresh Ingredients: Always choose bright red ground beef to guarantee freshness and flavor in your Cheeseburger Rollups.
-
Baking Temperature: If your rollups are browning too quickly, reduce the oven temperature to 350°F and bake longer to ensure even cooking.
-
Easy Reheating: To maintain crispiness, reheat leftover rollups in the oven at 350°F for 10-15 minutes instead of using the microwave.
-
Make Ahead: Prepare the rollups a day in advance and refrigerate them covered until you’re ready to bake for a quick game day snack.
-
Customize Wisely: Experiment with different cheeses and add-ins like jalapeños for heat or bacon for a richer flavor, but avoid overfilling to prevent spills while baking.
Cheeseburger Rollups: Fun Variations!
Feel free to unleash your culinary creativity and make these rollups truly your own with these delightful suggestions.
-
Ground Turkey: Replace beef with lean ground turkey for a lighter option that still packs flavor. The slightly milder taste lets the spices shine through beautifully.
-
Spicy Jalapeños: Stir in some chopped jalapeños for a fiery kick. Each bite will surprise you with a delightful heat that perfectly complements the cheesy goodness.
-
Bacon Bits: Crumble crispy bacon into the beef mixture for an indulgent touch. The smoky richness elevates the flavor profile immeasurably.
-
Pepper Jack Cheese: Swap out cheddar for pepper jack to add an extra layer of spiciness. It’s a great way to spice things up without overwhelming the classic cheeseburger flavor.
-
Gluten-Free Dough: Use gluten-free crescent roll dough as a substitute to accommodate those with gluten sensitivities. It allows everyone to join in on the fun!
-
Herbed Garlic Butter: Infuse your butter with additional herbs like thyme or oregano for more aroma and flavor. This twist adds a gourmet touch to your rollups.
-
BBQ Sauce: Mix in a bit of BBQ sauce with the beef filling for a sweet and tangy twist. You’ll create a unique flavor reminiscent of summer cookouts!
-
Italian Twist: Add Italian seasoning and mozzarella cheese for an Italian-style rollup. You could even serve it with marinara sauce for dipping, offering a delightful fusion of flavors!
With these delicious variations, your Cheeseburger Rollups will never get boring, so gather your loved ones and whip up a batch that truly speaks to your taste buds! If you’re looking for more ideas, don’t miss these finger food variations for your next gathering.
Storage Tips for Cheeseburger Rollups
Fridge: Store your cheeseburger rollups in an airtight container for up to 3 days. They’ll remain deliciously flavorful and ready to enjoy!
Freezer: For longer storage, wrap the rollups tightly in plastic wrap and freeze for up to 2 months. Thaw in the fridge overnight before reheating.
Reheating: To reheat, place the rollups in a preheated oven at 350°F (175°C) for 10-15 minutes. This keeps them crispy while warming the cheesy filling.
Make Ahead Options
These Cheeseburger Rollups are a fantastic option for meal prep enthusiasts who want to save time without sacrificing flavor! You can prepare the rollups up to 24 hours in advance by filling and rolling them, then covering tightly with plastic wrap and refrigerating. To maintain that delightful crisp when baking, avoid brushing with the garlic butter until you’re ready to cook. When it’s time to serve, simply preheat your oven, brush the rollups with the garlic butter, and bake as instructed. They’ll come out just as delicious and golden, allowing you to enjoy game day without the last-minute rush!
What to Serve with Cheeseburger Rollups?
Elevate your game day gathering by pairing these delightful rollups with tasty sides that complement their savory goodness.
- Crispy Potato Chips: The crunchiness of chips adds texture and is perfect for dipping alongside the rollups.
- Dill Pickle Slices: Their tangy flavor brings a refreshing contrast, reminiscent of classic cheeseburger toppings.
- Creamy Coleslaw: A cool, creamy side balances the richness of the rollups, making for a satisfying bite.
- BBQ Baked Beans: The sweet and smoky beans provide a hearty complement, adding depth to your meal.
- Buffalo Cauliflower Bites: For a twist, these spicy bites offer a zesty crunch, giving your spread an exciting kick!
Add a couple of refreshing drinks like sparkling lemonade or iced tea to round out your game day experience!
Cheeseburger Rollups Recipe FAQs
How do I choose ripe ingredients for my Cheeseburger Rollups?
Absolutely! For the best flavor, choose lean ground beef that is bright red and has minimal brown spots. This indicates freshness. When selecting cheeses, pick ones that have a smooth texture and a pleasant aroma. If adding vegetables like jalapeños or pickles, look for bright colors without any dark spots or blemishes to ensure optimal taste.
How should I store leftover Cheeseburger Rollups?
Very! Store your Cheeseburger Rollups in an airtight container in the refrigerator for up to 3 days. Just make sure they cool down completely before sealing to prevent moisture from sogging up the rollups. If you have a large batch, wrapping them individually in plastic wrap is a great way to keep them fresh and easy to grab for a quick snack.
Can I freeze Cheeseburger Rollups, and how?
Yes, you can freeze them! To freeze Cheeseburger Rollups, let them cool completely after baking. Then, wrap each roll tightly in plastic wrap, followed by aluminum foil, to prevent freezer burn. You can store them for up to 2 months. When you’re ready to enjoy them again, thaw in the refrigerator overnight before reheating in a preheated oven at 350°F (175°C) for 10-15 minutes to restore that crispy texture.
What should I do if my rollups are browning too quickly while baking?
If you notice your Cheeseburger Rollups are browning too fast, lower the oven temperature to 350°F (175°C). Continue to bake them longer—about 15-20 minutes—until they are puffed and golden brown, and the cheese is melty. This temperature adjustment will help ensure they cook through without burning.
Are there any dietary considerations for Cheeseburger Rollups?
Of course! If you’re making Cheeseburger Rollups for someone with dietary restrictions, opt for gluten-free crescent roll dough to accommodate those with gluten sensitivities. You can also switch to leaner meats like turkey or even plant-based ground meat for a vegetarian alternative. Always check labels for allergens if you are serving guests with food allergies, especially regarding the cheeses and sauces used.
Ultimate Cheesy Cheeseburger Rollups for Game Day Fun
Ingredients
Equipment
Method
- Preheat your oven to 375°F (190°C) and line a baking sheet with parchment paper.
- In a large skillet over medium heat, add your lean ground beef and cook until browned, about 5-7 minutes.
- Season the beef with salt, black pepper, garlic powder, smoked paprika, and Worcestershire sauce. Stir and cook for another 1-2 minutes.
- Unroll the crescent roll dough and separate it into triangles.
- Spoon the seasoned beef mixture onto the wide end of each triangle and sprinkle with shredded cheddar cheese.
- Roll each triangle toward the pointed tip, tucking in the filling as you go.
- In a small saucepan, melt unsalted butter over low heat, then stir in minced garlic and chopped parsley. Brush over the tops of the rollups.
- Bake for 12-15 minutes until golden brown and cheese is bubbling.
- Remove from the oven and let cool for a minute. Serve warm with mustard and ketchup.
Leave a Reply