
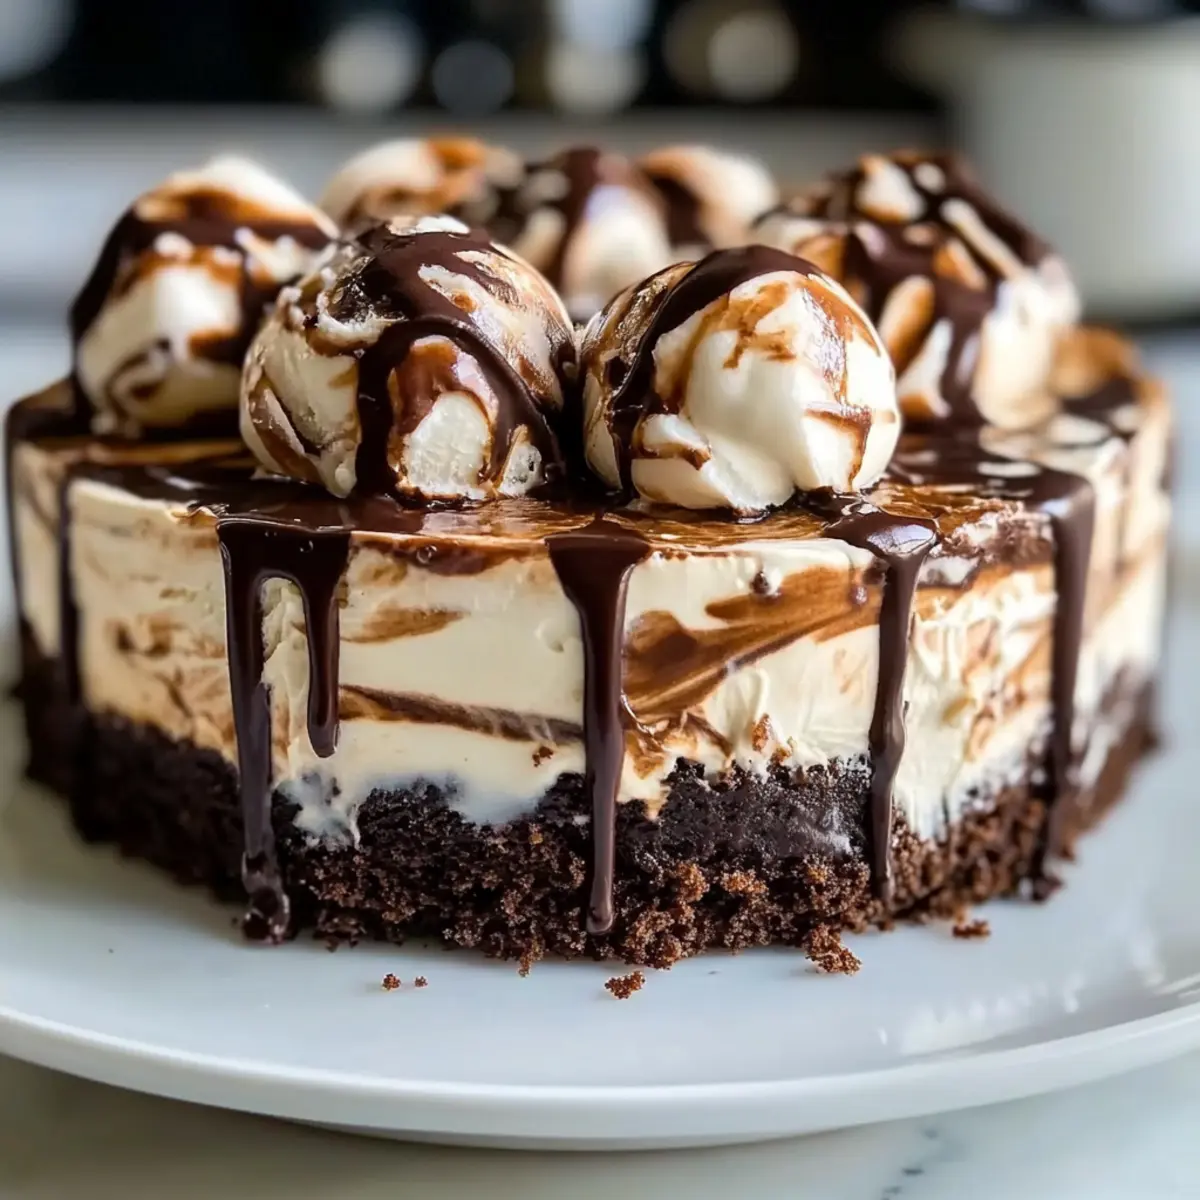
As I stood in my kitchen, the aroma of freshly brewed coffee filled the air, evoking memories of cozy gatherings and sweet indulgences. That’s when I decided to create my ultimate dessert: a Coffee Ice Cream Cake that would satisfy my cravings and impress my family. This delightful treat features rich layers of brownie topped with creamy coffee and vanilla ice creams, transforming simple flavors into a show-stopping dessert perfect for any occasion. Not only is this Coffee Ice Cream Cake a crowd-pleaser, but it is also wonderfully customizable—swap out the ice cream flavors to make it your own! Whether you’re celebrating a birthday or just craving something sweet, this dessert will make any moment feel special. Ready to dive into this delicious journey? Let’s get started!
Why is Coffee Ice Cream Cake so special?
Decadent Layers: The delightful combination of rich brownie, creamy coffee, and vanilla ice creams makes for a truly indulgent dessert experience.
Versatile Flavor Profiles: This recipe invites customization—try using different ice cream flavors such as chocolate or caramel to create your perfect treat!
Easy to Prepare: With a simple recipe and minimal ingredients, making this cake is a breeze. It’s a hassle-free way to impress your guests.
Make Ahead Delight: Prepare this cake a day in advance, allowing the flavors to meld beautifully while saving you time on the special day.
Looking for more delightful desserts? You might enjoy my Coconut Cloud Cake or a classic Blueberry Cream Cake.
Coffee Ice Cream Cake Ingredients
For the Brownie Base
- Brownie Mix – This provides a rich, fudgy foundation that complements the ice cream layers.
- Eggs – Offer structure and moisture; use room temperature eggs for easier mixing.
- Butter – Enhances richness and flavor; for a dairy-free option, try coconut oil instead.
For the Ice Cream Layers
- Coffee Ice Cream – The star of the show; its rich flavor is what makes this Coffee Ice Cream Cake a true delight.
- Vanilla Ice Cream – Adds a sweet, creamy touch; feel free to switch it up with chocolate or caramel for a fun twist.
For the Fudge Sauce
- Chocolate Fudge Sauce – Drizzle this on top and swirl it inside for extra sweetness and visual appeal; homemade or store-bought works great!
Step‑by‑Step Instructions for Coffee Ice Cream Cake
Step 1: Prepare Brownie Base
Preheat your oven to 350°F (175°C) and grease an 8-inch round pan. In a mixing bowl, combine the brownie mix, room temperature eggs, and melted butter until smooth. Pour the batter into your prepared pan and bake for 20 minutes, or until a toothpick inserted into the center comes out clean. Once done, remove the brownie from the oven and let it cool completely in the pan.
Step 2: Layer Ice Creams
While the brownie base cools, take your coffee ice cream out of the freezer and allow it to soften slightly, about 5–10 minutes. Once softened, evenly spread a generous layer over the cooled brownie base. Next, take the vanilla ice cream and repeat the process, creating a second layer over the coffee ice cream. Finish with a swirl of chocolate fudge sauce on the top for added richness and visual delight.
Step 3: Freeze
Once all layers are assembled, cover the cake with plastic wrap and place it in the freezer. Allow the cake to freeze for at least 4 hours or until completely set. This ensures that all the flavors meld beautifully and gives the Coffee Ice Cream Cake the perfect texture for slicing.
Step 4: Serve
When ready to serve, remove the cake from the freezer and let it sit for about 10 minutes to soften slightly. This step allows for easier slicing. Use a sharp knife to cut the cake into slices while the cake is still firm but not too hard. Garnish with additional fudge sauce if desired, and enjoy your decadent Coffee Ice Cream Cake!
Coffee Ice Cream Cake Variations
Feel free to explore new flavors and ideas to make your Coffee Ice Cream Cake truly unique!
-
Dairy-Free: Substitute both ice creams with coconut-based alternatives for a delicious vegan treat. Coconut milk’s richness complements the coffee beautifully.
-
Nutty Delight: Add a layer of chopped walnuts or almonds between the ice cream layers for delightful crunch. Nuts bring a lovely texture that enhances each bite.
-
Chocolate Lover: Swap coffee ice cream for chocolate ice cream to create an indulgent double chocolate experience. This rich twist is sure to please any chocolate lover in your life!
-
Caramel Swirl: Drizzle caramel sauce between the brownie and the coffee ice cream layer for an extra touch of sweetness. This rich, buttery flavor elevates the entire cake.
-
Frozen Fruit: Layer fresh or frozen berries like raspberries or strawberries between the ice cream layers for a tart contrast to sweetness. The pop of fruit adds freshness, making each slice vibrant.
-
Minty Fresh: Replace the coffee ice cream with mint chocolate chip for a refreshing change. Mint invigorates, and the chocolate flecks add delightful surprises with each bite.
-
Spiced Up: Add a sprinkle of cinnamon or a touch of nutmeg to the brownie mix for a warming spice element. These aromatic spices complement the coffee and give a cozy feel.
-
Layer It Up: Create multiple layers by alternating flavors (e.g., coffee, mocha, and mint ice creams) for a visually stunning and flavor-packed cake. Each slice will be a beautiful surprise of flavors.
This Coffee Ice Cream Cake truly invites creativity! Consider creating your own masterpiece, just like with my delightful Boston Cream Pie or the inviting Flourless Orange Cake.
Expert Tips for Coffee Ice Cream Cake
-
Cool Completely: Allow the brownie base to cool fully before adding ice cream layers. This prevents melting and ensures a clean slice when serving.
-
Soften Ice Cream: Let the coffee ice cream sit out for a few minutes to soften before spreading it on the brownie. This makes layering easier and smoother.
-
Layering Technique: Spread ice cream layers quickly once softened. Delaying too long can cause them to melt and mix, leading to an unappealing texture in your Coffee Ice Cream Cake.
-
Slice Under Control: Cut the cake while it’s slightly softened for the best slice. A sharp knife runs through the cake more easily, yielding beautiful pieces.
-
Customize Wisely: Feel free to experiment with ice cream flavors, but remember to balance richness. Mixing two creamy flavors can enhance texture and flavor impact.
Make Ahead Options
These Coffee Ice Cream Cakes are a perfect choice for busy home cooks looking to save time without sacrificing flavor! You can prepare the brownie base up to 24 hours in advance; simply bake and cool it completely before wrapping it tightly in plastic wrap and refrigerating. The ice cream layers can be assembled and frozen for up to 3 days ahead of serving, allowing the flavors to meld beautifully. When ready to serve, remove the cake from the freezer and let it sit for about 10 minutes for easier slicing. This way, you can enjoy your Coffee Ice Cream Cake with minimal effort while still delivering a deliciously impressive dessert!
How to Store and Freeze Coffee Ice Cream Cake
Fridge: Store any leftover slices in an airtight container in the refrigerator for up to 3 days to maintain freshness and texture.
Freezer: For longer storage, wrap the entire cake in plastic wrap and then aluminum foil before placing it in the freezer. It will freeze well for up to 2 months.
Reheating: When ready to enjoy, remove the cake from the freezer and let it sit at room temperature for about 10 minutes before slicing for easier serving.
Airtight Guidance: Ensure the cake is well-wrapped to prevent ice crystals and flavor loss, preserving the delicious taste of your Coffee Ice Cream Cake.
What to Serve with Coffee Ice Cream Cake
As you prepare to indulge in this creamy delight, consider rounding out your dessert experience with mouth-watering accompaniments that enhance each luscious bite.
-
Fresh Berries: Their tartness provides a beautiful contrast to the rich, sweet layers of the cake, creating a harmonious balance.
-
Whipped Cream: A light dollop adds an airy sweetness, complementing the dense brownie and creamy ice cream perfectly.
-
Chocolate Sauce: Drizzle over the top for an extra layer of indulgence. It enhances the chocolate flavors, making each slice even more decadent.
-
Espresso: For a sophisticated pairing, serve a shot of espresso alongside your cake. It deepens the coffee flavor and adds warmth.
-
Nutty Crunch: Chopped nuts like almonds or hazelnuts sprinkled on top boost texture and offer a delightful crunch that contrasts beautifully with the smoothness of the cake.
-
Mint Leaves: A few fresh mint leaves on the side brighten up the presentation and introduce a refreshing touch that lightens the dessert.
-
Coconut Flakes: For a tropical twist, sprinkle toasted coconut flakes on top. They add a sweet, chewy texture that takes the cake to a new level.
Coffee Ice Cream Cake Recipe FAQs
What type of coffee ice cream should I use for the best flavor?
Absolutely! I recommend using high-quality coffee ice cream with rich flavor for the best results. Look for brands that use real coffee for an authentic taste, or try making your own at home for a personal touch!
How long can I store leftover Coffee Ice Cream Cake?
You can store leftover slices in an airtight container in the refrigerator for up to 3 days or in the freezer for up to 2 months. Just make sure to wrap the cake well to prevent freezer burn or ice crystals from forming.
Can I freeze Coffee Ice Cream Cake? How?
Very much so! To freeze your Coffee Ice Cream Cake, wrap it tightly in plastic wrap, followed by aluminum foil, to help prevent ice crystals from forming. Just place it in the freezer, and it will keep well for about 2 months. When you’re ready to serve, let it sit at room temperature for about 10 minutes for easier slicing.
What can I do if my brownie base is too crumbly?
If your brownie base becomes crumbly, try to ensure that you mix the ingredients thoroughly and cool the brownies completely before adding the ice cream layers. If it still crumbles, serve the cake in dessert cups—no one will mind the presentation when they taste the delicious flavors!
Are there any dietary considerations for this Coffee Ice Cream Cake?
Absolutely! You can make this dessert dairy-free by using coconut oil instead of butter and opting for dairy-free ice creams. If allergy concerns exist, always check labels for nuts or other allergens in the ice cream or fudge sauce. Enjoy customizing it to fit your needs!
Irresistible Coffee Ice Cream Cake for Ultimate Dessert Delight
Ingredients
Equipment
Method
- Preheat your oven to 350°F (175°C) and grease an 8-inch round pan.
- In a mixing bowl, combine the brownie mix, room temperature eggs, and melted butter until smooth.
- Pour the batter into your prepared pan and bake for 20 minutes, or until a toothpick inserted into the center comes out clean.
- Once done, remove the brownie from the oven and let it cool completely in the pan.
- While the brownie base cools, take your coffee ice cream out of the freezer and allow it to soften slightly, about 5–10 minutes.
- Once softened, evenly spread a generous layer over the cooled brownie base.
- Next, take the vanilla ice cream and repeat the process, creating a second layer over the coffee ice cream.
- Finish with a swirl of chocolate fudge sauce on the top for added richness and visual delight.
- Once all layers are assembled, cover the cake with plastic wrap and place it in the freezer.
- Allow the cake to freeze for at least 4 hours or until completely set.
- When ready to serve, remove the cake from the freezer and let it sit for about 10 minutes to soften slightly.
- Use a sharp knife to cut the cake into slices while the cake is still firm but not too hard.
- Garnish with additional fudge sauce if desired, and enjoy your decadent Coffee Ice Cream Cake!
Leave a Reply