
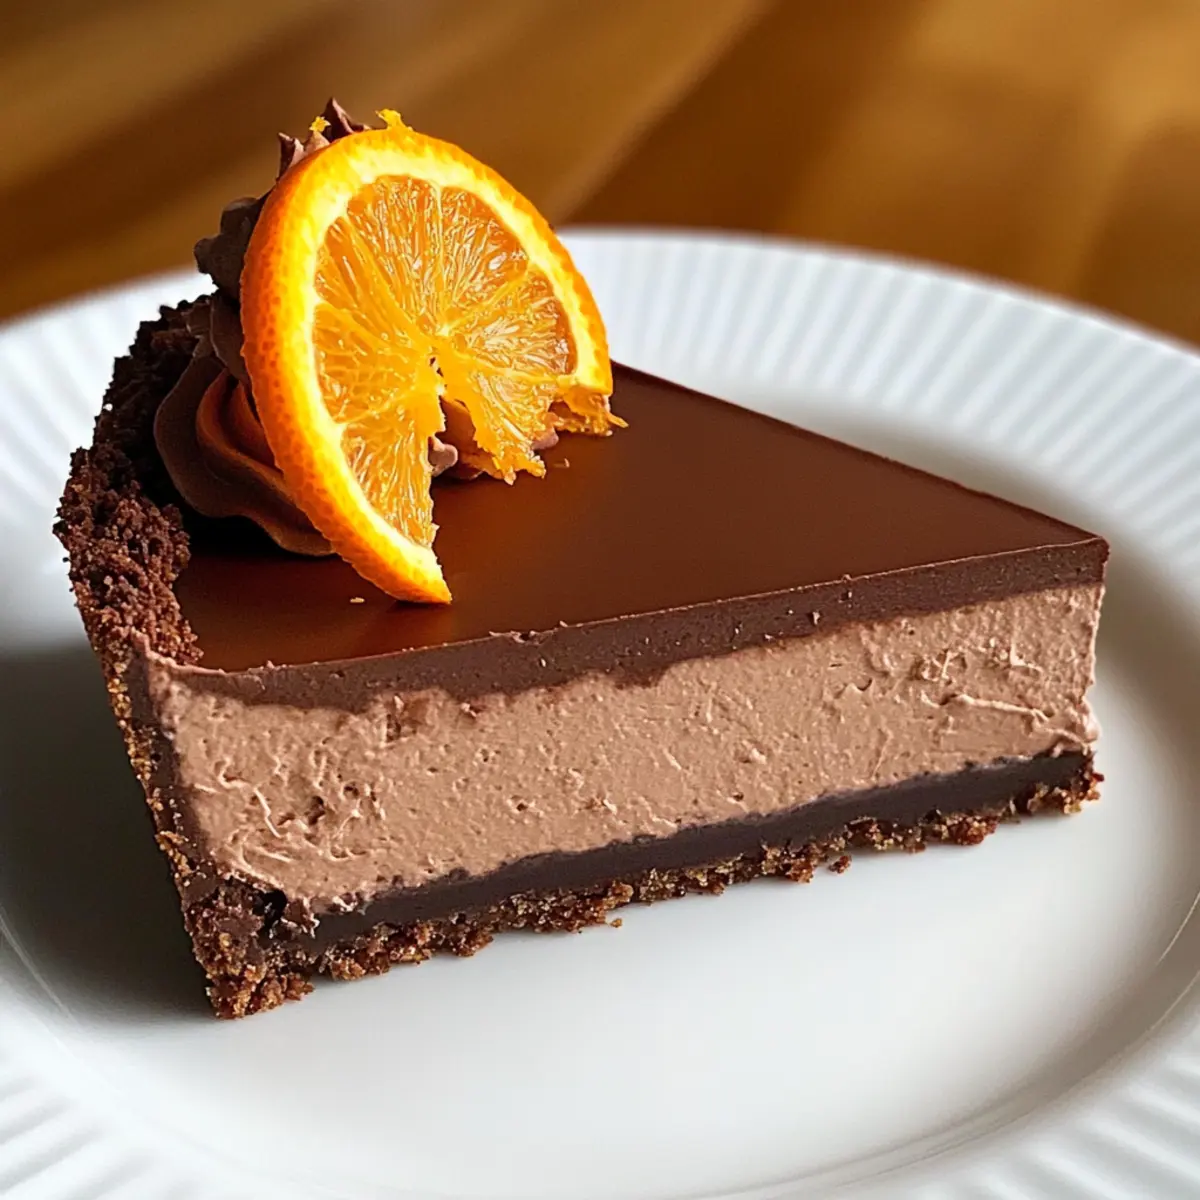
As I sifted through my pantry for the perfect dessert to impress family and friends, a rich idea emerged: the Creamy Chocolate Orange Cheesecake. This indulgent treat combines the deep satisfaction of chocolate with the bright zing of orange zest, creating a dessert experience like no other. What’s more, this forgiving recipe is a breeze to prepare, making it ideal for both seasoned bakers and those just starting their culinary journey. It’s perfect for special occasions or just because you deserve a little luxury in your life! Plus, it’s make-ahead and freezer-friendly, allowing you to delight in a decadent slice whenever the mood strikes. Curious about how to create this creamy masterpiece that marries flavors so beautifully? Let’s dive in!
Why choose Creamy Chocolate Orange Cheesecake?
Irresistible Flavor Combination: Rich chocolate paired with fresh orange zest creates a unique taste that delights the senses.
Effortless Preparation: With simple steps, even novice bakers can master this creamy dessert.
Make-Ahead Ease: Prepare in advance and chill, making it perfect for parties or last-minute cravings.
Freezer-Friendly: Store up to two months for an instant indulgence whenever you desire.
Crowd-Pleasing Appeal: This cheesecake is guaranteed to impress family and friends, keeping them coming back for more! Need more inspiration? Check out our Flourless Orange Pistachio and Lemon Blueberry Cheesecake recipes as delicious alternatives!
Creamy Chocolate Orange Cheesecake Ingredients
For the Cheesecake Filling
• Cream Cheese – Provides a rich, creamy base; make sure it’s at room temperature for smooth blending.
• Granulated Sugar – Sweetens the cheesecake and balances the flavors; adjust to taste based on your sweetness preference.
• Unsweetened Cocoa Powder – Gives that deep chocolate flavor; always use high-quality cocoa for the best results.
• Orange Zest – Adds a fresh, citrusy note; feel free to swap with orange extract for a more intense flavor.
• Eggs – Essential for structure; adding them one at a time helps maintain a smooth texture in your creamy chocolate orange cheesecake.
• Heavy Cream – Contributes to the decadent richness; it’s key for achieving that luscious, creamy consistency.
For the Crust
• Crushed Cookies or Graham Crackers – Forms a deliciously crisp crust; use your favorite type, or opt for gluten-free versions if needed.
• Unsalted Butter – Binds the crust together; melted butter is ideal for ensuring a cohesive base.
This delightful ingredient list is your ticket to crafting a show-stopping Creamy Chocolate Orange Cheesecake everyone will love!
Step‑by‑Step Instructions for Creamy Chocolate Orange Cheesecake
Step 1: Preheat the Oven
Begin by preheating your oven to 325°F (160°C). This low temperature will help create a gentle baking environment for your Creamy Chocolate Orange Cheesecake, ensuring even cooking without cracking.
Step 2: Prepare the Crust
In a mixing bowl, combine crushed cookies or graham crackers with melted unsalted butter. Press this mixture into the bottom of a 9-inch springform pan, creating an even layer. Bake the crust for about 10 minutes until set, then remove and let it cool while you prepare the filling.
Step 3: Beat the Cream Cheese
In a large mixing bowl, beat the room-temperature cream cheese using a hand mixer on medium speed until smooth and creamy, approximately 2–3 minutes. Add in the granulated sugar and unsweetened cocoa powder, mixing until well incorporated and the mixture is free of lumps, around another 2 minutes.
Step 4: Add the Eggs
Slowly add the eggs to the cream cheese mixture, one at a time, mixing on low speed after each addition. This method helps prevent introducing too much air, maintaining the dense, creamy texture vital for your cheesecake. Continue until all eggs are fully blended.
Step 5: Incorporate Orange Zest and Heavy Cream
Gently fold in the fresh orange zest and heavy cream into the mixture with a spatula. Be careful not to overmix; your goal is to achieve a combined batter that’s rich and creamy with a hint of citrus, which will beautifully highlight the chocolate flavor.
Step 6: Pour the Batter
Carefully pour the creamy cheesecake batter over the cooled crust, smoothing the top with a spatula. Ensuring a level surface will help the cheesecake bake evenly, which is key to achieving that desirable texture in your Creamy Chocolate Orange Cheesecake.
Step 7: Bake in a Water Bath
Prepare a water bath by placing the springform pan into a larger roasting pan and filling it with hot water until it reaches halfway up the sides of the cheesecake pan. Bake for 50–60 minutes or until the edges are set and the center remains slightly jiggly, indicating doneness.
Step 8: Cool and Refrigerate
Once baked, turn off the oven and crack the door open to allow the cheesecake to cool gradually for about 1 hour. After cooling, remove it from the oven and refrigerate for at least 4 hours or overnight for the best flavor and texture of your Creamy Chocolate Orange Cheesecake.
Creamy Chocolate Orange Cheesecake Variations
Feel free to add your own spin to this delicious cheesecake and make it uniquely yours!
-
Citrus Swap: Experiment with different citrus zests like lemon or lime for a fresh twist. The bright flavors will change the character of your cheesecake in delightful ways.
-
Gluten-Free Crust: Use crushed gluten-free cookies for the crust to create a delicious gluten-free option that’ll please everyone at the table.
-
Mint Chocolate: Incorporate peppermint extract instead of orange zest for a festive twist. It’s a refreshing change that brings a whole new dimension to your cheesecake.
-
Nutty Crunch: Add finely chopped nuts like walnuts or almonds to the crust for an added crunch. This will beautifully contrast the creamy filling and add richness.
-
Chocolate Ganache Topping: Drizzle melted chocolate ganache on top before serving for an extra decadent touch. The glossy finish gives it an elegant look while enhancing the chocolate flavor!
-
Whipped Topping: Top your cheesecake with freshly whipped cream for added lightness and a touch of sweetness. You could even flavor your whipped cream with a hint of vanilla or almond extract.
-
Fruity Addition: Stir in some chopped dark cherries or raspberries into the filling for bursts of flavor and color. This addition makes each bite even more exciting!
-
Spicy Kick: Add a pinch of cayenne pepper or a dash of cinnamon to the filling for a surprising kick. This will create a delightful contrast to the sweet, creamy cheesecake!
And if you’re on the lookout for even more delicious dessert ideas, don’t forget to check out our artistic Cheesecake Fruit Salad or our colorful Fruity Pebbles Cheesecake Tacos. Your guests will be raving with delight!
Make Ahead Options
These Creamy Chocolate Orange Cheesecakes are a busy cook’s best friend! You can prepare the cheesecake filling up to 3 days in advance. Simply follow all the steps until the baking phase, then pour the batter into the prepared crust, cover it tightly with plastic wrap, and refrigerate. To maintain quality, avoid introducing air into the batter, as this helps keep your cheesecake dense and creamy. When you’re ready to serve, bake it as instructed and let it cool gradually. This way, you’ll have a luscious dessert ready for any occasion, saving you time while ensuring an indulgent treat awaits!
Expert Tips for Creamy Chocolate Orange Cheesecake
-
Room Temperature Cream Cheese: Ensure your cream cheese is at room temperature for easy blending, avoiding lumps in your creamy chocolate orange cheesecake batter.
-
Perfect Water Bath: Using a water bath keeps your cheesecake moist and helps prevent cracks; make sure the water level is halfway up the pan for best results.
-
Don’t Overbake: Watch the baking time closely; overbaking can lead to a dry cheesecake. Aim for slightly jiggly centers for that ideal creamy texture.
-
Chill for Flavor: Allow your cheesecake to chill overnight for the best flavor development; flavors deepen beautifully as it sits in the fridge.
-
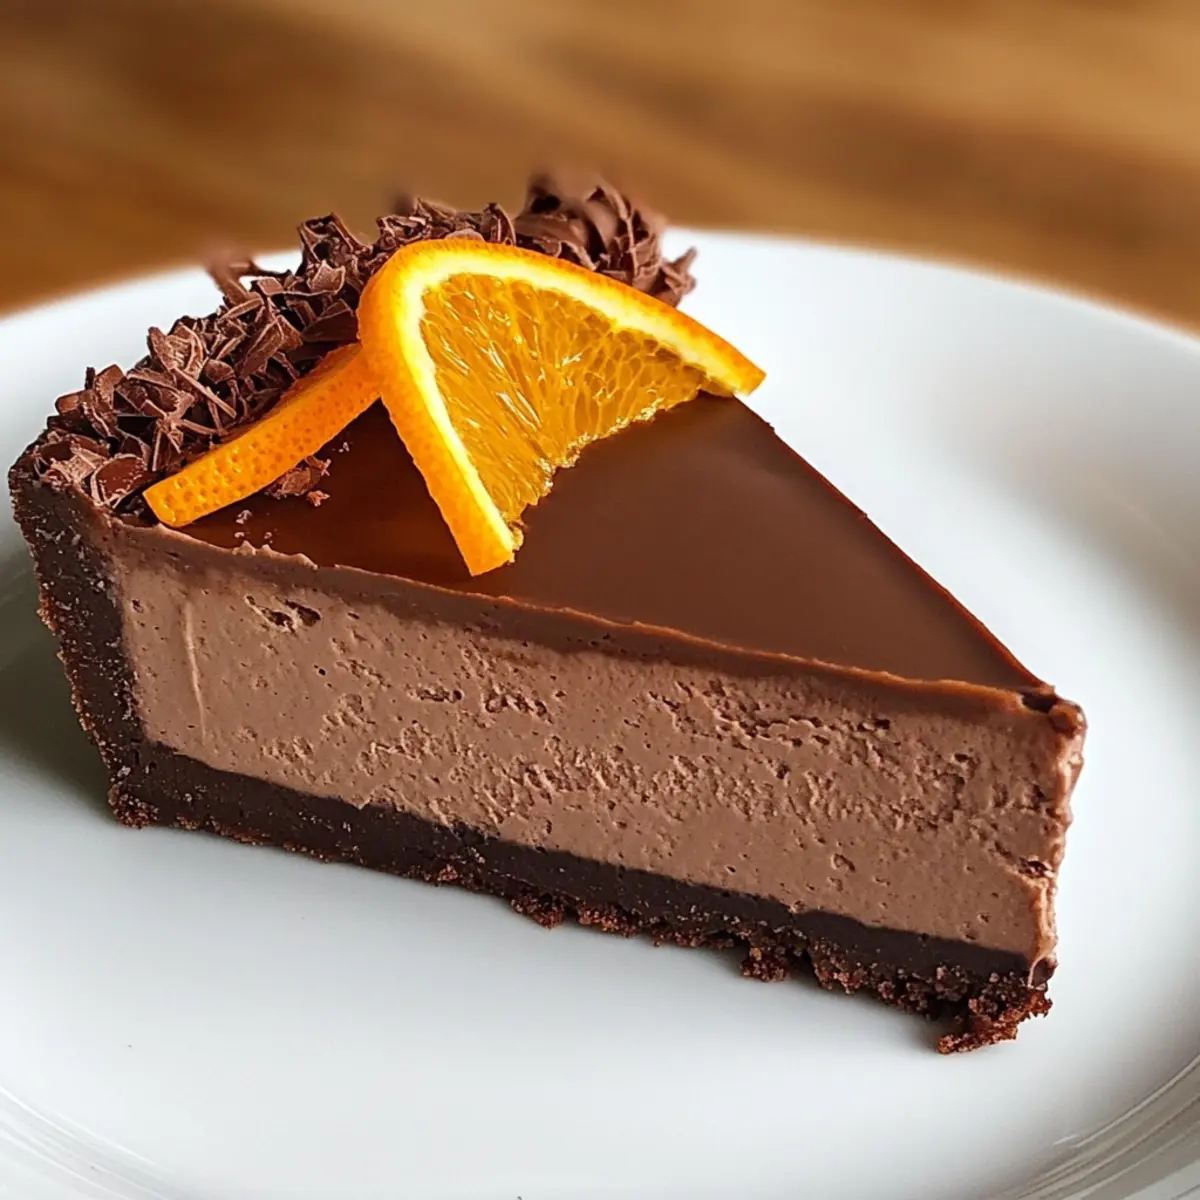
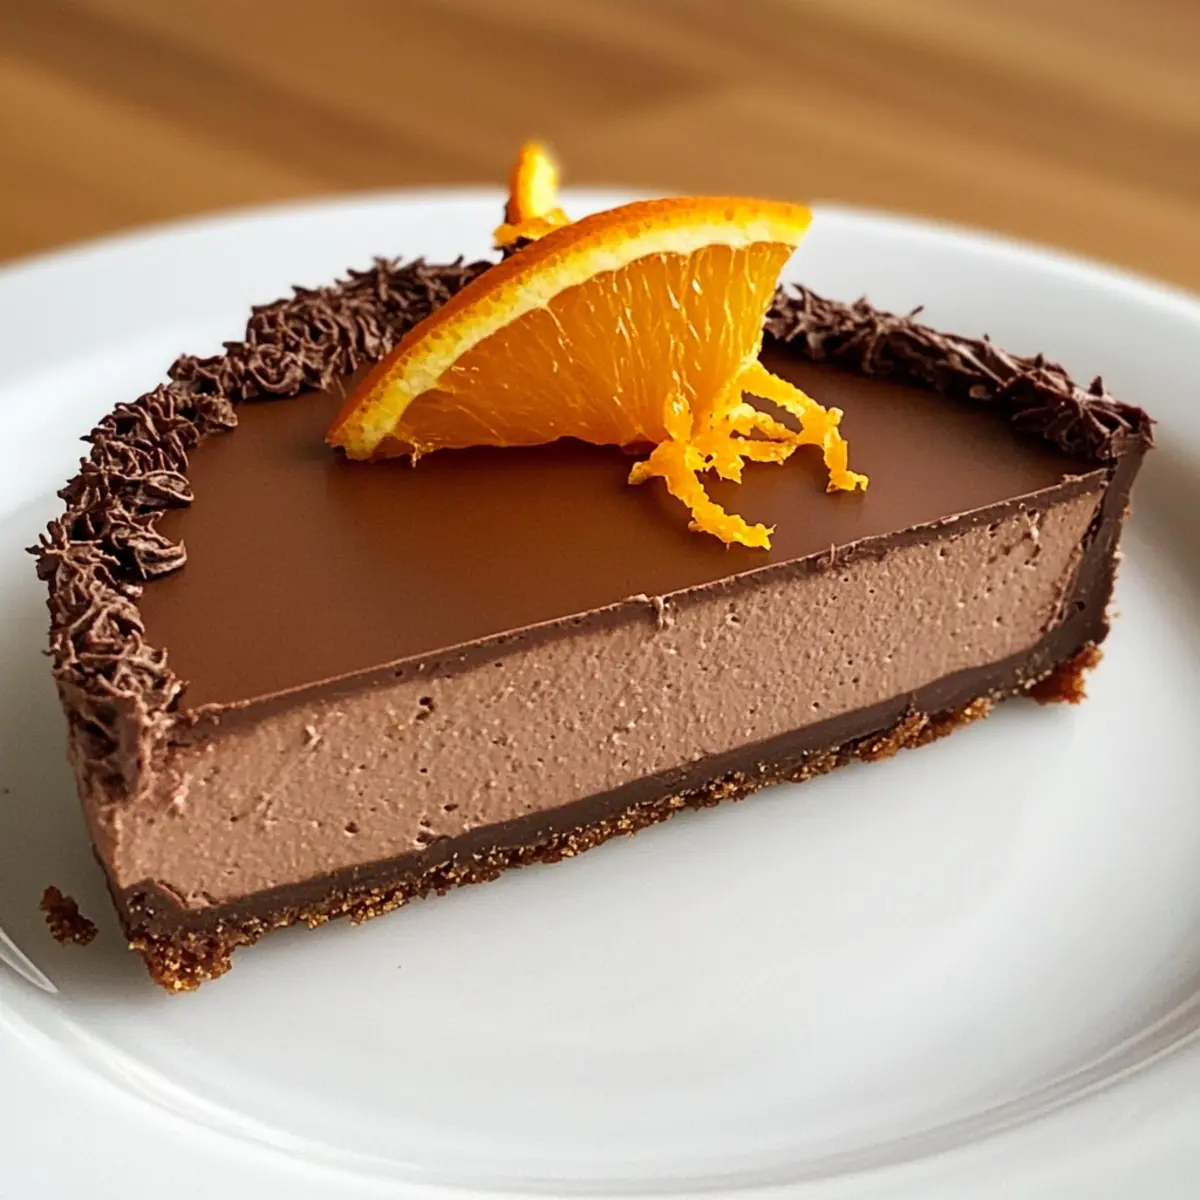
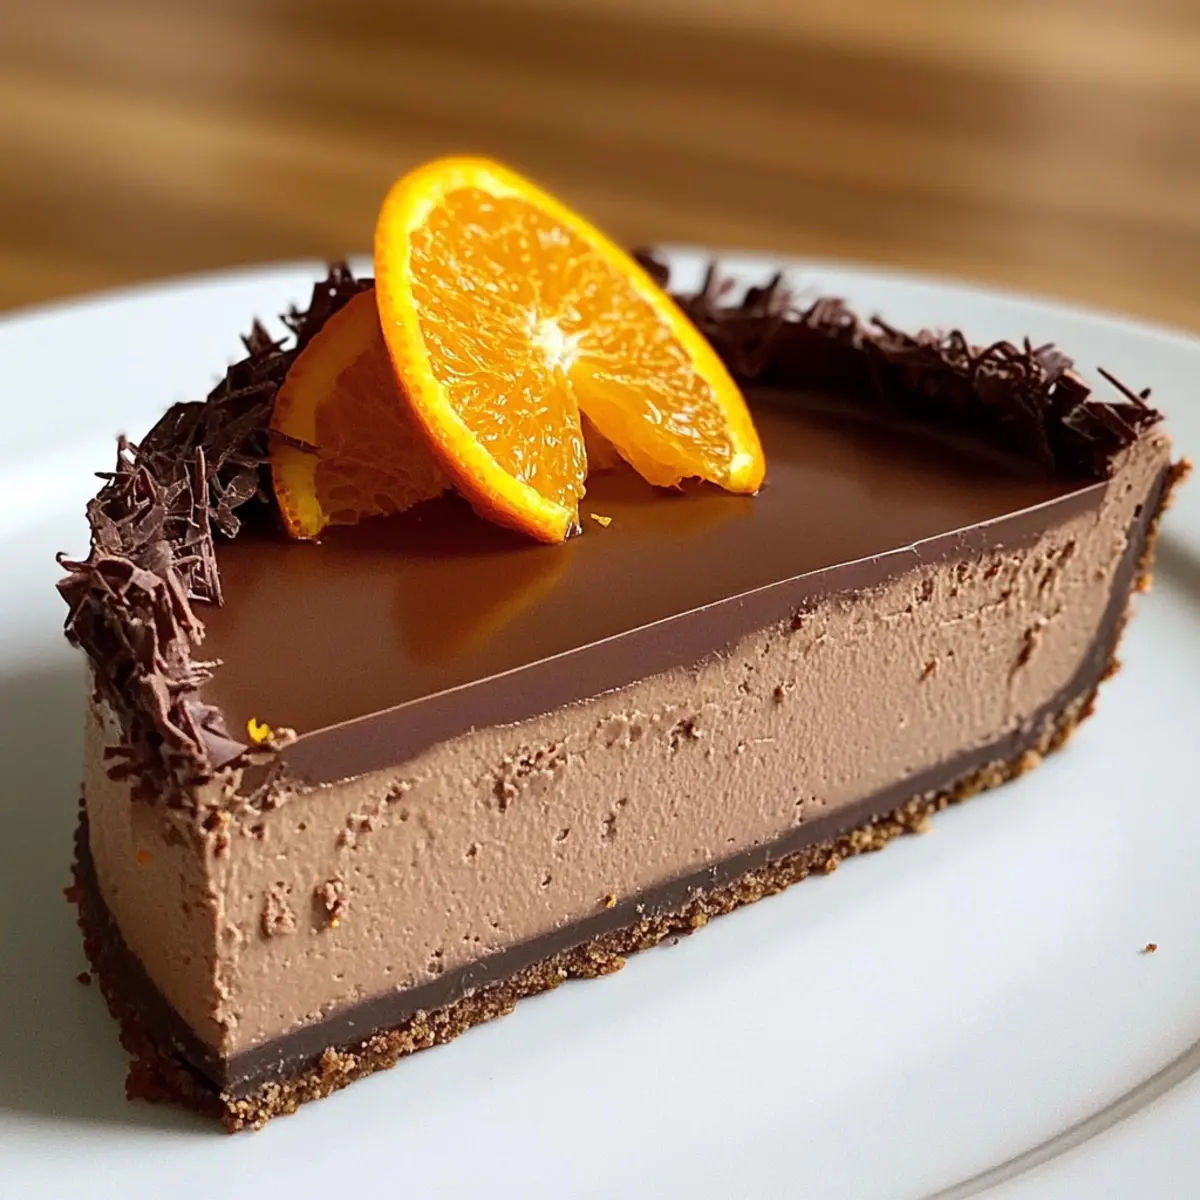
Customize Toppings: Experiment with toppings like fresh orange slices, whipped cream, or chocolate drizzle to enhance presentation and flavor of your creamy chocolate orange cheesecake.
What to Serve with Creamy Chocolate Orange Cheesecake?
Imagine delighting your loved ones with an unforgettable meal that perfectly complements the indulgence of this creamy dessert.
- Fresh Berries: Juicy, vibrant berries add a refreshing contrast to the richness of the cheesecake, enhancing the overall dining experience.
- Whipped Cream: Light and fluffy, a generous dollop of whipped cream brings a creamy texture that encourages the deep flavors of chocolate and orange to shine.
- Espresso or Coffee: A bold cup of espresso or a rich coffee balances the sweetness and provides a comforting conclusion to a sumptuous meal.
- Chocolate Ganache: Drizzling warm chocolate ganache over the cheesecake enhances its decadent essence, giving chocolate lovers an extra treat.
- Nutty Biscotti: Crunchy biscotti offer a delightful texture that pairs beautifully with the creamy cheesecake; perfect for dipping alongside your coffee!
- Citrus Salad: A light citrus salad, featuring oranges and grapefruits, adds a refreshing palate cleanser that brightens up the dining table.
Each pairing elevates your dessert experience and creates a complete culinary adventure that captivates both flavor and emotion!
How to Store and Freeze Creamy Chocolate Orange Cheesecake
Fridge: Store your cheesecake in an airtight container in the fridge for up to 5 days to maintain its creamy texture and rich flavor.
Freezer: For longer storage, wrap the cheesecake tightly in plastic wrap and foil, then freeze for up to 2 months. Thaw in the refrigerator overnight before serving for the best taste.
Serving: When ready to enjoy, slice chilled cheesecake directly from the fridge. For a lovely touch, consider adding a drizzle of chocolate sauce or fresh orange slices!
Reheating: If desired, you can gently warm individual slices in the microwave for about 10-15 seconds. Avoid overheating to keep the creamy texture intact.
Creamy Chocolate Orange Cheesecake Recipe FAQs
What type of cream cheese should I use?
Absolutely! Always opt for block-style cream cheese instead of the spreadable kind. Make sure it’s at room temperature before mixing; this helps create a creamy and lump-free batter, which is essential for a velvety texture in your Creamy Chocolate Orange Cheesecake.
How should I store leftover cheesecake?
Very simple! You can keep any leftovers in an airtight container in the fridge for up to 5 days. Just make sure to cover it well to prevent it from absorbing any odors. Trust me, it tastes even better after chilling for a day or two!
Can I freeze the cheesecake?
Indeed! To freeze your Creamy Chocolate Orange Cheesecake, wrap it tightly in plastic wrap and then in aluminum foil to prevent freezer burn. It can be frozen for up to 2 months. When you’re ready to enjoy it again, thaw it in the refrigerator overnight for the best flavor and texture.
What if my cheesecake cracks while baking?
Don’t worry! Cracking can happen. To avoid it next time, make sure you bake the cheesecake in a water bath; this helps maintain moisture. Also, check for doneness when the center is slightly jiggly. If it does crack, a drizzle of chocolate ganache or whipped cream can elegantly disguise it!
Can I use other types of citrus?
Absolutely! While orange zest gives a delightful zing, feel free to experiment with lemon or lime zest for a different flavor profile. You can also use extracts, but adjust the quantity as needed for taste. The more the merrier when it comes to creating variations of this cheesecake!
Is this recipe suitable for gluten-free diets?
Yes! For a gluten-free option, simply substitute the crushed cookies or graham crackers in the crust with gluten-free varieties. This way, everyone can indulge in the deliciousness of your Creamy Chocolate Orange Cheesecake!
Indulge in Creamy Chocolate Orange Cheesecake Bliss
Ingredients
Equipment
Method
- Preheat the oven to 325°F (160°C).
- In a bowl, combine crushed cookies or graham crackers with melted butter. Press into a 9-inch springform pan and bake for about 10 minutes.
- Beat the cream cheese on medium speed until smooth, about 2-3 minutes. Add sugar and cocoa powder, mixing until incorporated.
- Add eggs one at a time, mixing on low speed after each addition until fully blended.
- Gently fold in orange zest and heavy cream until combined.
- Pour the batter over the cooled crust, smoothing the top.
- Bake in a water bath for 50-60 minutes until edges are set and center is slightly jiggly.
- Cool for about 1 hour in the oven. Refrigerate for at least 4 hours or overnight.
Leave a Reply