
As I sifted through my pantry, a playful idea took shape: a luscious, dessert dream concocted from simple ingredients. The result? A Creamy No-Bake Chocolate Hazelnut Tart that whisks you straight into chocolate paradise without breaking a sweat. This delightful creation combines a crunchy biscuit crust and an irrestibly creamy filling that melts on your tongue, making it an instant crowd-pleaser. Not only is it quick to whip up—perfect for unexpected guests—but it’s also a rich, no-bake option for those warm evenings when you want to keep the oven off. So, are you ready to indulge your sweet tooth with this easy recipe that everyone will love? Let’s dive into the delicious details!
Why is this tart a game-changer?
Irresistibly Rich: The combination of creamy chocolate hazelnut spread and whipped cream creates a dessert experience that’s simply luxurious.
Effortless Preparation: With no baking required, this tart comes together in no time, making it ideal for busy chefs or those spontaneous get-togethers.
Versatile Options: Feel free to customize it—substituting nuts or adding fresh fruits opens up a world of flavor possibilities.
Crowd-Pleasing Delight: This tart is sure to impress your family and friends, offering a sweet escape that rivals any fancy dessert.
No-Bake Convenience: Perfect for warm weather, you’ll keep your kitchen cool while serving up a treat that’s both sumptuous and satisfying.
Whether you’re serving it at a gathering or enjoying it as a quiet personal treat, this recipe will become a staple in your dessert repertoire!
Creamy No-Bake Chocolate Hazelnut Tart Ingredients
• Dive into the delicious world of Creamy No-Bake Chocolate Hazelnut Tart with these simple ingredients!
For the Crust
- Crushed Digestive Biscuits – Forms the tart crust; substitute with graham crackers or Oreos for unique flavors.
- Unsalted Butter – Binds the crust while adding richness; ensure it’s melted for easy mixing.
For the Filling
- Toasted Hazelnuts – Introduces crunchy texture and nutty flavor; can be swapped with almonds or walnuts.
- Cream Cheese – Ensures a creamy, smooth filling; make sure it’s softened for better blending.
- Heavy Whipping Cream – Adds lightness and volume; whip until soft peaks form, then fold gently.
- Powdered Sugar – Sweetens and smoothens the filling; you can reduce the amount if you prefer less sweetness.
- Chocolate Hazelnut Spread (e.g., Nutella) – The star flavor of this dessert, enriching the creaminess.
- Pure Vanilla Extract – Enhances overall flavor by adding depth and warmth.
- Flaky Sea Salt – Balances the sweetness and brings out the chocolate’s richness.
For Garnish
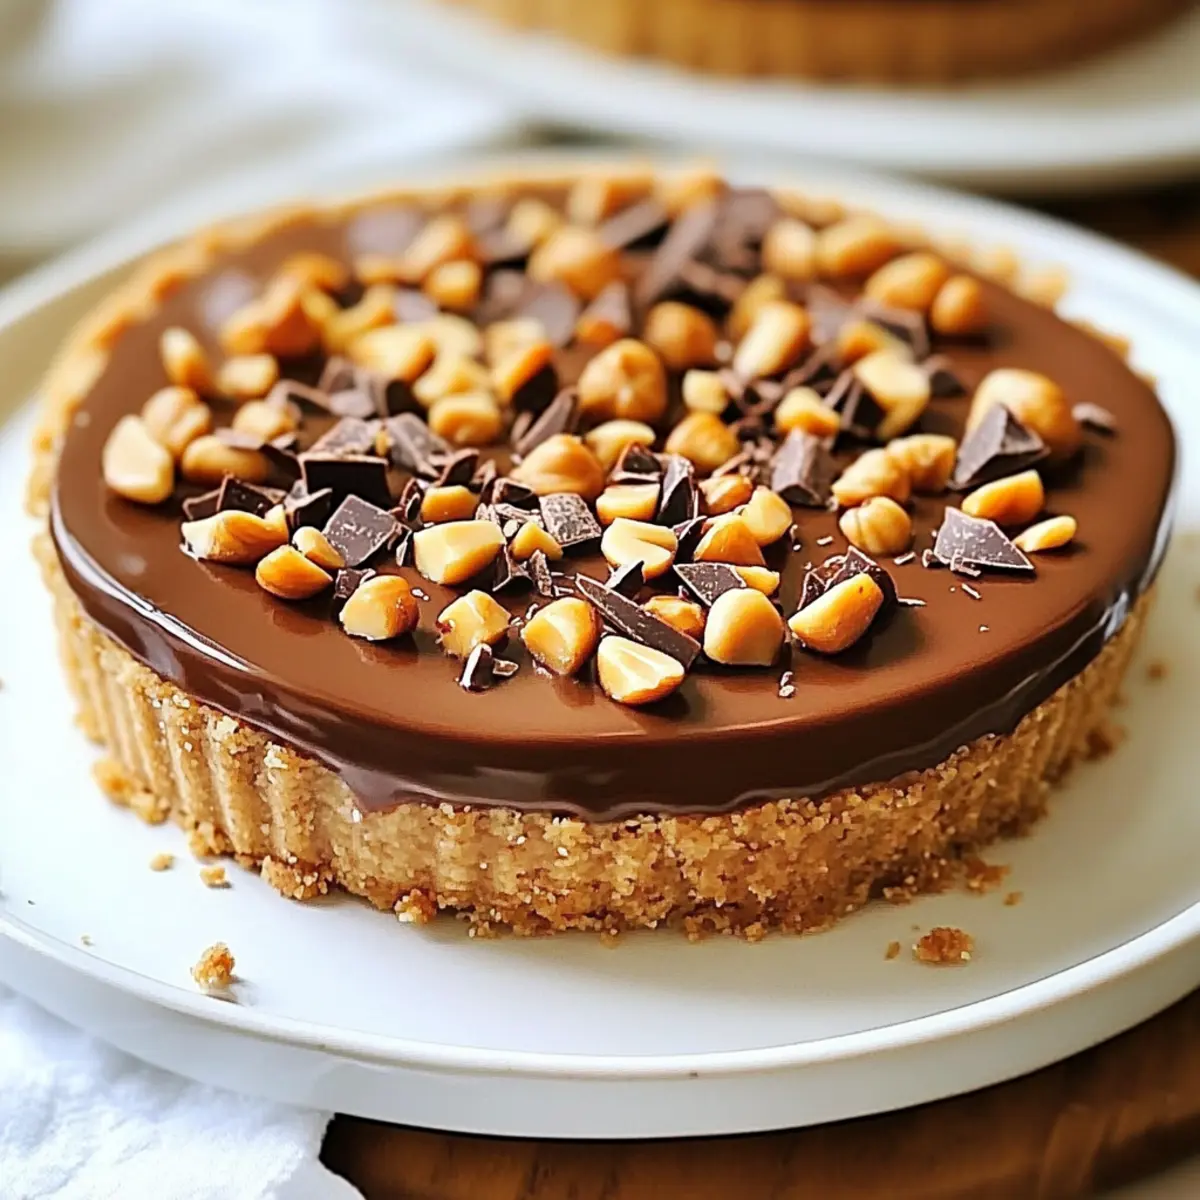
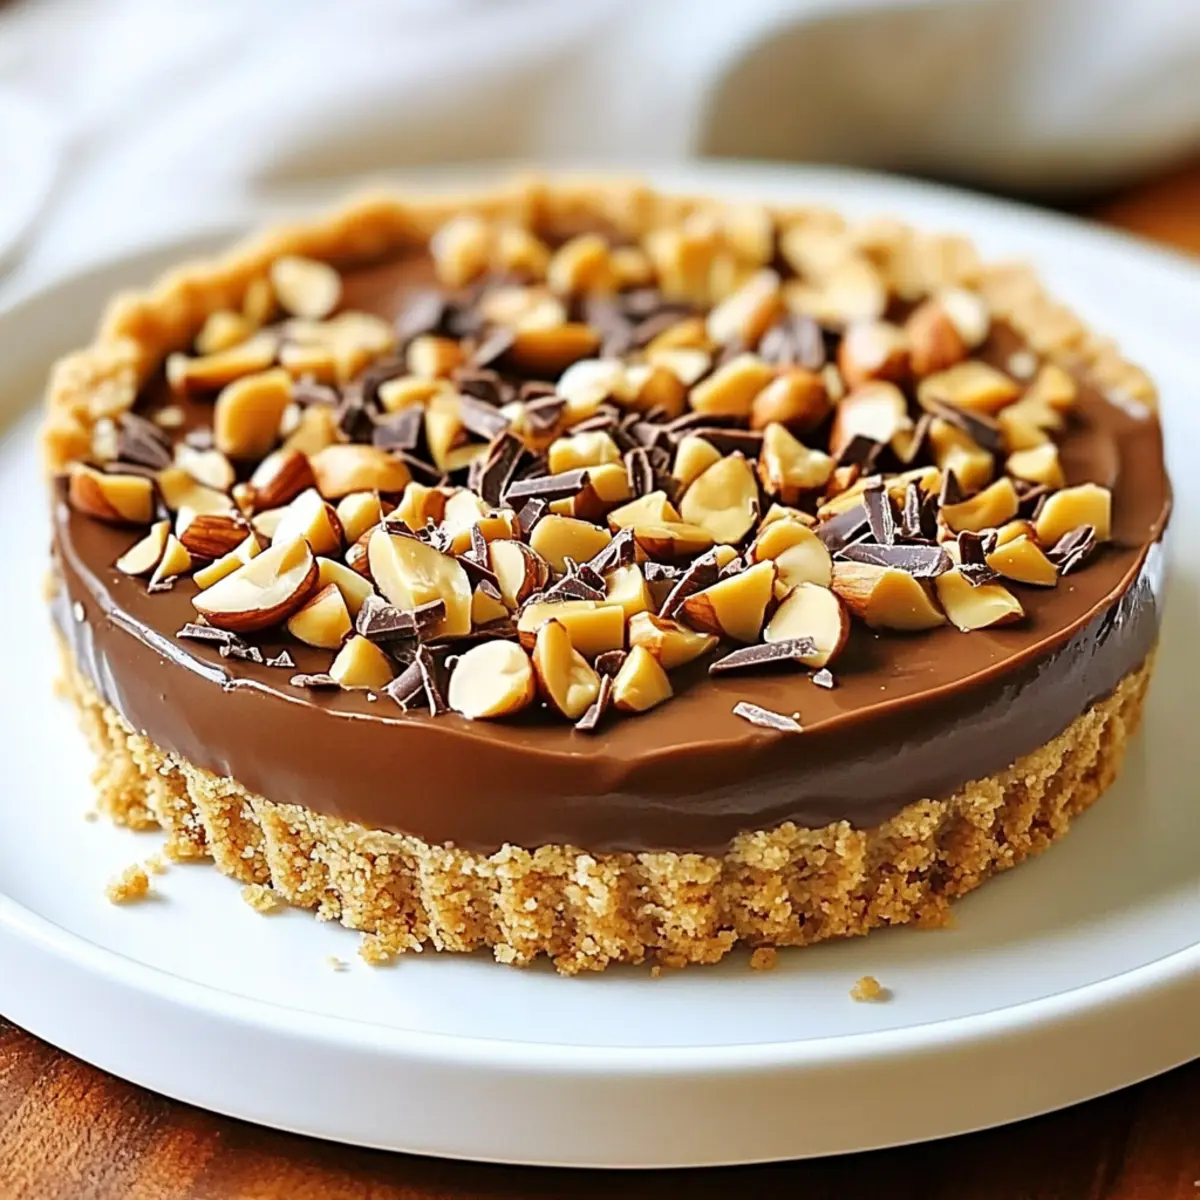
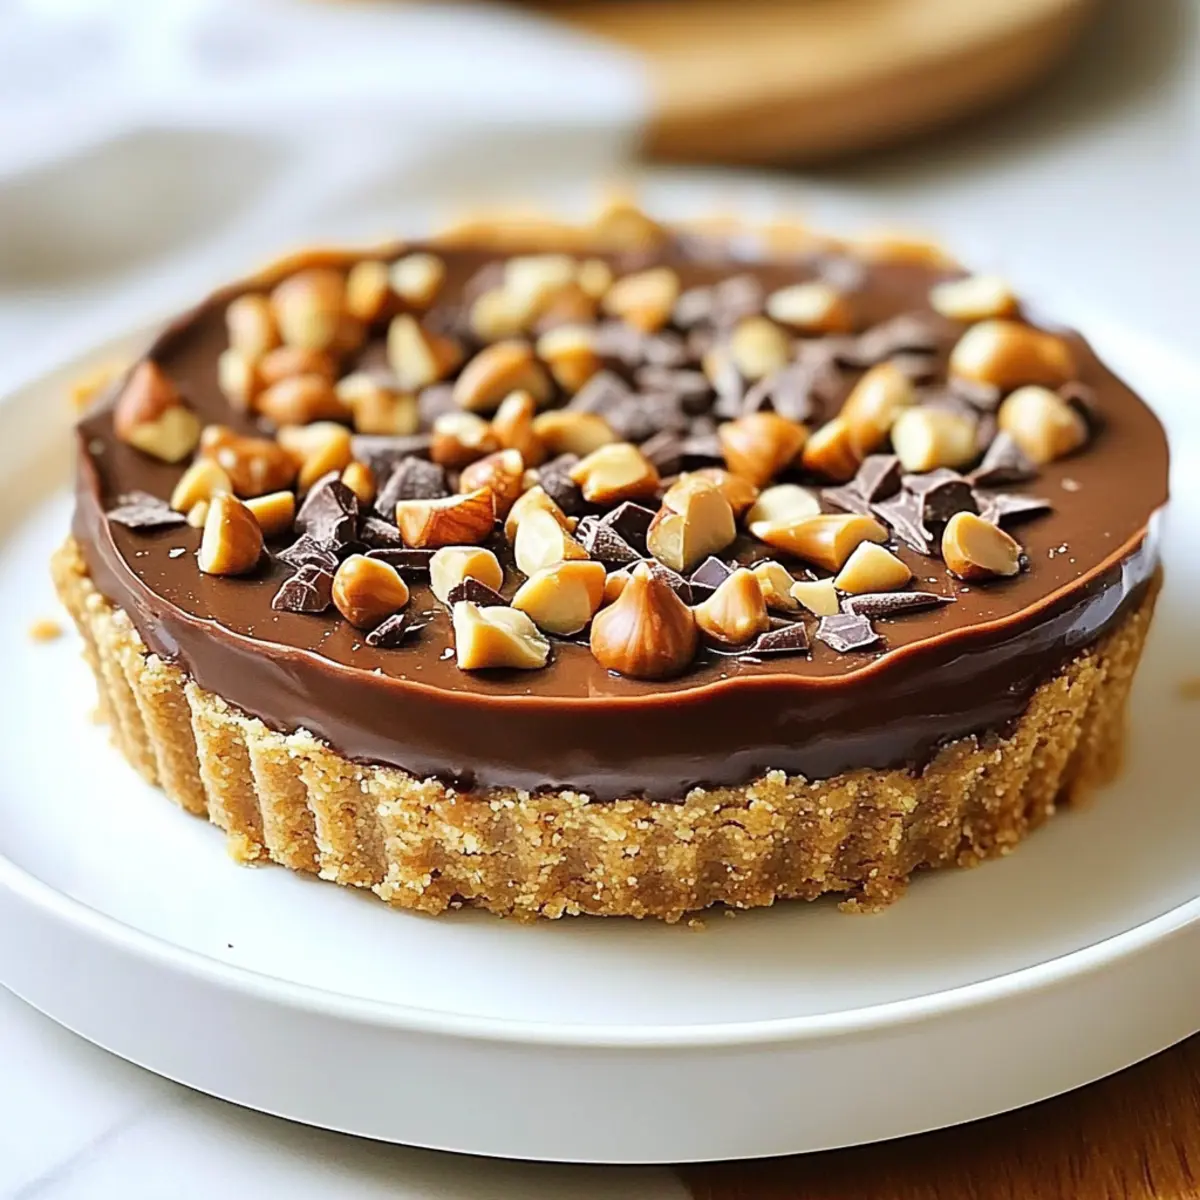
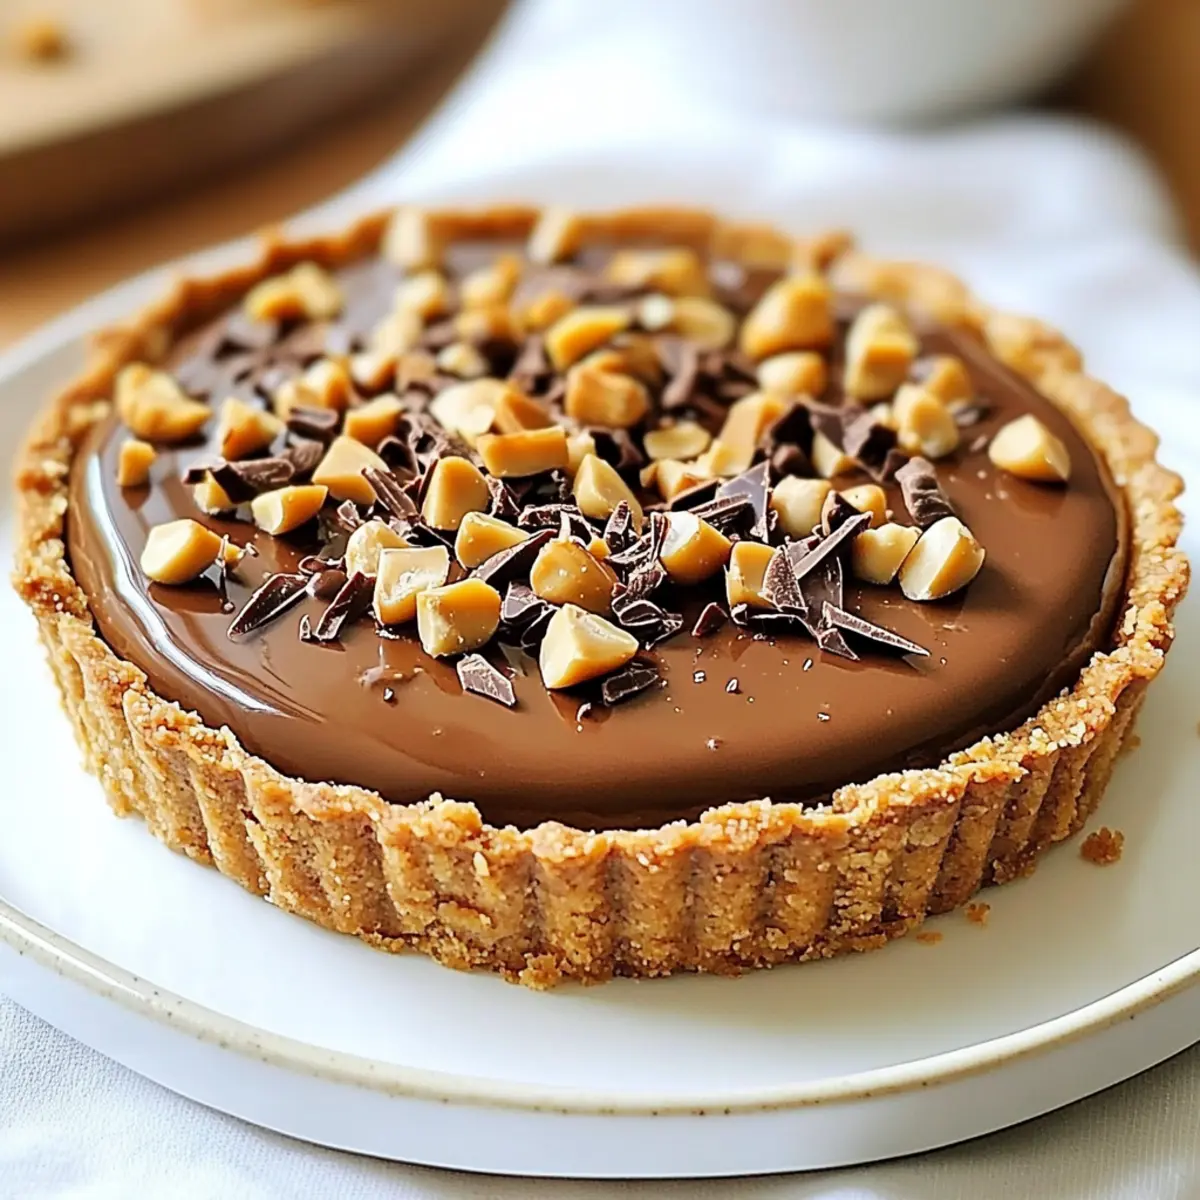
- Chopped Hazelnuts – Offers extra crunch; ideal for topping this luscious tart.
- Dark Chocolate Shavings – A decorative finishing touch that elevates the presentation beautifully.
Step‑by‑Step Instructions for Creamy No-Bake Chocolate Hazelnut Tart
Step 1: Prepare Crust
In a medium bowl, combine the crushed digestive biscuits with melted unsalted butter until the mixture resembles damp sand. Using the back of a measuring cup, press this mixture firmly into the bottom and up the sides of a 9-inch tart pan. Place the crust in the refrigerator for about 20 minutes to set up.
Step 2: Whip Cream
While the crust chills, take a separate mixing bowl and beat the heavy whipping cream using an electric mixer until soft peaks form. Gradually incorporate the powdered sugar while mixing until you achieve stiff peaks, which should take about 2-3 minutes. Gently set the whipped cream aside, ensuring it remains light and airy.
Step 3: Make Filling
In another bowl, blend the softened cream cheese and chocolate hazelnut spread until the mixture is creamy and smooth, which should take around 2 minutes. Add in the pure vanilla extract and a pinch of flaky sea salt, mixing until well combined. This rich filling is the essence of your Creamy No-Bake Chocolate Hazelnut Tart.
Step 4: Combine
Carefully fold the whipped cream into the chocolate hazelnut mixture using a spatula. Start by adding a third of the whipped cream to lighten the mixture, then gently fold in the remaining whipped cream until the filling is uniform and airy. This careful folding ensures a light and creamy texture for your tart.
Step 5: Assemble Tart
Pour the luscious chocolate filling into the chilled biscuit crust, using a spatula to smooth the surface evenly. Cover the tart with plastic wrap or a lid, then return it to the refrigerator. Chill the tart for at least 4 hours, or overnight if you can, allowing it to set beautifully.
Step 6: Serve
Once set, remove the Creamy No-Bake Chocolate Hazelnut Tart from the refrigerator. Garnish the top with chopped hazelnuts and dark chocolate shavings for added texture and elegance. Slice with a sharp knife and serve chilled, enjoying each luscious bite of this delightful dessert!
Expert Tips for Creamy No-Bake Chocolate Hazelnut Tart
-
Whip with Care: Ensure all utensils and bowls are squeaky clean to maximize the volume of your whipped cream. This makes your filling airy and light.
-
Chill Time Matters: Allow at least 4 hours for the tart to chill in the refrigerator. This ensures it sets firmly for perfect slices and avoids a runny filling.
-
Adjust Sweetness: If you prefer a less sweet dessert, reduce the powdered sugar or use unsweetened cocoa powder in the filling for a more balanced flavor.
-
Mix It Up: Feel free to substitute the chocolate hazelnut spread with almond or peanut butter to explore different flavor profiles for your tart.
-
Garnish for Appeal: Adding a mint garnish not only enhances the visual appeal but adds a refreshing flavor contrast to every delicious slice of your tart.
Make Ahead Options
These Creamy No-Bake Chocolate Hazelnut Tart delights are perfect for busy home cooks looking to save time! You can prepare the crust and filling up to 24 hours in advance. Simply make the biscuit crust and refrigerate it, then store the filling in an airtight container in the fridge. When you’re ready to serve, just fill the chilled crust with the luscious mixture and let it set for at least 4 hours (or overnight for best results). For maintaining quality, keep the tart covered in the refrigerator and garnish just before serving to keep those toppings fresh and crunchy. Each bite will be just as delicious as the day you made it!
What to Serve with Creamy No-Bake Chocolate Hazelnut Tart
Looking to enhance your dessert experience? Pairing your tart with delightful accompaniments will take your meal to new heights.
- Fresh Berries: Juicy strawberries or raspberries add a tart contrast, brightening the rich chocolate flavors beautifully.
- Vanilla Ice Cream: A scoop of creamy vanilla ice cream creates a lovely temperature contrast and enhances the chocolatey indulgence.
- Chocolate Drizzle: A rich chocolate sauce drizzled over each slice amplifies the decadent experience and adds a gourmet touch.
- Mint Leaves: Fresh mint adds a burst of color and a refreshing element, balancing the sweetness of the tart perfectly.
- Coffee or Espresso: A strong coffee pairing elevates the dessert experience, bringing out the chocolate’s richness in a delightful way.
- Whipped Cream Topping: Adding a dollop of lightly sweetened whipped cream brings a fluffy texture and extra creaminess to every slice.
- Nuts on the Side: A small mix of toasted nuts can provide a satisfying crunch and complement the hazelnut flavor in the tart.
- Chilled Dessert Wine: A glass of dessert wine like Moscato or a rich late-harvest Riesling can enhance the flavor sensation with every bite.
Creamy No-Bake Chocolate Hazelnut Tart Variations
Feel free to get creative with your tart by trying out these exciting substitutions and adaptations!
-
Nut-Free Option: Replace hazelnuts with sunflower seed butter and use crushed gluten-free cookies for a nut-free delight. The sunflower butter will give a lovely creaminess without the allergens.
-
Fruity Twist: Add fresh berries, like raspberries or strawberries, to the filling for bursts of freshness. This not only adds flavor but also complements the rich chocolate wonderfully!
-
Vegan Delight: Use coconut cream instead of heavy whipping cream and a dairy-free cream cheese for a vegan version that maintains sweetness and creaminess. Your guests will be amazed at how delicious vegan treats can be!
-
Spicy Kick: Incorporate a pinch of cayenne pepper or espresso powder into the filling to elevate the chocolate flavor with a hint of warmth. Just a little spice can create a dynamic flavor profile!
-
Syrupy Drizzle: Drizzle some maple syrup or agave nectar on top before serving for added sweetness and a beautiful finishing touch. It introduces a new texture and a comforting sweetness that complements the chocolate perfectly.
-
Chocolate Lovers: For an even richer chocolate experience, fold in some melted dark chocolate into the filling for depth. This adds extra creaminess and enhances the indulgence!
-
Cookie Crust Variation: Swap out digestive biscuits for chocolate sandwich cookies or ginger snaps to create a unique crust that adds depth and a subtle spice to your tart. Each bite will surprise you!
Why not pair this tart with a light summer dessert like a refreshing scoop of sorbet or a simple fruit salad? Or, if you’re in the mood for something more extravagant, serve it alongside a slice of the beautifully creamy Zucchini Lemon Pasta for a delightful contrast. Enjoy this creative journey in your kitchen and make it your own!
Storage Tips for Creamy No-Bake Chocolate Hazelnut Tart
Fridge: Store the tart covered in plastic wrap in the refrigerator for up to 5 days to maintain its freshness and creamy texture.
Freezer: For long-term storage, slice the tart into pieces and wrap them individually in plastic wrap, then place them in an airtight container. It can be frozen for up to 2 months.
Thawing: When ready to enjoy, transfer the frozen slices to the fridge to thaw overnight for a smooth and delicious return to that dreamy chocolate hazelnut experience.
Reheating: No reheating is needed; simply enjoy the tart chilled straight from the fridge or after thawing for the best taste!
Creamy No-Bake Chocolate Hazelnut Tart Recipe FAQs
How do I choose the right hazelnuts for this tart?
Absolutely! Look for hazelnuts that are plump and free from dark spots or blemishes. The best choice is to select raw or lightly roasted hazelnuts, as toasting them enhances their flavor. If you can, choose organic nuts for better taste and quality.
How should I store my leftover Creamy No-Bake Chocolate Hazelnut Tart?
To keep your tart fresh, store it covered in plastic wrap in the refrigerator for up to 5 days. This ensures it retains its delightful texture and flavor. If you prefer to enjoy it later, slice the tart and freeze the pieces wrapped separately in plastic wrap and stored in an airtight container for up to 2 months.
What’s the best way to freeze the tart if I want to save some for later?
Certainly! Follow these steps: First, slice the tart into individual pieces. Then, wrap each piece tightly in plastic wrap, ensuring no air is trapped inside. Place them in a freezer-safe container or a resealable plastic bag. Label with the date, and your delectable slices can be frozen for up to 2 months! When you’re ready, simply thaw in the fridge overnight before enjoying.
What should I do if my whipped cream isn’t thickening?
Very! If your whipped cream isn’t achieving soft peaks, ensure your heavy whipping cream is chilled and your mixing bowl and beaters are clean and cold. Start whipping on low speed and gradually increase to medium-high. If all else fails, try adding a tablespoon of cornstarch to stabilize the cream. This should help get it to the right consistency!
Can I make this tart gluten-free?
Definitely! To make a gluten-free version of the Creamy No-Bake Chocolate Hazelnut Tart, substitute crushed digestive biscuits with gluten-free graham crackers or gluten-free cookies of your choice for the crust. Just ensure that all the ingredients you use are certified gluten-free to cater to any dietary restrictions.
Is this dessert suitable for pets?
Not at all! Chocolate is harmful to pets, especially dogs, as it can be toxic to their system. It’s best to keep this delightful dessert strictly for human consumption and ensure that leftovers are securely stored away from curious furry friends.
Indulge in a Creamy No-Bake Chocolate Hazelnut Tart Magic
Ingredients
Equipment
Method
- In a medium bowl, combine the crushed digestive biscuits with melted unsalted butter until the mixture resembles damp sand. Press this mixture into the bottom and up the sides of a 9-inch tart pan. Refrigerate for about 20 minutes to set up.
- While the crust chills, beat the heavy whipping cream using an electric mixer until soft peaks form. Gradually incorporate the powdered sugar while mixing until stiff peaks are achieved in about 2-3 minutes.
- In another bowl, blend the softened cream cheese and chocolate hazelnut spread until creamy and smooth. Add the pure vanilla extract and a pinch of flaky sea salt, mixing until well combined.
- Carefully fold the whipped cream into the chocolate hazelnut mixture using a spatula. Start with a third of the whipped cream, then gently fold in the remaining whipped cream until uniform and airy.
- Pour the chocolate filling into the chilled biscuit crust, smooth the surface evenly, cover with plastic wrap, and return to the refrigerator. Chill for at least 4 hours or overnight.
- Once set, remove the tart from the refrigerator. Garnish with chopped hazelnuts and dark chocolate shavings, slice with a sharp knife, and serve chilled.
Leave a Reply