
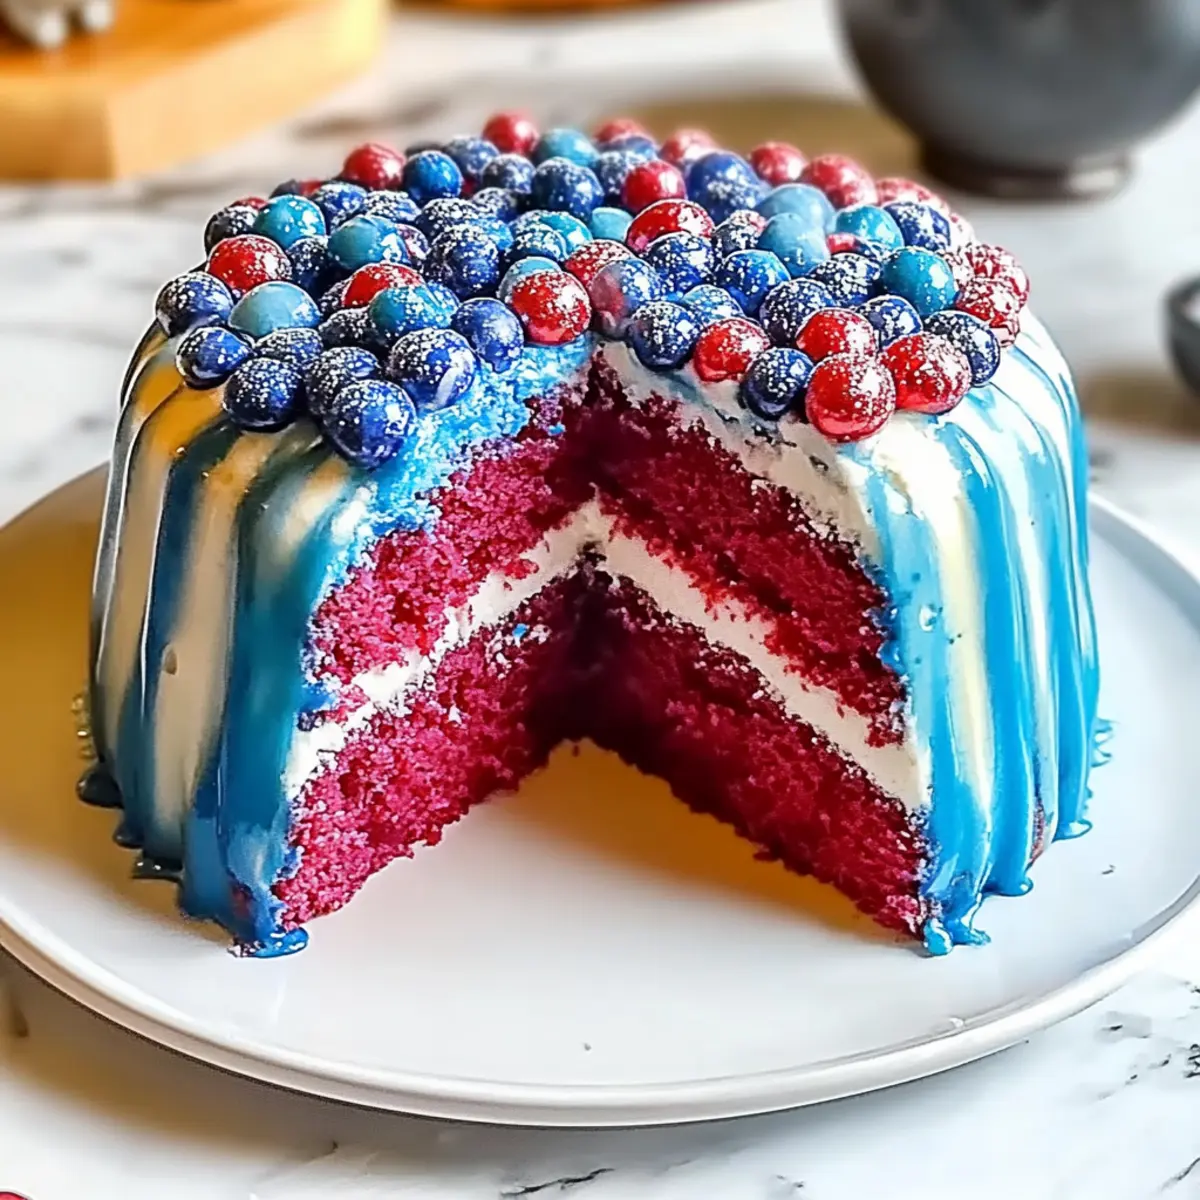
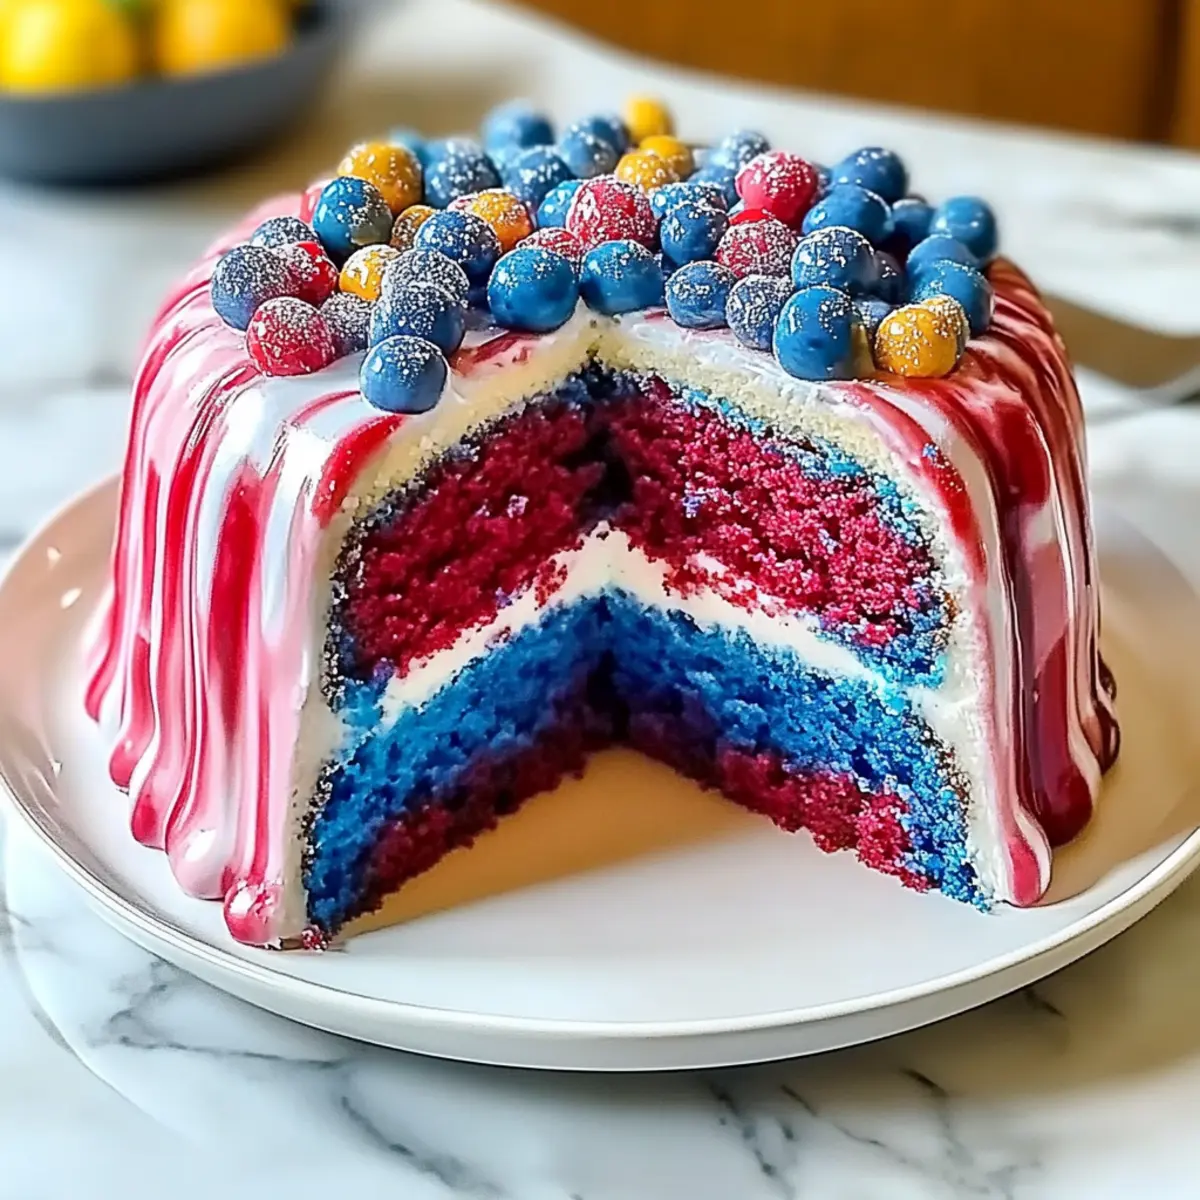
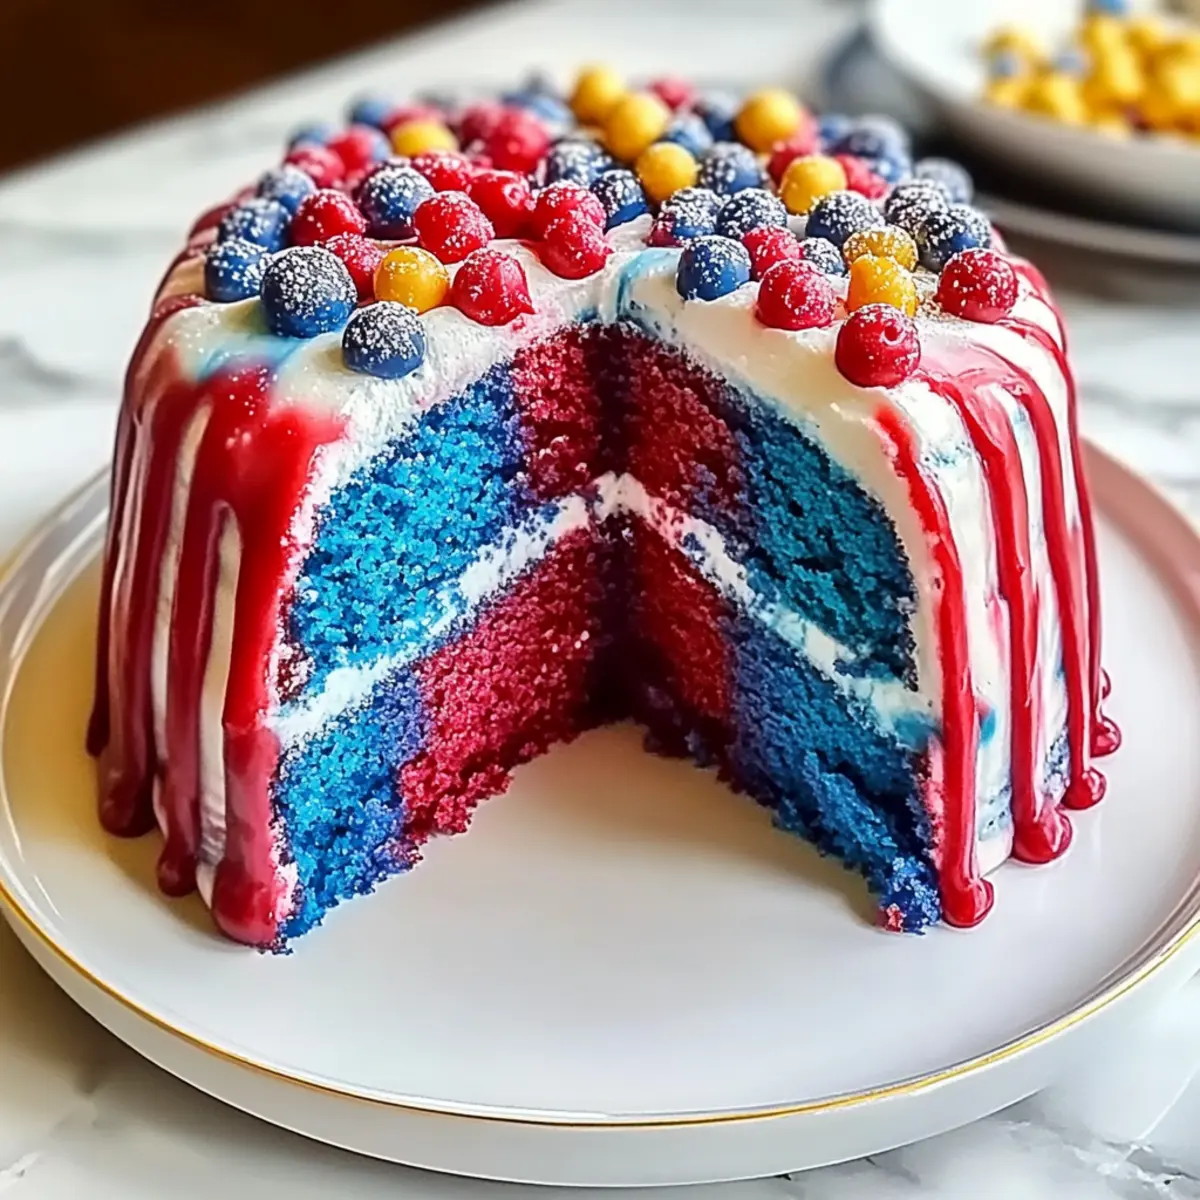
As I pulled the vibrant cake from the oven, the rich aroma of sweet vanilla filled my kitchen, instantly transforming the space into a warm celebration hub. This Deliciously Simple Red White & Blue Marble Cake isn’t just a festive centerpiece; it’s a colorful dairy-free dessert that makes any gathering feel special. With its effortless preparation, you can create a stunning masterpiece that impresses your guests without the fuss. Plus, adapting it to be gluten-free or nut-free ensures that everyone can join in the fun! Ready to dive into a swirl of red, white, and blue? Let’s get baking and make your next occasion unforgettable!

Why is this cake a crowd-pleaser?
Colorful and festive, this Deliciously Simple Red White & Blue Marble Cake adds joy to any celebration. Versatile enough to cater to dietary needs—go gluten-free or nut-free with easy substitutions. Effortless preparation means you can spend less time in the kitchen and more time with your guests. Irresistibly fragrant, the sweet vanilla aroma will have everyone flocking to dessert. Serve it with some fresh berries or with a dollop of whipped cream for an elevated touch, ensuring a slice of joy for everyone!
Deliciously Simple Red White & Blue Marble Cake Ingredients
For the Cake Batter
• Cake Flour – Provides structure for a light, fluffy cake; substitute with gluten-free flour for a gluten-free option.
• Granulated Sugar – Sweetens the cake; adjust amount based on your taste preferences.
• Baking Powder – Acts as a leavening agent to help the cake rise; ensure freshness by checking the expiration date.
• Salt – Enhances flavor; a pinch is essential for balance in this deliciously simple Red White & Blue Marble Cake.
• Unsalted Butter – Adds richness and moisture; make sure it’s softened to cream properly.
• Fresh Eggs – Contributes structure and moisture; using room temperature helps with better incorporation.
• Pure Vanilla Extract – Adds depth of flavor; avoid synthetic alternatives for the best taste.
• Whole Milk – Provides moistness; can be substituted with almond or oat milk for dairy-free versions.
For the Color
• Red Gel Food Coloring – Colors one part of the batter; gel maintains consistency better than liquid dyes.
• Blue Gel Food Coloring – Colors another part of the batter; also use gel form for the best results.
For the Frosting
• Powdered Sugar – Sweetens the frosting; necessary for achieving a smooth finish.
• Heavy Cream – Adds richness to the frosting; whipped until fluffy for the perfect topping.
Step‑by‑Step Instructions for Deliciously Simple Red White & Blue Marble Cake
Step 1: Preheat and Prepare
Begin by preheating your oven to 350°F (175°C) and greasing two 9-inch round cake pans with butter or cooking spray. For easy release, you can also line the bottoms with parchment paper. This initial step sets the stage for your Deliciously Simple Red White & Blue Marble Cake to bake evenly and beautifully.
Step 2: Combine Dry Ingredients
In a medium mixing bowl, whisk together 2 cups of cake flour, 2 teaspoons of baking powder, and a pinch of salt until thoroughly combined. This process aerates the flour, ensuring your cake achieves its fluffy texture. Set this bowl aside while you prepare the butter and sugar mixture, which adds richness to your cake.
Step 3: Cream Butter and Sugar
In a large bowl, beat 1 cup of softened unsalted butter and 1 ½ cups of granulated sugar using an electric mixer on medium speed for about 3 minutes. Continue mixing until the mixture becomes light and fluffy, appearing pale in color. This step is essential in creating a perfect base for your Deliciously Simple Red White & Blue Marble Cake.
Step 4: Incorporate Eggs and Vanilla
Next, add in 4 fresh eggs, one at a time, beating well after each addition. Follow with 2 teaspoons of pure vanilla extract and mix until the batter is smooth. The combination of eggs provides moisture and structure, while the vanilla infuses a warm aroma into your cake batter.
Step 5: Add Dry Ingredients and Milk
Gradually incorporate the flour mixture into the butter mixture, alternating with 1 cup of whole milk. Start with the dry ingredients, then milk, and finish with dry, mixing gently until just combined. Avoid overmixing; a few lumps are perfectly fine, ensuring your Deliciously Simple Red White & Blue Marble Cake remains airy and delightful.
Step 6: Color the Batter
Divide your batter evenly into three separate bowls. In one bowl, add red gel food coloring to achieve a vibrant hue; in another, add blue gel food coloring. Leave the third bowl plain to represent the white layer. Stir each bowl gently until the colors are fully incorporated, creating colorful layers for your marble cake.
Step 7: Assemble the Batter in Pans
Using a spoon, alternate dollops of each colored batter into the prepared cake pans—start with a layer of red, followed by blue, and then white. Continue layering until the batter is used up. To create a marbled effect, gently swirl the colors together with a knife or skewer, being careful not to over mix, so the distinct colors remain.
Step 8: Bake the Cakes
Place the pans in the preheated oven and bake for 25-30 minutes, or until a toothpick inserted in the center comes out clean. Keep an eye on the cakes; they should rise and have a slightly golden top. Once baked, remove them from the oven and allow them to cool completely in the pans on a wire rack for about 10-15 minutes.
Step 9: Frost and Decorate
As the cake layers cool, prepare the frosting by beating 2 cups of heavy cream with 2 cups of powdered sugar until stiff peaks form. Once the cakes are entirely cooled, carefully remove them from the pans. Frost between the layers and around the outside of the cake. Feel free to get creative with your decorations for this Deliciously Simple Red White & Blue Marble Cake!
What to Serve with Deliciously Simple Red White & Blue Marble Cake
Elevate your celebration with delightful accompaniments that harmonize beautifully with this vibrant, fluffy dessert.
-
Whipped Cream: A dollop adds a creamy contrast, enhancing the cake’s sweet flavor and making each bite even more indulgent.
-
Fresh Berries: Serve alongside strawberries and blueberries for a refreshing burst of flavor, perfectly complementing the cake’s festive colors.
-
Vanilla Ice Cream: Creamy and cool, a scoop of vanilla ice cream creates a deliciously decadent pairing that everyone will love.
-
Sparkling Lemonade: This refreshing drink provides a zesty contrast, perfect for summer gatherings and balancing the sweet cake.
-
Chocolate Ganache: Drizzle warm ganache over the cake for an extra touch of luxury—rich chocolate pairs beautifully with the vibrant vanilla flavors.
-
Fruit Salad: A light, colorful fruit medley offers a refreshing and healthy side, harmonizing with the cake’s colors while providing a tangy counterbalance.
-
Coffee or Tea: Warm beverages are the perfect pairing, enhancing the cake’s aroma while inviting guests to linger over dessert and conversation.
Expert Tips for Red White & Blue Marble Cake
-
Room Temperature Ingredients: Ensure eggs and butter are at room temperature for a smoother batter, promoting better emulsification and a fluffier cake.
-
Baking Powder Freshness: Always check the expiry date on your baking powder to avoid a flat cake. Fresh baking powder is crucial for a proper rise in your festive cake.
-
Gentle Mixing: Avoid overmixing once you combine the dry and wet ingredients. Gentle folding helps maintain the light texture that makes this Deliciously Simple Red White & Blue Marble Cake truly delightful.
-
Perfect Marbling Technique: To achieve that stunning marbled effect, use a skewer or knife to swirl the batters together gently. Too much mixing will lead to a blended color rather than vibrant swirls.
-
Cooling Time: Allow your cakes to cool completely in the pans before frosting. This helps prevent the frosting from melting and ensures a beautiful finish on your colorful dessert.
Make Ahead Options
These Deliciously Simple Red White & Blue Marble Cake preparations are perfect for busy home cooks! You can make the cake layers up to 24 hours in advance; simply bake and let them cool completely before wrapping tightly in plastic wrap. When ready to serve, just frost and decorate the cake. For optimal freshness, store the unfrosted layers at room temperature if consumed within a day or refrigerate them if needing an extra day. Additionally, you can prepare the frosting in advance and keep it refrigerated for up to 3 days; just give it a quick whip before using. This approach saves you time while ensuring your cake remains just as delicious!
Deliciously Simple Red White & Blue Marble Cake Variations
Feel free to explore these delectable twists and swaps to create your perfect version of this festive cake!
-
Gluten-Free: Substitute cake flour with a gluten-free baking blend to enjoy a light and fluffy texture without the gluten. This allows everyone to indulge without worry!
-
Nut-Free: For those with nut allergies, simply use regular cow’s milk instead of nut-based alternatives. Your cake will still be delicious and safe for all to enjoy.
-
Dairy-Free: To make the cake dairy-free, replace unsalted butter with coconut oil and whole milk with almond milk. You’ll still get that delightful moistness, with a touch of coconut goodness!
-
Less Sugar: Reduce the amount of granulated sugar and add mashed bananas into the mix. This change not only lowers the sugar content but also adds a unique flavor and moisture to every bite.
-
Natural Dyes: Opt for natural coloring by using beet juice for red and spirulina for blue. This way, you can maintain color without the artificial ingredients, keeping it wholesome and vibrant.
-
Layered Frosting: For a different texture, try mixing cream cheese into the frosting. This twist adds a tangy flavor that pairs beautifully with sweet cake, giving you a new layer of indulgence.
-
Fruit-Infused: Want to boost the fruity freshness? Fold in some chopped strawberries or blueberries into the batter. The bursts of fruit add a delightful surprise in every slice!
-
Tropical Surprise: Elevate the flavor profile by incorporating coconut flakes into the batter. This little twist transforms your cake into a tropical paradise, perfect for summer celebrations!
If you’re looking for more delightful cake recipes, check out these treats: Blueberry Cream Cake and Coconut Cloud Cake. Enjoy your baking adventure!
How to Store and Freeze Deliciously Simple Red White & Blue Marble Cake
Room Temperature: Store leftover slices in an airtight container at room temperature for up to 3 days to maintain freshness and flavor.
Fridge: For longer storage, refrigerate the cake in an airtight container for up to a week. This helps keep the moist texture intact.
Freezer: Wrap individual slices tightly in plastic wrap and then aluminum foil before freezing for up to 2 months. Thaw overnight in the fridge when you’re ready to enjoy your colorful dessert again.
Reheating: If desired, gently warm slices in the microwave for a few seconds before serving to bring back the delightful moisture of this festive cake.
Deliciously Simple Red White & Blue Marble Cake Recipe FAQs
How do I select the best ingredients for this cake?
Absolutely! When selecting cake flour, you want a finely milled product for the best results; look for brands that promise “light” and “fluffy” textures. For butter, choose unsalted and ensure it’s softened to room temperature for easy creaming. When purchasing eggs, opt for fresh and organic if possible—they contribute greatly to the cake’s overall structure and flavor.
What is the best way to store leftovers of the cake?
Very simple! Store leftover slices in an airtight container at room temperature for up to 3 days to maintain their freshness and texture. If you want to keep it longer, refrigerate it in an airtight container for up to a week. This will help keep your Deliciously Simple Red White & Blue Marble Cake moist and delicious!
Can I freeze this cake, and if so, how?
Absolutely! To freeze, wrap individual slices tightly in plastic wrap, then in aluminum foil to prevent freezer burn. You can freeze them for up to 2 months. When you’re ready to enjoy, simply thaw overnight in the fridge. If you wish to warm them up a bit, a quick 10-15 second blast in the microwave does wonders to restore some of that delightful moisture!
How can I ensure my cake turns out perfectly without any common issues?
To avoid a dense cake, always use room temperature ingredients, especially your eggs and butter, which promote better mixing. Check that your baking powder is fresh—this is crucial for a good rise. Gently fold the wet and dry ingredients to keep the batter airy. Lastly, when it comes to achieving the marbled effect, use a skewer or knife to swirl the colors lightly; overmixing will dilute the vibrant colors into a solid hue.
Are there dietary considerations I should be aware of with this recipe?
Very much so! For a gluten-free version, substitute the cake flour with a gluten-free baking blend. If nut allergies are a concern, be sure to use regular cow’s milk instead of almond or any nut-based alternatives. Also, if you’re looking for dairy-free options, swap the unsalted butter with coconut oil and the whole milk with almond or oat milk. Your bake will still be colorful and delicious!
Deliciously Simple Red White & Blue Marble Cake for Celebrations
Ingredients
Equipment
Method
- Preheat your oven to 350°F (175°C) and grease two 9-inch round cake pans with butter or cooking spray.
- In a medium mixing bowl, whisk together cake flour, baking powder, and salt until well combined.
- In a large bowl, beat softened butter and granulated sugar for about 3 minutes until light and fluffy.
- Add eggs one at a time, followed by vanilla extract, mixing until smooth.
- Gradually incorporate the flour mixture and milk, alternating as you mix until just combined.
- Divide batter into three bowls; color one with red food coloring and another with blue.
- In prepared pans, alternate dollops of each color, creating a marbled effect.
- Bake for 25-30 minutes or until a toothpick comes out clean.
- Cool in pans for 10-15 minutes before transferring to a wire rack.
- For the frosting, beat heavy cream and powdered sugar until stiff peaks form, then frost cooled cakes.
Leave a Reply