
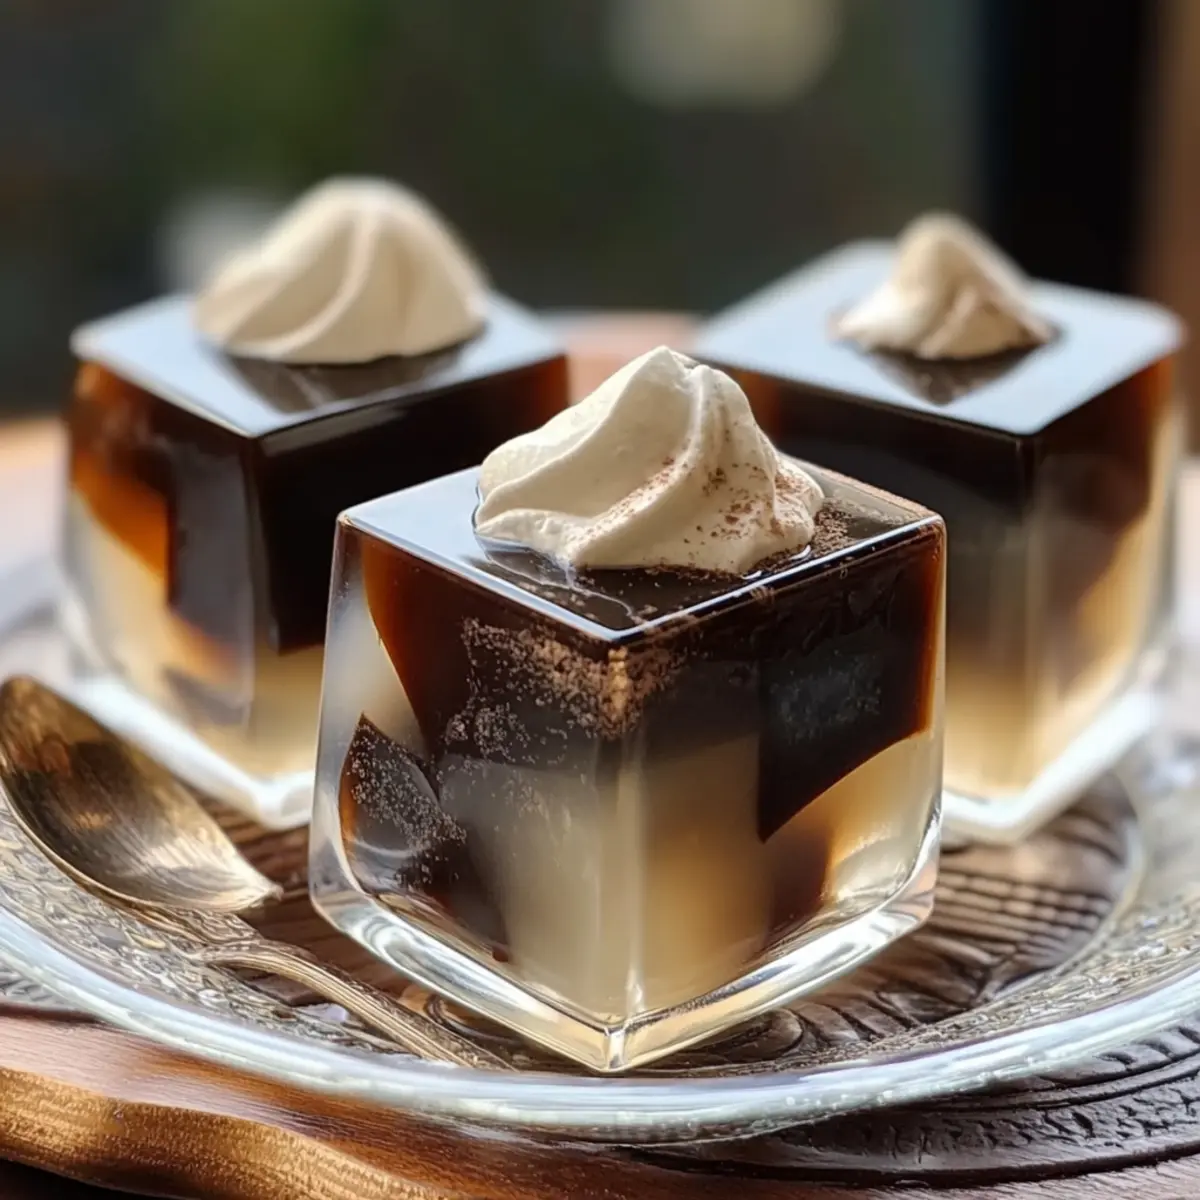
As I walked through a quaint Japanese café, a delightful sight caught my eye—glassy cubes of shimmering coffee jelly, elegantly displayed and begging to be tasted. That is how I first fell in love with Easy Japanese Coffee Jelly, a no-bake dessert that captures the rich essence of coffee in a refreshing form. In just 30 minutes of prep time and a bit of patience while it chills, you can create a smooth, delightful treat that’s perfect for coffee lovers and dessert enthusiasts alike. The best part? This customizable dessert allows you to experiment with different flavors and garnishes, making it a breeze to impress friends or satisfy your sweet cravings. Are you ready to whip up this delightful dessert and explore its endless possibilities?
Why Is Japanese Coffee Jelly So Special?
Unique Experience: This dessert offers a delightful twist on traditional jelly, enveloping rich coffee flavors in a smooth texture that’s simply irresistible.
No-Bake Convenience: You’ll love how quick and easy it is to prepare, requiring just 30 minutes of active time. Perfect for busy home cooks!
Customizable Flavors: Add a touch of creativity with personalized variations; try matcha, vanilla, or even your favorite syrups to tailor it to your taste.
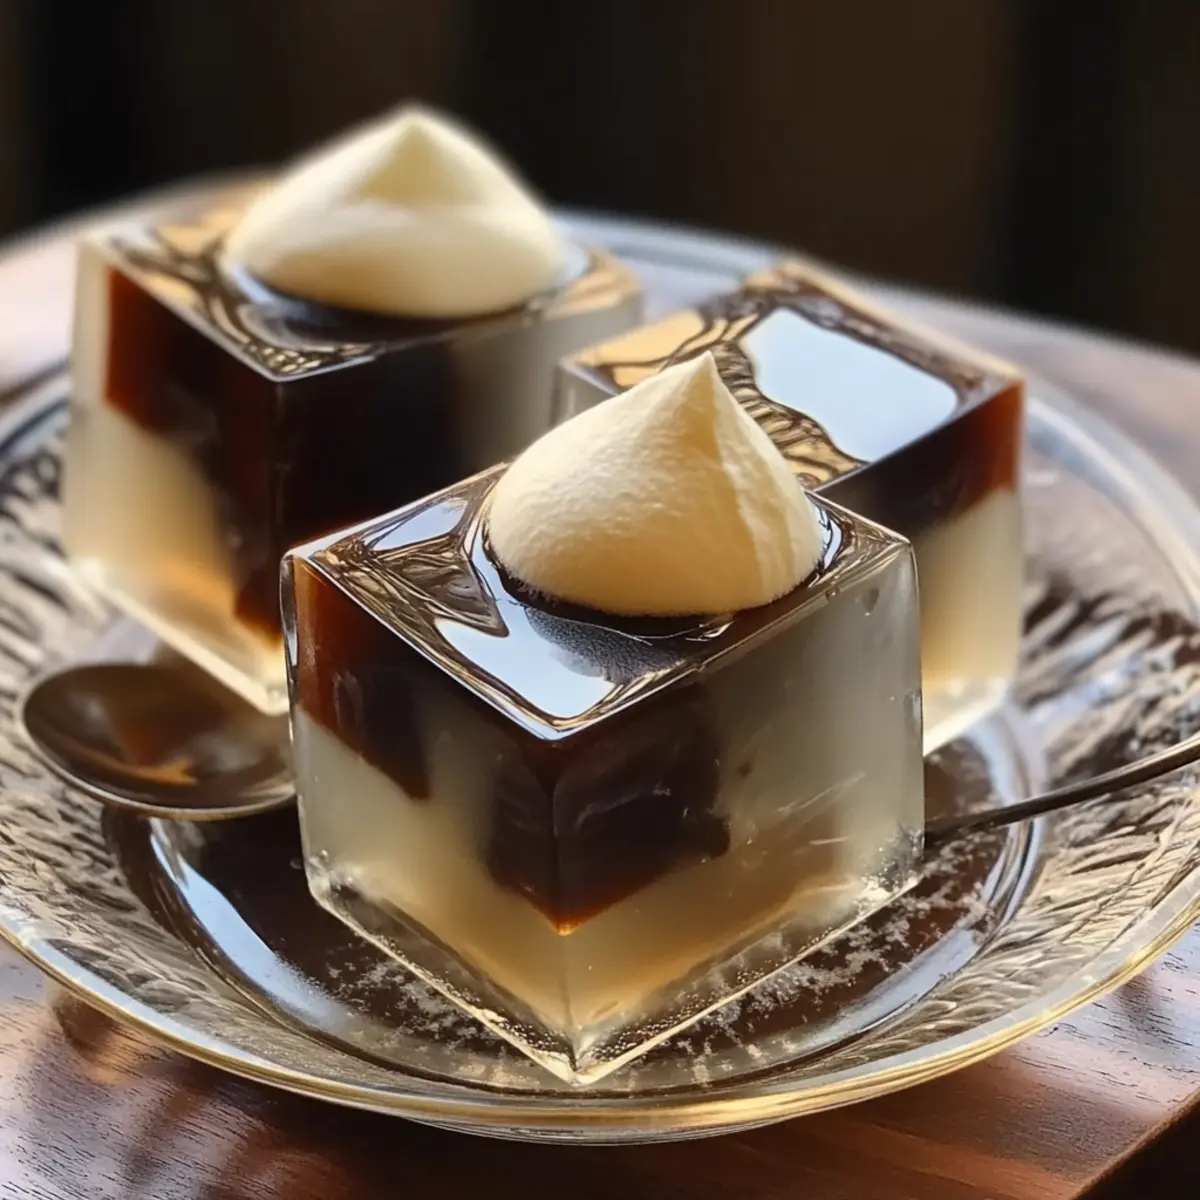
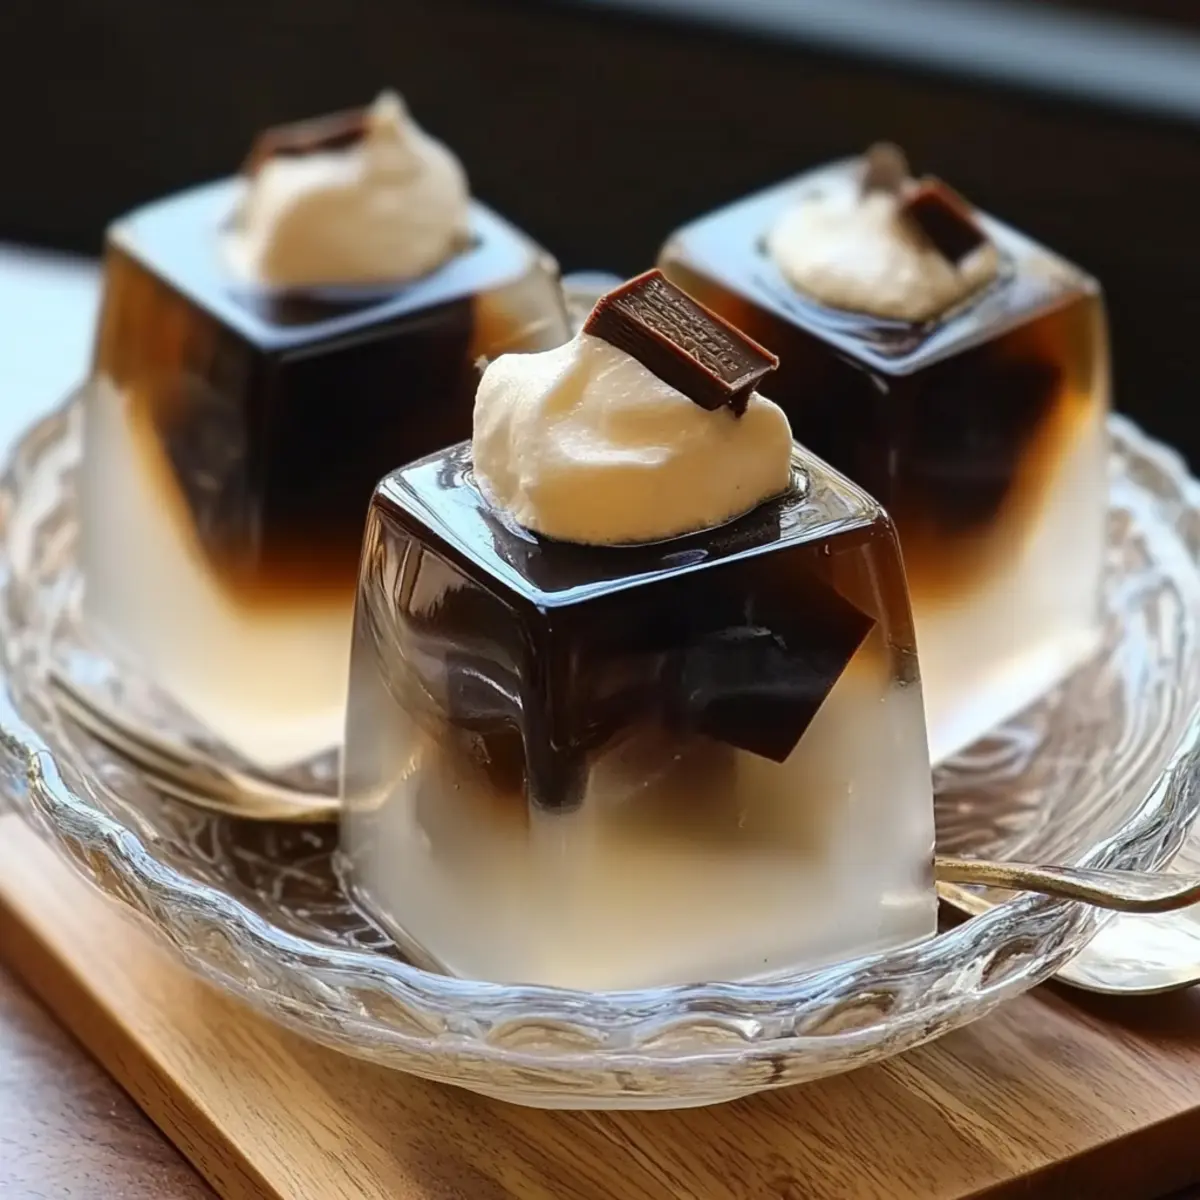
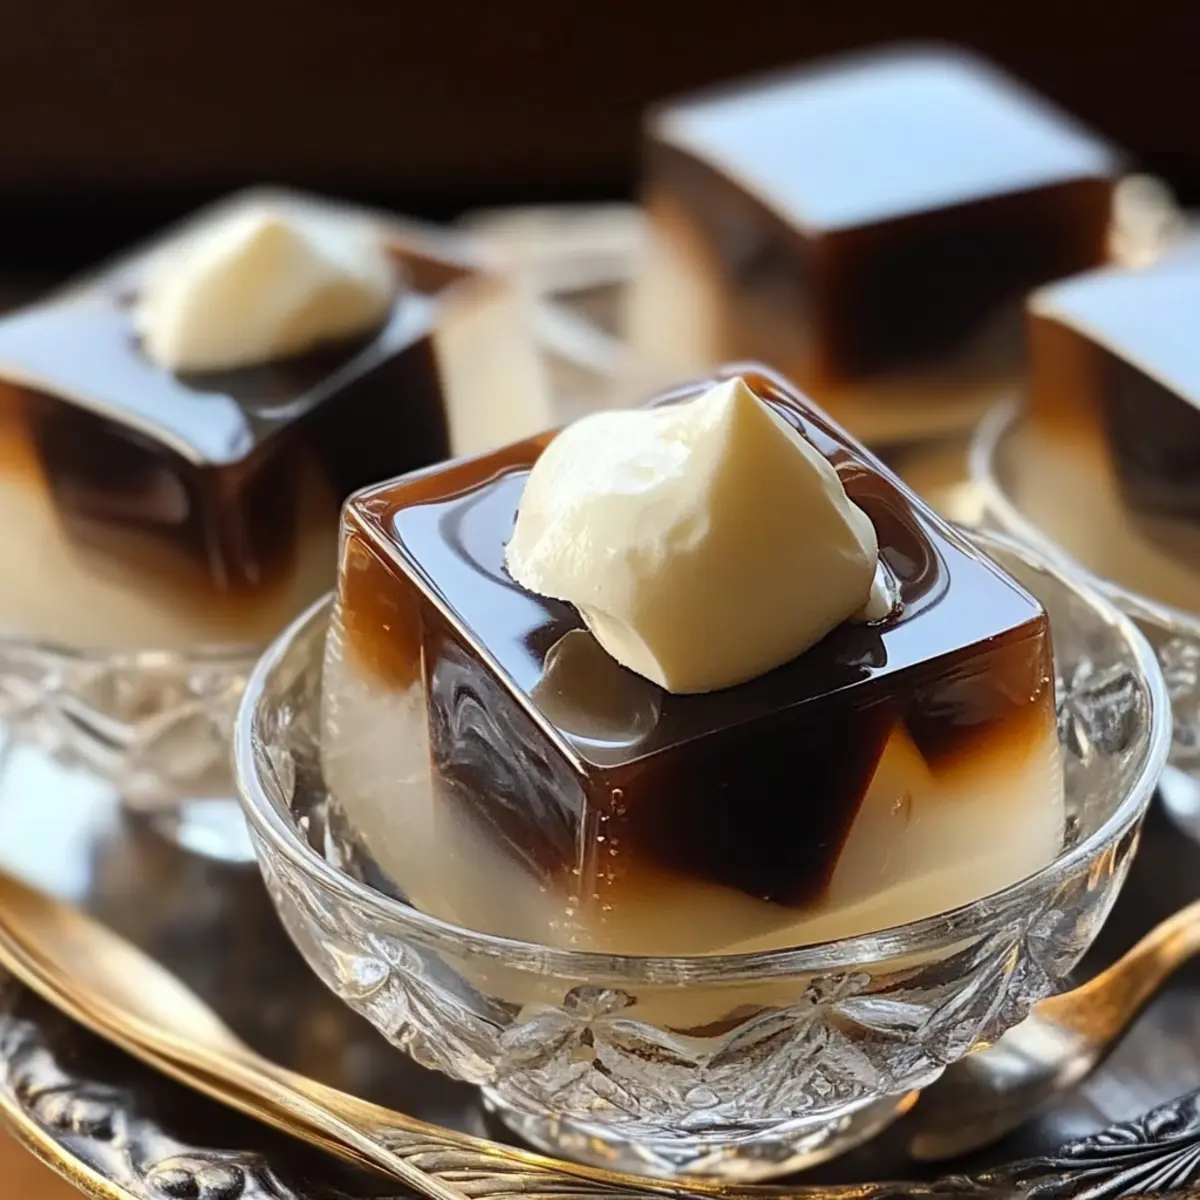
Charming Presentation: Serve it in elegant cups or cut into cubes, garnished with colorful toppings—your guests will be wowed by its beauty!
Satisfying, Guilt-Free Indulgence: With approximately 90 calories per serving, it’s a light yet satisfying dessert to curb those sweet cravings. For more ways to elevate your dessert game, check out our no-bake treats that are sure to impress!
Japanese Coffee Jelly Ingredients
For the Jelly Base
• Boiling Water – Dissolves the gelatin smoothly for impeccable texture.
• Cold Water – Essential for setting the gelatin properly without being too firm.
• Brown Sugar (50 g) – Adds a rich sweetness; feel free to swap it with white sugar for a lighter flavor.
• Gelatin Powder (9 g) – Choose unflavored gelatin for the best consistency; agar-agar is a great vegetarian alternative.
• Instant Coffee (8 g) – Offers a robust coffee flavor that brings the jelly to life.
For the Creamy Layer
• Thickened Cream / Heavy Cream – Imparts a luscious creaminess; use whipped cream for a lighter texture if preferred.
For Garnishing
• Garnishes (e.g., chocolate shavings, coffee beans, fresh mint leaves) – Elevates presentation and adds delightful flavor contrasts; get creative with your toppings!
Dive into the fun of crafting your own Japanese Coffee Jelly, and let your creativity shine through these easy-to-find ingredients!
Step-by-Step Instructions for Easy Japanese Coffee Jelly
Step 1: Prepare the Base Mixture
In a large jug, combine 8 grams of instant coffee, 9 grams of gelatin powder, and 50 grams of brown sugar. Pour in 250 ml of boiling water and whisk vigorously until the mixture is smooth and the sugar has completely dissolved. You should see a glossy, dark liquid indicating that your Japanese Coffee Jelly base is ready for the next step.
Step 2: Add Cold Water
Once the coffee mixture is fully blended, add 250 ml of cold water. Use your whisk to combine the liquids thoroughly, ensuring that no gelatin granules remain. The cold water will help cool down the mixture, making it easier to handle and perfect for setting the jelly later on.
Step 3: Transfer to Serving Dish
Carefully pour the coffee mixture into individual serving cups or a larger glass dish. Gently tap the dish on the counter to release any trapped air bubbles, ensuring a smooth texture throughout. Visualize the rich, dark liquid filling the cups as you prepare it for chilling; this will become your luxurious dessert.
Step 4: Chill the Jelly
Refrigerate the coffee jelly for at least 3 hours, or until it is fully set. You’ll know it’s ready when the surface is firm to the touch, and it holds its shape. The cooling process allows the flavors to meld beautifully, so be patient and resist the temptation to dig in too early.
Step 5: Serve and Garnish
Once set, if you used a larger dish, cut the jelly into cubes to create delightful bites. If you used individual cups, serve them directly. Just before serving, you can add optional garnishes such as chocolate shavings, coffee beans, or fresh mint leaves to enhance the appearance and taste of your Easy Japanese Coffee Jelly.
Japanese Coffee Jelly Variations & Substitutions
Feel free to unleash your creativity and tailor this delightful dessert to your taste preferences!
-
Matcha Marvel: Substitute instant coffee with matcha powder for a vibrant, earthy flavor that packs a unique punch. The lovely green color will be a feast for the eyes too!
-
Berry Bliss: Infuse the jelly with berry puree or chunks, like strawberries or raspberries, for a fruity twist that adds delightful tartness and a pop of color.
-
Flavored Syrup Upgrade: Replace brown sugar with flavored syrups, such as vanilla or caramel, to elevate the sweetness and add depth to the jelly’s flavor profile.
-
Coconut Cream: For a tropical flair, swap thickened cream with coconut cream, enhancing the dish’s creaminess while infusing it with a lovely coconut essence.
-
Spicy Kick: Add a pinch of cinnamon or cayenne pepper to your coffee mixture for a subtle kick that beautifully contrasts with the sweetness.
-
Decaf Delight: If you prefer a caffeine-free version, simply use decaffeinated instant coffee to enjoy the nostalgic coffee flavors without the buzz.
-
Agar-Agar Alternative: For a vegan-friendly option, substitute gelatin with agar-agar using the same ratio; it sets beautifully while keeping the jelly plant-based.
-
Minty Fresh: Incorporate a few drops of peppermint extract to the base mixture for a refreshing minty variation; perfect for anyone looking for a fresh take on chocolate desserts.
Let your imagination run wild with these adjustments, and be sure to share your favorite combinations that make your heart (and taste buds) sing! Don’t forget to check out our tips on creating delightful no-bake treats that will impress your family and friends!
How to Store and Freeze Japanese Coffee Jelly
Fridge: Store your Japanese Coffee Jelly in an airtight container in the refrigerator for up to 5 days. This will keep it fresh and maintain its delightful texture.
Freezer: While freezing is not recommended due to potential changes in texture, if you must, freeze it in an airtight container for up to 2 months; thaw in the fridge before serving.
Reheating: If serving the jelly cold, there’s no need to reheat. Just ensure it’s chilled adequately for the best taste experience before enjoying.
Make-Ahead: Feel free to prepare this dessert up to 2 days in advance; just keep it refrigerated until you’re ready to serve, ensuring maximum flavor and freshness.
Tips for the Best Japanese Coffee Jelly
- Whisk Well: Make sure to whisk thoroughly at every step to prevent gelatin granules from settling, ensuring a smooth Japanese Coffee Jelly texture.
- Chill Time Matters: Don’t rush the chilling process; allow at least 3 hours for the flavors to meld and the jelly to set properly.
- Garnish Creativity: Experiment with different garnishes like mint leaves or berry coulis to elevate the presentation and add contrasting flavors.
- Customize Wisely: Feel free to swap out instant coffee for flavors like matcha or chai, but ensure you maintain the same proportions for best results.
- Storage Tip: Keep your jelly in an airtight container in the fridge to maintain freshness, ideally consuming within five days.
What to Serve with Easy Japanese Coffee Jelly
Elevate your dessert experience by pairing this delightful treat with complementary flavors and textures.
- Light Bento-Style Meal: A variety of small, flavorful dishes will harmonize with the coffee jelly, creating a balanced dining experience.
- Refreshing Fruit Salad: Fresh, zesty fruits add a bright contrast to the rich coffee flavor, making each bite a burst of freshness.
- Creamy Vanilla Ice Cream: The vanilla’s sweetness enhances the coffee notes, while the ice cream’s creamy texture contrasts beautifully with the jelly.
- Matcha Tea: Enjoying the jelly with a cup of matcha infuses an earthy flavor that beautifully balances the richness of coffee.
- Chocolate Mousse: Indulge in the smooth and rich texture of chocolate mousse, creating a decadent duo for chocolate lovers and coffee fans alike.
- Chilled Green Tea: Refreshing and light, chilled green tea provides a subtle bitterness that pairs well with the sweetness of the coffee jelly.
- Whipped Coconut Cream: Add a tropical twist with whipped coconut cream, offering delightful creaminess and a hint of exotic flavor to the experience.
- Savory Scones: A lightly spiced scone or biscuit can ground the coffee jelly’s sweetness, providing a delightful contrast that creates harmony.
Make Ahead Options
These Easy Japanese Coffee Jelly treats are a wonderful option for meal prep! You can prepare the jelly base up to 24 hours in advance—just ensure you refrigerate it in an airtight container to maintain its freshness and prevent unwanted odors. After chilling for at least 3 hours, the jelly will be perfectly set and ready to enjoy. To serve, simply return it to the counter and cut it into cubes if you’ve made it in a larger dish, or brighten up your individual cups with garnishes like chocolate shavings or fresh mint leaves just before serving. This way, you’ll have a delightful dessert ready for those busy weeknights, saving you ample time while still impressing your guests!
Japanese Coffee Jelly Recipe FAQs
What type of coffee works best for this recipe?
Absolutely! For the best flavor, I recommend using a high-quality instant coffee that you enjoy drinking on its own. This will ensure that the essence of coffee shines through in your jelly. You could also experiment with flavored instant coffees for a fun twist!
How should I store the Japanese Coffee Jelly once it’s made?
You can store your Japanese Coffee Jelly in an airtight container in the refrigerator for up to 5 days. This keeps it fresh and preserves its delightful, smooth texture, so it’s always ready for a quick treat or fancy dessert for guests.
Can I freeze Japanese Coffee Jelly?
While it’s not ideal to freeze this jelly due to potential texture changes, you can do it if necessary. Freeze the jelly in an airtight container for up to 2 months. When you’re ready to enjoy it, simply thaw it in the refrigerator overnight to allow it to regain some of its original texture.
What if my jelly doesn’t set properly?
No worries! If your Japanese Coffee Jelly hasn’t set after chilling for at least 3 hours, it may be due to insufficient gelatin. To troubleshoot, you can gently reheat the unset jelly in a saucepan over low heat, whisk in a little more gelatin (dissolved in a bit of boiling water), and then return it to the refrigerator to set again.
Is this recipe suitable for those with dietary restrictions?
Very much! The recipe can be easily customized to be vegetarian-friendly by using agar-agar instead of gelatin. Additionally, you can substitute the sweeteners based on personal dietary needs, such as using sugar alternatives if you’re watching your sugar intake. Just be sure to check for any allergies with your ingredients!
How can I elevate the presentation of my coffee jelly?
Get creative with garnishes! Adding chocolate shavings, fresh mint leaves, or even a drizzle of sweet cream can not only enhance the visual appeal of your Japanese Coffee Jelly but also add exciting flavor contrasts that will impress your guests at any gathering!
Delightfully Easy Japanese Coffee Jelly for Instant Refreshment
Ingredients
Equipment
Method
- In a large jug, combine 8 grams of instant coffee, 9 grams of gelatin powder, and 50 grams of brown sugar. Pour in 250 ml of boiling water and whisk vigorously until smooth.
- Add 250 ml of cold water to the coffee mixture, whisking thoroughly to remove any gelatin granules.
- Carefully pour the coffee mixture into serving cups or a larger dish, tapping to release air bubbles.
- Refrigerate the coffee jelly for at least 3 hours, or until fully set.
- Once set, cut into cubes if in a larger dish or serve directly from individual cups. Garnish with optional toppings before serving.
Leave a Reply