
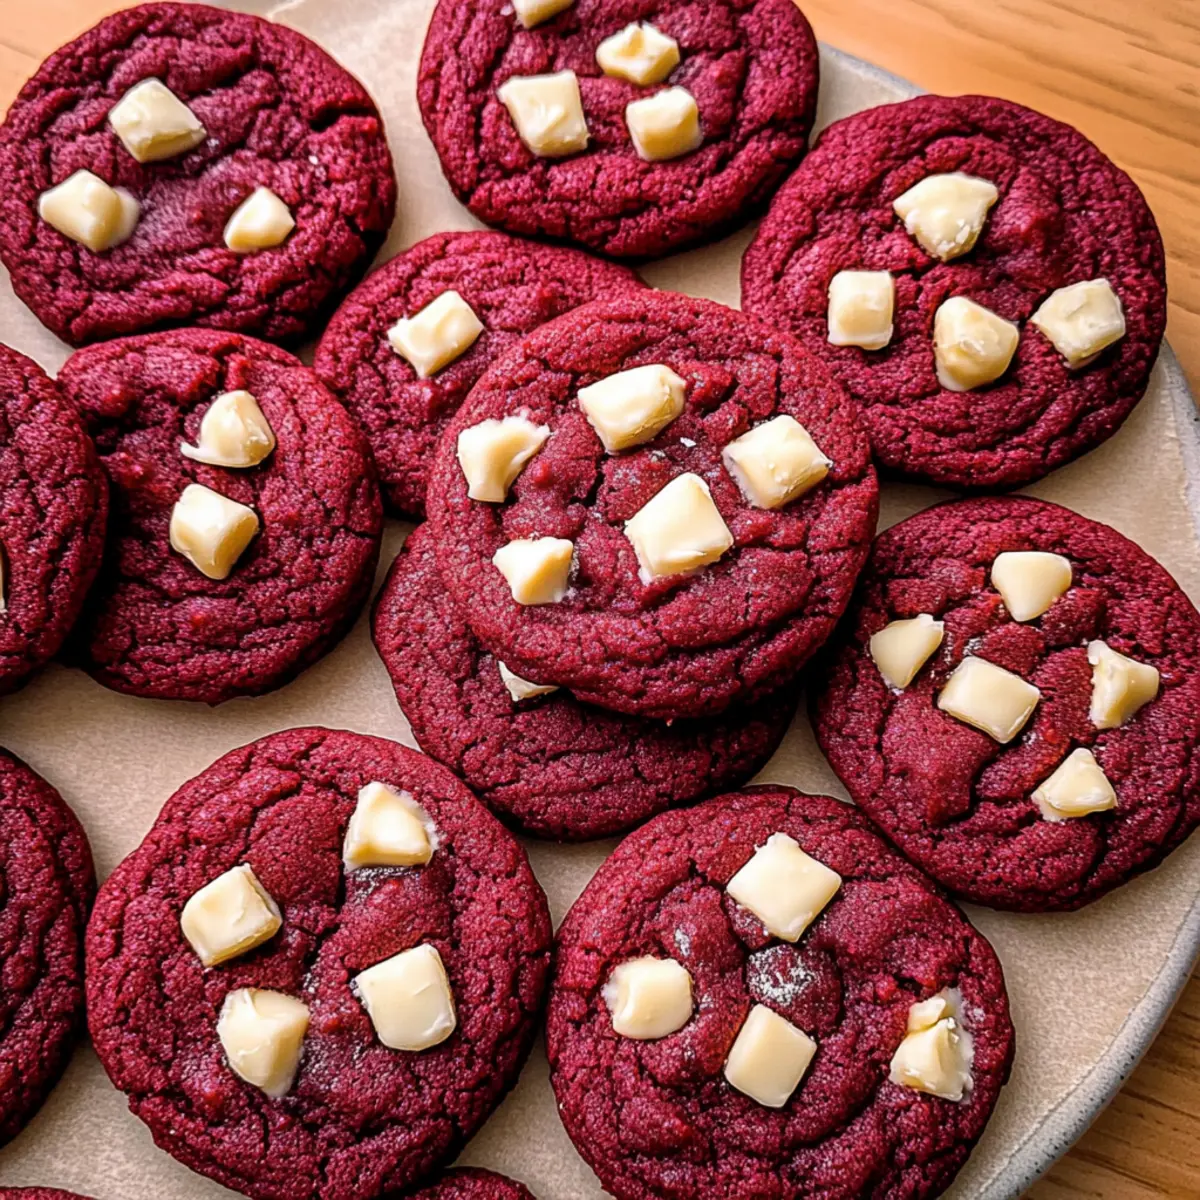
As I rummaged through my pantry one rainy afternoon, I stumbled upon a bottle of red gel food coloring—instantly, a spark of inspiration hit me! This moment led to the creation of my delightful Chewy Red Velvet Cookies with White Chocolate Chunks. Perfectly chewy and subtly chocolatey, these cookies are a quick fix that takes less than 30 minutes, requiring no chill time whatsoever. They make a charming addition to any Valentine’s Day celebration or a sweet indulgence on an ordinary day. Plus, the creamy white chocolate chunks add a luxurious twist that elevates them beyond your standard cookie fare. Are you ready to surprise your loved ones (and yourself) with these irresistible cookies? Let’s dive into the recipe!
Why are Red Velvet Cookies a Must-Try?
Delightfully Quick: You can whip these cookies up in just 30 minutes, making them ideal for spontaneous baking!
Zero Chill Time: Say goodbye to long waits—these cookies come together instantly.
Perfect for Any Occasion: Whether it’s Valentine’s Day or a cozy weekend treat, they’re always a hit!
Rich, Creamy Flavor: The addition of white chocolate chunks elevates the taste, adding a decadent twist that cookie lovers will adore.
Versatile and Fun: Swap in milk or dark chocolate for a new flavor experience, or try adding nuts for extra crunch.
You’ll be hooked after your first bite, so don’t hesitate to check out other sweet treats like Brownie Mix Cookies and Cream Pie Cookies for more delicious inspiration!
Red Velvet Cookies Ingredients
• Classic ingredients for a timeless treat!
For the Batter
- All-Purpose Flour – Provides the essential structure; make sure to spoon and level for accurate measurements.
- Dutch Process Cocoa Powder – Adds a subtle chocolatey flavor; if unavailable, regular cocoa powder can work as a substitute.
- Baking Soda – Essential for helping the cookies rise; ensure it’s fresh for the best results.
- Baking Powder – Collaborates with baking soda to achieve a light, fluffy texture in each cookie.
- Salt – Enhances the overall flavor profile; don’t skip it—it’s key to balancing sweetness.
- Salted Butter – Brings richness and moisture; you can use unsalted butter but adjust your salt accordingly.
- Light Brown Sugar – Contributes moisture and depth of flavor; white sugar can replace it for lighter cookies.
- Granulated Sugar – Sweetens the dough perfectly; coconut sugar can be a delightful alternative for a unique taste.
- Egg Yolks – Enrich the dough’s texture, adding to the chewiness; whole eggs may alter the results but are acceptable if necessary.
- Vanilla Extract – Amplifies the delicious flavor; always opt for pure vanilla for the best taste.
- Red Gel Food Coloring – Delivers that iconic red hue; liquid food coloring can be an alternative, though it might not be as vivid.
- Chopped White Chocolate or White Chocolate Chips – Imparts melting creaminess; feel free to swap in semi-sweet chocolate for a different twist.
With these ingredients at hand, you’re ready to transform your kitchen into a cookie haven. Get ready for some delightful Red Velvet Cookies that your loved ones won’t forget!
Step‑by‑Step Instructions for Chewy Red Velvet Cookies with White Chocolate Chunks
Step 1: Preheat Your Oven
Begin by preheating your oven to 350°F (175°C). While it warms up, line two baking sheets with parchment paper to prevent sticking. This is a crucial first step, as it ensures your chewy red velvet cookies bake evenly and don’t end up stuck on the pan!
Step 2: Whisk Dry Ingredients
In a small bowl, whisk together the all-purpose flour, Dutch process cocoa powder, baking soda, baking powder, and salt. Make sure there are no lumps in the mixture; this will ensure a smooth texture in your cookies. Set this dry mixture aside as we’ll incorporate it into the wet ingredients shortly.
Step 3: Cream Butter and Sugars
In a large mixing bowl, use an electric mixer to beat together the softened salted butter, light brown sugar, and granulated sugar. Beat these ingredients until the mixture becomes light and fluffy, which should take about 2 minutes. This step adds air and texture that really elevates your red velvet cookies!
Step 4: Add Egg Yolks and Flavorings
Next, mix in the egg yolks, vanilla extract, and red gel food coloring to the creamed butter mixture. Beat for another 2 minutes until everything is well combined and fluffy. The vibrant red color will start to emerge, giving you a sneak peek of the delicious chewy red velvet cookies to come!
Step 5: Combine Wet and Dry Ingredients
Gradually add the whisked dry ingredients to the wet mixture, mixing on low speed until just combined. Avoid overmixing, as this can make the cookies tough. You want to see a soft, thick dough that hints at the chewy texture you’ll achieve once baked.
Step 6: Fold in White Chocolate
Now, gently fold in the chopped white chocolate or white chocolate chips using a spatula. Ensure they are evenly distributed throughout the dough, as these chunks will provide delightful bursts of creaminess in your chewy red velvet cookies.
Step 7: Scoop Dough onto Baking Sheets
Using a cookie scoop or tablespoon, scoop the dough into balls, each about 1.5 tablespoons in size. Place them onto the prepared baking sheets, ensuring they are spaced about 2 inches apart. This distance allows your cookies to spread while baking, ensuring beautiful, uniform shapes.
Step 8: Bake to Perfection
Place the baking sheets in the preheated oven and bake for 10-12 minutes. For chewier cookies, stick to the lower end of the bake time, while the full 12 minutes will yield slightly crispier edges. Watch for that lovely red color and a slight soft puff; they’re ready when the edges look set.
Step 9: Cool and Enjoy
Once baked, let your red velvet cookies cool on the baking sheets for about 5 minutes. This will help them firm up slightly. Afterward, gently transfer them to a cooling rack to cool completely. Your chewy red velvet cookies are now ready to be shared and enjoyed!
Make Ahead Options
These Chewy Red Velvet Cookies with White Chocolate Chunks are a fantastic choice for meal prep, saving you time on busy days! You can prepare the cookie dough in advance and refrigerate it for up to 3 days. Simply scoop the dough onto baking sheets lined with parchment paper, then wrap tightly with plastic wrap or place in an airtight container. For longer storage, freeze the unbaked dough balls for up to 2 weeks. Just remember to thaw them at room temperature before baking, which ensures they stay just as delicious! When you’re ready to bake, preheat the oven and follow the usual baking instructions for a delightful treat on demand.
Red Velvet Cookies: Creative Twists
Feel free to get cozy in your kitchen and experiment with these variations to elevate your cookie game!
-
Chocolate Lovers: Replace white chocolate with milk or dark chocolate chunks for a richer, chocolatey experience. The balance between the cocoa and creamy chocolate will make your taste buds dance!
-
Nutty Delight: Stir in chopped pecans or walnuts for added crunch and depth in flavor. The nuts will add a delightful texture, giving each bite an irresistible surprise.
-
Cream Cheese Filling: Create a decadent twist by adding a cream cheese filling. Simply flatten the dough, add a spoonful of cream cheese, and cover it with more dough before baking—pure indulgence!
-
Coconut Sugar: Swap out granulated sugar for coconut sugar to introduce a caramel-like flavor. This not only adds a unique taste but also makes your cookies a tad more wholesome.
-
Spicy Kick: Add a dash of cayenne pepper or cinnamon to the batter for a subtle heat that beautifully complements the sweetness. Who knew a hint of spice could shine in a classic cookie?
-
Festive Colors: Instead of red food coloring, experiment with different gel colors for unique holiday-themed cookies. Imagine scrumptious green cookies for St. Patrick’s Day or pastel shades for Easter!
-
Fruity Twists: Toss in dried cranberries or cherries for a fruity explosion of flavor. Their tartness will contrast wonderfully with the sweetness of the cookies, creating a delightful balance.
If you’re still in the mood for sweet creativity, why not check out these delicious twists too? You’ll love the Zebra Cookies for a striped surprise or the delectable Chocolate Marshmallow Swirl Cookies that’ll make your dessert table pop!
How to Store and Freeze Red Velvet Cookies
Room Temperature: Store your cookies in an airtight container at room temperature for up to 3 days to maintain their soft, chewy texture.
Fridge: If you prefer colder cookies, place them in the fridge in an airtight container, where they will stay fresh for up to a week.
Freezer: Freeze your red velvet cookies for up to 2 weeks. Place them in a single layer on a baking sheet to firm up before transferring to a freezer-safe container, ensuring they are well-wrapped to avoid freezer burn.
Reheating: For the best experience, let frozen cookies thaw at room temperature before enjoying or warm them briefly in the microwave for a few seconds to regain that just-baked softness.
What to Serve with Chewy Red Velvet Cookies with White Chocolate Chunks
These scrumptious treats shine even brighter when paired with delightful accompaniments that enhance your dessert experience.
-
Creamy Vanilla Ice Cream: The smooth, cold creaminess balances out the chewy texture, creating a delightful contrast of warmth and chill.
-
Rich Hot Chocolate: A comforting cup of hot chocolate, with its deep cocoa flavor, uniquely complements the chocolate notes in the cookies.
-
Fresh Berries: Juicy raspberries or strawberries offer a bright, tangy flavor that cuts through the sweetness, adding a refreshing pop.
-
Coffee or Espresso: The rich, bold flavors of coffee harmonize beautifully with the sweetness of the cookies, perfect for afternoon indulgence.
-
Chocolate Ganache Dip: For an extra layer of decadence, serve a small bowl of warm chocolate ganache for dipping—an irresistible indulgence.
-
Coconut Macaroons: The chewy sweetness of coconut macaroons mirrors the texture of the cookies, making for a perfect duo at dessert gatherings.
Pair these treats for an unforgettable dessert spread that is sure to impress your loved ones!
Expert Tips for Chewy Red Velvet Cookies
-
Accurate Measurement: Measure your flour accurately using the spoon and level method to avoid overly dense cookies. Too much flour can ruin the texture of your red velvet cookies.
-
Fresh Ingredients: Ensure your baking soda and baking powder are fresh. Old leavening agents can lead to cookies that don’t rise well, resulting in a hefty cookie instead of a light, chewy treat.
-
Mixing Technique: Avoid overmixing the dough once you combine the dry and wet ingredients. Overmixing can create tough red velvet cookies, so just mix until combined for optimal chewiness.
-
Cooling Time: Be patient during the cooling process. Allow cookies to rest on the baking sheets to firm up, making them easier to transfer to a cooling rack without breaking.
-
Storage Tips: For best flavor and texture, store your cookies in an airtight container at room temperature for up to three days. They can be frozen for up to two weeks for longer enjoyment!

Red Velvet Cookies Recipe FAQs
How do I select the right ingredients for red velvet cookies?
Absolutely! For the best results, choose high-quality, fresh ingredients. Use all-purpose flour that is spooned and leveled for accuracy, ensuring you have the right structure. Opt for Dutch process cocoa powder for a milder chocolate flavor, and always check the expiration date on your baking soda and powder to guarantee they provide adequate leavening. The red gel food coloring should also be vibrant for that classic red hue, and using quality white chocolate will enhance the creaminess of your cookies.
What’s the best way to store red velvet cookies?
Very! Store your cookies in an airtight container at room temperature for up to 3 days. This helps maintain their delightful chewy texture. If you have extra cookies or want to save them for later, place them in an airtight container and refrigerate for up to a week, or freeze them for up to 2 weeks. Always ensure they are well-wrapped to avoid freezer burn.
How can I freeze red velvet cookie dough for later use?
Certainly! To freeze your red velvet cookie dough, scoop the dough into balls and place them on a baking sheet lined with parchment paper. Freeze the dough balls for about 1-2 hours until firm. Once solid, transfer the dough balls into a freezer-safe bag or container, stacking them with parchment paper in between layers to prevent sticking. They can be kept frozen for up to 2 weeks—just bake them directly from the freezer, adding a minute or two to the bake time!
Can these cookies be enjoyed by people with allergies?
Good question! These cookies contain common allergens like flour, eggs, and dairy. If you want to accommodate allergies or dietary restrictions, you can try using a gluten-free all-purpose flour blend instead of regular flour. Substitute the egg yolks with flax eggs (1 tablespoon ground flaxseed + 2.5 tablespoons water per egg) as a vegan option. For dairy-free needs, consider using coconut oil or a dairy-free butter alternative alongside dairy-free chocolate.
What should I do if my red velvet cookies turn out too cakey?
Don’t worry—this happens sometimes! If your cookies turn out too cakey, check if you might have accidentally added too much flour. Ensure you’re measuring accurately by using the spoon and level method. Additionally, make sure not to overmix the dough after adding dry ingredients. For a chewier texture, try reducing the bake time slightly or adding an extra egg yolk to the dough next time you bake.
How long can I keep these cookies without losing freshness?
Absolutely! These cookies can stay fresh for up to 3 days at room temperature in an airtight container. If you want to prolong their shelf life, freeze them for up to 2 weeks. This way, you can savor the flavors and chewy goodness even longer. Just remember to thaw them at room temperature, or warm them briefly in the microwave!
Irresistible Red Velvet Cookies with White Chocolate Bliss
Ingredients
Equipment
Method
- Preheat your oven to 350°F (175°C) and line two baking sheets with parchment paper.
- In a small bowl, whisk together the flour, cocoa powder, baking soda, baking powder, and salt.
- In a large mixing bowl, cream together the butter, light brown sugar, and granulated sugar until light and fluffy.
- Mix in the egg yolks, vanilla extract, and red gel food coloring until well combined.
- Gradually add the dry ingredients to the wet mixture, mixing on low speed until just combined.
- Fold in the white chocolate chunks until evenly distributed.
- Scoop the dough into balls about 1.5 tablespoons in size and place them spaced 2 inches apart on the baking sheets.
- Bake for 10-12 minutes, watching for a slightly soft puff and set edges.
- Let the cookies cool on the baking sheets for 5 minutes before transferring to a cooling rack.
Leave a Reply