
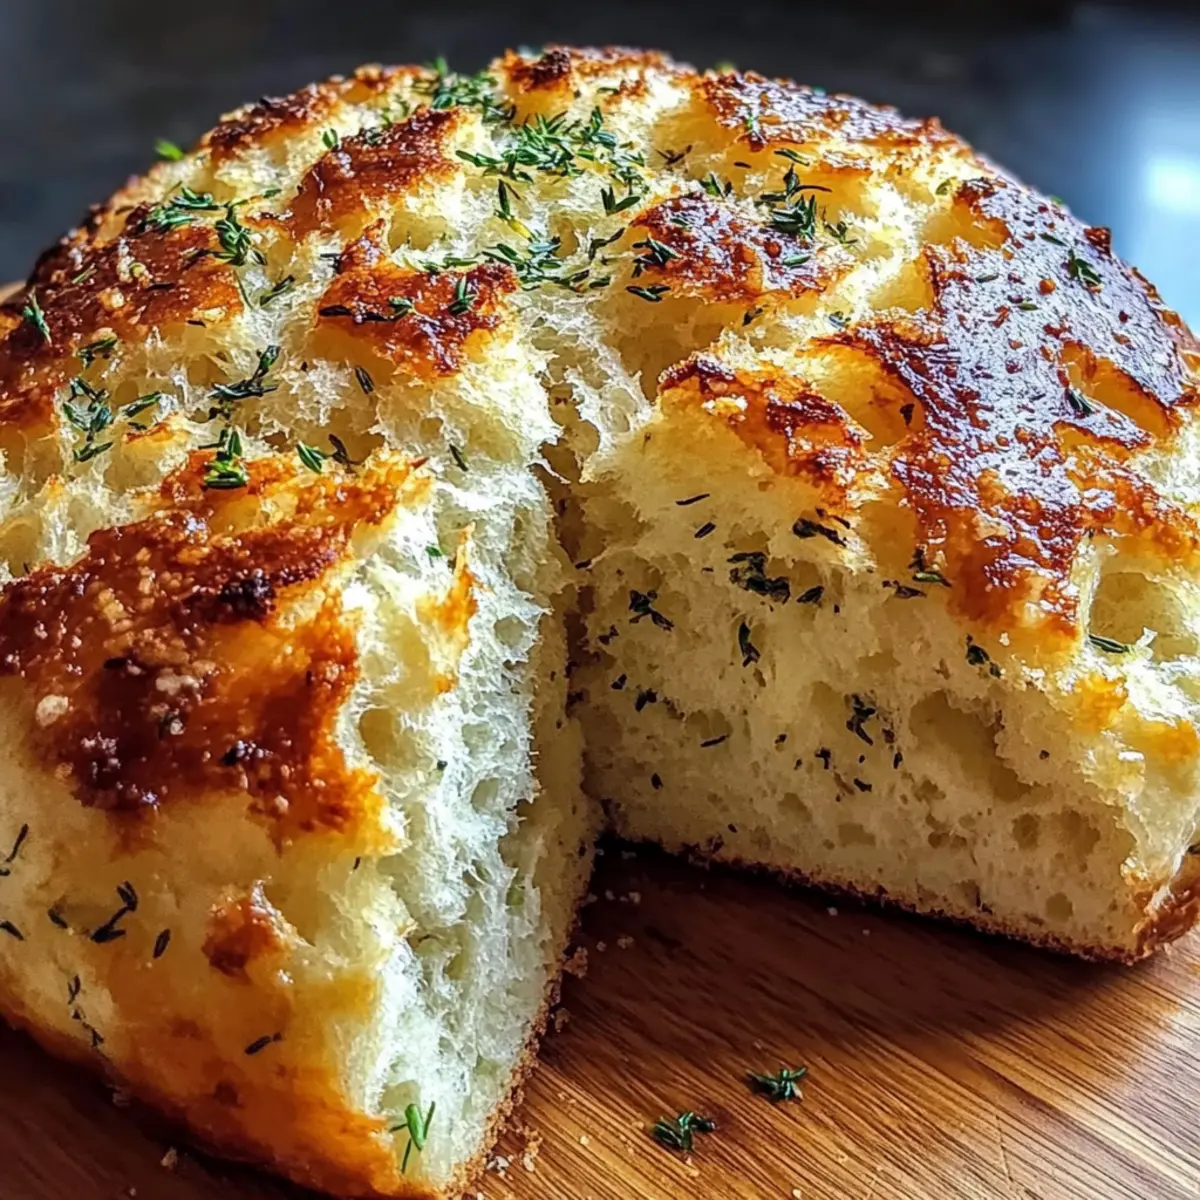
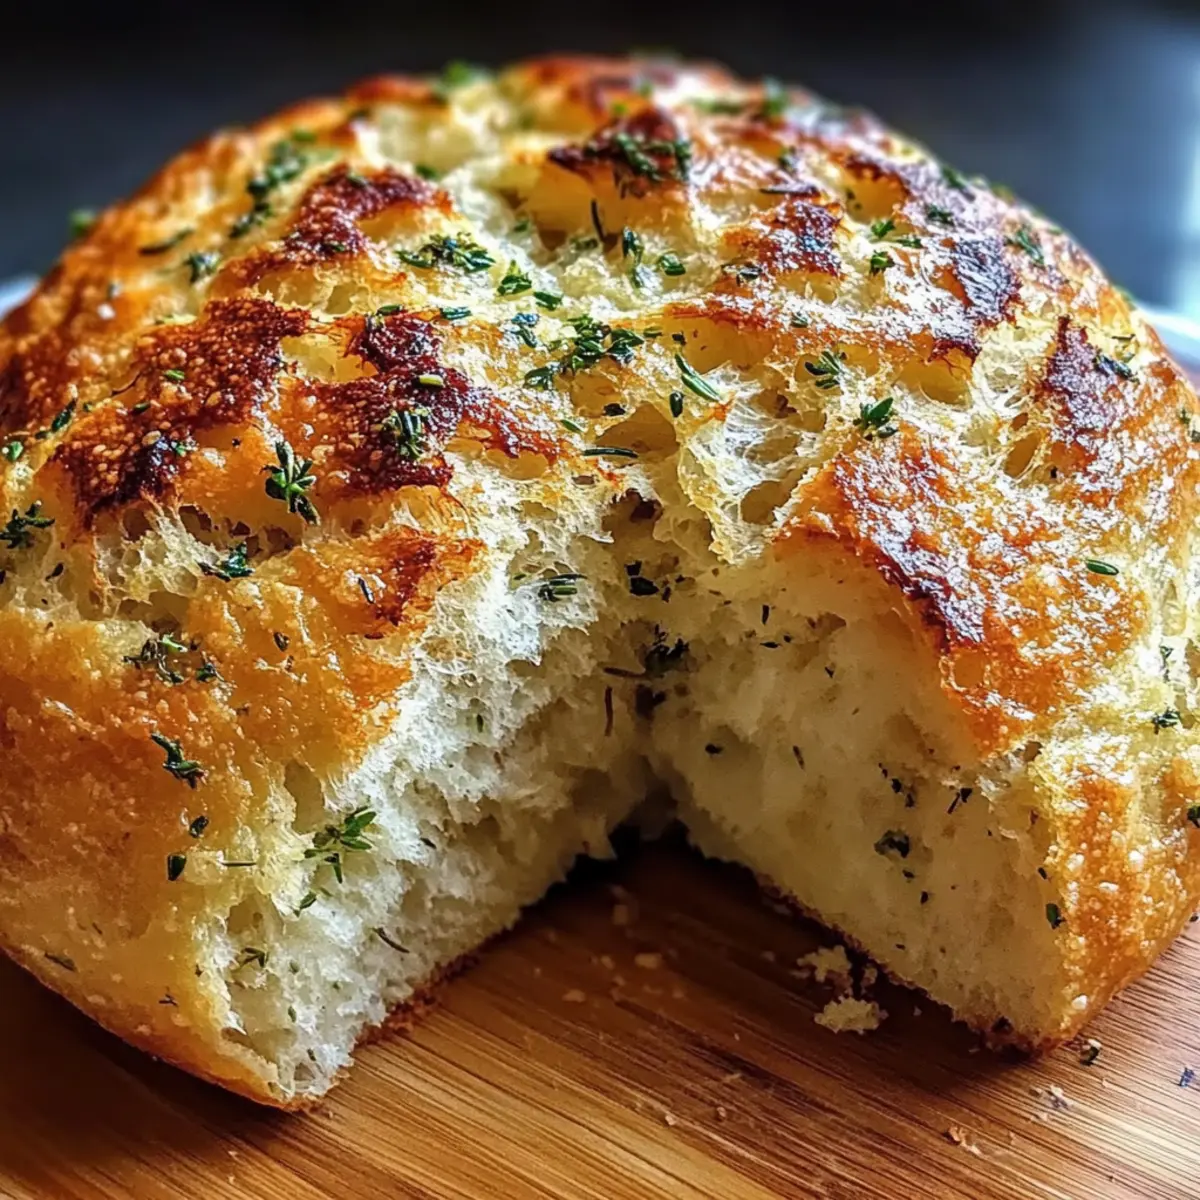
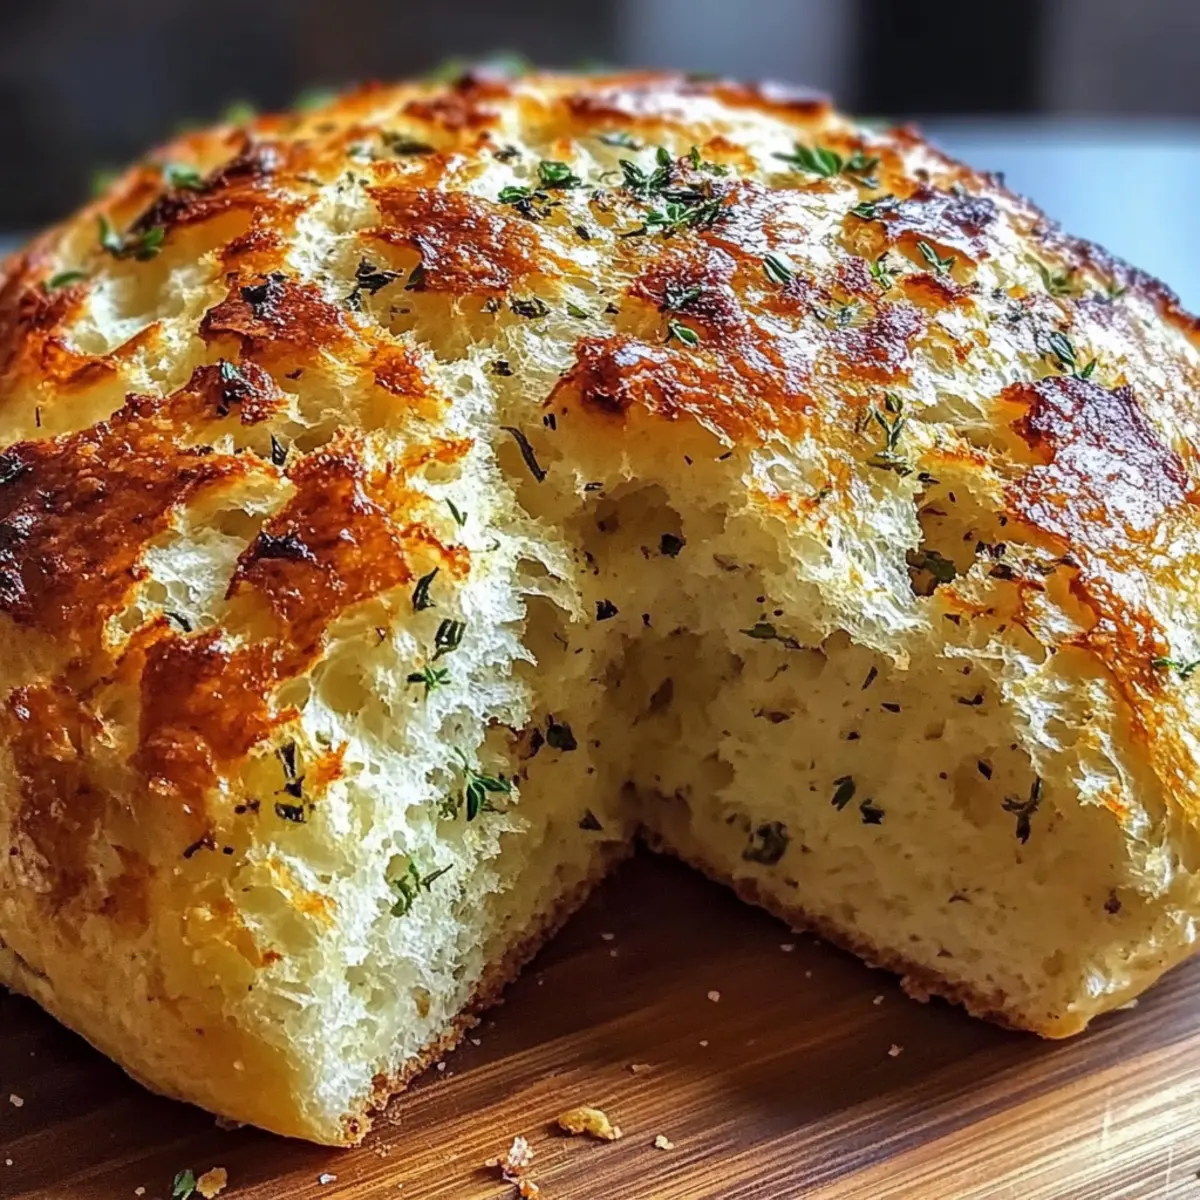
The aroma of warm garlic mingling with the earthy notes of rosemary has a way of whisking me back to cozy evenings spent around the dinner table. It’s in those simple moments that I often find joy, and nothing’s quite as satisfying as pulling a golden-crusted loaf from the oven. Today, I’m excited to share my recipe for Soft and Crusty Garlic Herb Dutch Oven Bread—a delightful homemade bread that strikes the perfect balance between a crispy exterior and a soft, airy interior. This recipe not only brings a delicious artisan touch to your meals but also schedules a bit of patience—making it a wonderfully easy way to elevate your cooking routine without slaving away in the kitchen. So, whether you’re dipping it into a rich soup or using it as the foundation for a hearty sandwich, get ready to savor the comfort you crave with every warm bite. Ready to bake this aromatic masterpiece?

Why Is This Bread So Irresistible?
Heavenly Aroma: The scent of warm garlic and rosemary fills your kitchen, setting the stage for cozy moments.
Artisan Quality: Achieve a bakery-style loaf at home with minimal effort, impressing friends and family alike.
Versatile Delight: Enjoy it fresh with butter, as the base for bruschetta, or as a side to your favorite soups.
Time-Saving Magic: With a long rise and simple ingredients, you’ll spend just moments preparing it.
Personal Touch: Customize the flavors by adding your favorite herbs or toppings for a unique twist. This Soft and Crusty Garlic Herb Dutch Oven Bread is destined to be your new go-to recipe for any occasion!
Soft and Crusty Garlic Herb Dutch Oven Bread Ingredients
For the Bread Dough
• All-Purpose Flour – Essential for creating structure; essential for this Soft and Crusty Garlic Herb Dutch Oven Bread.
• Salt – Vital for flavor enhancement; avoid omitting to bring out the best taste.
• Instant Yeast – A leavening agent for rapid rise; can substitute with active dry yeast at a 1:1 ratio, keeping in mind activation.
• Warm Water (110°F/43°C) – Ensures proper hydration for yeast activation; can use slightly warmer water if you’re shortening the rise time.
• Olive Oil (3 tablespoons, divided) – Enhances flavor and keeps the bread moist; swap with melted butter for a different twist.
• Garlic (5 cloves, minced) – Adds aromatic depth; consider using roasted garlic for a sweeter profile.
For the Herbs
• Fresh Rosemary (2 tablespoons, finely chopped) – Brings a fragrant flavor; dried rosemary can substitute at 1 teaspoon for convenience.
• Fresh Thyme (1 tablespoon, chopped) – Adds a lovely note; can replace with 1 teaspoon dried thyme if necessary.
• Dried Oregano (1 teaspoon) – Optional spice to elevate flavor; feel free to adjust based on your preference.
• Black Pepper (½ teaspoon) – Adds warmth and spice; you can adjust to taste for your ideal kick.
Optional Garnish
• Herbs and Sea Salt – Personalize with your favorite herbs on top for an added flavor boost; experiment to find your perfect combination!
Step‑by‑Step Instructions for Soft and Crusty Garlic Herb Dutch Oven Bread
Step 1: Combine Dry Ingredients
In a large mixing bowl, whisk together 4 cups of all-purpose flour, 2 teaspoons of salt, and 2 teaspoons of instant yeast until evenly distributed. This step is essential for ensuring the leavening agent is properly blended within the flour. Set aside to gather the wet ingredients, as this will create the base for your Soft and Crusty Garlic Herb Dutch Oven Bread.
Step 2: Mix Wet Ingredients
In a separate bowl, whisk together 1 ½ cups of warm water (at 110°F/43°C), 1 tablespoon of olive oil, 5 cloves minced garlic, 2 tablespoons finely chopped fresh rosemary, 1 tablespoon chopped fresh thyme, and ½ teaspoon black pepper. Make sure the mixture is well blended, releasing the aromatic essence of garlic and herbs that will flavor your bread.
Step 3: Form the Dough
Pour the wet mixture into the dry ingredients and mix gently with a silicone spatula until a shaggy dough forms and no dry flour remains. The dough should feel slightly sticky which is vital for achieving that soft interior. This step blends the flavors and ingredients that will make your Soft and Crusty Garlic Herb Dutch Oven Bread memorable.
Step 4: Let the Dough Rise
Cover the bowl tightly with plastic wrap or a damp kitchen towel and let the dough rise at room temperature for 12-18 hours. You’ll know it’s ready when it has doubled in size and is bubbly; this long rise is crucial for developing depth of flavor and creating that airy texture in your bread.
Step 5: Shape the Dough
After the rise, sprinkle some flour on your work surface and gently turn out the dough. Without deflating it too much, shape the dough into a round boule, creating tension on the surface for a lovely crust. This step is all about finesse, aiming for a smooth outer texture on your Soft and Crusty Garlic Herb Dutch Oven Bread.
Step 6: Rest and Preheat
Cover the shaped dough with a clean kitchen towel and let it rest for about 1 hour. During this time, preheat your oven to 450°F (232°C) along with a Dutch oven (lid on) inside. Preheating the Dutch oven is vital for achieving a perfectly crispy crust when you bake the bread.
Step 7: Prepare Dutch Oven
Once preheated, carefully remove the Dutch oven and add 2 tablespoons of olive oil, swirling it to coat the bottom evenly. This step not only prevents sticking but adds a delicious flavor to the crust of your Soft and Crusty Garlic Herb Dutch Oven Bread.
Step 8: Place Dough in Pot
Gently place the dough into the hot Dutch oven, seam-side down, while being cautious of the steam. Optionally, sprinkle additional herbs and sea salt on top for enhanced flavor. The appearance of the dough in the pot is the precursor to the baking magic that will happen next.
Step 9: Bake Covered
Cover the Dutch oven with its lid and bake for 30 minutes. This covered baking allows the steam to create a perfect environment for the dough to rise and develop a beautifully airy crumb. After 30 minutes, you will notice a lovely golden hue starting to form.
Step 10: Finish Baking
Remove the lid carefully and continue baking for an additional 15-20 minutes until the crust is a deep golden brown. The aroma will fill your kitchen, signaling that your Soft and Crusty Garlic Herb Dutch Oven Bread is nearly ready to delight your senses.
Step 11: Cool Before Slicing
Once baked, carefully transfer the bread to a wire rack to cool for at least 30 minutes before slicing. This cooling step is crucial for setting the crumb structure and enhancing the overall texture of your artisan loaf. Patience here will yield a perfectly sliced bread ready for any occasion!
What to Serve with Irresistibly Soft and Crusty Garlic Herb Dutch Oven Bread
The warmth and delightful aroma of garlic herb bread create the perfect canvas for a delicious meal, inviting you to explore wonderful pairings that complement its flavors.
- Creamy Tomato Soup: The acidity of tomatoes plays beautifully against the richness of the bread. Dip your slices to balance richness with zest.
- Garlic Butter Shrimp: Juicy shrimp sautéed in garlic butter will echo the flavors of the bread, creating a harmonious dining experience that captivates.
- Caesar Salad: Crisp romaine dressed in tangy Caesar dressing provides a refreshing contrast to the hearty bread, making each bite a delightful mix of textures.
- Roasted Vegetables: Seasonal roasted veggies, drizzled in balsamic glaze, add sweetness, enhancing the artisan quality of the bread while introducing a tempting variation in flavor.
- Bruschetta Topping: Fresh tomatoes, basil, and mozzarella on toasted slices of garlic herb bread give a vibrant twist, turning your loaf into a show-stopping appetizer.
- Chardonnay: A glass of chilled Chardonnay works beautifully, its fruity notes balancing the rich garlic and herb flavors for a sophisticated touch.
Your Soft and Crusty Garlic Herb Dutch Oven Bread sets the stage for all these delightful combinations!
Soft and Crusty Garlic Herb Dutch Variations
Customize your Soft and Crusty Garlic Herb Dutch Oven Bread to suit your mood and taste preferences.
- Dairy-Free: Substitute olive oil with dairy-free butter for a plant-based twist that’s still rich and flavorful.
- Herb Swap: Experiment with fresh basil or parsley instead of rosemary for a fresh flavor that brightens the loaf. Keep it seasonal with your favorite herbs!
- Garlic Lovers: Increase the garlic to 8 cloves or add roasted garlic for an even deeper flavor—perfect for garlic enthusiasts!
- Cheesy Option: Incorporate shredded cheese like mozzarella or cheddar into the dough before baking for a gooey, savory surprise. Imagine the melty goodness!
- Whole Wheat: Swap half the all-purpose flour for whole wheat flour to add a nutty flavor and extra fiber without sacrificing texture.
- Spicy Kick: Add a teaspoon of red pepper flakes to the dough for a delightful hint of heat that pairs wonderfully with garlic.
- Nutty Texture: Toss in a handful of toasted sunflower seeds or walnuts for a crunchy surprise in every bite.
- Toppings Galore: Before baking, sprinkle on sun-dried tomatoes and parmesan cheese for a gourmet touch that elevates your bread experience.
Whatever variations you choose, your Soft and Crusty Garlic Herb Dutch Oven Bread will surely become a favorite at your table. And if you’re inspired to whip up more deliciousness, consider trying this Garlic Butter Beef or a comforting Creamy Garlic Shrimp with Spinach to accompany your bread!
Make Ahead Options
Preparing this Soft and Crusty Garlic Herb Dutch Oven Bread ahead of time is a fantastic way to streamline your meal planning! You can mix the dough up to 24 hours in advance, allowing it to rise slowly on your countertop. Simply cover the bowl tightly with plastic wrap to prevent drying out. If you prefer, shape the dough into a boule and let it rest for up to 3 days in the fridge; just remember to bring it back to room temperature for about an hour before baking. To finish, simply place it in a preheated Dutch oven and bake as directed for a delightful artisanal loaf ready to be enjoyed, saving you valuable time on busy nights. Each bite will be just as delicious as if you had made it on the same day!
Expert Tips for Soft and Crusty Garlic Herb Dutch Oven Bread
-
Sticky Dough Is Key: Ensure your dough remains slightly sticky for the best texture; this helps retain moisture and creates a soft crumb in your Soft and Crusty Garlic Herb Dutch Oven Bread.
-
Preheat with Purpose: Always preheat your Dutch oven to avoid a soggy bottom. Place it in a cold oven and heat it to prevent thermal shock and ensure a crispy crust.
-
Patience Pays Off: Don’t rush the long rise. While reducing rise time is possible, it compromises flavor and texture—embrace the wait for the best results!
-
Master the Shaping: Handle the dough gently when shaping it into a boule. Creating surface tension helps develop a beautiful crust on your bread.
-
Customize to Taste: Feel free to adjust the garlic and herb levels based on your personal preference. Experiment with different combinations for a fun twist on this Soft and Crusty Garlic Herb Dutch Oven Bread!
Storage Tips for Soft and Crusty Garlic Herb Dutch Oven Bread
-
Room Temperature: Store the bread in an airtight container or wrap it in a clean kitchen towel for up to 3 days to maintain freshness and prevent staleness.
-
Fridge: Avoid refrigerating the bread, as this can lead to a tough texture. Instead, keep it at room temperature for the best results.
-
Freezer: If you want to keep your Soft and Crusty Garlic Herb Dutch Oven Bread longer, slice it and freeze in an airtight bag for up to 3 months. Just be sure to let it cool completely before freezing.
-
Reheating: To revive its original crustiness, reheat frozen slices in a 350°F (175°C) oven for about 10 minutes. Enjoy the delightful aroma as it warms up!
Soft and Crusty Garlic Herb Dutch Oven Bread Recipe FAQs
What should I look for when selecting garlic and herbs?
Absolutely! For the freshest flavor, select firm, smooth garlic bulbs; avoid any with dark spots or sprouting. Fresh herbs should be vibrant and fragrant; wilted or yellowed leaves indicate age.
How do I store Soft and Crusty Garlic Herb Dutch Oven Bread?
Store this delicious bread in an airtight container or wrap it in a clean kitchen towel at room temperature for up to 3 days. It’s crucial to avoid refrigerating as it can toughen the texture.
Can I freeze Soft and Crusty Garlic Herb Dutch Oven Bread?
Yes, you can! To freeze, slice the loaf and place it in an airtight bag. It will keep well for up to 3 months. Just ensure it’s completely cooled before freezing to retain texture.
What can I do if my dough doesn’t rise?
If your dough isn’t rising, check the yeast’s freshness first! Make sure to use warm water at 110°F (43°C) for activation, as too hot or cold water can be detrimental. Also, ensure the dough is covered tightly to prevent drafts during the rising period.
Are there any dietary concerns I should consider?
If you have allergies, note that this recipe contains gluten from all-purpose flour and may not be suitable for those with gluten sensitivities. For a vegan approach, you can replace the olive oil with a plant-based butter or continue with it if you’re not eliminating fats, as it enhances the flavor profile.
Can I adjust the herbs in this recipe?
Very much so! If you prefer a different herb mix, feel free to swap in your favorites. Just use dried herbs in one-third the quantity of fresh ones for convenience. For instance, you can try basil or sage to explore new flavor landscapes—with your imagination and taste buds, the possibilities are endless!
Soft and Crusty Garlic Herb Dutch Oven Bread to Crave
Ingredients
Equipment
Method
- In a large mixing bowl, whisk together 4 cups of all-purpose flour, 2 teaspoons of salt, and 2 teaspoons of instant yeast until evenly distributed.
- In a separate bowl, whisk together 1 ½ cups of warm water, 1 tablespoon of olive oil, 5 cloves minced garlic, 2 tablespoons finely chopped fresh rosemary, 1 tablespoon chopped fresh thyme, and ½ teaspoon black pepper.
- Pour the wet mixture into the dry ingredients and mix gently with a silicone spatula until a shaggy dough forms.
- Cover the bowl tightly with plastic wrap or a damp kitchen towel and let the dough rise at room temperature for 12-18 hours.
- After the rise, sprinkle some flour on your work surface and gently turn out the dough, shaping it into a round boule.
- Cover the shaped dough with a clean kitchen towel and let it rest for about 1 hour. Preheat your oven to 450°F (232°C) along with a Dutch oven.
- Once preheated, carefully remove the Dutch oven and add 2 tablespoons of olive oil, swirling it to coat the bottom.
- Gently place the dough into the hot Dutch oven, seam-side down.
- Cover the Dutch oven with its lid and bake for 30 minutes.
- Remove the lid carefully and continue baking for an additional 15-20 minutes until the crust is a deep golden brown.
- Once baked, carefully transfer the bread to a wire rack to cool for at least 30 minutes before slicing.
Leave a Reply