
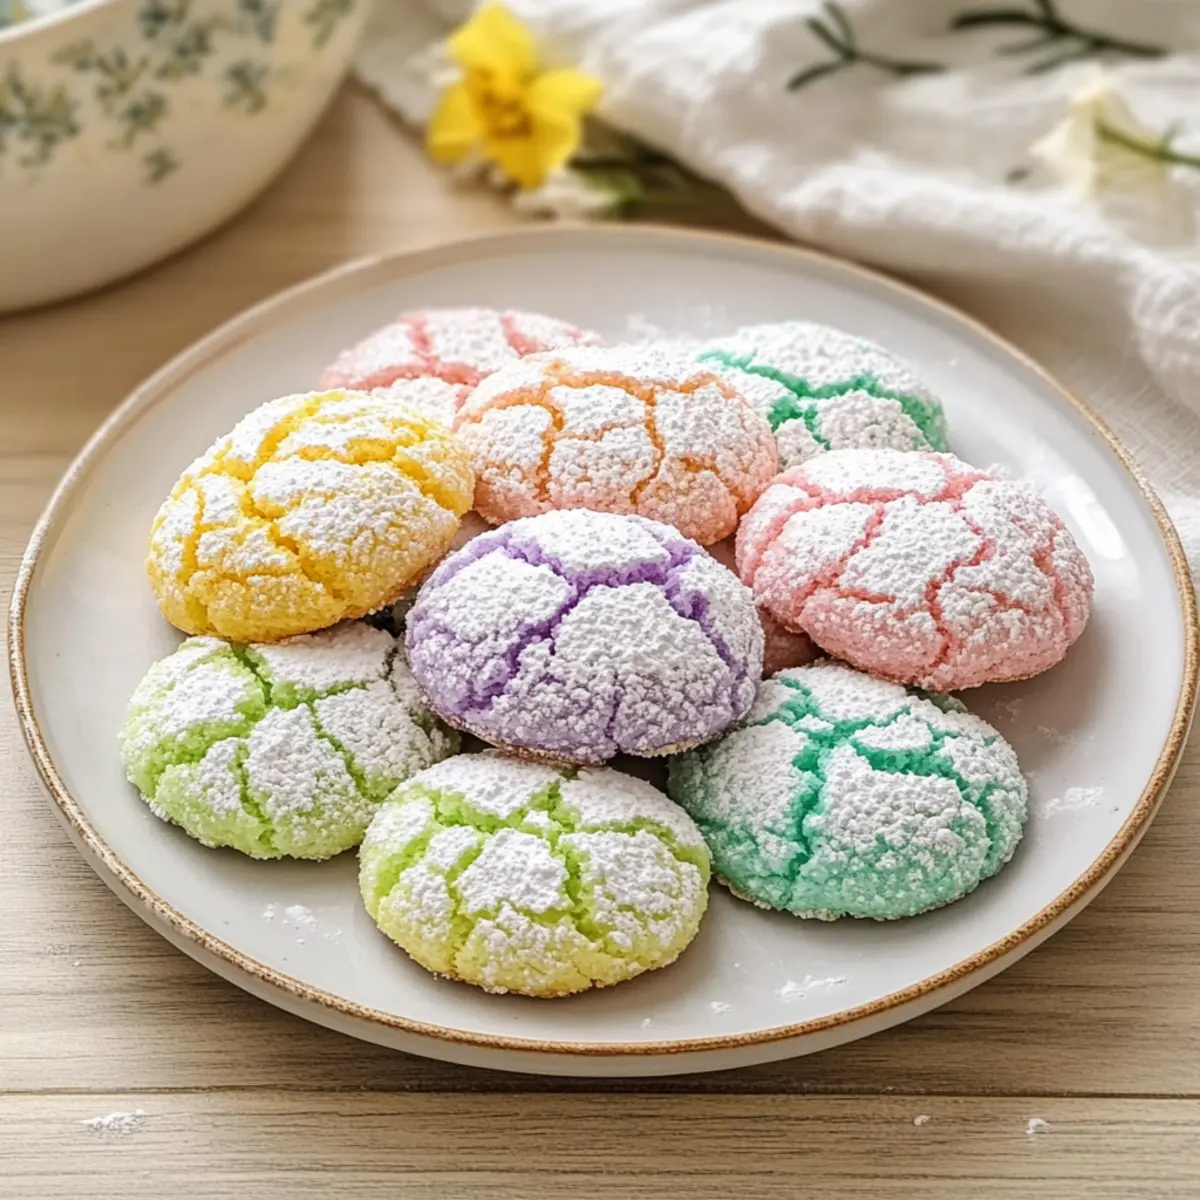
Bright pastel colors dance on my kitchen counter as I mix up a batch of Springtime Crinkle Cookies, and I can’t help but smile. These easy dessert delights are the perfect treat for anyone craving a sweet, homemade touch to their spring gatherings. With their chewy centers and delightful crackled tops coated in powdered sugar, they not only bring joy to your taste buds but also elevate any occasion with vibrant charm. As a cheerful addition to Easter celebrations or a fun weekend baking project, these Springtime Crinkle Cookies are beginner-friendly and ready to impress without hours of prep. Just imagine serving these colorful confections at your next event! Aren’t you curious about how to make them?
Why Are Springtime Crinkle Cookies Special?
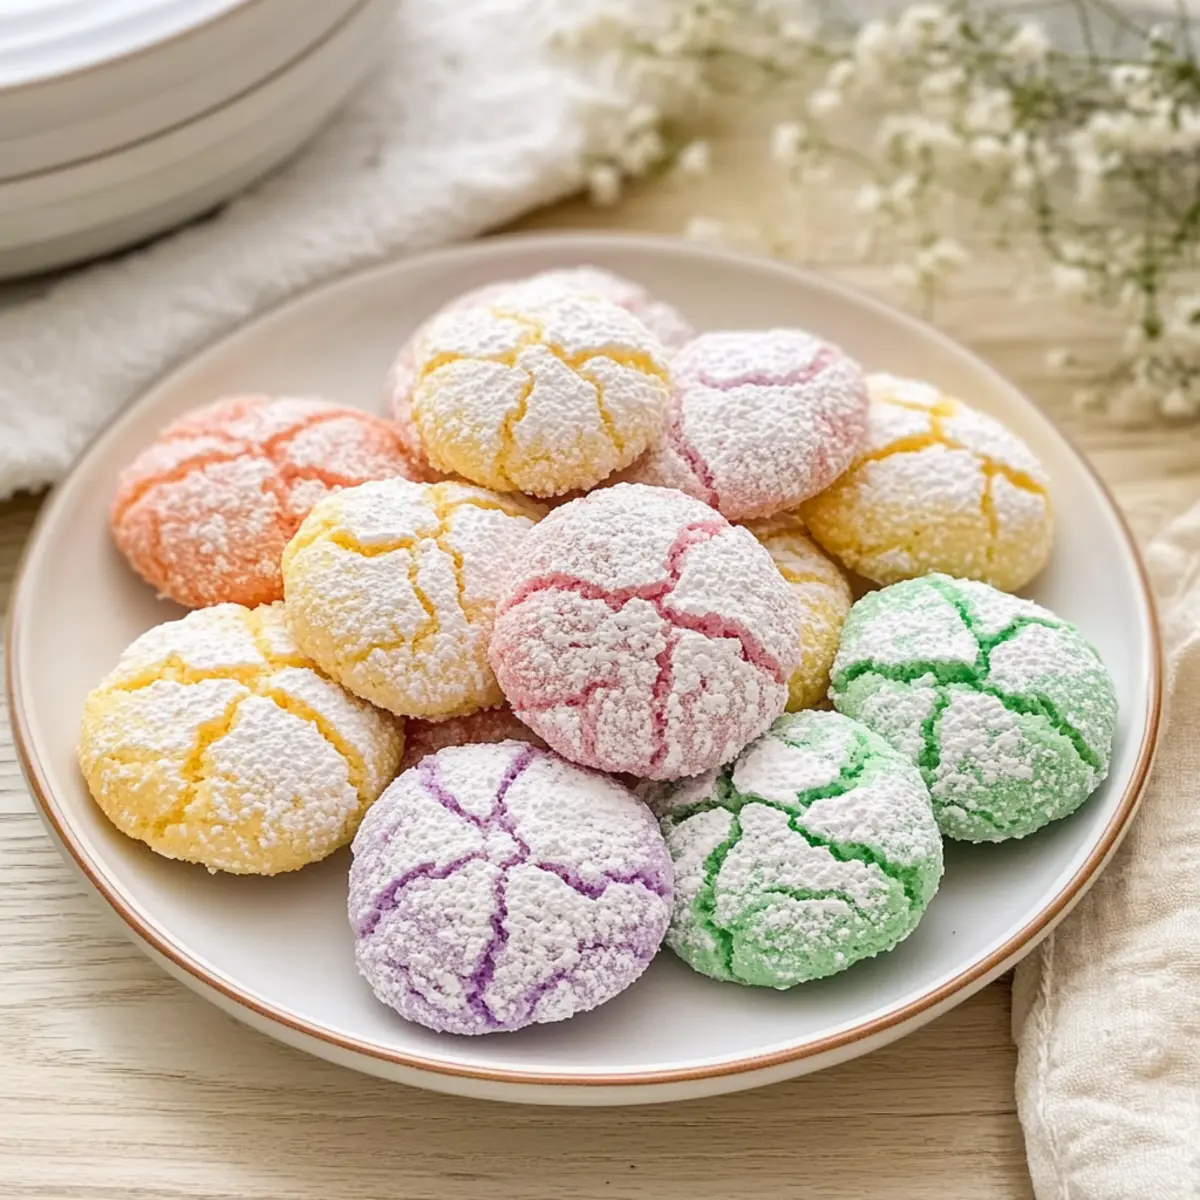
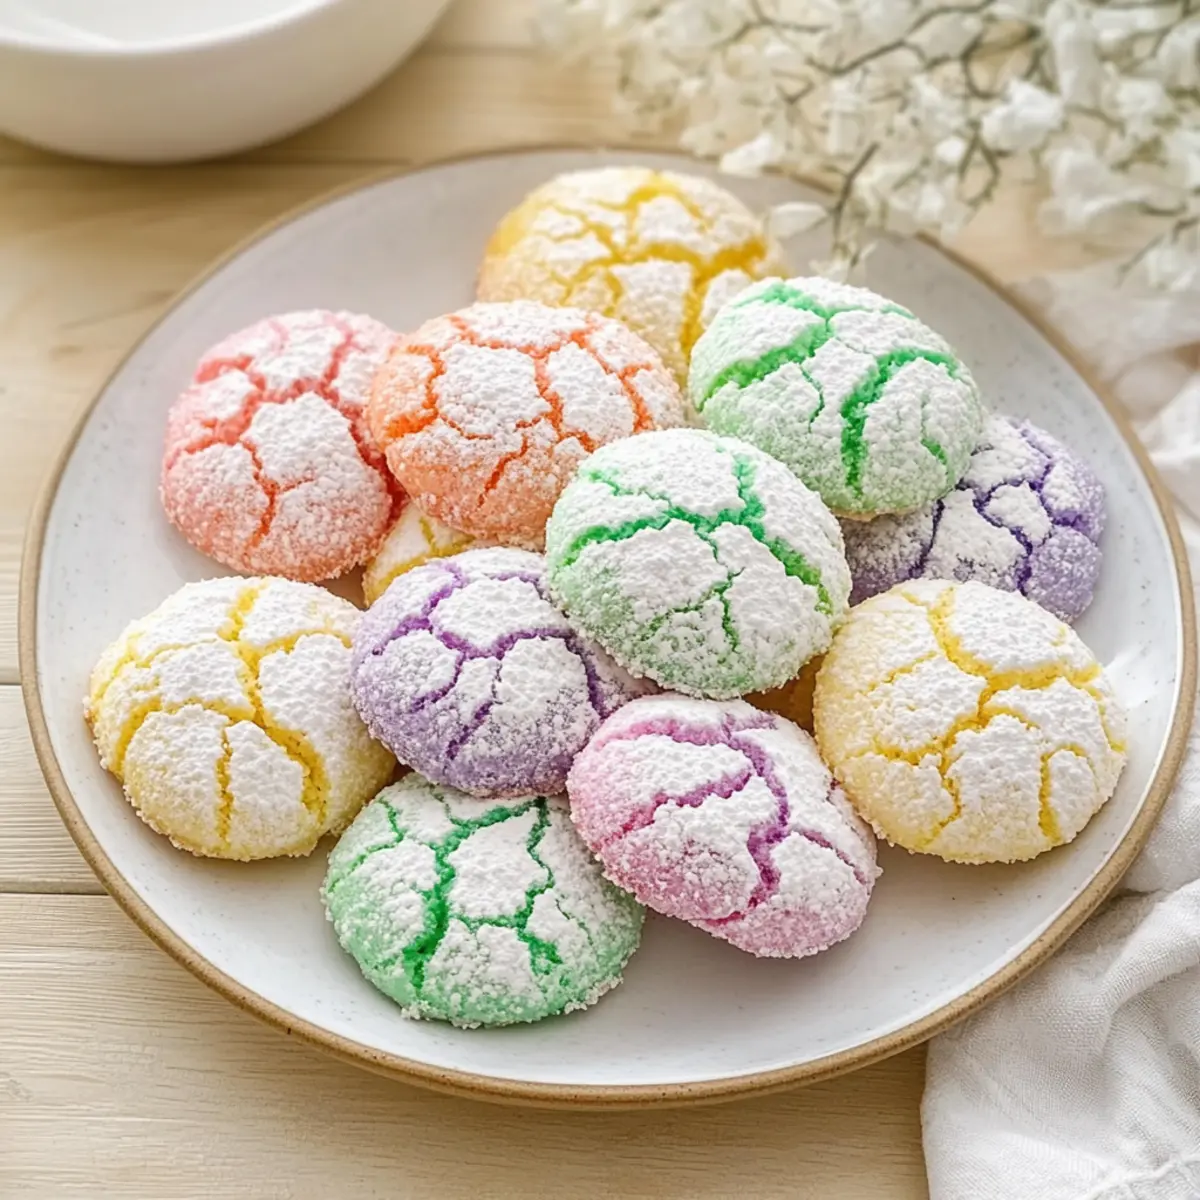
Vibrant Colors: These cookies showcase pastel shades that brighten any occasion, making them visually appealing for parties or gatherings.
Easy to Make: Perfect for beginner bakers, this recipe requires simple steps and minimal ingredients to create delicious treats everyone will love.
Chewy Texture: Experience the delightful contrast of a soft, chewy center paired with a crisp edge for an irresistible bite.
Versatile Flavors: Customize with different extracts or add-ins like lemon zest for a refreshing twist that suits any palate.
Perfect for Sharing: Ideal for special occasions or everyday indulgence, these cookies are sure to impress guests and family alike. Explore more delightful treats like Zebra Cookies Discover or Brownie Mix Cookies for your next baking adventure!
Springtime Crinkle Cookies Ingredients
These delightful cookies use simple ingredients to create colorful and chewy treats!
For the Dough
- All-Purpose Flour – Provides structure and texture; for a gluten-free option, use a gluten-free flour blend.
- Baking Powder – Adds lift, ensuring a soft, fluffy interior; no substitutions recommended.
- Salt – Enhances overall flavor; it’s essential for balance, so don’t skip it.
- Unsalted Butter – Adds richness and moisture; vegan butter can be used for a dairy-free version.
- Granulated Sugar – Sweetens the cookies and contributes to their chewy texture; you can swap brown sugar for added moisture.
- Large Eggs – Binds the ingredients and helps achieve tenderness; for a vegan option, use flax eggs (1 tbsp ground flaxseed + 2.5 tbsp water).
- Vanilla Extract – Infuses a comforting aroma and depth of flavor; opt for pure vanilla for best results.
- Almond Extract (optional) – Introduces a subtle nutty flavor; feel free to omit it if allergies are a concern.
- Powdered Sugar – Creates the signature crinkle appearance; adjust amounts for a desired coating effect.
- Gel Food Coloring (pastel shades) – Enhances visual appeal without altering dough consistency; just a few tiny drops will achieve vibrant colors.
Step‑by‑Step Instructions for Springtime Crinkle Cookies
Step 1: Preheat the Oven
Begin by preheating your oven to 350°F (175°C) and lining a baking sheet with parchment paper. This will help prevent your Springtime Crinkle Cookies from sticking while baking. Ensure that your oven has reached the desired temperature before placing the cookies in, so they bake evenly and achieve that delightful soft and chewy texture.
Step 2: Mix Dry Ingredients
In a medium bowl, sift together the all-purpose flour, baking powder, and salt. Whisking these dry ingredients well will ensure that your cookies have an even rise and balanced flavor. Set this bowl aside as you prepare to cream the butter and sugar, allowing the dry ingredients to combine perfectly without clumping.
Step 3: Cream Butter & Sugar
In a large mixing bowl, beat the softened unsalted butter and granulated sugar until the mixture becomes light and fluffy, about 2-3 minutes with an electric mixer. The butter should easily lighten in color during this time, indicating it’s aerated properly. This step is crucial as it builds the foundation for the soft, chewy texture of your Springtime Crinkle Cookies.
Step 4: Add Eggs & Extracts
Next, add the large eggs one at a time to the butter and sugar mixture, mixing well after each addition. Stir in both the vanilla and almond extracts, ensuring a lovely balance of flavors in your cookie dough. This will add the delightful aroma that makes baking so inviting, setting the stage for your sweet adventure.
Step 5: Combine Mixtures
Gradually fold in the dry ingredients mixture into the wet ingredients, using a rubber spatula or wooden spoon. Mix until just combined, ensuring not to overwork the dough. The final product should be thick and slightly sticky, perfect for rolling into balls for your colorful Springtime Crinkle Cookies.
Step 6: Color the Dough
Divide the dough into equal portions, and add a tiny drop of gel food coloring to each portion, mixing until the colors are evenly distributed. Don’t be afraid to have some fun with this step! Chill your tinted dough in the refrigerator for at least 30 minutes to help them hold their shape while baking and achieve those beautiful pastel hues.
Step 7: Shape Cookies
After chilling, roll tablespoon-sized balls of the colored dough in powdered sugar until fully coated. Place the coated dough balls on the prepared baking sheet, leaving about 2 inches between each one. This spacing is essential to allow the Springtime Crinkle Cookies to spread and develop their signature crinkle effect during baking.
Step 8: Bake
Place your baking sheet in the preheated oven and bake the cookies for 10–12 minutes. You’ll know they are done when the tops crack and the edges are set but the centers remain soft, promoting that delightful chewy texture. Keep an eye on them to avoid overbaking and losing that delightful softness.
Step 9: Cool
Once baked, allow the cookies to cool on the baking sheet for a few minutes before carefully transferring them to a wire rack. This helps firm them up and ensures that they maintain their chewy sweet centers. Serve and enjoy the vibrant charm of your Springtime Crinkle Cookies once they’re cool enough to handle!
Make Ahead Options
These Springtime Crinkle Cookies are perfect for meal prep, allowing you to savor sweet moments without the last-minute rush! You can prepare the cookie dough up to 24 hours in advance by mixing all the ingredients and then chilling it in the refrigerator. This chilling period helps maintain the dough’s consistency and enhances the flavors. For even more flexibility, you can shape the dough into balls, coat them in powdered sugar, and store them on a baking sheet in the freezer for up to 3 days. When you’re ready to bake, just pop them into a preheated oven straight from the fridge or freezer; there’s no need to thaw! This way, you’ll enjoy fresh, chewy Springtime Crinkle Cookies just as delightful as if you baked them from scratch that day!
Expert Tips for Springtime Crinkle Cookies
-
Use Gel Coloring: Gel food coloring maintains dough consistency; avoid liquid dye to prevent spreading and achieve vibrant pastel hues.
-
Dust Sugar on Hands: To avoid sticking while shaping, dust your hands with powdered sugar, making rolling dough balls easier and cleaner.
-
Don’t Skip Chilling: Chilling the dough for at least 30 minutes is vital for easier shaping and helps achieve the classic crinkle effect in your cookies.
-
Watch the Bake Time: Ensure cookies are slightly underbaked for a soft center; they will firm up while cooling, retaining that delightful chewy texture.
-
Flavor Experimentation: Mix different extracts like lemon or orange for fun twists, adding unique flavors to your Springtime Crinkle Cookies.
What to Serve with Springtime Crinkle Cookies
Picture a cheerful spring gathering, where delightful treats and laughter fill the air, all complemented by your colorful Springtime Crinkle Cookies.
- Fresh Fruit Salad: A vibrant mix of seasonal fruits adds a refreshing element, beautifully balancing the sweetness of the cookies with juicy, colorful bites.
- Lemonade Spritz: The zesty fizz of a lemonade spritz enhances the cheerful theme, making it a perfect thirst-quencher for warm spring days.
- Whipped Cream: Serve a dollop of freshly whipped cream alongside for a creamy contrast, inviting guests to create their own delicious cookie sandwiches.
- Chocolate Dipped Strawberries: These indulgent treats echo the festive spirit and provide a sweet, fruity pairing that brightens any dessert table.
- Earl Grey Tea: The subtle floral notes of Earl Grey tea offer a sophisticated touch, ideal for afternoon tea parties alongside your vibrant cookies.
- Mini Cupcakes: Add a selection of mini cupcakes for variety, making it easy for everyone to enjoy a mix of sweet treats at once.
- Sparkling Water with Citrus: Refreshing sparkling water infused with citrus slices lightens the palate, adding a crisp touch that pairs wonderfully with the cookies.
- Vanilla Ice Cream: A scoop of creamy vanilla ice cream provides a comforting, classic pairing, transforming your cookies into a delightful sundae treat.
- Meringue Nests: Light and airy meringue nests topped with fruits would harmonize beautifully, adding a fun, elegant touch to your dessert spread.
- Pistachio Macarons: These delicate delights not only add a pop of color but also a delightful crunch and nutty flavor that pairs beautifully with the cookies.
Storage Tips for Springtime Crinkle Cookies
Room Temperature: Store cookies in an airtight container at room temperature for up to 5 days to maintain their chewy texture and prevent them from drying out.
Freezer: For longer storage, freeze cookies in a single layer on a baking sheet, then transfer to an airtight container where they can last up to 3 months.
Reheating: To enjoy cookies later, reheat in the microwave for about 10-15 seconds. This will restore their delightful softness, making them feel freshly baked again.
Chill Dough: If you have leftover dough, it can be refrigerated for up to 2 days. Bring back to room temperature for easier shaping before baking your next batch of Springtime Crinkle Cookies.
Springtime Crinkle Cookies Variations
Feel free to let your creativity shine as you customize these delightful cookies with fun twists and substitutions!
-
Color Combinations: Mix several pastel gel food coloring shades to create a colorful platter of cookies that’s visually stunning and festive.
-
Citrusy Flavor Boost: Replace almond extract with lemon or orange extract for a refreshing citrus pop that brightens every bite.
-
Add Fun Sprinkles: Incorporate colorful sprinkles into the dough or coat cookie balls with them before baking for a delightful crunch and eye-catching look.
-
Nutty Delight: Fold in finely chopped walnuts or pecans for added texture and flavor, perfect for those who love a nutty crunch in their sweets.
-
Chocolate Twist: Mix in mini chocolate chips to the dough for a decadent surprise in each bite. The rich chocolate complements the sweetness perfectly.
-
Dairy-Free Delight: Swap unsalted butter with vegan butter and replace eggs with flax eggs for a deliciously dairy-free version that everyone can enjoy.
-
Gluten-Free Goodness: Use a gluten-free flour blend instead of all-purpose flour to ensure that these colorful treats are suitable for those with gluten sensitivities.
-
Spiced Fall Cookies: Channel cozy flavors by adding a dash of cinnamon and nutmeg to the dough, transforming these cookies for autumn celebrations.
With so many variations, these Springtime Crinkle Cookies will never feel monotonous! Whether it’s a sweet addition to a spring gathering or an afternoon treat, the possibilities are endless. If you’re looking to explore more delicious cookie options, don’t forget to also check out Soft Chewy Cookies or Marshmallow Swirl Cookies for more fun baking adventures!
Springtime Crinkle Cookies Recipe FAQs
How do I choose the right gel food coloring for my cookies?
I recommend using gel food coloring to achieve those beautiful pastel shades without affecting the dough’s consistency. Look for high-quality brands that offer a range of colors. Just a tiny drop of color is often enough; you can always add more if you want a deeper hue!
How should I store my Springtime Crinkle Cookies, and how long do they last?
To keep your cookies fresh, store them in an airtight container at room temperature for up to 5 days. This helps maintain their chewy texture. If you want to save some for later, you can freeze them! Simply lay them out in a single layer on a baking sheet, freeze until solid, and then transfer them to an airtight container. They’ll keep well in the freezer for up to 3 months.
Can I freeze the dough for Springtime Crinkle Cookies?
Absolutely! You can freeze the cookie dough before baking. After preparing the dough, roll it into balls, and place them on a baking sheet lined with parchment paper. Freeze until solid, then transfer to a resealable plastic bag or airtight container. When you’re ready to bake them, just take the dough balls out, let them thaw for about 30 minutes, and bake as instructed.
What should I do if my cookies spread too much during baking?
If your cookies spread too much, try chilling the dough longer next time—about 30-60 minutes works great. Also, ensure your baking powder is fresh, as stale leavening agents can affect spread and rise. Finally, make sure your oven is preheated properly; an oven that’s too cool can also lead to excess spreading.
Are there any allergens I should consider with the ingredients used?
Yes, if you’re baking for someone with allergies, remember that the Springtime Crinkle Cookies contain eggs, dairy (from the butter), and almonds (if using almond extract). For a dairy-free option, you can substitute the unsalted butter with vegan butter, and for eggs, flax eggs are a great alternative. Always double-check ingredient labels for cross-contamination if you’re concerned about allergens.

Sweet and Chewy Springtime Crinkle Cookies for a Colorful Treat
Ingredients
Equipment
Method
- Preheat your oven to 350°F (175°C) and line a baking sheet with parchment paper.
- In a medium bowl, sift together the all-purpose flour, baking powder, and salt.
- In a large mixing bowl, beat the softened unsalted butter and granulated sugar until light and fluffy.
- Add the large eggs one at a time, mixing well after each addition, then stir in the vanilla and almond extracts.
- Gradually fold in the dry ingredients into the wet ingredients until just combined.
- Divide the dough into portions, add gel food coloring, and chill in the refrigerator for at least 30 minutes.
- Roll tablespoon-sized balls in powdered sugar and place them on the baking sheet, spaced 2 inches apart.
- Bake for 10–12 minutes until the tops crack and edges are set, while centers remain soft.
- Allow to cool on baking sheet then transfer to a wire rack.
Leave a Reply