
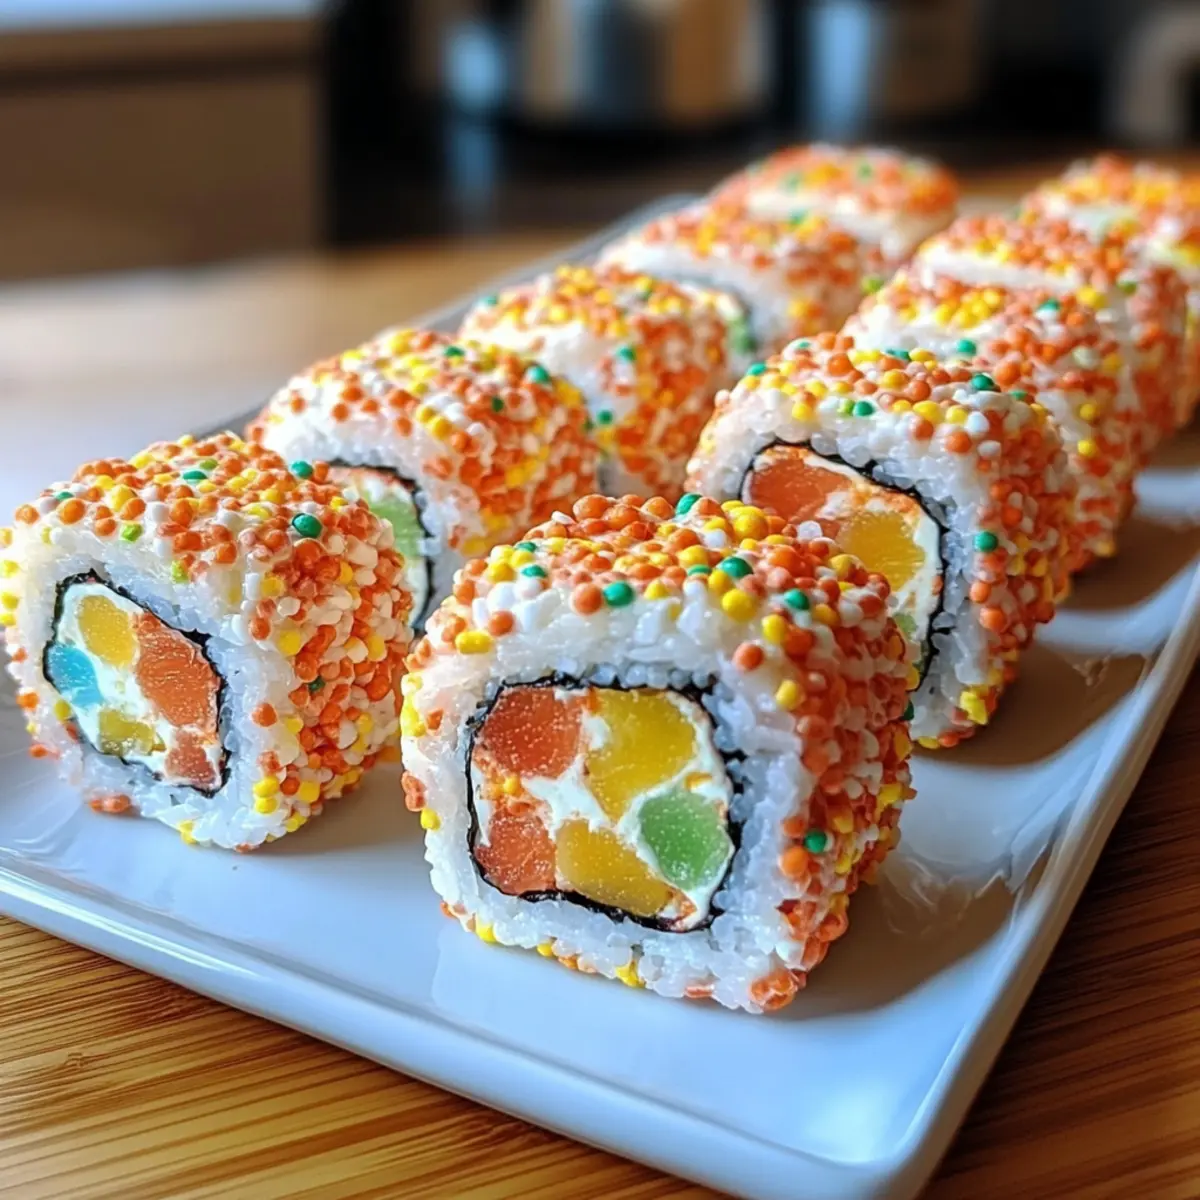
As I tucked into a cafe last weekend, a playful, rainbow-hued dish caught my eye—Fruity Pebbles Sushi! This no-bake dessert encapsulates the whimsy of childhood while effortlessly inviting creativity into the kitchen. With a delightful mix of colorful cereal and gooey marshmallows, this easy-to-make treat is perfect for a fun family day or a delightful surprise snack for friends. One of the best parts? It’s customizable! You can switch up the cereals or fillings, making it a versatile recipe that caters to everyone’s palate. Plus, it’s gluten-free when you check those labels, making it a crowd-pleaser for all. Are you ready to roll up some joyful sweetness? Let’s dive into this vibrant treat!

Why Is Fruity Pebbles Sushi So Fun?
Versatile and Customizable: This no-bake treat lets you unleash your creativity! Switch up cereals or fillings—from Cocoa Pebbles to Nutella—making it ideal for every palate.
Nostalgic Delight: Fruity Pebbles Sushi brings back childhood memories while delivering a playful twist that appeals to both kids and adults.
Quick and Easy: With just a few simple steps, you can whip this up in no time—perfect for unexpected guests or last-minute gatherings!
Fun Presentation: Each colorful slice resembles a sushi roll, making them perfect for parties or festive occasions, turning any snack time into a celebration!
For more fun dessert ideas, don’t forget to check out my Fruity Pebbles Cheesecake or other quick and easy treats like the Savory Ground Beef recipes!
Tasty Fruity Pebbles Sushi Ingredients
For the Sushi Base
• Fruity Pebbles Cereal – adds a colorful crunch; swap for Cocoa Pebbles for a chocolate delight!
• Marshmallows – creates the chewy texture; use fresh ones for the best results.
• Butter – helps with greasing and binds the mix together.
For the Fillings
• Gummy Candies (optional) – a fun surprise filling; choose your favorites like gummy bears or gummy worms.
• Nutella or Chocolate-Hazelnut Spread (optional) – brings in rich layers of flavor; perfect for a decadent addition.
• Sprinkles (optional) – enhance visual appeal; seasonal colors make it festive for holidays or parties.
Each delightful slice of tasty Fruity Pebbles Sushi will take you back to carefree days while adding a whimsical touch to any occasion. Enjoy rolling!
Step‑by‑Step Instructions for Tasty Fruity Pebbles Sushi
Step 1: Melt the Marshmallows
In a medium saucepan, combine 4 cups of marshmallows and 2 tablespoons of butter over low heat. Stir constantly for about 5–7 minutes, until the mixture is completely melted and smooth. Watch for a glossy texture and ensure there are no lumps. This gooey base is essential for our tasty Fruity Pebbles Sushi!
Step 2: Combine Ingredients
Remove the saucepan from heat and immediately add 6 cups of Fruity Pebbles cereal. Gently fold the cereal into the melted marshmallow mixture until well incorporated, ensuring every piece is coated. The vibrant colors should become a cohesive blend across the cereal. The mix should feel slightly sticky but manageable to shape.
Step 3: Form Sushi Rolls
Lay a large piece of parchment paper on a clean surface and transfer the Fruity Pebbles mixture onto it. Use your hands, greased with a little butter, to flatten the mixture into a rectangle about ½ inch thick. If you’re feeling adventurous, spread your preferred filling, like Nutella, over the flattened surface, leaving a small border for easy rolling.
Step 4: Roll the Sushi
Starting at one edge of the parchment paper, carefully roll the flattened mixture tightly into a log shape. Use the parchment to guide the roll and keep everything together. Roll until fully enclosed, applying gentle, even pressure along the way. Once rolled tightly, seal the edges and shape it into a sushi roll.
Step 5: Chill and Slice
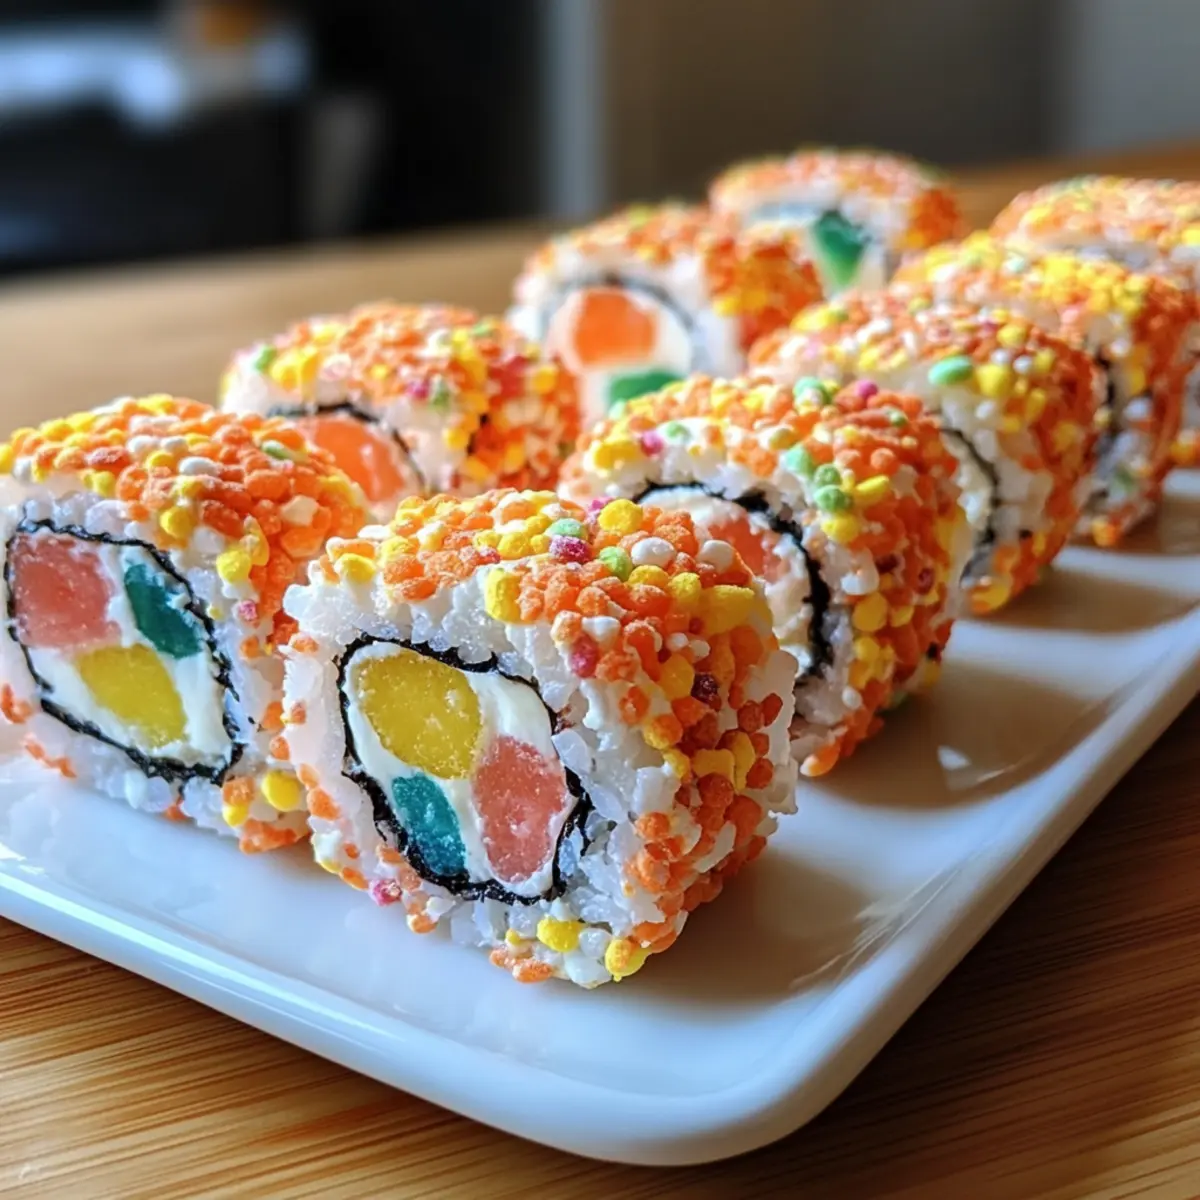
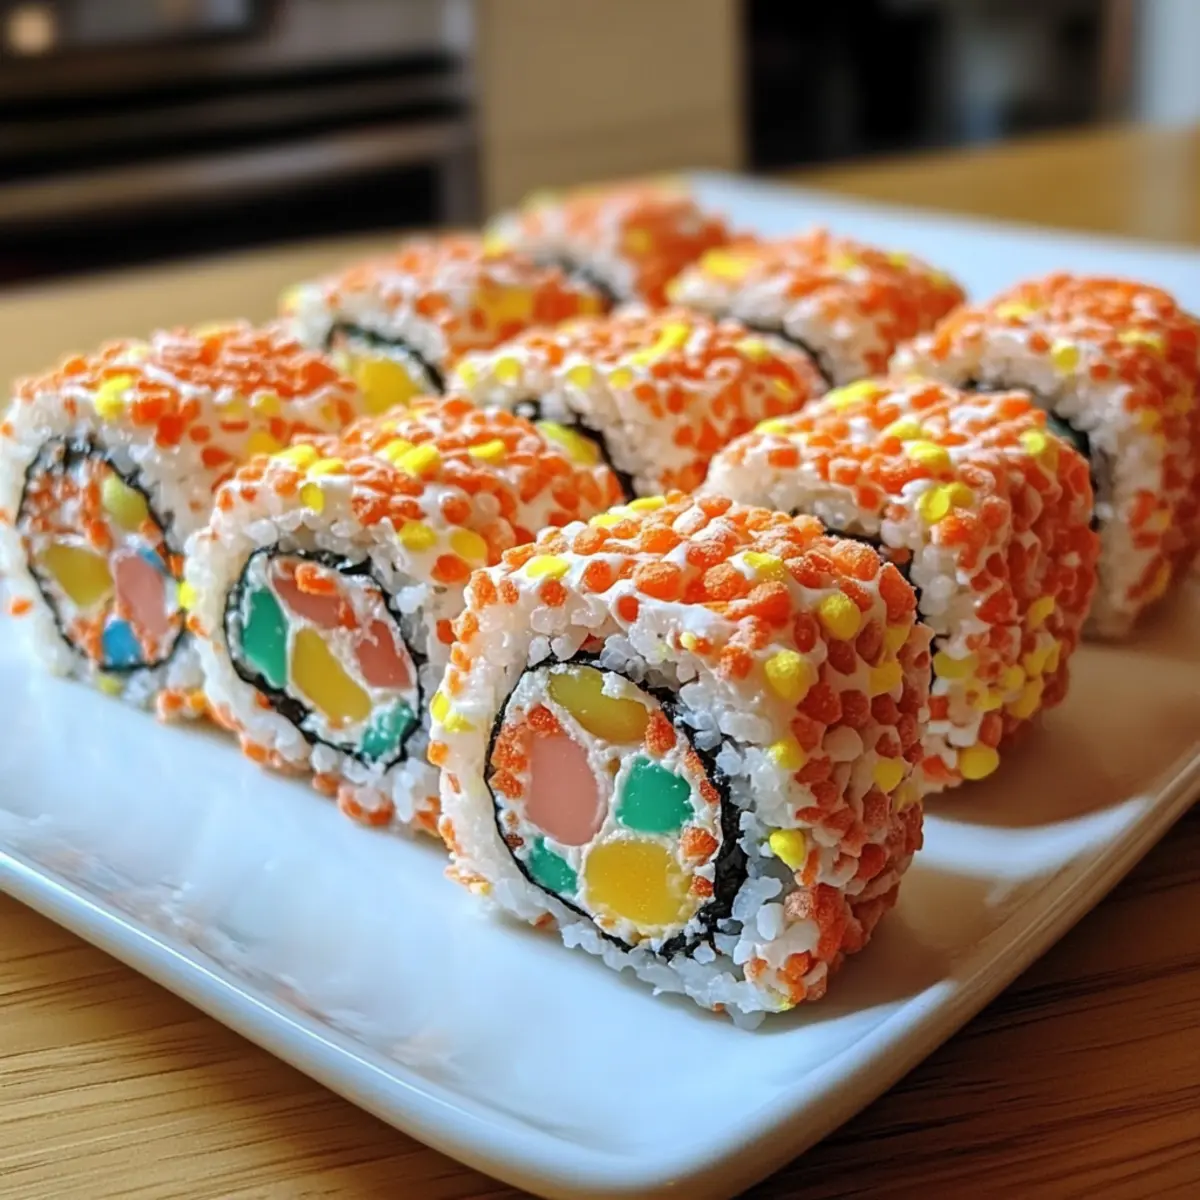
Transfer the rolled sushi to the refrigerator and let it chill for about 30 minutes, allowing it to firm up. Once set, remove the roll from the parchment paper and place it on a cutting board. Use a sharp knife to slice the roll into bite-sized pieces, resembling sushi, with bright colors peeking from each slice.
Step 6: Serve and Enjoy
Arrange your colorful slices of tasty Fruity Pebbles Sushi on a serving platter. These delightful bites are perfect for sharing at parties, as fun snacks, or even a whimsical dessert. Enjoy them fresh for the best chewy texture and taste, bringing smiles to everyone around the table!
How to Store and Freeze Tasty Fruity Pebbles Sushi
Room Temperature: Keep sliced pieces in an airtight container at room temperature for optimal freshness. They’ll stay delicious for up to 3 days, making them perfect for quick snacks!
Freezer: For longer storage, slice and freeze the sushi in a single layer on a baking sheet. Once solid, transfer to a freezer-safe bag for up to 2 months.
Reheating: If frozen, allow the pieces to thaw in the fridge overnight. Enjoy at room temperature after thawing, as reheating isn’t necessary for this treat!
Texture Note: To maintain the delightful chewy texture of your tasty Fruity Pebbles Sushi, avoid refrigeration as it can affect consistency.
What to Serve with Tasty Fruity Pebbles Sushi
Enhance your colorful creation with delightful pairings that balance flavors and textures for a truly memorable meal.
-
Fresh Fruit Salad: A light, refreshing complement that adds natural sweetness and a vibrant burst of flavor to your dessert spread. Plus, the juicy fruit provides a lovely contrast to the chewy sushi.
-
Chocolate Dipping Sauce: Indulge your sweet tooth by serving a warm chocolate dip alongside. The luscious richness beautifully contrasts the colorful crunch of the sushi, making each bite an exceptional treat!
-
Whipped Cream: Light and fluffy, whipped cream adds a creamy texture that melds wonderfully with the playful sushi. Drizzle some over the top for an elegant presentation that tempts every dessert lover.
-
Rainbow Sprinkles Topping: For an even more festive appeal, top the slices of sushi with additional sprinkles. They provide a crunchy texture that enhances the overall fun look and feel while satisfying those with a sweet tooth.
-
Ice Cream Sundae: A scoop of vanilla or rainbow sherbet would create a whimsical dessert duo. The creamy richness pairs delightfully with the chewy sushi, offering a dreamy balance of textures and flavors.
-
Sparkling Fruit Punch: A refreshing drink option, sparkling fruit punch bridles fruity notes that complement the cereal while adding a bubbly kick to your dessert experience.
Pairing these delightful options with your tasty Fruity Pebbles Sushi will create a feast that not only satisfies the sweet cravings but also brings smiles all around the table!
Expert Tips for Tasty Fruity Pebbles Sushi
-
Work Quickly: As the marshmallow mixture cools, it can become difficult to shape. Have all your ingredients ready before you start!
-
Grease Your Hands: Prevent the mixture from sticking to your hands by greasing them with butter or non-stick spray when rolling.
-
Cut Carefully: Use a sharp knife to slice the sushi roll cleanly for beautiful presentation. This way, each piece showcases the vibrant colors of your tasty Fruity Pebbles Sushi.
-
Experiment with Fillings: Feel free to get creative with your fillings! Different combinations can add unique flavors and textures that everyone will love.
-
Storage Reminder: Keep your sliced sushi in an airtight container at room temperature for up to three days. Refrigeration may alter the delightful chewy texture!
Tasty Fruity Pebbles Sushi Variations
Feel free to let your creativity shine as you mix and match flavors and textures to make this treat your own!
- Cocoa Pebbles: Substitute Fruity Pebbles with Cocoa Pebbles for a delicious chocolatey twist that satisfies sweet cravings.
- Rice Krispies: Use Rice Krispies for a classic marshmallow treat base, keeping it simple yet scrumptious.
- Nutella Delight: Spread Nutella on your flattened sushi mixture for a rich, creamy layer that adds depth to every bite.
- Shredded Coconut: For a tropical flair, sprinkle shredded coconut within your rolls; it adds an irresistible chewiness and sweetness.
- Gummy Surprises: Experiment with seasonal gummy candies for fun fillings—gummy worms or rainbow bears add a delightful surprise!
- Festive Sprinkles: Top with holiday-themed sprinkles to add color and excitement, turning your sushi into a celebration!
- Peanut Butter Swirl: Spread a thin layer of peanut butter to create a delicious nutty flavor that’s a real crowd-pleaser.
- Spicy Twist: For those who love heat, add a light sprinkle of cayenne pepper in the filling for an unexpected zing with every bite!
By embracing these variations, you can create an endless array of delightful flavors. And remember, if you’re looking for even more creative ideas, my Bok Choy Stir is another fan favorite that embraces fun combinations! Let your imagination run wild while making these tasty treats!
Make Ahead Options
These tasty Fruity Pebbles Sushi are perfect for meal prep enthusiasts! You can prepare the marshmallow and cereal mixture up to 24 hours in advance and keep it in an airtight container at room temperature. Simply follow the first two steps of melting the marshmallows and mixing with the Fruity Pebbles. When you’re ready to serve, just roll the mixture in parchment paper and chill for about 30 minutes before slicing. This method allows for easy assembly before serving while ensuring the sushi remains just as delicious and colorful. With this time-saving tip, you can enjoy the fun of Fruity Pebbles Sushi without the last-minute rush!
Tasty Fruity Pebbles Sushi Recipe FAQs
What type of Fruity Pebbles should I use?
Absolutely! You can use the classic Fruity Pebbles for their crunchy texture and vibrant colors. If you’re looking to mix things up, consider trying Cocoa Pebbles for a chocolate twist or Rice Krispies for a more traditional flavor. Both options are delicious and will change the taste profile while still keeping that fun vibe!
How should I store my Fruity Pebbles Sushi?
Store your sliced pieces in an airtight container at room temperature for up to 3 days. It’s best not to refrigerate them, as this can make the texture a bit tough. For longer storage, you can freeze the sushi by placing the slices in a single layer on a baking sheet until solid, then transfer them to a freezer bag for up to 2 months.
Can I freeze Fruity Pebbles Sushi?
Yes, you can freeze your tasty Fruity Pebbles Sushi! First, slice the sushi and spread the pieces out on a baking sheet in a single layer. Freeze them until solid (about 1-2 hours), then transfer the slices to a freezer-safe bag. When you’re ready to enjoy, simply let them thaw in the fridge overnight and enjoy them at room temperature!
What if my marshmallow mixture is too sticky to handle?
Very! If you find that your marshmallow mixture is too sticky, make sure to grease your hands with a bit of butter or non-stick spray before forming the sushi rolls. This simple step prevents the mixture from sticking to your fingers and makes it easier to work with. If it’s still too difficult, give it a moment to cool slightly before trying again.
Is this recipe suitable for people with allergies?
Absolutely! While the recipe can be gluten-free, always double-check the labels of your cereals and marshmallows to ensure they meet your dietary needs. Additionally, if you’re serving it to children or guests, inquire about any potential allergies to specific ingredients like marshmallows or nut spreads to ensure everyone can enjoy this fun treat!
Tasty Fruity Pebbles Sushi – A Fun No-Bake Dessert Adventure
Ingredients
Equipment
Method
- In a medium saucepan, combine 4 cups of marshmallows and 2 tablespoons of butter over low heat. Stir constantly for about 5–7 minutes until completely melted and smooth.
- Remove the saucepan from heat and immediately add 6 cups of Fruity Pebbles cereal. Gently fold until the cereal is coated.
- Lay a large piece of parchment paper on a clean surface and transfer the mixture onto it, flattening it into a rectangle about ½ inch thick.
- Starting at one edge of the parchment paper, roll the flattened mixture tightly into a log shape.
- Transfer the rolled sushi to the refrigerator and let it chill for about 30 minutes. Once set, slice into bite-sized pieces.
- Arrange the colorful slices on a serving platter and enjoy fresh for the best chewy texture!
Leave a Reply