
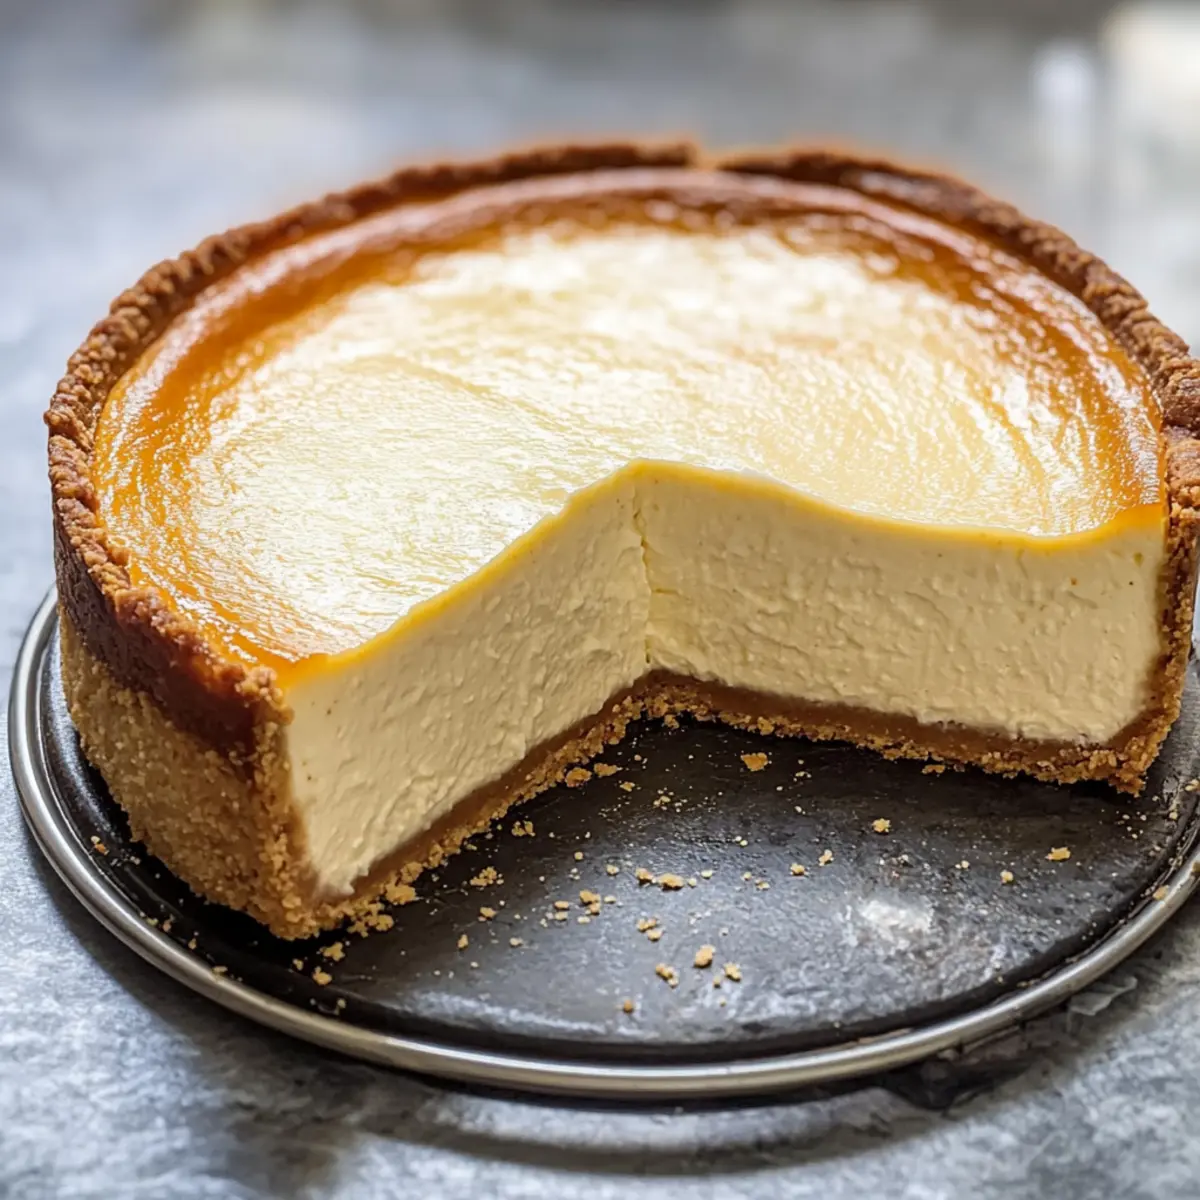
As I stood in my kitchen, the faint aroma of vanilla wafting through the air, I couldn’t help but feel a rush of excitement. This isn’t just any dessert; it’s the best creamy cheesecake, complete with a crunchy graham cracker crust that takes your taste buds on a delightful journey. This stunning cheesecake strikes the perfect balance between rich, velvety smoothness and a satisfying crunch that will have your family and friends begging for more. It’s an ideal choice for holidays and gatherings — not only can you whip it up in advance, but it also chills beautifully, ensuring every slice is fresh and delicious. Are you ready to bring this classic delight into your home? Let’s dive into the details of making your very own masterpiece!
Why Is This Cheesecake So Perfect?
Simplicity at its Best: The steps are easy to follow, making it accessible whether you’re a beginner or a seasoned baker.
Creamy Texture: Crafted with full-fat cream cheese and heavy cream, this cheesecake delivers a luscious mouthfeel that will keep you coming back for more.
Craving Satisfaction: The classic graham cracker crust adds the perfect crunchy contrast, elevating the overall experience of every bite.
Versatile Toppings: Feel free to personalize this cheesecake with fresh fruit, chocolate drizzle, or even a tangy lemon twist for a fun flavor twist! For more variations, check out my delightful Lemon Blueberry Cheesecake or Fruity Pebbles Cheesecake for inspiration.
Impress Your Guests: With its elegant appearance and rich taste, this cheesecake is sure to wow your family and friends during special occasions or holiday gatherings.
The Best Creamy Cheesecake Ingredients
• Make your cheesecake dreams come true with these classic ingredients.
For the Crust
- Graham Cracker Crumbs – The base of the cheesecake that adds the much-loved crunch; feel free to use store-bought or crush your own.
- Sugar – Balances the flavors of the crust; adjust based on your sweetness preference.
- Butter – Acts as the binder for the crust and adds richness; unsalted butter is best for controlled saltiness.
For the Filling
- Full-Fat Cream Cheese – The star ingredient that creates a rich, creamy texture; opt for brick-style cream cheese for the best result.
- Granulated Sugar – Sweetens the cheesecake filling; consider reducing the amount if you’re looking for something less sweet.
- Pure Vanilla Extract – Deepens the flavor profile; high-quality extract will elevate the cheesecake even more.
- Large Eggs – Essential for binding the filling; ensure they are at room temperature for a smoother batter.
- Large Egg Yolks – Enhances the richness of the filling; also, keep them at room temperature for mixing ease.
- Heavy Cream – Contributes to a silky texture; adding an extra 1/4 cup can enhance creaminess.
Enjoy these simple ingredients as you create the best creamy cheesecake that promises to wow anyone who gets to taste it!
Step‑by‑Step Instructions for The Best Creamy Cheesecake
Step 1: Prepare the Crust
Begin by preheating your oven to 350°F (175°C). Lightly oil a 9-inch springform pan, ensuring a smooth release later on. Wrap the outside of the pan with aluminum foil to prevent water from seeping in during baking. In a mixing bowl, combine graham cracker crumbs, sugar, and melted unsalted butter, then press the mixture firmly into the bottom of the pan. Bake the crust for 8 minutes, then remove it and allow it to cool completely.
Step 2: Make the Filling
In a stand mixer, beat the room temperature cream cheese until it’s smooth and creamy, which should take about 2-3 minutes. Gradually add in the granulated sugar and pure vanilla extract, mixing until well-combined. Next, it’s time to add the large eggs and yolks one at a time, blending each addition until just incorporated. Finally, gently mix in the heavy cream until the filling is smooth, avoiding overmixing to keep it airy and prevent cracks.
Step 3: Bake Cheesecake
Take your prepared crust and pour the creamy filling over it, carefully smoothing the top with a spatula. Place the springform pan inside a larger baking dish filled with about 2 inches of hot water to create a water bath. This technique helps to maintain a moist baking environment. Bake the cheesecake for 1 hour and 10 minutes; the edges should be set while the center remains slightly jiggly, signaling it’s ready to come out.
Step 4: Cooling
Once the baking time is up, turn off the oven and leave the cheesecake inside for an additional 45 minutes. This gradual cooling process helps to prevent cracks from forming. After the time is up, carefully run a knife around the edges of the cheesecake to loosen it from the pan. Let it cool completely at room temperature before transferring it to the refrigerator for at least 8 hours, or overnight, to enhance flavor and texture.
Step 5: Serve and Enjoy
When you’re ready to revel in the delights of your homemade cheesecake, gently release the sides of the springform pan and slice the cheesecake into perfect portions. Consider adding a delightful topping of fresh berries, whipped cream, or a drizzle of chocolate to elevate the experience. Now, sit back and enjoy each creamy, dreamy bite of The Best Creamy Cheesecake you’ve expertly crafted!
Make Ahead Options
These delightful slices of the Best Creamy Cheesecake are perfect for busy home cooks looking to simplify their meal prep! You can prepare the graham cracker crust up to 3 days in advance; simply store it tightly wrapped at room temperature to maintain its crunch. The cheesecake filling can also be made up to 24 hours ahead of time and kept refrigerated in an airtight container. When ready to bake, pour the filling into the prepped crust and follow the baking instructions. This meal prep strategy not only saves you time but ensures your dessert remains just as delicious for any gathering or special occasion!
What to Serve with Creamy Baked Cheesecake?
Treat your taste buds to a symphony of delightful flavors and textures by pairing your cheesecake with these scrumptious options.
-
Whipped Cream:
A dollop of freshly whipped cream adds a light and airy element, beautifully complementing the cheesecake’s richness. -
Berry Compote:
Drizzle a homemade berry compote over each slice for a burst of tart freshness that perfectly balances the sweet, creamy cheesecake. -
Chocolate Sauce:
Pour warm chocolate sauce on top to indulge your sweet tooth. The rich chocolate enhances every creamy bite with decadent flavors. -
Fresh Berries:
Serve a medley of strawberries, blueberries, and raspberries alongside the cheesecake for a colorful and refreshing contrast that bursts with flavor. -
Coffee or Espresso:
Pairing your cheesecake with a cup of coffee or espresso enhances its richness and brings out the cheesecake’s creamy texture beautifully.
A warm cup of coffee creates a delightful moment as the bittersweet notes mingle with the sweet cheesecake, making for an unforgettable dessert experience!
-
Vanilla Ice Cream:
Scooping vanilla ice cream next to your slice creates a delightful melty effect, combining creamy, cold and rich flavors that elevate your dessert game. -
Lemon Zest:
A sprinkle of lemon zest adds a bright, zesty touch, enhancing the cheesecake’s flavors with its citrus notes and refreshing aroma.
Enjoy exploring these pairings as you savor each heavenly slice of the best creamy cheesecake!
How to Store and Freeze The Best Creamy Cheesecake
Fridge: Keep your cheesecake covered in the refrigerator for up to 5 days. This will help maintain its creamy texture and flavor freshness for your dessert cravings.
Freezer: If you want to enjoy your cheesecake later, it can be frozen for up to 2 months. Wrap it tightly in plastic wrap and then in aluminum foil to prevent freezer burn.
Thawing: When ready to enjoy, transfer your frozen cheesecake to the fridge to thaw overnight. This gentle thawing helps retain its rich and creamy texture.
Reheating: While cheesecake is best served chilled, if you prefer a slightly warmer treat, give it 10-15 seconds in the microwave. Just be careful not to overheat, as it may alter the creamy goodness!
Expert Tips for The Best Creamy Cheesecake
-
Room Temperature Ingredients: Ensure all your ingredients, especially cream cheese and eggs, are at room temperature. This helps create a smooth batter and a creamy texture for the cheesecake.
-
Avoid Overmixing: Once you add the eggs, mix just until combined. Overmixing can introduce air into the batter, leading to cracks during baking.
-
Water Bath Essential: Use a water bath to bake your cheesecake. This gentle baking method keeps the cheesecake moist and helps prevent cracks on the surface.
-
Cool Gradually: After baking, let the cheesecake cool slowly in the oven for 45 minutes. This gradual cooling reduces the risk of cracks due to sudden temperature changes.
-
Chill Properly: Chill the cheesecake for at least 8 hours before serving. This not only enhances the flavor but also allows the cheesecake to firm up, making slicing easier.
-
Storage Tips: If you have leftovers, store your cheesecake covered in the fridge for up to 5 days or freeze it for up to 2 months. Thaw overnight in the refrigerator for best results.
Variations & Substitutions for The Best Creamy Cheesecake
Feel free to get creative with this cheesecake! Every variation adds its own unique twist to the classic recipe, inviting your taste buds to explore.
-
Citrus Burst: Add a teaspoon of lemon or orange zest to the filling for a refreshing citrus kick. This brightens the flavors and complements the creaminess beautifully.
-
Chocolate Lover’s Delight: Swap out the graham cracker crust for an Oreo crust for an indulgent chocolate twist. The chocolate flavor pairs wonderfully with the creamy filling, making each slice even more decadent.
-
Nutty Alternative: Integrate finely chopped nuts into the crust for a crunchy texture. Walnuts or almonds can add a delightful flavor contrast alongside the rich filling. It’s a delicious surprise in every bite!
-
Fruit Fusion: Top your cheesecake with a colorful array of fresh berries or a homemade fruit compote. This not only adds visual appeal but also balances the sweetness of the cheesecake perfectly. Consider drizzling with a touch of honey for added sweetness.
-
Frozen Treat: For a summer-inspired version, consider freezing individual slices. Once frozen, serve directly from the freezer for an icy treat that’s refreshing on warm days.
-
Caramel Drizzle: Before serving, drizzle warm caramel sauce over the top of the cheesecake. It creates a luscious, gooey topping that’s hard to resist. Pair it with a sprinkle of sea salt for a gourmet touch!
-
Spiced Up: Incorporate a dash of cinnamon or nutmeg into the filling for a warm, aromatic spice flavor. This variation is especially delightful for fall gatherings.
Embrace these variations and substitutions to make this cheesecake your own! Plus, if you’re feeling adventurous, why not try out some fruity twists with a delightful Cheesecake Fruit Salad or a refreshing Key Lime Cheesecake?
The Best Creamy Cheesecake Recipe FAQs
What type of cream cheese should I use?
Absolutely! For the best creamy cheesecake, I recommend using full-fat, brick-style cream cheese, such as Philadelphia. This type offers the richest and smoothest texture, which is essential when crafting a stunning cheesecake.
How should I store the cheesecake after baking?
After your cheesecake has cooled completely, cover it with plastic wrap and store it in the refrigerator for up to 5 days. This keeps it fresh and ready for any dessert cravings. It’s important to ensure it’s well covered to prevent it from absorbing any odors from the fridge.
Can I freeze the cheesecake for later?
Very much so! You can freeze your cheesecake for up to 2 months. Just wrap it tightly in plastic wrap, then in aluminum foil, to prevent freezer burn. When you’re ready to enjoy it, move it to the fridge and let it thaw overnight. This gradual thawing helps retain its creamy texture.
What can I do if my cheesecake cracks during baking?
Don’t worry; cracks can be a common issue! To avoid this in the future, make sure to use a water bath while baking, as it creates a moist environment. Also, avoid overmixing the batter once the eggs are added. If it does crack, you can cover it beautifully with fruit compote or whipped cream when serving.
Is this cheesecake suitable for gluten-free diets?
Absolutely! If you’re catering to someone with a gluten intolerance, I recommend substituting the graham cracker crust with either almond flour or coconut flour crusts. These alternatives will give you a delightful crunch without sacrificing flavor, making it an inclusive dessert for everyone.
Should I let the cheesecake cool completely before refrigerating?
Yes! After baking, it’s crucial to let your cheesecake cool at room temperature before moving it to the fridge. This cooling period allows it to set properly and reduces the chances of developing cracks, ensuring that every bite is as creamy and delicious as possible.
The Best Creamy Cheesecake That's Just Like a Dream
Ingredients
Equipment
Method
- Preheat oven to 350°F (175°C) and lightly oil a 9-inch springform pan, wrapping the outside with aluminum foil. Combine graham cracker crumbs, sugar, and melted butter in a bowl, then press firmly into the pan.
- Bake the crust for 8 minutes and allow it to cool completely.
- Beat cream cheese in a stand mixer until smooth and creamy for about 2-3 minutes. Gradually add sugar and vanilla, mixing well.
- Incorporate eggs and yolks one at a time, blending until just combined. Gently mix in heavy cream.
- Pour filling over the crust and smooth the top. Place springform pan in a larger baking dish filled with hot water and bake for 1 hour and 10 minutes, until edges are set and center is slightly jiggly.
- Turn off oven and leave cheesecake inside for 45 minutes. Run a knife around edges to loosen and cool completely before refrigerating for at least 8 hours.
- Release springform pan sides and slice cheesecake. Top with berries, whipped cream, or chocolate drizzle if desired.
Leave a Reply