
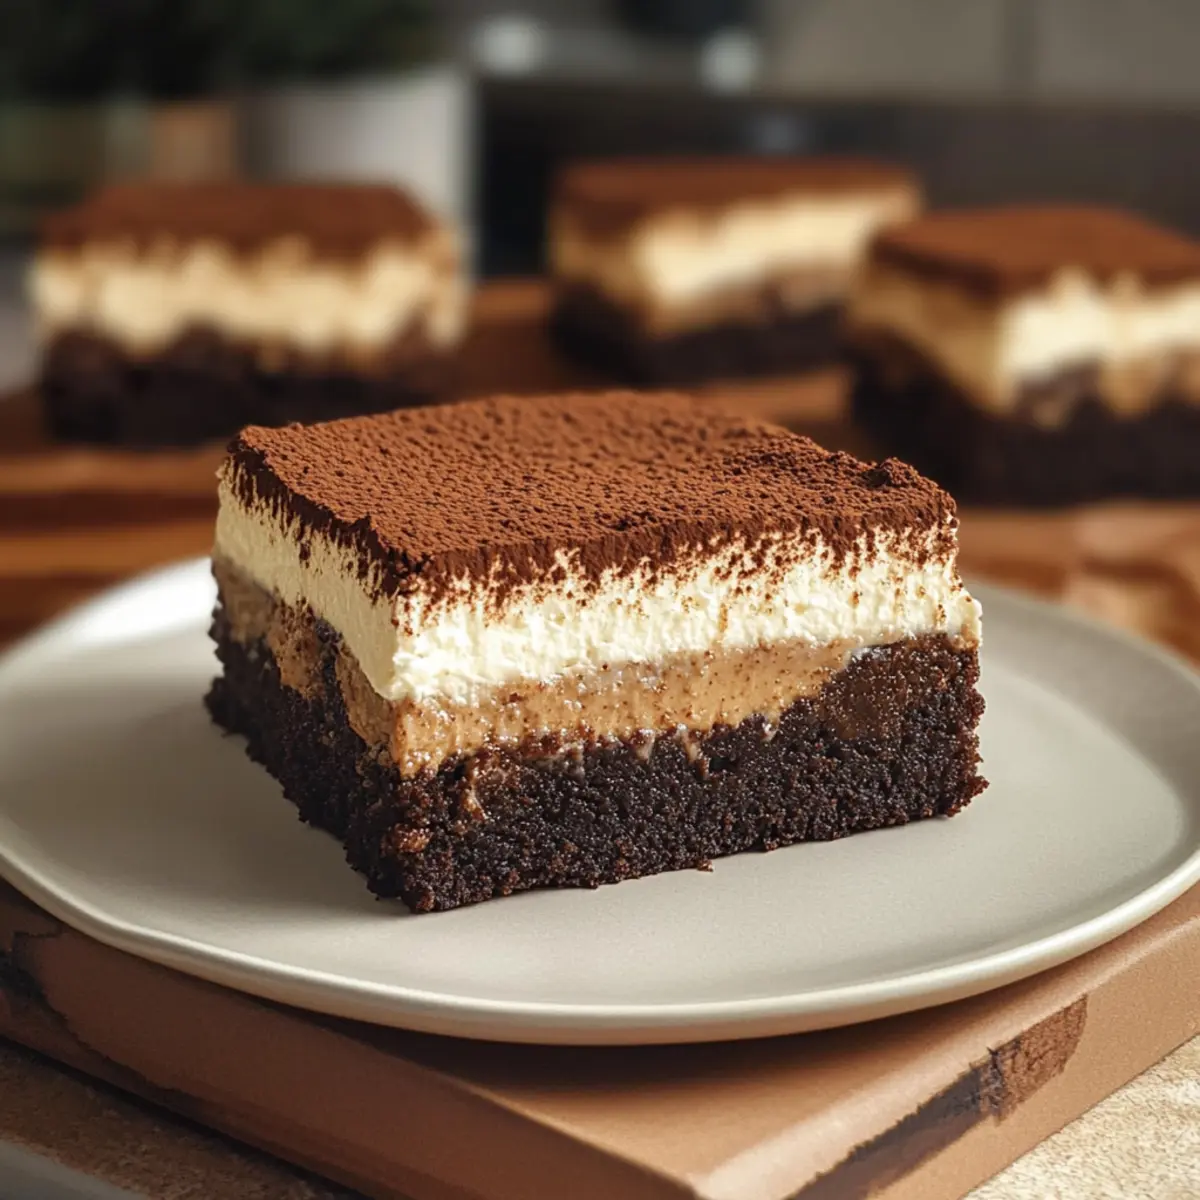
The aroma of freshly brewed espresso mingling with the rich scent of chocolate has a way of transporting me back to cozy kitchens where sweet creations come to life. It’s this nostalgic fusion that inspired my latest masterpiece: fudgy tiramisu brownies! These delicious treats are an irresistible combination of heartwarming brownies and indulgent tiramisu, delivering a delightful texture and flavor explosion that’s perfect for any gathering or cozy night in. With minimum prep time and maximum satisfaction, these tiramisu brownies are sure to impress friends and family alike. Are you ready to create a dessert that marries two beloved classics in the most scrumptious way? Let’s dive into this delightful recipe!
Why are Tiramisu Brownies a must-try?
Irresistible Combination: Imagine the richness of fudgy brownies paired with the creaminess of tiramisu; it’s a dessert lover’s dream come true!
Quick Prep: With minimal effort, you’ll achieve maximum satisfaction, making these brownies perfect for spontaneous gatherings or a cozy night in.
Versatile Flavor: Feel free to customize them! Try rich dark chocolate, or even add a splash of amaretto for an extra flair.
Crowd-Pleaser: Whether it’s a family dinner or a potluck, these brownies will surely wow everyone around the table.
Check out the delicious Red Velvet Brownies for another unique twist on a classic!
Tiramisu Brownies Ingredients
For the Brownie Base
- Dark or Semi-Sweet Chocolate (100g) – Adds rich chocolate flavor and moisture; substitute with milk chocolate for a sweeter option.
- Natural Cocoa Powder (50g) – Enhances chocolate flavor; ensure it is unsweetened for the best results.
- Unsalted Butter (230g) – Provides moisture and flavor; brown it for a nutty taste that elevates the brownies.
- Large Eggs (4) – Critical for structure and moisture; use room temperature eggs for better mixing.
- Granulated Sugar (150g) – Sweetens the brownies; can substitute with coconut sugar for a lower glycemic option.
- Brown Sugar (100g) – Adds moisture and a hint of caramel flavor; dark brown sugar can intensify this.
- All-Purpose Flour (100g) – Supplies structure; use gluten-free flour blend for a gluten-free version.
For the Tiramisu Layer
- Mascarpone Cheese (250g) – Creates the creamy tiramisu layer; substitute with cream cheese for a tangier taste.
- Whipping Cream (200g) – Provides lightness to the mascarpone cream; heavy cream can be used for extra richness.
- Powdered Sugar (50g) – Sweetens the mascarpone cream; alternatively, use a sweetener for a sugar-free version.
- Vanilla Extract (½ tsp) – Adds depth of flavor; homemade vanilla extract can enhance your brownies even more.
For the Ladyfingers
- Espresso Powder (2 tsp) – Infuses the ladyfingers with rich coffee flavor; instant coffee can be a substitute if needed.
- Hot Water (150g) – Used for dissolving espresso; ensures flavorful extraction for that authentic taste.
- Coffee Liqueur or Dark Rum (1 tbsp, optional) – Adds depth to the flavor; omit for a non-alcoholic version.
- Ladyfingers (12) – Serve as the tiramisu base; essential for texture contrast, or use gluten-free ladyfingers if preferred.
For Garnishing
- Cocoa Powder (1 tbsp for dusting) – Adds a final touch of bitterness and elegance to your presentation.
These tiramisu brownies are an unforgettable dessert that will have everyone coming back for seconds!
Step‑by‑Step Instructions for Tiramisu Brownies
Step 1: Preheat Oven and Prepare Pan
Begin by preheating your oven to 350°F (175°C). While the oven heats, line a 9×9 inch baking pan with parchment paper, allowing some paper to hang over the edges. This will help with easy removal later. Set the prepared pan aside, ready to hold your luscious tiramisu brownies.
Step 2: Create Chocolate Mixture
In a heatproof bowl, combine 100g of dark or semi-sweet chocolate with 50g of unsweetened cocoa powder. Melt these together over a double boiler or microwave, stirring frequently until smooth. Once melted and glossy, set this rich chocolate mixture aside to cool slightly, ensuring it’s ready for the next steps.
Step 3: Brown the Butter
In a saucepan, melt 230g of unsalted butter over medium heat. Continue cooking it until it turns golden brown and develops a nutty aroma, about 5-7 minutes. Once browned, pour the butter over the prepared chocolate mixture, stirring until the chocolate is completely melted and well combined.
Step 4: Whisk the Eggs and Sugars
In a separate bowl, whisk together 4 large eggs with 150g of granulated sugar and 100g of brown sugar until the mixture becomes pale and frothy, roughly 3-4 minutes. This step adds airiness to your tiramisu brownies. Gently mix in the cooled chocolate and browned butter mixture until fully incorporated.
Step 5: Fold in the Flour
Sift 100g of all-purpose flour into the chocolate-egg mixture. Carefully fold the flour into the batter using a rubber spatula until just combined. Be cautious not to overmix; the goal is a fudgy texture that’s perfect for your tiramisu brownies.
Step 6: Bake the Brownies
Pour the brownie batter into your prepared baking pan, smoothing the top with a spatula. Bake for 28-30 minutes, until a toothpick inserted into the center comes out mostly clean with a few moist crumbs. Keep an eye on the timer to ensure your brownies remain rich and fudgy.
Step 7: Cool the Brownies
Once baked, remove the brownies from the oven and place them on a wire rack to cool completely, about 1 hour. This cooling period is crucial as it prevents the mascarpone topping from melting when added later.
Step 8: Whip the Mascarpone Mixture
In a large mixing bowl, beat 250g of mascarpone cheese until smooth. Gradually add 200g of whipping cream, 50g of powdered sugar, and ½ teaspoon of vanilla extract. Whip this mixture together until it thickens and forms soft peaks, creating a luscious cream layer for your tiramisu brownies.
Step 9: Soak the Ladyfingers
In a shallow dish, combine 2 teaspoons of espresso powder with 150g of hot water and 1 tablespoon of coffee liqueur (if using). Dip each of the 12 ladyfingers into the espresso mixture, soaking them quickly on both sides. Avoid oversoaking to keep them from becoming mushy.
Step 10: Assemble the Layers
Place the soaked ladyfingers in a single layer atop the cooled brownies, ensuring even coverage. Spread the whipped mascarpone mixture generously over the ladyfingers, smoothing it into an even layer. This marries the flavors beautifully for your tiramisu brownies.
Step 11: Chill and Set
Cover the assembled tiramisu brownies with plastic wrap and refrigerate for at least 1 hour. This allows the flavors to meld and the mascarpone cream to set, making for a decadent dessert.
Step 12: Dust and Serve
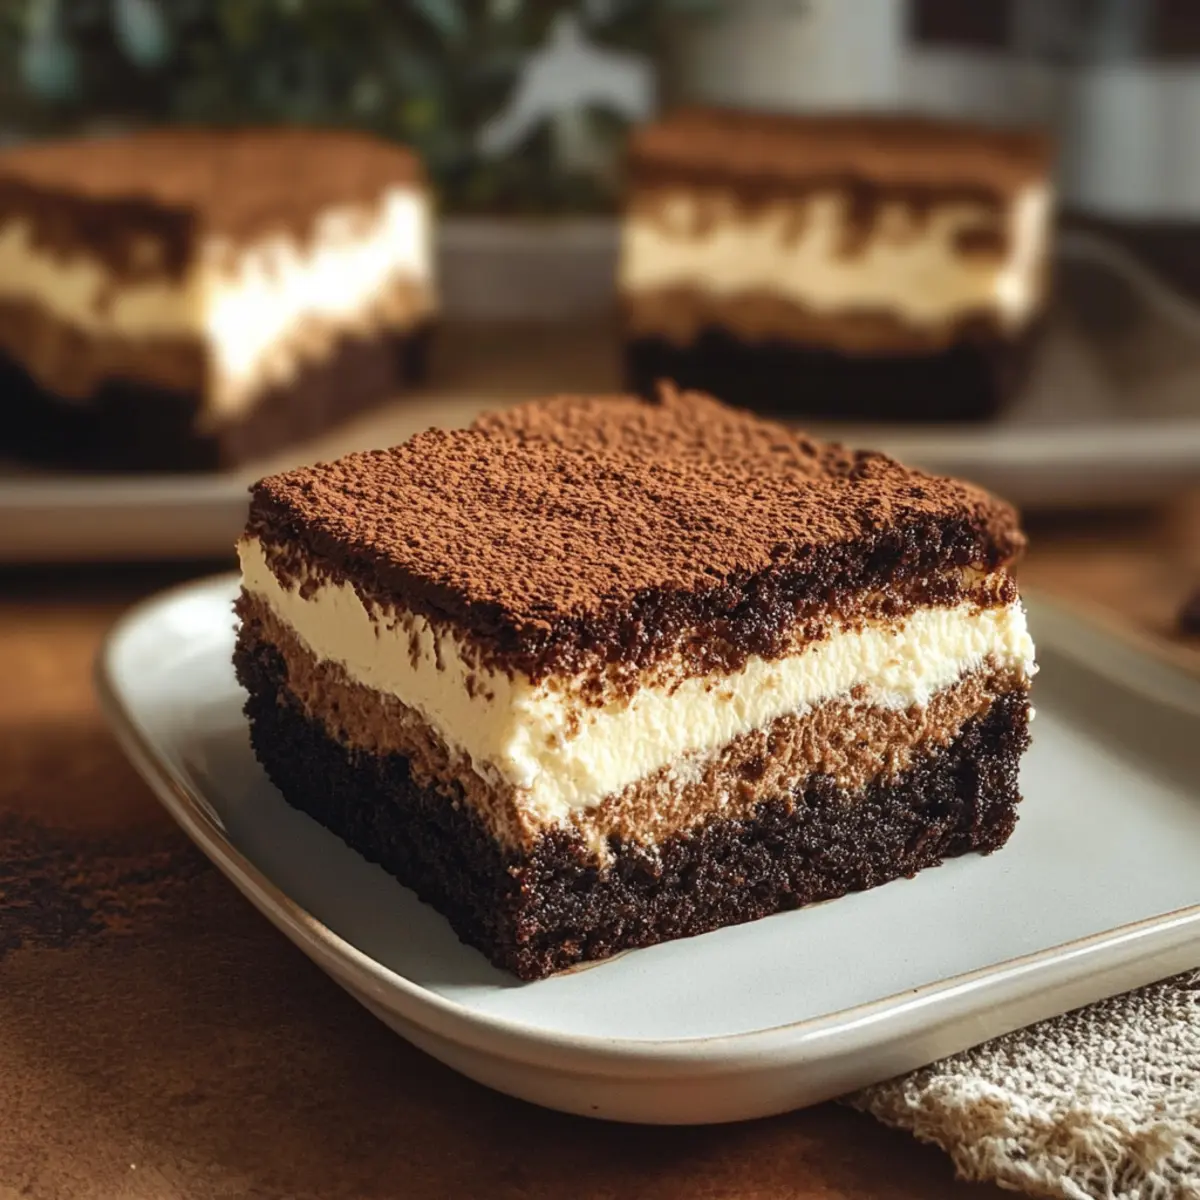
Just before serving, remove the brownies from the fridge and dust the top with cocoa powder for that classic tiramisu touch. Use the parchment paper to lift the brownies out of the pan, slice them into squares, and enjoy every rich bite of these indulgent tiramisu brownies!
Make Ahead Options
These fudgy tiramisu brownies are perfect for meal prep enthusiasts! You can prepare the brownie base up to 24 hours in advance by baking them, cooling, and tightly wrapping them in plastic wrap before refrigerating. The mascarpone layer can be made up to 3 days ahead—just whip it and store it separately in the fridge. When you’re ready to assemble, simply soak the ladyfingers in the espresso mixture and layer them atop the cooled brownies, then spread the mascarpone cream and chill everything together. This method ensures you’ll enjoy delicious tiramisu brownies with minimal last-minute effort while maintaining their delightful texture and rich flavor.
How to Store and Freeze Tiramisu Brownies
-
Fridge: Store your tiramisu brownies in an airtight container in the fridge for up to 3 days. This helps maintain their luscious layers and fudgy texture.
-
Freezer: For longer storage, wrap each brownie individually in plastic wrap and place them in a freezer-safe container. They can be frozen for up to 2 months.
-
Reheating: To enjoy, simply thaw the brownies in the fridge overnight and allow them to come to room temperature before serving for the best taste and texture.
-
Layer Preservation: For optimal enjoyment, avoid stacking the brownies to keep the mascarpone layer intact while stored.
Tiramisu Brownies Variations & Substitutions
Feel free to elevate these delightful tiramisu brownies with creative twists that excite your taste buds!
-
Milk Chocolate: Swap dark chocolate for milk chocolate for a sweeter, creamier version. Kids often love this variation!
-
Coffee-Free: For a caffeine-free treat, replace espresso powder with your favorite decaf coffee alternative. It keeps the coffee flavor without the buzz.
-
Gluten-Free: Use a 1:1 gluten-free flour blend in place of all-purpose flour. Just like magic, everyone can enjoy these brownies!
-
Nutty Flavor: Add chopped hazelnuts or walnuts to the brownie batter for an added crunch and flavor complexity. It’s like a surprise in every bite!
-
Flavor Infusion: Incorporate 1 teaspoon of almond extract into the mascarpone layer. This subtle twist brings a new depth of flavor that pairs wonderfully with chocolate.
-
Amaretto Splash: Instead of coffee liqueur, opt for amaretto to give a sweet, nutty flavor. Just imagine the depth it brings!
-
Spice It Up: Add a pinch of cinnamon or nutmeg to the brownie batter for a warm, fragrant touch. This twist is perfect for cozy gatherings!
-
Fruity Addition: Layer sliced strawberries or raspberries between the brownies and mascarpone for a fresh, fruity contrast. It not only looks gorgeous but tastes amazing too!
Looking for other unique brownie recipes? Check out these delicious Pumpkin Swirl Brownies and the festive Patriotic Star Brownies to add some variety to your dessert repertoire!
What to Serve with Fudgy Tiramisu Brownies?
Elevate your dessert experience with delightful accompaniments that complement the decadent layers of these fudgy tiramisu brownies.
-
Rich Vanilla Ice Cream: The creamy sweetness of vanilla ice cream contrasts beautifully with the fudgy richness, creating a delightful cold and warm combination.
-
Fresh Berries: Juicy raspberries or strawberries add a burst of freshness and acidity, perfectly balancing the heavy chocolate and mascarpone.
-
Espresso or Dark Coffee: A strong cup of coffee enhances the rich espresso flavors in the brownies, providing a sophisticated edge to your dessert experience.
-
Whipped Cream: Light and airy whipped cream adds a lovely texture while enriching the dessert’s flavor, making every bite even more indulgent.
-
Chocolate Sauce Drizzle: A drizzle of warm chocolate sauce can enhance richness, bringing out the brownie flavor while adding a decadent touch.
-
Nutty Cookies: Pair your tiramisu brownies with a crunchy nut cookie for a delightful texture contrast. Whether it’s a pecan sandie or almond tuile, they add a pleasant crunch.
-
Mint Chocolate Chip Milkshake: For a fun twist, consider serving with a mint chocolate chip milkshake. It’s refreshing and ensures a deliciously indulgent end to your meal.
-
Caramel Sauce: A touch of sweet caramel sauce drizzled on top adds a new layer of flavor that melds harmoniously with the brownies’ richness.
Expert Tips for Tiramisu Brownies
-
Chill Wisely: Ensure you chill the brownies only until the mascarpone cream sets, as serving them at room temperature maintains the best texture.
-
Soaking Technique: Avoid oversoaking the ladyfingers—just a quick dip is enough to prevent a mushy texture in your tiramisu brownies.
-
Cooling Time: Allow the brownies to cool evenly before adding the mascarpone topping. This step is crucial to prevent melting and achieve a beautiful finish.
-
Egg Temperature: Using room temperature eggs aids in better mixing, giving your brownies a smoother batter and a richer texture.
-
Customization Options: Feel free to experiment with flavored extracts or different types of chocolate to personalize your tiramisu brownies and make them uniquely yours!
Tiramisu Brownies Recipe FAQs
What type of chocolate should I use for the brownie base?
I recommend using dark or semi-sweet chocolate for a rich, decadent flavor. If you prefer a sweeter dessert, you can opt for milk chocolate instead. Be sure to check the baking aisle for high-quality chocolate that will melt beautifully when combined with the butter and cocoa.
How should I store my tiramisu brownies?
Store your tiramisu brownies in an airtight container in the fridge for up to 3 days. This will help keep their luscious layers and fudgy texture intact. When you’re ready to serve, allow them to come to room temperature for the best experience.
Can I freeze tiramisu brownies?
Absolutely! For freezing, wrap each brownie individually in plastic wrap and place them in a freezer-safe container. They can be stored in the freezer for up to 2 months. When you’re ready to enjoy, simply thaw them in the fridge overnight before serving.
What if my mascarpone cream doesn’t whip properly?
If you find that your mascarpone cream isn’t whipping, make sure both the mascarpone and whipping cream are cold. Sometimes, using a chilled mixing bowl can also help. Start whipping slowly and increase the speed gradually. If it still doesn’t whip, consider adding a tablespoon of corn starch to stabilize the cream.
Can I use substitutes for any allergens?
Certainly! You can use gluten-free flour for a gluten-free version of the brownies. If you’re avoiding dairy, substitute mascarpone with a dairy-free cream cheese and choose a plant-based whipping cream. Always read the labels and adjust according to your dietary needs to enjoy these delicious tiramisu brownies safely.
How do I know when the brownies are done baking?
To check if your brownies are done, insert a toothpick into the center. It should come out mostly clean with a few moist crumbs attached, which typically takes about 28-30 minutes of baking. Remember, a little underbaking is ideal for that fudgy texture!
Fudgy Tiramisu Brownies That Will Wow Your Taste Buds
Ingredients
Equipment
Method
- Preheat your oven to 350°F (175°C) and line a 9x9 inch baking pan with parchment paper.
- Combine 100g of dark or semi-sweet chocolate and 50g of cocoa powder in a heatproof bowl and melt over a double boiler or microwave, stirring frequently until smooth.
- In a saucepan, melt 230g of unsalted butter over medium heat until it turns golden brown and develops a nutty aroma, about 5-7 minutes. Pour over the chocolate mixture and stir to combine.
- Whisk together 4 large eggs with 150g of granulated sugar and 100g of brown sugar until frothy, about 3-4 minutes. Then mix in the cooled chocolate-butter mixture.
- Fold in 100g of all-purpose flour into the batter until just combined, being careful not to overmix.
- Pour the batter into the prepared baking pan and bake for 28-30 minutes, until a toothpick comes out mostly clean with a few moist crumbs.
- Remove the brownies and let cool on a wire rack for about 1 hour.
- Beat 250g of mascarpone cheese until smooth and gradually add 200g of whipping cream, 50g of powdered sugar, and 0.5 tsp of vanilla extract until thick.
- In a shallow dish, combine 2 tsp of espresso powder with 150g of hot water and 1 tbsp of coffee liqueur (if using). Dip ladyfingers quickly into the mixture.
- Place the soaked ladyfingers atop the cooled brownies, then spread the whipped mascarpone mixture over them.
- Cover and refrigerate for at least 1 hour to let the flavors meld and the cream set.
- Dust the top with cocoa powder before serving, slice into squares, and enjoy.
Leave a Reply