
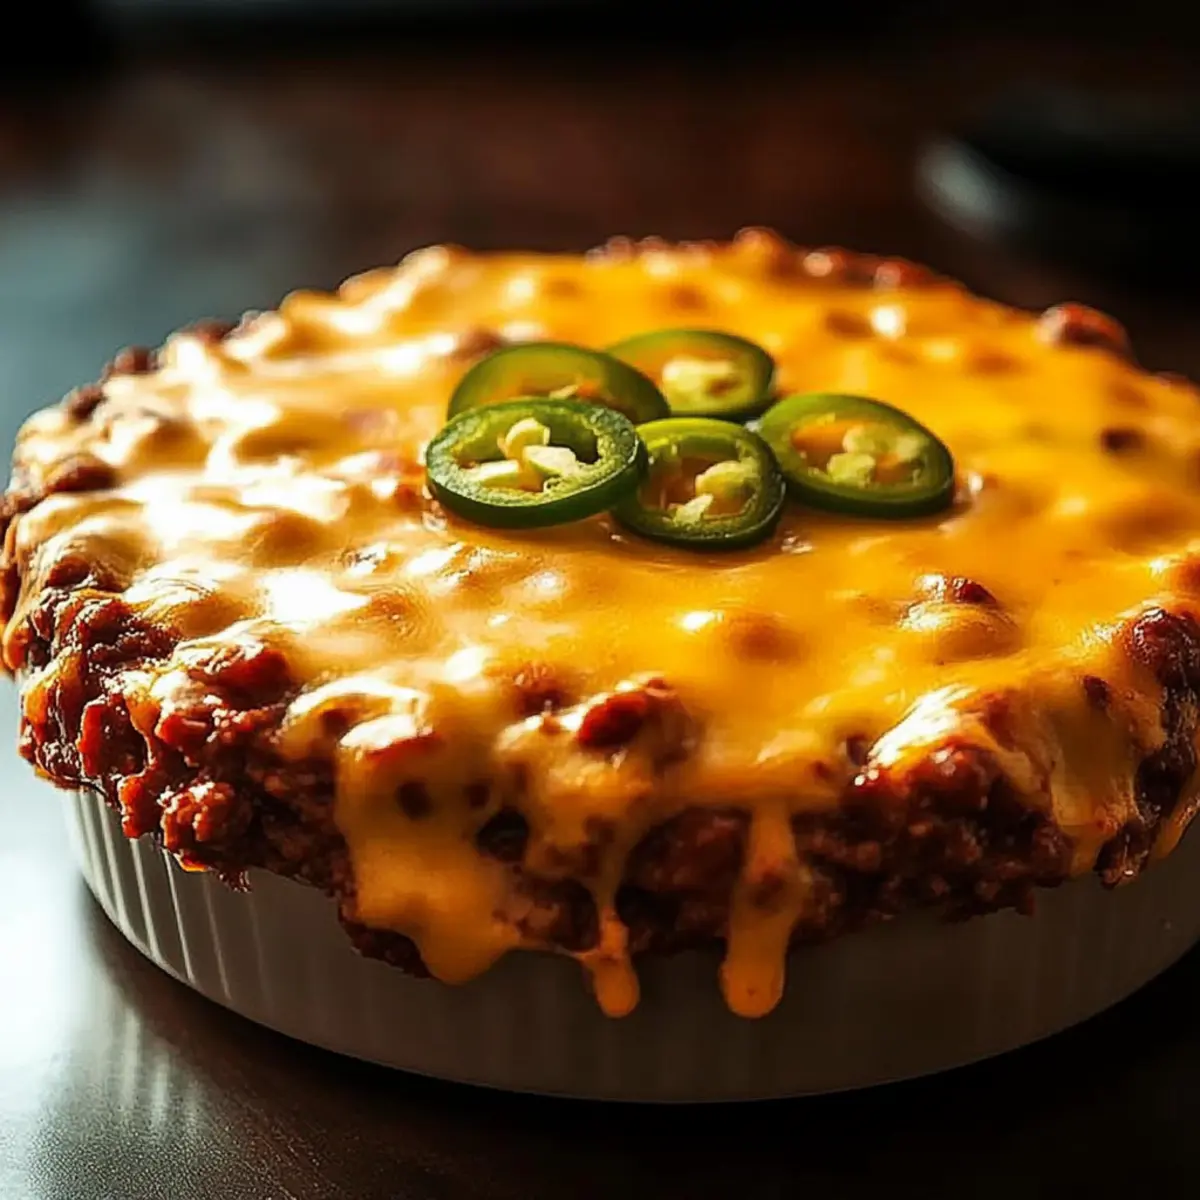
The aroma of warm, cheesy goodness wafts through the air, beckoning everyone to gather around. This Easy Cheesy Chili Dip is my go-to for game day gatherings, bringing a hearty punch to any snack table. Packed with creamy sharp cheddar and savory ground beef, this dip delivers comfort and flavor that simply can’t be beaten. What I love most is its versatility—prepping it ahead of time means less stress while entertaining, and it’s endlessly forgiving when it comes to ingredient swaps. Whether you’re dipping crispy tortilla chips or fresh veggies, this crowd-pleaser is sure to spark joy and connection among friends and family. Are you ready to make a dip that’s sure to become a staple in your cooking repertoire?
Why Is This Cheesy Chili Dip a Must-Try?
Satisfying, Crowd-Pleasing Flavor: This dip combines creamy sharp cheddar with savory ground beef, creating an irresistible blend of tastes that will have everyone raving.
Effortless Preparation: With just a few simple steps, you can whip up this delicious dip in no time, letting you focus on enjoying the game or gathering.
Versatile Options: Feel free to customize with your favorite toppings or substitutions, like swapping out ground beef for plant-based meat or adding extra spices for a kick.
Make-Ahead Convenience: Prepare this cheesy delight in advance to save time on those busy game days—just heat and serve for a hassle-free hit!
Perfect for Any Occasion: Whether it’s a tailgate, house party, or a cozy movie night, this dip is sure to be a hit with any crowd. For even more cheesy goodness, check out Cheesy Ground Beef Enchilada Skillet.
Cheesy Chili Dip Ingredients
For the Base
• Ground Beef – Adds heartiness and flavor; substitute with ground turkey or a plant-based option for a lighter dip.
• Canned Chili – Provides a flavorful foundation; opt for a low-fat version to keep it lighter.
• Cream Cheese – Creates a smooth and creamy texture; essential for binding, no substitutions recommended.
For the Cheese
• Sharp Cheddar Cheese – Offers a rich, melty goodness; use mild cheddar if you prefer a gentler flavor.
For the Spice
• Fresh Jalapeños – Infuses a fresh kick of heat; replace with pickled jalapeños for a tangy twist.
This cheesy chili dip is the ultimate game day snack that warms hearts and brings people together!
Step‑by‑Step Instructions for Easy Cheesy Chili Dip
Step 1: Brown the Beef
In a large skillet, heat a drizzle of oil over medium heat. Add the ground beef and cook for about 8-10 minutes, stirring frequently until it’s browned and no longer pink. Make sure to break up any chunks for even cooking. Once done, drain excess fat to create a healthier base for your cheesy chili dip.
Step 2: Add the Chili
Next, stir in the canned chili with the browned beef, mixing well to combine. Let this mixture simmer over medium heat for 5 minutes, allowing the flavors to meld together. You’ll know it’s ready when it bubbles gently and emits a delightful aroma that fills your kitchen.
Step 3: Incorporate the Cream Cheese
Reduce the heat to low and add the cream cheese to the skillet. Stir diligently for 3-4 minutes until the cream cheese fully melts and blends into the beef and chili mixture. The goal here is a smooth, creamy texture that enhances your cheesy chili dip.
Step 4: Melt the Cheddar
Now it’s time to add the star of this cheesy chili dip: shredded sharp cheddar cheese. Gradually sprinkle it into the skillet, mixing continuously for around 2-3 minutes until the cheese is completely melted and the dip is a luscious, gooey delight. You should see a rich, creamy consistency that’s hard to resist!
Step 5: Fold in Jalapeños
Once the cheese is melted, fold in the fresh jalapeños, adjusting the amount based on your spice preference. Stir them into the dip for about 1-2 minutes until well incorporated. The fresh jalapeños add a zingy freshness that complements the creamy richness of the dip beautifully.
Step 6: Serve Warm
Transfer your delicious cheesy chili dip to a warm serving bowl. Pair it with tortilla chips, fresh veggies, or your favorite dippers. Serve immediately, while it’s bubbling and cheesy, ensuring that everyone can dive into this irresistible snack at your game day gathering.
What to Serve with Easy Cheesy Chili Dip?
The scent of warm, cheesy delight fills the air, inviting family and friends to indulge in an unforgettable snacking experience.
-
Crunchy Tortilla Chips: Their saltiness and crunch elevate the creamy dip, creating a delightful contrast that keeps everyone reaching for more.
-
Fresh Veggies: Crisp slices of bell peppers, cucumbers, or carrot sticks add a refreshing element, balancing the richness of the dip.
-
Savory Crackers: Opt for hearty, whole-grain crackers to scoop up the dip, bringing their nutty flavor into the mix for an exciting twist.
-
Baked Potato Skins: These crispy treasures make for a hearty base, inviting generous spoonfuls of cheesy chili dip that are simply irresistible.
-
Sweet and Spicy Salsa: A small bowl of salsa can provide a tantalizing contrast, mingling its zesty flavors with the warm, creamy dip.
-
Crispy Onion Rings: Their crunchy texture pairs beautifully with the smooth dip, adding a delightful bite to your game day spread.
-
Light Beer or Cider: A refreshing drink can enhance the overall flavor experience, cutting through the richness of the dip and keeping things balanced.
These delightful pairings promise to create a cheerful and satisfying gathering around your Easy Cheesy Chili Dip!
Make Ahead Options
Preparing your Easy Cheesy Chili Dip ahead of time is a fantastic way to save time and reduce stress on game day! You can cook the ground beef and mix it with the canned chili up to 24 hours in advance—just refrigerate it in an airtight container. You can also prepare the cream cheese and cheese mixture, but hold off on combining with jalapeños until you’re ready to heat it. When it’s time to serve, simply melt the cheese mixture into the beef and chili combination over low heat, and fold in the fresh jalapeños just before serving for that perfect fresh kick. This way, you’re guaranteed a dip that’s just as delicious and warm as if you made it all in one go!
Expert Tips for the Best Cheesy Chili Dip
-
Grease Control: Drain excess fat after browning beef. This ensures a smoother dip without unwanted grease pooling at the top.
-
Flavor Boost: Enhance the dip by adding a teaspoon of your favorite taco seasoning while mixing the chili and beef. This elevates the flavor profile of the cheesy chili dip.
-
Freshness Matters: Use fresh jalapeños for a bright, zesty kick. If you prefer less heat, opt for pickled jalapeños instead, which add a tangy twist without overwhelming spice.
-
Keep it Creamy: For a velvety texture, add cream cheese gradually while stirring. This helps avoid any lumps and ensures a smooth, creamy cheesy chili dip.
-
Reheat with Care: If you have leftovers, gently reheat in the oven at 350°F for 10-15 minutes. Stir occasionally to maintain the dip’s creamy consistency.
How to Store and Freeze Cheesy Chili Dip
Fridge: Store leftovers in an airtight container in the fridge for up to 4 days. Make sure it’s cooled completely before sealing to maintain freshness.
Freezer: To freeze, place the cooled cheesy chili dip in a freezer-safe container, leaving some space for expansion. It can be frozen for up to 3 months.
Reheating: For best results, thaw overnight in the fridge and reheat in the oven at 350°F for about 15-20 minutes until warmed through. Stir occasionally for even heating.
Make-Ahead Tips: Prepare the dip a day ahead, storing it in the fridge before serving. Simply reheat just before your gathering for a delicious, stress-free snack!
Cheesy Chili Dip Variations & Substitutions
Feel free to let your creativity shine in the kitchen by customizing this dip to suit your taste preferences and dietary needs!
-
Veggie-Packed: Swap out the ground beef for black beans or kidney beans, adding a wholesome plant-based option full of fiber. This twist creates a hearty taste that’s still satisfying and delicious.
-
Kick it Up: For heat lovers, add diced serrano peppers or a sprinkle of cayenne pepper for an extra kick. The added spices can create a vibrant background for the creamy goodness, elevating flavor to new heights.
-
Creamy and Dreamy: Substitute regular cream cheese with a flavored cream cheese (like chive or garlic) for a unique twist. It adds a layer of flavor that can wow your guests—perfect for any gathering!
-
Smoky Flavor Boost: Mix in a teaspoon of smoked paprika or add crispy bacon bits for a smoky depth. These ingredients enhance the overall complexity, inviting everyone to take another dip.
-
Cheddar Swap: If sharp cheddar isn’t your favorite, try using pepper jack for an extra spicy, creamy melt. This variation will keep your taste buds guessing while retaining that irresistible melt.
-
Zesty Alternative: Use a zesty ranch dressing in place of some cream cheese for a tangy twist that blends perfectly with the chili. Imagine the blend of ranch herbs and spices enhancing the dip’s flavor profile!
-
Colorful Addition: Add diced tomatoes or corn for a pop of color and sweetness. These add-ins not only brighten up the dish but also create a vibrant texture contrast that is delightful for dipping.
For even more cheesy inspiration, don’t forget to explore other recipes like Cheesy Ground Beef Enchilada Skillet and Cheesy Garlic Chicken Wraps!
Easy Cheesy Chili Dip Recipe FAQs
What type of cheese is best for this dip?
Absolutely! Sharp cheddar cheese is the star of this Easy Cheesy Chili Dip, providing a rich, melty texture and bold flavor. If you prefer a milder taste, you can easily swap it for mild cheddar or even a blend of cheeses for added complexity.
How should I store leftovers?
Store any leftovers in an airtight container in the fridge for up to 4 days. Make sure to allow the dip to cool completely before sealing to maintain its freshness. If you find yourself with more than you can eat, don’t worry—I’ve got freezing instructions for you next!
Can I freeze this cheesy chili dip?
Yes, you can definitely freeze your delicious dip! To do this, allow the cheesy chili dip to cool completely, then transfer it to a freezer-safe container, leaving a little space for expansion. It can be frozen for up to 3 months. When you’re ready to enjoy it again, thaw it overnight in the fridge, then reheat in the oven at 350°F for 15-20 minutes, stirring occasionally for even warmth.
What if my dip is too greasy?
No worries! If your dip turns out greasier than you’d like, the key is to thoroughly drain the ground beef after browning it. To absorb excess grease, consider adding a small amount of cornstarch or flour while mixing it with the chili. This will help create a smoother, creamier consistency without the unwanted oil.
Are there any dietary considerations for this dip?
Very! If you’re catering to specific dietary needs, you can make this dip vegetarian by omitting the ground beef and substituting it with black beans or lentils for added protein. For those with dairy allergies, try using cashew cream in place of cream cheese and a dairy-free cheese alternative. Enjoy customizing this Easy Cheesy Chili Dip to fit your guests’ preferences!
Can I prepare this dip ahead of time?
Certainly! I often prepare this dip a day ahead to save time. Just follow all the steps up until adding the cheese, let it cool completely, and store it in the fridge. Then, on game day, simply reheat it with the cheese until it’s melted and bubbling, and you’re good to go!
Creamy Cheesy Chili Dip: Your Game Day Must-Have Snack
Ingredients
Equipment
Method
- In a large skillet, heat a drizzle of oil over medium heat. Add the ground beef and cook for about 8-10 minutes, stirring frequently until browned.
- Stir in the canned chili and let it simmer over medium heat for 5 minutes.
- Reduce heat to low and add the cream cheese, stirring for 3-4 minutes until fully melted.
- Gradually sprinkle in the shredded cheddar cheese, mixing for around 2-3 minutes until melted.
- Fold in the fresh jalapeños, stirring for 1-2 minutes until well incorporated.
- Transfer to a warm serving bowl and serve immediately with tortilla chips or fresh veggies.
Leave a Reply