
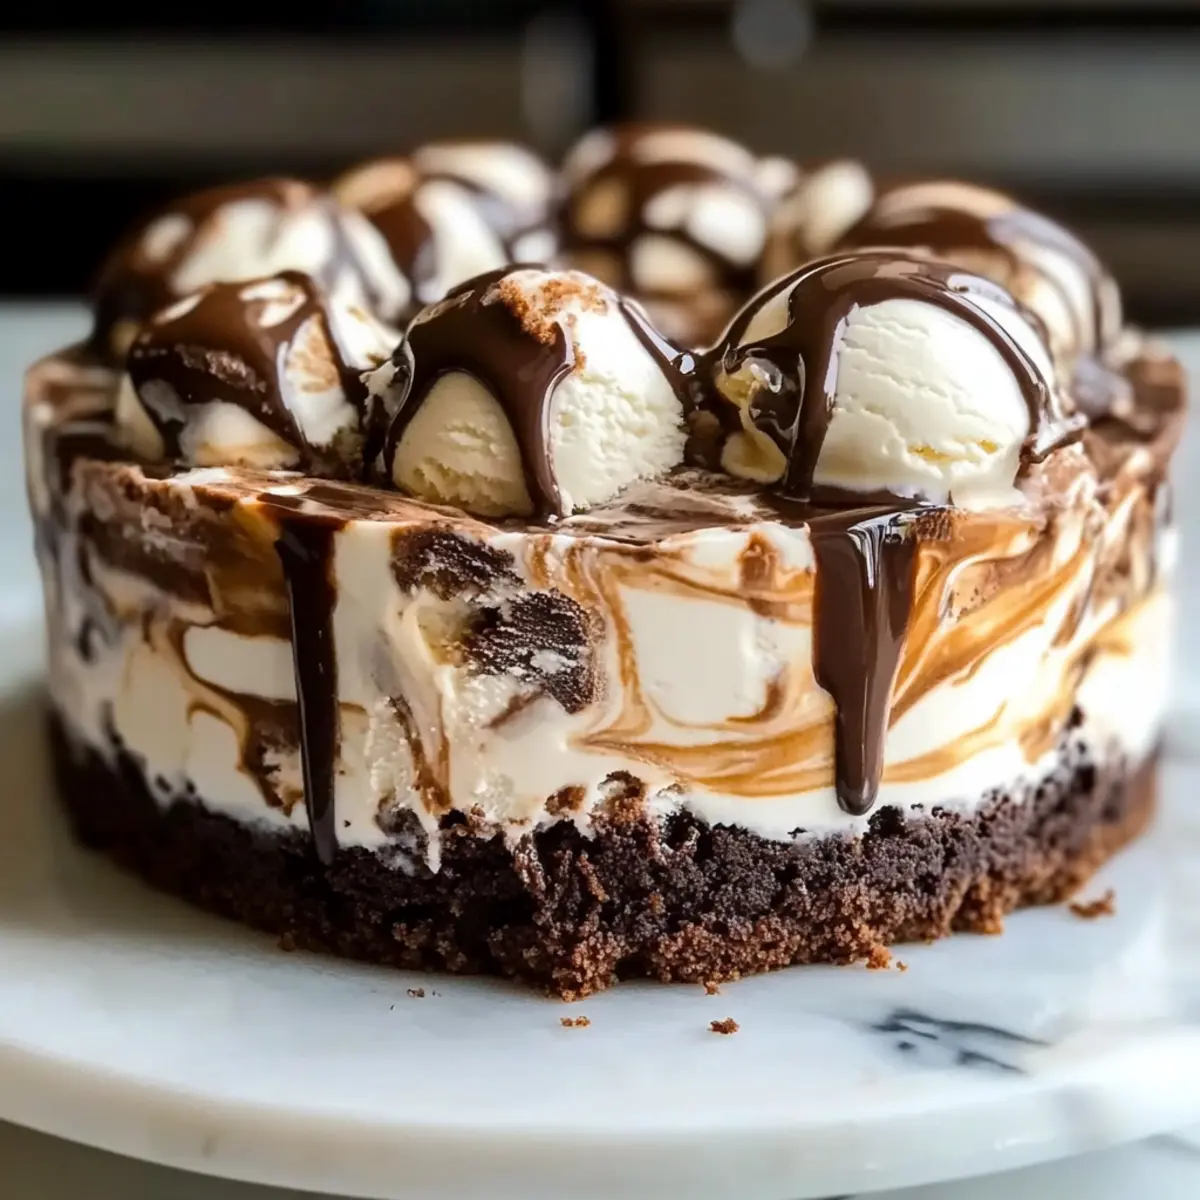
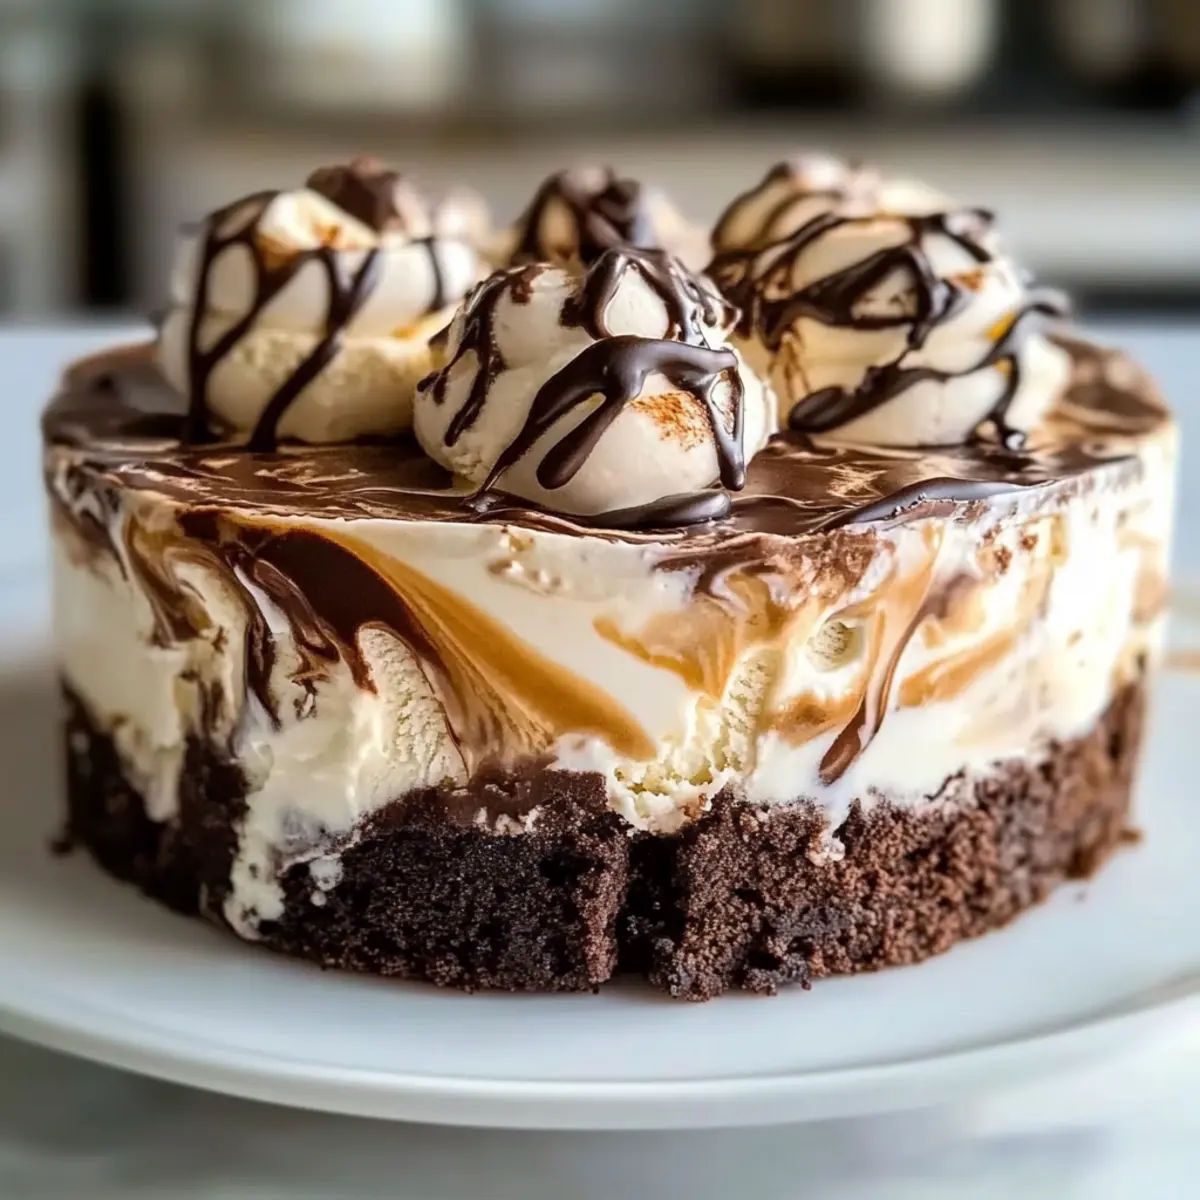
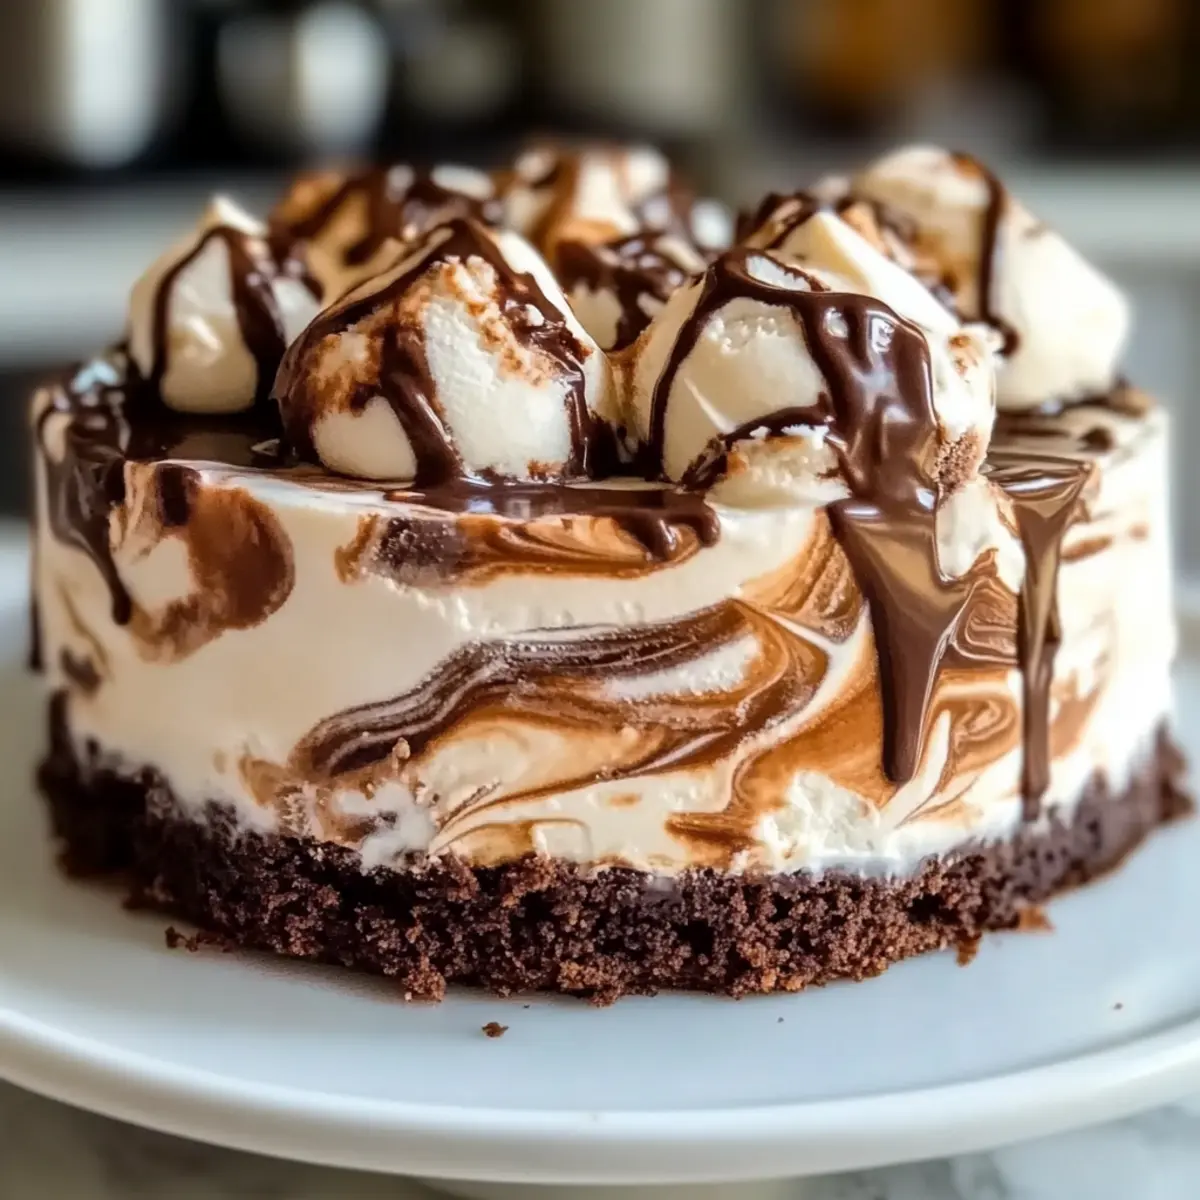
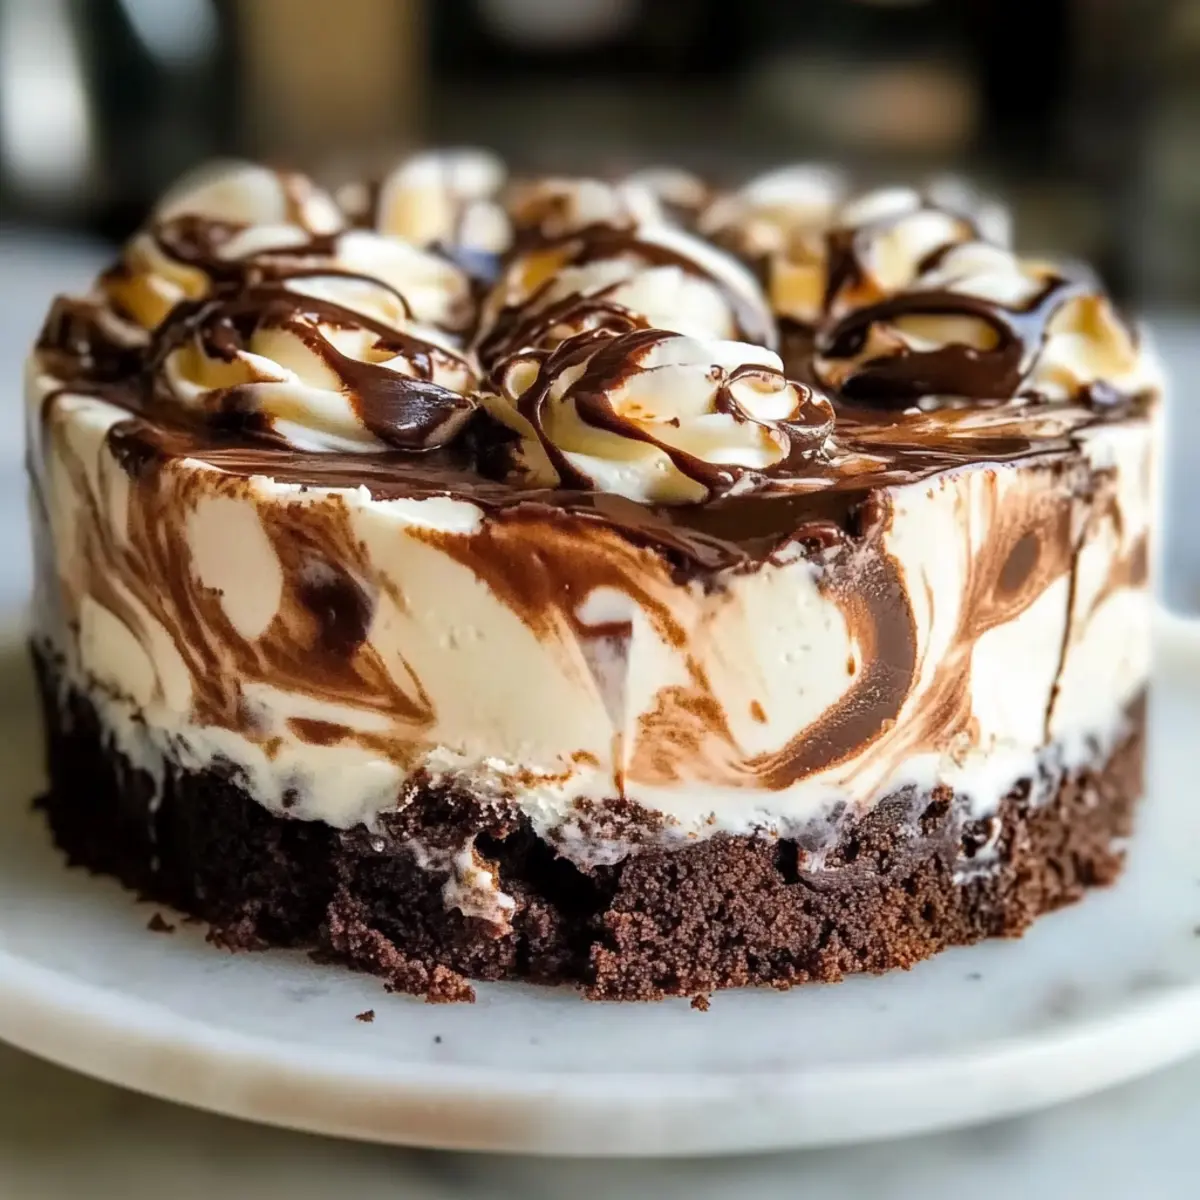
As I stood in the kitchen with the aroma of freshly brewed coffee wafting through the air, inspiration struck. Suddenly, I envisioned a deliciously indulgent dessert that would sweep any coffee lover right off their feet: Coffee Ice Cream Cake. With a rich brownie base and layers of creamy coffee and vanilla ice creams, this delightful treat is not only a visual masterpiece but also an irresistible crowd-pleaser. What makes it even better? It’s customizable—switch up the flavors with chocolate or caramel, making it a fun dessert for any occasion! Whether you’re hosting a birthday bash or simply treating yourself on a cozy weekend, this cake promises to elevate your dessert game while being gluten-free friendly. Are you ready to make your friends and family swoon with each satisfying slice? Let’s dive into this decadent creation!
Why is Coffee Ice Cream Cake so irresistible?
Decadent Layers: The rich brownie base perfectly complements the creamy coffee and vanilla ice creams, creating an indulgence that’s hard to resist.
Customizable Flavors: Mix it up! With a range of flavor options—like chocolate or caramel—you can personalize this dessert to suit any taste.
Perfect Party Dessert: Whether it’s a birthday or family gathering, this stunning cake is sure to impress and keep guests coming back for more.
Simple Preparation: With quick prep steps and minimal fuss, you’ll have this delectable treat ready to serve in no time.
Gluten-Free Option: Cater to everyone! It’s easy to make a gluten-free version by swapping in a baking blend for the brownie base.
For more delightful desserts, try the luscious Coconut Cloud Cake or the classic Boston Cream Pie for your next gathering!
Coffee Ice Cream Cake Ingredients
• Here’s everything you need to create this dreamy dessert.
For the Brownie Base
- Brownie Mix – Provides the cake’s rich and dense foundation; use a homemade recipe or a store-bought mix for convenience.
- Gluten-Free Flour – Optional substitute for the brownie mix to create a gluten-free version; ensure it’s a baking blend for the best results.
For the Ice Cream Layers
- Coffee Ice Cream – Main flavor profile that contributes creaminess and a deep coffee taste; swap it with chocolate or caramel-flavored ice cream for a twist.
- Vanilla Ice Cream – Balances out the strong coffee flavor with sweetness; feel free to experiment with other ice cream flavors for variety.
For the Swirl
- Fudge Swirl – Enhances the sweetness and adds extra texture to the ice cream layers; you can also opt for hot fudge or chocolate syrup for a delicious swirl.
Get ready to delight your family and friends with this show-stopping Coffee Ice Cream Cake that caters to all tastes!
Step‑by‑Step Instructions for Coffee Ice Cream Cake
Step 1: Preheat and Prepare
Begin by preheating your oven according to the brownie mix instructions, typically around 350°F (175°C). While the oven warms up, take an 8-inch cake pan and grease it lightly, or line it with parchment paper for easy removal later. This step ensures your Coffee Ice Cream Cake has a perfect base to build upon.
Step 2: Make the Brownie Base
Prepare the brownie mix according to the package instructions, incorporating any optional ingredients like eggs or oil. Stir until just combined; be careful not to overmix. Pour the batter into the prepared cake pan, smoothing the top with a spatula. Bake in the preheated oven for 25-30 minutes, or until a toothpick inserted in the center comes out clean.
Step 3: Cool the Brownies
Once the brownies are done baking, remove them from the oven and allow them to cool completely in the pan. This usually takes about 30 minutes. Cooling is crucial, as hot brownies will mix with the ice cream layers and create a melty mess, ruining your beautiful Coffee Ice Cream Cake.
Step 4: Layer Coffee Ice Cream
After the brownies have cooled, take the coffee ice cream out of the freezer and let it soften for about 10 minutes. Once it’s scoopable, layer the coffee ice cream evenly over the cooled brownies, smoothing it out with a spatula. This step adds the delicious, creamy coffee flavor that pairs perfectly with the brownie base.
Step 5: Add Vanilla Ice Cream and Fudge
Next, dollop vanilla ice cream over the coffee ice cream layer. Use a spatula to gently spread it, creating a marbled effect as you swirl in fudge sauce. Aim for an artistic blend of colors and flavors that will elevate your Coffee Ice Cream Cake both in taste and in presentation.
Step 6: Freeze Until Solid
Once the layers are beautifully swirled, cover the cake pan with plastic wrap or aluminum foil. Place the assembled cake in the freezer and let it freeze until solid, ideally for at least 4-6 hours, or overnight. This ensures that your cake is firm enough to slice without falling apart.
Step 7: Slice and Serve
Before serving, remove the Coffee Ice Cream Cake from the freezer and let it sit at room temperature for about 5 minutes to soften slightly. This makes slicing much easier. Use a sharp knife to cut into wedges, and serve immediately for a delightful dessert experience!
What to Serve with Coffee Ice Cream Cake
Indulging in a slice of this creamy, decadent dessert opens the door to vibrant pairings that elevate your dining experience.
-
Fresh Berries: Juicy strawberries or blueberries offer a refreshing contrast to the rich flavors, brightening each bite. These vibrant fruits add color and a sweet-tart zing, making every piece a little party on your plate.
-
Chocolate Sauce: A drizzle of warm chocolate sauce creates an extra layer of indulgence and enhances the cake’s flavors beautifully. The gooey, rich texture complements the creamy ice cream and fudgy brownie base perfectly.
-
Mint Leaves: A few sprigs of fresh mint not only add a splash of color to the plate but also offer a light and refreshing flavor contrast. The fragrant herb complements the coffee notes beautifully, providing a delightful pop.
-
Espresso Shot: Kick up the coffee flavor by serving a small shot of espresso on the side. The bold, intense caffeine boost enhances the dessert experience, making it a true delight for caffeine lovers.
-
Whipped Cream: Light and airy whipped cream adds an extra layer of sweetness and a fluffy texture that contrasts perfectly with the rich cake. Consider topping each slice with a dollop for a charming presentation.
-
Vanilla Ice Cream: For the ultimate ice cream experience, pair your Coffee Ice Cream Cake with a scoop of classic vanilla ice cream. Its creamy sweetness will enhance the flavors, making every bite even more delightful.
-
Caramel Sauce: A drizzle of rich caramel adds a touch of sweetness that balances the coffee’s bitterness. The gooey texture brings warmth, creating a cozy feeling perfect for dessert gatherings.
By exploring these exciting combinations, you’ll create a symphony of flavors and colors that will surely impress your guests.
How to Store and Freeze Coffee Ice Cream Cake
Fridge: Keep the Coffee Ice Cream Cake tightly wrapped in plastic wrap or an airtight container to prevent freezer burn; it can last up to 1 week in the fridge.
Freezer: For longer storage, the cake can be frozen for up to 2 weeks. Wrap it securely in plastic wrap and then aluminum foil to minimize ice crystals.
Reheating: Allow the frozen cake to sit at room temperature for about 5 minutes before slicing for clean cuts. Serve slightly softened for the best texture and flavor experience.
Make-Ahead Tips: You can prepare the Coffee Ice Cream Cake in advance and store it in the freezer—perfect for gatherings or special occasions!
Coffee Ice Cream Cake Variations
Feel free to let your creativity flow and make this recipe uniquely yours with these delicious twists!
-
Chocolate Twist: Replace coffee ice cream with rich chocolate ice cream for a double dose of chocolate indulgence, creating a deep, sweet flavor profile. It’s a chocolate lover’s dream come true!
-
Caramel Drizzle: Add a layer of caramel sauce between the ice cream layers for a luscious sweetness. Not only does it enhance the flavor, but it also adds a beautiful layer to your cake.
-
Mint Chocolate Chip: Swap in mint chocolate chip ice cream for a refreshing twist that adds a burst of minty flavor. This variation is perfect for summer and is sure to be a hit at outdoor gatherings.
-
Fruit Layer: Replace the vanilla ice cream with fruit-flavored sorbet, like strawberry or mango, for a delightful fruity flavor contrast. This twist brings a refreshing touch, perfect for a light dessert option.
-
Nutty Crunch: Add chopped nuts or crushed cookies between the layers for an exciting crunch. This creates a wonderful texture that enhances the creamy ice cream and brownie layers.
-
Spicy Kick: Blend in a teaspoon of cinnamon or a pinch of cayenne pepper for a subtle heat that beautifully complements the coffee flavor. This unexpected twist will surprise and delight your guests!
-
Seasonal Flavors: Experiment with seasonal ice cream flavors, like pumpkin spice in the fall or eggnog in the winter, to keep your dessert exciting year-round. There’s no limit to the creativity you can express!
-
Homemade Ice Cream: For a truly gourmet touch, make your own ice cream at home. You can control the flavors and sweetness, creating a dessert that’s uniquely tailored to your taste. For inspiration, check out this delicious Flourless Orange Cake for a lovely twist on texture!
The possibilities are endless, and each variation promises to deliver the joy of indulgence paired with your own unique twist!
Expert Tips for Coffee Ice Cream Cake
-
Cool Completely: Allow brownies to cool fully before layering ice creams; this prevents melting and messy results.
-
Slice at the Right Time: For clean cuts, slice the cake when it’s slightly frozen. Let it sit at room temperature for a few minutes before serving.
-
Mix with Care: Avoid overmixing the brownie batter to keep the texture light and airy; mix just until ingredients are combined.
-
Customize Flavors: Feel free to experiment with ice cream flavors, like chocolate or mint, for a unique twist on the classic Coffee Ice Cream Cake.
-
Storing Leftovers: Store leftover cake tightly wrapped in the freezer for up to a week; just allow it to sit out briefly before slicing.
Make Ahead Options
With this Coffee Ice Cream Cake, you can take the stress out of dessert preparations! You can prepare the brownie base up to 24 hours in advance; just ensure they are completely cooled before layering. The ice cream layers can be assembled up to 3 days ahead—simply layer the coffee and vanilla ice creams and swirl in the fudge, then tightly cover and freeze. To maintain quality, it’s crucial to avoid prolonged exposure to air by using plastic wrap or aluminum foil. When it’s time to serve, let the cake sit at room temperature for about 5 minutes before slicing for that perfect creamy texture. Enjoy a show-stopping dessert without the last-minute rush!
Coffee Ice Cream Cake Recipe FAQs
What is the best way to select ripe ingredients for my Coffee Ice Cream Cake?
Absolutely! When choosing ice cream, opt for high-quality brands that prioritize natural flavors. For the brownie mix, select one with a rich chocolate flavor that doesn’t contain artificial additives. If using fresh toppings like fruits or nuts, make sure they are at peak ripeness—look for fresh, brightly colored berries without any dark spots for the best taste and visual appeal.
How should I store my Coffee Ice Cream Cake to keep it fresh?
To keep your Coffee Ice Cream Cake fresh, wrap it tightly in plastic wrap or store it in an airtight container. It can last in the freezer for up to 2 weeks. If you’re keeping it in the fridge, make sure it’s tightly covered to prevent freezer burn and maintain its texture for about 1 week.
Can I freeze leftovers of this Coffee Ice Cream Cake?
Absolutely! You can freeze leftover slices of your Coffee Ice Cream Cake for up to 2 weeks. First, wrap each piece tightly in plastic wrap, then in aluminum foil to help prevent ice crystals from forming. When ready to enjoy, just let it sit at room temperature for about 5 minutes before slicing—this makes for cleaner cuts and a better texture.
How can I troubleshoot if my Coffee Ice Cream Cake layers are melting together?
If your cake layers are melting together, it may be due to not allowing the brownies to cool completely before adding the ice cream. Always ensure the brownies are fully cooled—this usually takes about 30 minutes. Additionally, if your ice cream is too soft, try letting it freeze for a bit longer to achieve a firmer consistency before layering it onto the brownies.
Are there any dietary considerations for making this cake, like allergies or pet safety?
Great question! If you’re making this for someone’s dietary needs, you can easily substitute gluten-free flour for the brownie mix to accommodate gluten sensitivities. For those with dairy allergies, consider using non-dairy ice creams like almond or coconut-based varieties. It’s important to keep this delicious treat out of reach of pets since chocolate can be toxic to dogs and cats.
Can I change the flavors of the ice cream in my Coffee Ice Cream Cake?
Very! The beauty of this recipe lies in its versatility. You can swap out the coffee ice cream for flavors like chocolate, caramel, or even fruity options like strawberry or mint. Just remember to balance stronger flavors with something more neutral, like vanilla ice cream, to maintain the cake’s harmonious taste profile. Enjoy experimenting!
Decadent Coffee Ice Cream Cake: Your New Favorite Dessert
Ingredients
Equipment
Method
- Preheat your oven to 350°F (175°C) and grease an 8-inch cake pan.
- Prepare the brownie mix according to package instructions and pour into the cake pan.
- Bake for 25-30 minutes or until a toothpick comes out clean. Allow to cool.
- Layer the softened coffee ice cream over the cooled brownies.
- Dollop vanilla ice cream on top and swirl in fudge sauce.
- Cover with plastic wrap and freeze for at least 4-6 hours.
- Slice and serve after allowing to sit at room temperature for 5 minutes.
Leave a Reply