
I recently found myself in the midst of a dessert dilemma: cravings were shouting for something sweet, yet my schedule was screaming for simplicity. That’s when I decided to whip up a batch of these delightful No-Bake Cheesecake Balls. With just four ingredients, they come together in minutes and require zero oven time—perfect for any busy day! Not only do these creamy bites melt in your mouth with every rich, luscious taste, but they also open the door to endless customization possibilities. You can dress them up with various toppings or flavors, making them a charming addition to any gathering. Are you ready to dive into the world of indulgence without the hassle? Let’s get rolling!

Why Are These Cheesecake Balls Irresistible?
Simplicity at Its Best: With only four ingredients, these No-Bake Cheesecake Balls come together in a flash, making them a go-to treat.
Customizable Flavors: Tailor these bites to your taste! From chocolate coatings to fruity toppings, the possibilities are endless.
Crowd-Pleasing Dessert: Perfect for parties or family gatherings, these cheesecake balls will have everyone coming back for more.
Zero Oven Time: Ditch the baking and still indulge in rich, creamy goodness without the fuss.
Make Ahead: Prepare them in advance and store in the fridge—ideal for busy schedules or last-minute gatherings!
Imagine presenting a platter of these creamy delights alongside your favorite Lemon Blueberry Cheesecake or decadent Fruity Pebbles Cheesecake Tacos for a striking and delicious dessert spread that will wow your guests!
No-Bake Cheesecake Balls Ingredients
• Get ready to create these creamy, delightful bites!
For the Cheesecake Mixture
- Cream Cheese – Use full-fat for that rich, creamy base that makes these No-Bake Cheesecake Balls so heavenly.
- Powdered Sugar – This sweetens the mixture and ensures a smooth consistency for each bite.
- Graham Cracker Crumbs – Provides structure and classic cheesecake flavor; substitute with gluten-free cookie crumbs for a gluten-free twist.
- Vanilla Extract – Adds a lovely depth of flavor that elevates the entire dessert experience.
Get ready to enjoy a treat that’s incredibly easy to whip up and customize to your liking!
Step‑by‑Step Instructions for No-Bake Cheesecake Balls
Step 1: Soften Cream Cheese
Begin by taking your cream cheese out of the refrigerator and letting it sit at room temperature for about 30 minutes to soften. If you’re short on time, you can microwave it for 10-15 seconds, just enough to soften but not melt. This step is crucial for achieving the creamy texture of these No-Bake Cheesecake Balls.
Step 2: Mix Ingredients
In a large mixing bowl, combine the softened cream cheese, powdered sugar, graham cracker crumbs, and vanilla extract. Use a hand mixer or a sturdy spatula to blend the ingredients until you achieve a smooth, lump-free mixture. This should take about 2-3 minutes of mixing, creating a thick and creamy base for your cheesecake balls.
Step 3: Chill Mixture
Once your mixture is well combined, cover the bowl with plastic wrap or a lid and place it in the refrigerator. Chill the mixture for at least 2 hours. This step helps to firm it up, making it easier to handle when you form your No-Bake Cheesecake Balls. You’ll know it’s ready when it holds its shape better and is less sticky.
Step 4: Form Balls
After the mixture has chilled, use a cookie scoop or your hands to form 1-inch balls from the chilled cheesecake mixture. Work quickly to prevent the mixture from warming up too much. Place each ball onto a parchment-lined tray, ensuring there’s enough space between them to avoid sticking while they chill again.
Step 5: Coat Balls
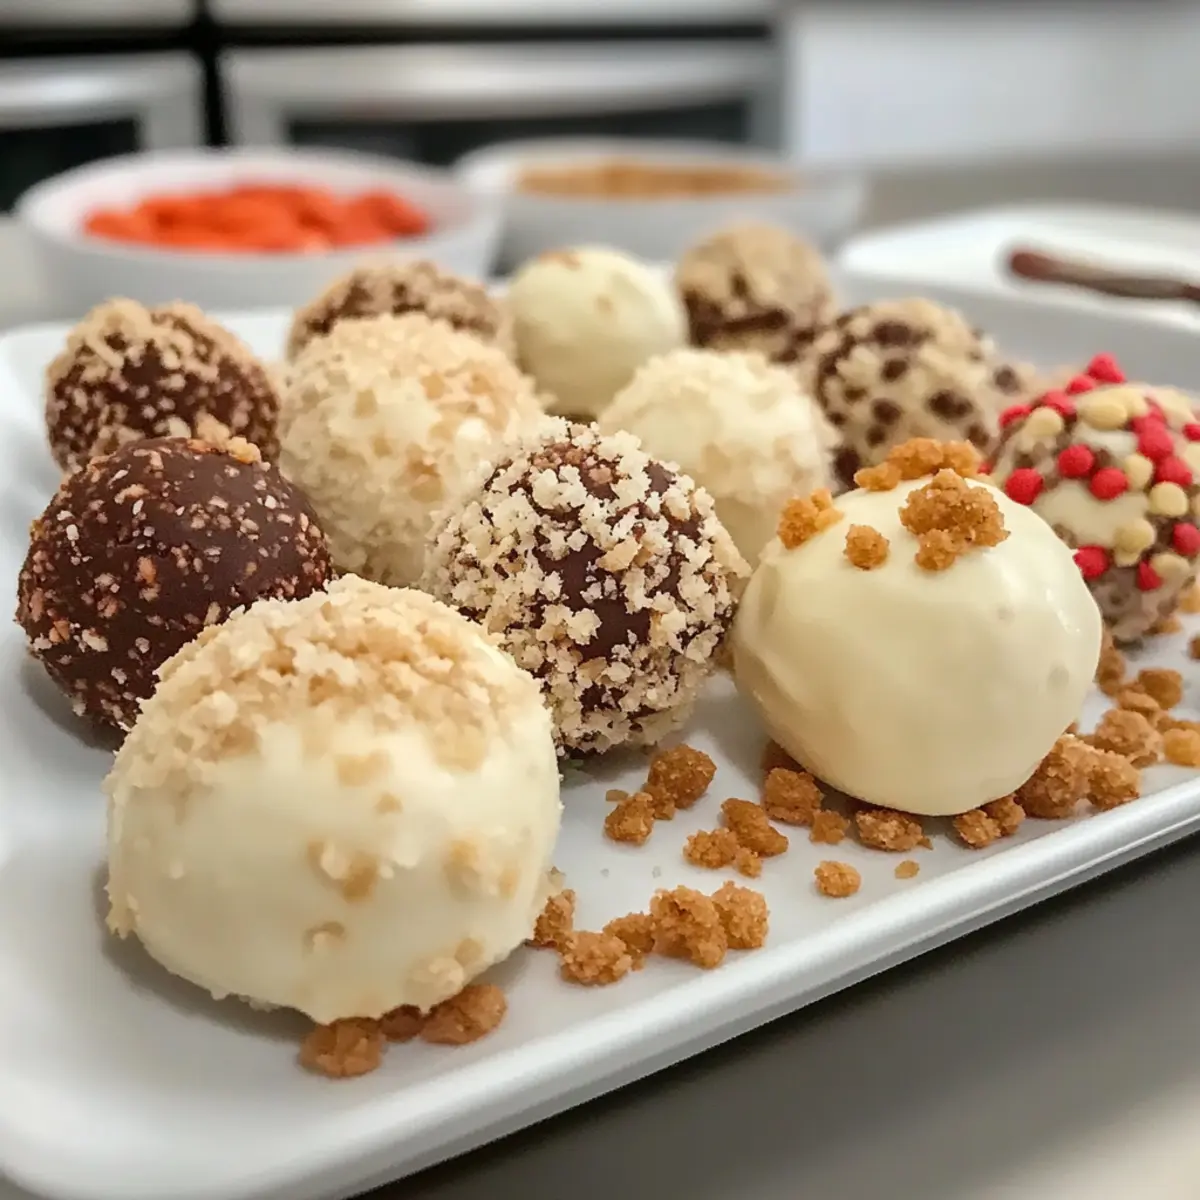
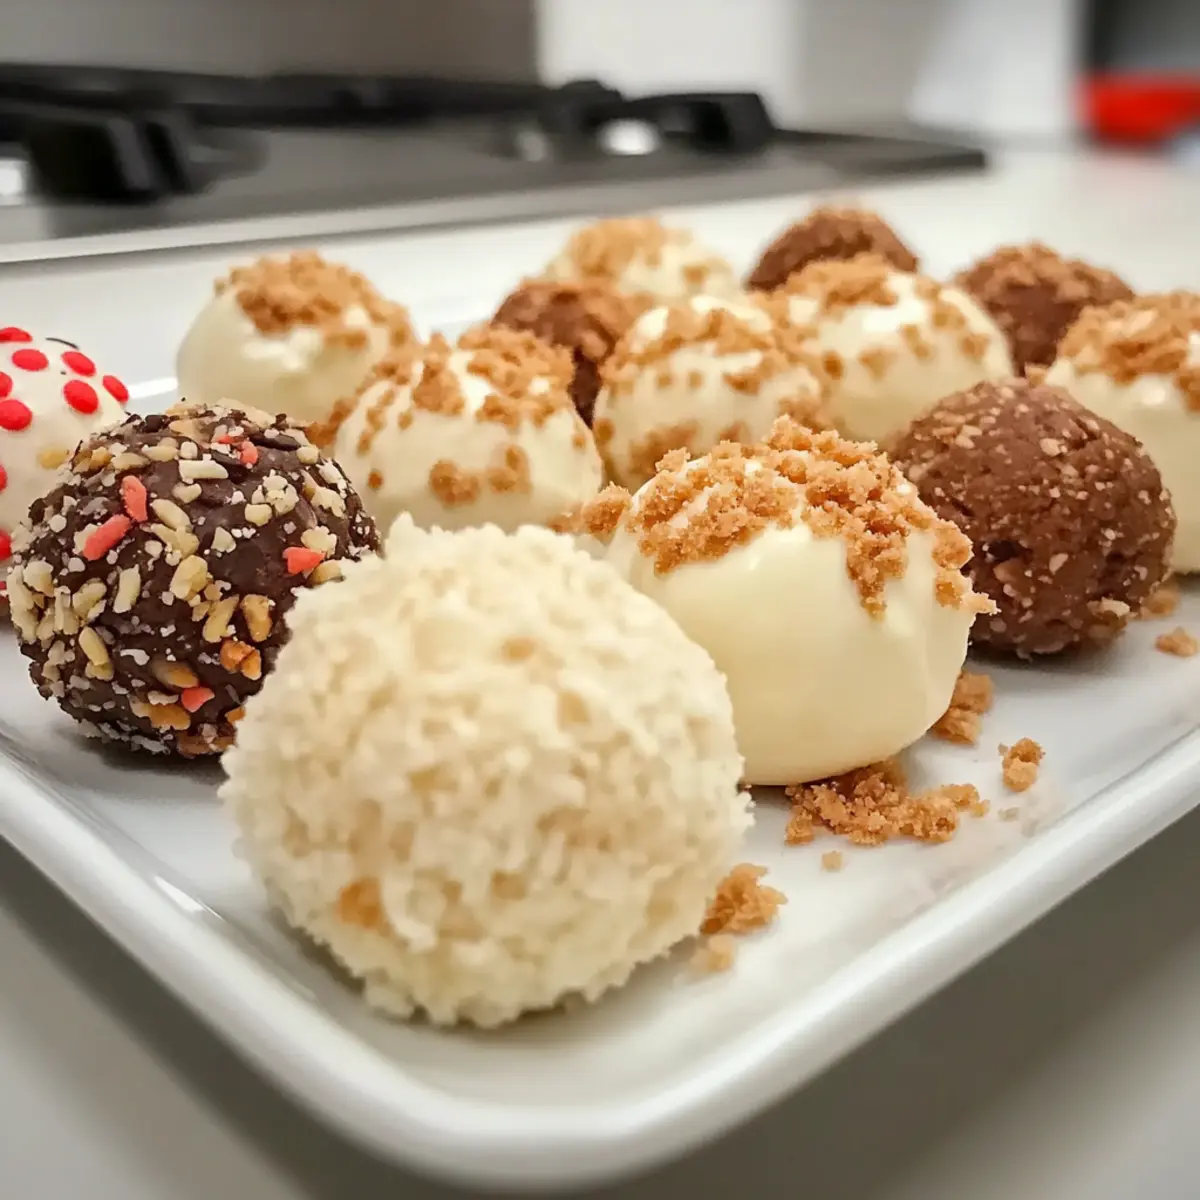
In this step, you can get creative! Roll each cheesecake ball in your choice of toppings, such as additional graham cracker crumbs, melted chocolate, or crushed nuts. Make sure each ball is evenly coated for a delightful crunch that complements the creamy filling. Set them back on the tray as you finish rolling each one.
Step 6: Refrigerate Again
Place the tray of coated cheesecake balls back in the refrigerator and chill for an additional 30 minutes. This final chilling phase is essential as it helps the coatings set properly and ensures that your No-Bake Cheesecake Balls maintain their shape when served. Once time is up, they are ready to enjoy!
Step 7: Serve and Enjoy
When you’re ready to indulge, remove the No-Bake Cheesecake Balls from the refrigerator. Arrange them on a serving platter, perhaps with some fresh berries for a pop of color, and offer them to family and friends. Their creamy texture and customizable nature will definitely make them a hit at any gathering!
Tips for the Best No-Bake Cheesecake Balls
Full-Fat Cream Cheese: Always use full-fat cream cheese for the best texture; low-fat versions may yield a less stable structure.
Chill Well: Ensure the mixture is thoroughly chilled before forming balls to avoid sticking and make handling easier.
Sticky Hands Solution: If your hands become sticky while rolling, lightly dust them with powdered sugar for smoother handling.
Coating Ideas: Don’t be afraid to experiment! Try different toppings like crushed cookies, nuts, or drizzles of chocolate for a fun twist on your No-Bake Cheesecake Balls.
Storage Tips: Store the finished cheesecake balls in an airtight container in the fridge for up to 5 days, or freeze for a delightful treat later on.
What to Serve with No-Bake Cheesecake Balls
Picture a delightful dessert spread that captivates the senses and elevates any occasion!
- Fresh Berries: The tartness of strawberries or blueberries balances the creaminess of the cheesecake balls, creating a refreshing contrast.
- Chocolate Drizzle: Drizzling melted chocolate over the cheesecake balls adds a touch of indulgence and enhances their elegance. It’s a match made in dessert heaven!
- Mint Leaves: These vibrant green leaves add freshness, both visually and in flavor, making your dessert display pop while also providing a refreshing bite.
- Coffee or Tea: A warm cup of coffee or tea serves as a perfect companion, rounding out the flavors beautifully. The bitterness of the drink contrasts wonderfully with the sweetness of the cheesecake balls.
- Nutty Granola: For added crunch and flavor, serve the cheesecake balls alongside a sprinkle of nutty granola. It brings a delightful texture that complements the smoothness of the dessert!
- Homemade Whipped Cream: Serve up a dollop of fluffy whipped cream alongside the cheesecake balls for that extra layer of richness and a classic dessert feel.
Imagine combining these elements to create an inviting dessert table, leaving your guests in awe while satisfying their sweet cravings!
How to Store and Freeze No-Bake Cheesecake Balls
Refrigerator: Store the cheesecake balls in an airtight container for up to 5 days. Keep them chilled to maintain that creamy texture and prevent drying out.
Freezer: For longer storage, freeze the cheesecake balls in a single layer on a baking sheet. Once frozen solid, transfer them to a zip-top bag for up to 3 months.
Thawing: When ready to enjoy, simply move the desired number of balls to the refrigerator for a few hours to thaw. They’ll maintain their creamy consistency for a decadent treat.
Serving: For the best flavor and texture, bring the cheesecake balls back to room temperature after freezing before serving them at your next gathering.
Make Ahead Options
These No-Bake Cheesecake Balls are ideal for meal prep, allowing you to save precious time during your busy week! You can prepare the cheesecake mixture up to 24 hours in advance; simply mix all the ingredients and refrigerate until you’re ready to roll. Additionally, the formed cheesecake balls can be chilled for up to 3 days before serving; just ensure they are stored in an airtight container to maintain their delicious texture. When you’re ready to impress guests or satisfy your cravings, roll them in your desired toppings and refrigerate for another 30 minutes to set, and enjoy restaurant-quality treats just as fresh and creamy!
No-Bake Cheesecake Balls Variations
Feel free to get creative and put your personal spin on these delightful cheesecake balls!
- Chocolate Coating: Dip the balls in melted chocolate for a rich, indulgent twist. Dark, milk, or white chocolate all work beautifully.
- Nutty Flavor: Roll in crushed nuts, like almonds or pecans, for a crunchy texture that pairs perfectly with the creamy filling.
- Fruity Bliss: Add fresh fruit puree or zest into the mixture for a pop of flavor; raspberry or lemon zest are fantastic choices!
- Peppermint Twist: Incorporate peppermint extract into the cheesecake mixture for a festive touch that’s perfect during the holidays.
- Savory Surprise: For a fun alternative, try adding herbs or bacon bits to form savory cheesecake balls. They make for a quirky appetizer!
- Spicy Kick: Mix in a dash of cayenne or chili powder for those who love a hint of heat in their sweets. It’s an adventurous combination!
- Coconut Dream: Roll the balls in shredded coconut for a tropical flair that adds a delightful chewiness.
- Mini Cheesecake Cups: If you want a unique presentation, press the mixture into mini cupcake liners instead of forming balls for adorable little cheesecake cups!
And if you’re on a roll with fun dessert ideas, don’t forget to explore other delightful treats like Cheesecake Fruit Salad or the festive Red White Blue Cheesecake. These variations will add delicious options to your dessert repertoire!
No-Bake Cheesecake Balls Recipe FAQs
What type of cream cheese should I use?
Always use full-fat cream cheese for the best texture in your No-Bake Cheesecake Balls. Low-fat versions may yield a less stable structure, resulting in a softer bite that may not hold its shape as well.
How should I store the cheesecake balls?
Store the cheesecake balls in an airtight container in the refrigerator for up to 5 days. Make sure to keep them chilled to maintain creamy texture and prevent drying out.
Can I freeze No-Bake Cheesecake Balls?
Absolutely! To freeze, arrange the cheesecake balls in a single layer on a baking sheet and freeze until solid. Then, transfer them to a zip-top bag and store them for up to 3 months. When you’re ready to enjoy, move them to the fridge for a few hours to thaw.
What should I do if my cheesecake mixture is too sticky?
If you find the mixture sticky, ensure that it’s sufficiently chilled before forming the balls. If you’re still having trouble, dust your hands lightly with powdered sugar while rolling to make the process smoother and more manageable.
Are there any dietary considerations for these cheesecake balls?
If you or your guests have dietary restrictions, consider using gluten-free graham cracker crumbs for a gluten-free version. Always check for allergies related to dairy or sugar, especially if serving to guests with known sensitivities.
How can I dress up my cheesecake balls for a party?
You can get creative with toppings! Try rolling the cheesecake balls in crushed nuts, melted chocolate, or sprinkles. You might also drizzle them with caramel or chocolate sauce right before serving for an extra indulgent touch.

Creamy No-Bake Cheesecake Balls: 4 Easy Ingredients to Delight!
Ingredients
Equipment
Method
- Soften the cream cheese at room temperature for about 30 minutes or microwave for 10-15 seconds to soften.
- Mix the softened cream cheese, powdered sugar, graham cracker crumbs, and vanilla extract until smooth.
- Chill the mixture in the refrigerator for at least 2 hours to firm it up.
- Form 1-inch balls from the chilled mixture and place them on a parchment-lined tray.
- Roll each ball in your choice of toppings like graham cracker crumbs, melted chocolate, or crushed nuts.
- Refrigerate the coated balls for an additional 30 minutes to set.
- Serve on a platter and enjoy these creamy delights with family and friends.
Leave a Reply