
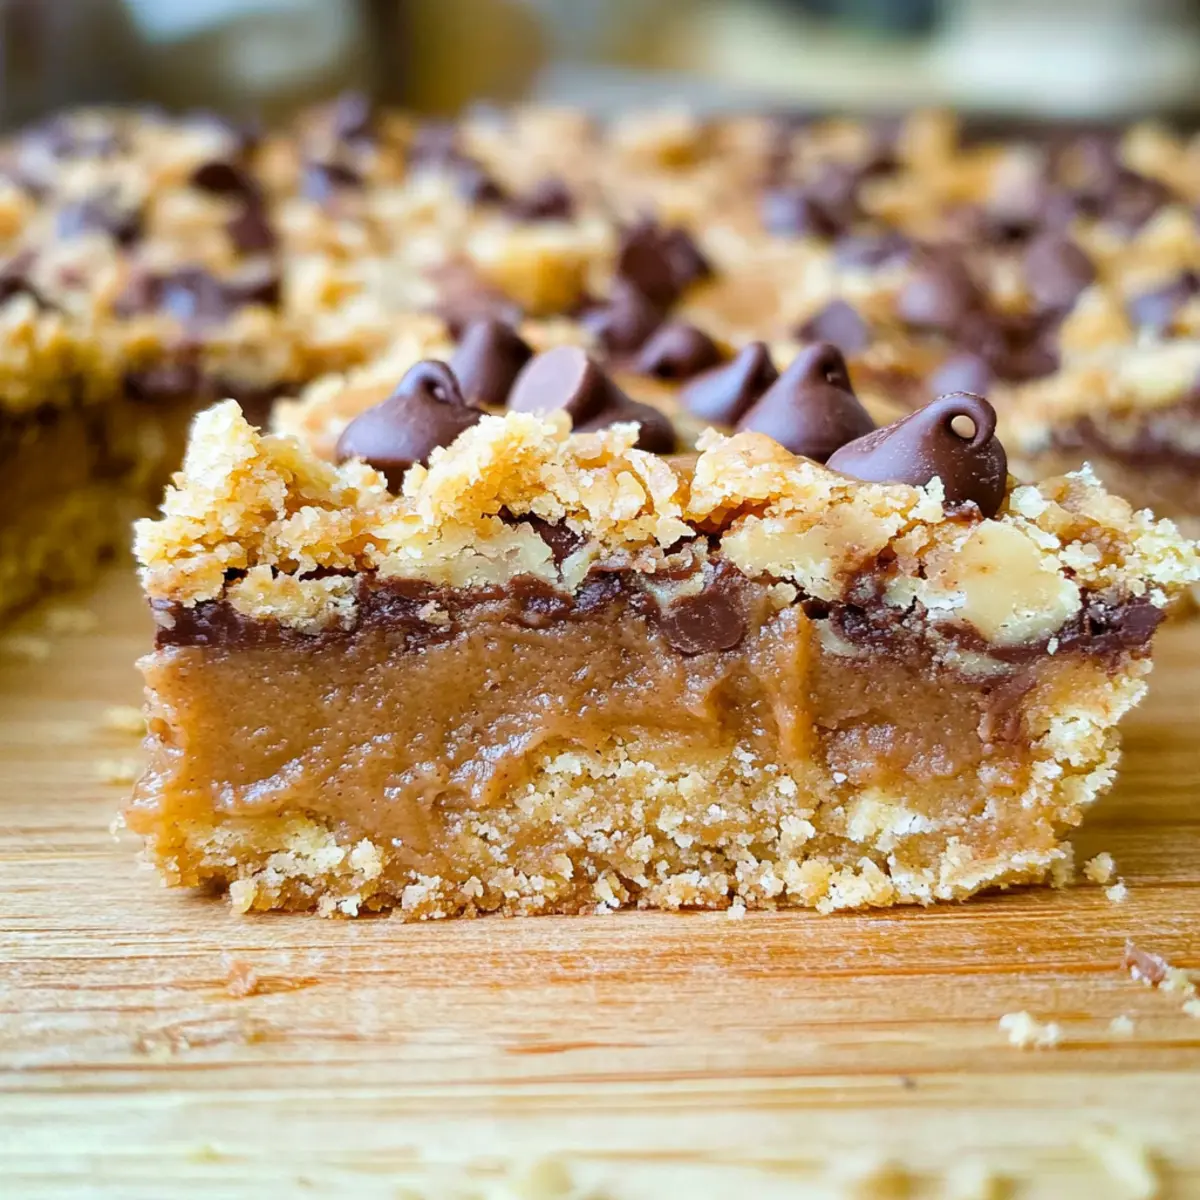
“Did you try making those Peanut Butter Passion Bars yet?” I overheard my friend asking the other day, and excitement rippled through me. These bars bring together creamy peanut butter, a crunchy oat crust, and a delightful sprinkle of chocolate chips in a way that just feels comforting and indulgent, making them the perfect dessert for any occasion. The best part? They come together in a flash, so you can whip them up whenever that sweet tooth strikes without the fuss of elaborate baking. Whether you’re serving them at a get-together or simply craving a homemade treat, these bars are sure to impress. Curious about how to create this irresistible combo in your kitchen? Let’s dive in!
Why Make Peanut Butter Passion Bars?
Quick & Easy: These bars come together in under an hour, perfect for those busy days when you need a sweet boost!
Irresistible Layers: The blend of creamy peanut butter and crunchy oats creates a taste sensation that’s hard to resist.
Crowd-Pleasing Treat: Ideal for gatherings, your friends and family will rave about these delectable bites.
Versatile Options: Feel free to substitute your favorite nut butter or add fun ingredients like mini marshmallows for a unique twist!
Guilt-Free Indulgence: With the option for alternative ingredients, these bars can fit into nearly any dietary preference.
To serve, why not try pairing them with a scoop of vanilla ice cream for a truly indulgent experience? Enjoy every satisfying bite!
Peanut Butter Passion Bars Ingredients
For the Crust
• All-Purpose Flour – Provides structure to the bars and can be substituted with a gluten-free flour blend for those with dietary restrictions.
• Old-Fashioned Oats – Adds chewiness and a nutty flavor; opt for instant oats in a pinch, but the texture may differ.
• Brown Sugar – Sweetens and moistens the mixture; coconut sugar is a fantastic healthier alternative.
• Salt – Balances sweetness; kosher salt is best for this recipe.
• Baking Soda – A leavening agent that helps the bars rise slightly for a light texture.
• Butter (cubed, at room temperature) – Adds richness; for a dairy-free option, use vegan butter.
For the Filling
• Peanut Butter – The star ingredient that provides creaminess and flavor; almond butter is a great substitute for nut allergies.
• Sweetened Condensed Milk – Adds creamy sweetness and binds the filling; evaporated milk works, but include sugar for sweetness.
• Vanilla Extract – Elevates the flavor; use a whole vanilla bean for an even richer profile.
For the Topping
• Semi-Sweet Chocolate Chips – Melts beautifully to create a luscious topping; swap for dark chocolate chips if you prefer a less sweet option.
Step‑by‑Step Instructions for Peanut Butter Passion Bars
Step 1: Preheat and Prepare
Preheat your oven to 350°F (175°C). Grease a 9×13-inch baking dish with nonstick spray or line it with parchment paper for easy removal. This will create a perfect foundation for your Peanut Butter Passion Bars, ensuring they bake evenly and don’t stick to the pan.
Step 2: Mix the Dry Ingredients
In a large mixing bowl, combine 1 ½ cups of all-purpose flour, 1 ½ cups of old-fashioned oats, 1 cup of brown sugar, ½ teaspoon of salt, and 1 teaspoon of baking soda. Mix these ingredients together until they are well combined. The blend of dry ingredients will create the crunchy oat base for your delicious bars.
Step 3: Incorporate the Butter
Add ½ cup of cubed, room-temperature butter to the dry mixture. Use your hands or a pastry cutter to mix until the texture resembles coarse crumbs, ensuring the butter is evenly distributed. This buttery mixture will form a delightful crust once pressed into the baking dish.
Step 4: Prepare the Oat Layer
Reserve 1 ½ cups of the crumbly mixture from your bowl. Take the remaining mixture and press it firmly into the bottom of your greased baking dish, creating an even layer. This will act as the sturdy foundation for the creamy peanut butter filling to come.
Step 5: Blend the Filling Ingredients
In a separate bowl, combine 1 cup of peanut butter, 1 cup of sweetened condensed milk, and 1 teaspoon of vanilla extract. Mix these ingredients together until the mixture is smooth and well-blended. This rich filling is what makes the Peanut Butter Passion Bars so indulgent and delightful.
Step 6: Assemble the Bars
Pour the smooth peanut butter mixture over the pressed oat layer in the baking dish. Use a spatula to spread it evenly across the surface. Then, sprinkle 1 cup of semi-sweet chocolate chips on top. These chocolate chips will melt beautifully during baking, adding an irresistible top layer.
Step 7: Add the Topping
Finish by evenly distributing the reserved oat mixture over the peanut butter filling and chocolate chips. Press down lightly to ensure it sticks together, creating a cohesive layer. This step adds a nice crunch to the top of your Peanut Butter Passion Bars once they are baked.
Step 8: Bake the Bars
Place the baking dish in your preheated oven and bake for approximately 30 minutes. Keep an eye on them; they should be lightly golden around the edges and firm in the center when done. Avoid overbaking to ensure your bars don’t turn out dry.
Step 9: Cool and Slice
Once baked, remove the dish from the oven and let the bars cool completely in the pan. This step is crucial for allowing them to set properly and maintain their shape when sliced. After cooling, carefully lift the bars out of the dish and cut them into squares.
Step 10: Serve with Love
Serve your decadent Peanut Butter Passion Bars on a beautiful platter or in individual paper wraps. They make for a delightful sweet treat any time of the day, whether enjoyed at a gathering or savored with a warm cup of tea.
Peanut Butter Passion Bars Variations
Feel free to let your creativity shine by customizing these bars to fit your taste preferences and dietary needs!
- Nut-Free: Use sun butter instead of peanut butter to make these delicious bars safe for those with nut allergies.
- Gluten-Free: Swap all-purpose flour for a gluten-free flour blend and ensure oats are certified gluten-free for a tasty alternative.
- Vegan: Replace butter with vegan butter and opt for coconut condensed milk to keep it dairy-free and indulgent.
- Flavor Boost: Toss in a tablespoon of your favorite extracts, like almond or maple, for an extra layer of flavor in the filling.
- Extra Crunch: Blend in a handful of crushed nuts or seeds for added texture and nutrition, making each bite even more delightful!
- Fruity Twist: Add dried fruits like cranberries or apricots to the oat mixture for a chewy, fruity surprise that brightens the flavor.
- Caramel Drizzle: Before serving, drizzle warm caramel sauce over the bars for a special touch that elevates their decadence.
- Chocolate Lovers: Swap semi-sweet chocolate chips for dark chocolate or even white chocolate for a unique and rich variation.
If you’re craving a cozy dessert, you might also enjoy this alongside some scrumptious Blueberry Cheesecake Bars or a batch of Garlic Butter Beef for a complete indulgent experience!
Storage Tips for Peanut Butter Passion Bars
Room Temperature: Store your Peanut Butter Passion Bars in an airtight container at room temperature for up to 1 week. This keeps them chewy and delicious!
Fridge: For longer freshness, refrigerate them in an airtight container for up to 2 weeks. Just allow them to come to room temperature before serving for the best flavor.
Freezer: You can freeze the bars for up to 3 months. Individually wrap them in plastic wrap and then place them in a freezer-safe bag for easy snacking later!
Reheating: To enjoy warm, simply microwave for 10-15 seconds or until heated through. This revives the gooey goodness that makes these bars so irresistible!
Expert Tips for Peanut Butter Passion Bars
• Room Temperature Butter: Ensure your butter is at room temperature for easy mixing, creating a smoother texture in your bars.
• Cool Before Cutting: Allow the bars to cool completely in the pan before slicing, which helps maintain their structure and prevents crumbling.
• Watch the Baking Time: Keep an eye on your bars while baking, as overbaking can yield dry bars; look for golden edges!
• Customize Flavor: For a twist, mix in chopped nuts, dried fruit, or even a swirl of caramel before baking, elevating your Peanut Butter Passion Bars to new heights.
• Storage Know-How: Store in an airtight container for up to a week at room temperature or freeze for longer freshness, ensuring you always have a treat on hand!
What to Serve with Peanut Butter Passion Bars
These deliciously rich bars will elevate any dessert spread and provide the perfect touch to your gathering or cozy night in.
- Vanilla Ice Cream: A scoop of this creamy goodness melts beautifully with the bars, balancing the rich flavors and adding a delightful chill.
- Fresh Berries: Serve with a side of mixed berries to introduce a burst of freshness that contrasts perfectly with the bars’ sweet decadence.
- Chocolate Sauce: Drizzling this over your bars adds an extra layer of indulgence, enhancing that luscious chocolatey topping for true dessert lovers.
- Nutty Granola: A sprinkle of crunchy granola provides delightful texture and enhances peanut flavors, making each bite even more enjoyable.
- Espresso or Coffee: A warm cup of coffee or a shot of espresso perfectly complements the rich flavors while offering a lovely contrast of warmth.
- Caramel Drizzle: For an added luxury, drizzle homemade or store-bought caramel over the bars for a sticky, sweet bite that everyone’s sure to love.
- Milk: A classic pairing—serve these bars alongside a cold glass for a nostalgic and satisfying treat.
- Coconut Whipped Cream: Light and fluffy, this tropical twist complements the nutty flavors and adds a festive flair to your dessert.
Make Ahead Options
These Peanut Butter Passion Bars are perfect for meal prep, allowing you to save time and enjoy their deliciousness even on the busiest days! You can prepare the oat crust and filling up to 24 hours in advance. Simply mix the dry ingredients and press the crust into the pan, then store it covered in the fridge. Additionally, blend the peanut butter filling, and keep it in an airtight container in the refrigerator until you’re ready to bake. When you’re ready to finish the recipe, just pour the peanut butter mixture over the crust, sprinkle with chocolate chips, and bake! By prepping ahead, you ensure these bars remain just as irresistible when it’s time to indulge.
Peanut Butter Passion Bars Recipe FAQs
How do I select ripe ingredients for my Peanut Butter Passion Bars?
Absolutely! When choosing your peanut butter, ensure it’s creamy and smooth without added sugars or oils for the best flavor. For oats, opt for old-fashioned rolled oats as they provide the ideal texture. Fresh brown sugar should clump slightly and have a deep molasses scent. If you’re using butter, it should be at room temperature to ensure it mixes well into the batter.
How should I store my Peanut Butter Passion Bars, and how long do they last?
Great question! Store your Peanut Butter Passion Bars in an airtight container at room temperature for up to 1 week. If you want to keep them fresher for longer, refrigerate them for up to 2 weeks. Just remember to let them come back to room temperature before serving for that perfect chewy texture!
Can I freeze my Peanut Butter Passion Bars, and how do I do it?
Yes, you can freeze them for up to 3 months! First, cut your bars into squares, then wrap each piece individually in plastic wrap. Place these wrapped bars in a freezer-safe bag or container to prevent freezer burn. When you’re ready to enjoy, simply remove a bar and reheat it in the microwave for 10-15 seconds or let it thaw at room temperature for a delightful treat!
What are some common issues I might face while making these bars?
One common issue is overbaking, which can lead to dry bars. Be sure to check them at the 30-minute mark. The edges should be golden but the center should still feel slightly soft. If your bars are too crumbly after baking, it may be due to not packing the oat crust tightly enough or using too much flour. Make sure you press it down firmly before adding the filling.
Are there any dietary considerations I should keep in mind for my Peanut Butter Passion Bars?
Absolutely! If you or your guests have nut allergies, feel free to substitute peanut butter with sunflower seed butter. This makes them nut-free but still delicious. For a gluten-free version, use a gluten-free flour blend in place of all-purpose flour. Always check labels on ingredients like sweetened condensed milk and chocolate chips if you’re concerned about allergens.
Irresistible Peanut Butter Passion Bars for Instant Indulgence
Ingredients
Equipment
Method
- Preheat your oven to 350°F (175°C). Grease a 9x13-inch baking dish with nonstick spray or line it with parchment paper.
- In a large mixing bowl, combine the dry ingredients: 1.5 cups of all-purpose flour, 1.5 cups of old-fashioned oats, 1 cup of brown sugar, 0.5 teaspoon of salt, and 1 teaspoon of baking soda.
- Add 0.5 cup of cubed butter to the mixture and mix until it resembles coarse crumbs.
- Reserve 1.5 cups of the mixture, then press the remaining mixture into the bottom of the baking dish to form the crust.
- In a separate bowl, mix together 1 cup of peanut butter, 1 cup of sweetened condensed milk, and 1 teaspoon of vanilla extract until smooth.
- Pour the peanut butter mixture over the crust and spread evenly. Sprinkle 1 cup of chocolate chips on top.
- Distribute the reserved oat mixture evenly over the filling and press down lightly.
- Bake in the preheated oven for about 30 minutes, until lightly golden around the edges.
- Let the bars cool completely in the pan before lifting them out and slicing into squares.
- Serve the bars on a platter or in individual wraps.
Leave a Reply