
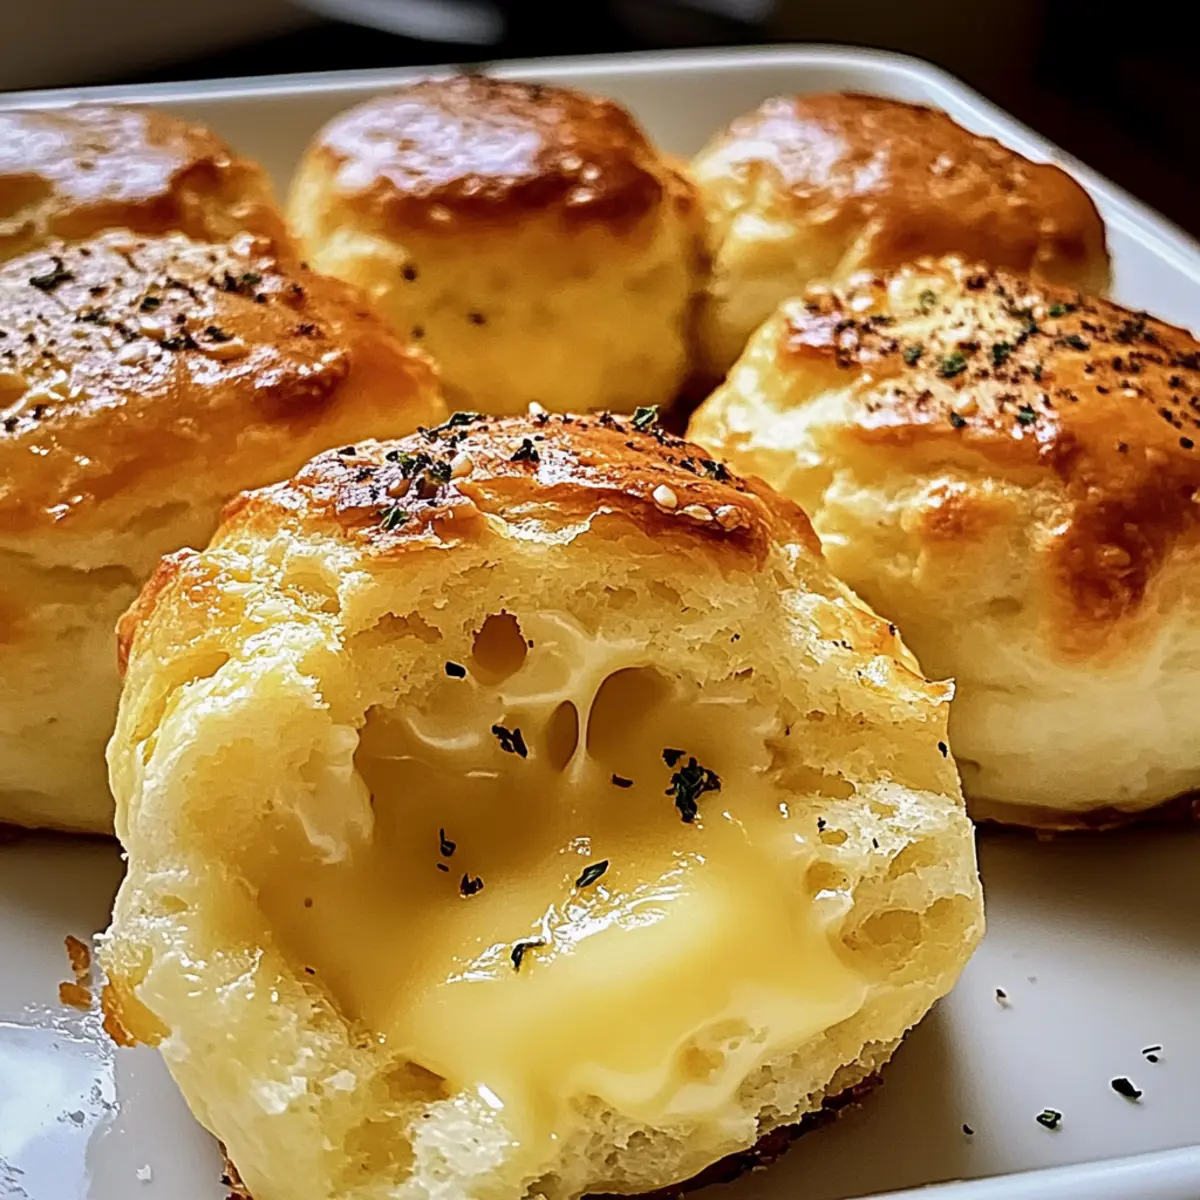
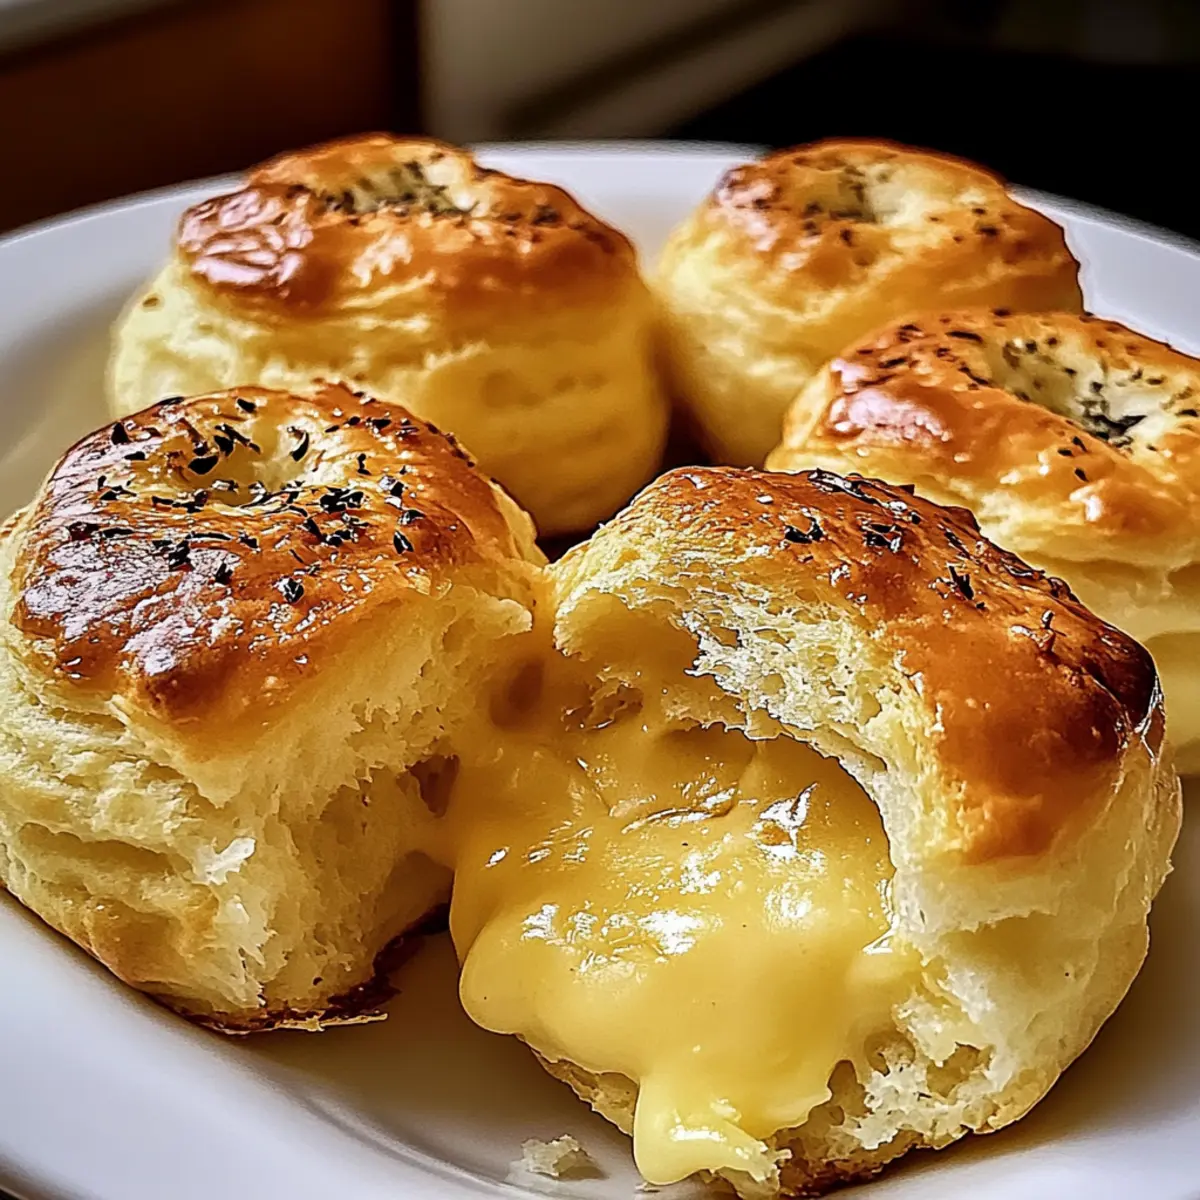
As I stood in my kitchen, the inviting aroma of garlic and melted cheese enveloped me like a warm hug. That’s when it hit me—what better way to elevate a cozy gathering than with Pillsbury Biscuit Garlic Butter Cheese Bombs? These golden delights are not only a breeze to whip up, but they also transform into bubbly, cheesy marvels in just 30 minutes. Perfectly customizable, you can mix and match cheeses and herbs to suit everyone’s palate, making them a surefire crowd-pleaser. Whether you’re hosting a game-day celebration or an intimate dinner with family, these little bites are bound to bring smiles all around. Curious to see just how easy it is to create your own cheesy masterpiece? Let’s dive in!
Why Are These Cheese Bombs So Irresistible?
Convenience, ready in just 30 minutes—ideal for busy weeknights or last-minute gatherings! Customizable flavor options let you mix and match your favorite cheeses, from sharp cheddar to spicy pepper jack. Kid-friendly fun, perfect for involving little chefs in the kitchen. Party pleaser, these cheesy delights are sure to be the star of any appetizer spread! For a delightful pairing, try serving them alongside Garlic Butter Steak or a dipping sauce like marinara. With their flaky exterior and gooey center, you won’t want to share!
Pillsbury Biscuit Garlic Butter Cheese Bombs Ingredients
-
For the Dough
Refrigerated Biscuit Dough – The base for easy preparation. Alternative: Use homemade biscuit dough for a fresher taste. -
For the Cheese Filling
Shredded Mozzarella Cheese – Provides a melty texture. Substitution: Pepper jack for a spicy kick.
Shredded Cheddar Cheese – Adds a sharp flavor profile. Substitution: Gouda for a smoky taste. -
For the Garlic Butter Coating
Melted Butter – Creates a golden, flavorful coating. Note: Can use olive oil for a lighter option.
Garlic Powder – Essential for the signature garlic butter flavor. Prep Note: Fresh garlic can be used for a more intense flavor.
Onion Powder – Enhances the overall savory profile. Note: Optional for those who prefer a milder taste.
Dried Parsley – Adds a pop of color and mild herb flavor. Substitution: Fresh herbs for a brighter freshness.
Salt and Black Pepper – Seasoning elements that elevate the flavor. Tip: Adjust according to taste preference.
Feel free to mix and match cheese types for your Pillsbury Biscuit Garlic Butter Cheese Bombs and craft the perfect flavor explosion!
Step‑by‑Step Instructions for Pillsbury Biscuit Garlic Butter Cheese Bombs
Step 1: Preheat Your Oven
Begin by preheating your oven to 375°F (190°C). This step is crucial as it ensures that your Pillsbury Biscuit Garlic Butter Cheese Bombs cook evenly, resulting in a perfectly golden and flaky exterior. While the oven warms up, you can move on to preparing your baking sheet.
Step 2: Prepare the Baking Sheet
Line a baking sheet with parchment paper to keep your cheese bombs from sticking. This will make cleanup a breeze later on! Keep the lined sheet nearby as you continue working on the dough, ensuring everything is organized for quick assembly.
Step 3: Mix the Cheese Filling
In a medium bowl, combine the shredded mozzarella and cheddar cheese. Stir well to create a uniform mixture that will melt beautifully inside each biscuit bomb. This cheesy filling is the star of the show, so make sure it’s blended nicely before moving to the next step.
Step 4: Shape the Bombs
Take each piece of refrigerated biscuit dough and flatten it slightly in your palm. Add a scoop of the cheese mixture to the center, fold the edges over to seal in the filling, and roll it into a smooth ball. Repeat this process until all the dough is formed into cheese bombs, showcasing the cheesy goodness inside.
Step 5: Make the Garlic Butter Mixture
In a small bowl, whisk together the melted butter, garlic powder, onion powder, dried parsley, salt, and black pepper. This flavorful garlic butter will coat your biscuit bombs, infusing them with a rich taste. Mix until everything is evenly combined to enhance each bite of the Pillsbury Biscuit Garlic Butter Cheese Bombs.
Step 6: Apply the Garlic Butter
Using a pastry brush, generously brush the prepared garlic butter over each biscuit ball. Ensure that every surface is coated, as this will help achieve that delicious golden brown finish while baking. The garlic butter not only enhances the flavor but adds an appealing shine to the biscuits.
Step 7: Bake the Cheese Bombs
Carefully place your garlic butter-coated cheese bombs on the prepared baking sheet, ensuring they have a little space between them for even cooking. Bake in the preheated oven for 15-20 minutes, or until they are puffed up and golden brown. The tantalizing aroma will soon fill your kitchen!
Step 8: Cool and Serve
Once baked, remove the cheese bombs from the oven and let them cool for a few minutes. This brief cooling period helps the cheesy filling set just enough to avoid burns from hot cheese. Serve these delightful Pillsbury Biscuit Garlic Butter Cheese Bombs warm and enjoy the melty goodness inside!
Pillsbury Biscuit Garlic Butter Cheese Bombs Variations
Don’t hesitate to mix things up with these delightful cheese bombs and discover your new favorite twist!
- Cheese Swap: Use Gruyère or fontina for a gourmet touch. Each bite will be richer and more sophisticated.
- Spicy Kick: Add diced jalapeños or crushed red pepper flakes for some heat. Adjust the amount to suit your taste for spice.
- Veggie Boost: Stir in chopped spinach or sun-dried tomatoes for a pop of color and nutrition. Your veggie-loving friends will appreciate this addition!
- Herb Infusion: Experiment with fresh basil, oregano, or chives for a burst of herbal freshness. A touch of green makes everything more vibrant!
- Bacon Lovers: Include crumbled cooked bacon for a smoky, savory explosion. The combination of cheese and bacon is sure to tantalize your taste buds!
- Dipping Sauces: Serve alongside a tangy marinara or a creamy ranch. These sauces elevate the overall experience and complement the flavors perfectly.
- Cheesy Pull-Apart: Shape the bomb mixture into a pull-apart bread loaf for a shareable experience. Perfect for gatherings, this variation encourages communal enjoyment.
No matter which option you choose, you’re guaranteed a crowd-pleasing appetizer that pairs beautifully with dishes like Garlic Butter Steak or Savory Ham Cheese for an unforgettable meal. Enjoy experimenting!
Expert Tips for Pillsbury Biscuit Garlic Butter Cheese Bombs
-
Seal Properly: Ensure each biscuit is sealed tightly to prevent cheese leakage during baking. A good seal keeps the melty goodness inside!
-
Don’t Overfill: Avoid overstuffing with cheese; too much filling can cause the biscuits to unravel or not cook through properly. Stick to a generous spoonful.
-
Crispier Exterior: For an extra crispy finish, brush a bit more garlic butter on just before baking. This enhances flavor and creates a beautiful golden color.
-
Customize Boldly: Feel free to experiment with different cheese combinations for your Pillsbury Biscuit Garlic Butter Cheese Bombs. Mixing cheeses can lead to delicious surprises!
-
Watch the Oven: Keep a close eye on them while baking; oven temperatures can vary. Pull them out once they’re golden brown for the best results!
What to Serve with Pillsbury Biscuit Garlic Butter Cheese Bombs
Transform your gathering into a warm, inviting experience by adding these delightful pairings to the mix.
- Marinara Sauce: A classic dip that balances the rich flavors, perfect for those who crave a tangy twist.
- Creamy Ranch Dressing: Cool and herbaceous, this dressing provides the ideal contrast to the cheesy, buttery bites. Dip in and enjoy!
- Fresh Salad: A crisp garden salad brightens the table, introducing refreshing elements that complement the richness of the cheese bombs.
- Spicy Buffalo Sauce: For those who adore heat, this fiery dip delivers a kick that elevates the flavor of your bombs to a new level.
- Bacon-Wrapped Jalapeños: Add a touch of smoky spiciness with these bite-sized delights that pair perfectly with the cheesy goodness.
- Garlic Butter Steak Bites: For a mouthwatering meat option, the savory steak encased in garlic butter mirrors the flavors of your cheese bombs.
- Cheesy Queso Dip: Creamy and irresistibly cheesy, this dip enhances the overall indulgence of your appetizer spread.
- Wine Pairing: Chardonnay: A chilled glass of Chardonnay balances the buttery aspects of the bombs with its crisp finish, rounding out your meal beautifully.
- Chocolate Chip Cookies: For dessert, these warm, gooey treats bring a comforting sweetness that complements the savory starters.
How to Store and Freeze Pillsbury Biscuit Garlic Butter Cheese Bombs
-
Fridge: Store leftover cheese bombs in an airtight container for up to 3 days. This helps maintain their wonderful texture and flavor for your next snack!
-
Freezer: Unbaked cheese bombs can be frozen for up to 2 months. Place them on a baking sheet to freeze individually before transferring to a freezer-safe bag. Bake from frozen, adding a few extra minutes to the cooking time.
-
Reheating: To reheat, place refrigerated or frozen cheese bombs on a baking sheet and warm in a preheated oven at 350°F (175°C) until heated through, about 10-15 minutes for refrigerated and 20-25 minutes for frozen.
-
Wrap Tips: For best results, tightly wrap any uneaten cheese bombs in plastic wrap before storing to prevent freezer burn while maintaining that gooey goodness of the Pillsbury Biscuit Garlic Butter Cheese Bombs.
Make Ahead Options
These Pillsbury Biscuit Garlic Butter Cheese Bombs are perfect for meal prep, saving you time on busy weeknights! You can prepare the cheese-filled biscuit balls and refrigerate them for up to 24 hours before baking. To do this, shape the bombs as instructed, then place them in an airtight container to prevent drying out. When you’re ready to enjoy them, simply brush on the garlic butter mixture and bake from the refrigerator—no need to wait for them to come to room temperature. For longer storage, you can freeze the unbaked cheese bombs for up to 2 months and then bake directly from frozen, adding a few extra minutes to the cooking time. With these make-ahead tips, you’ll have delicious garlic butter cheese bombs ready to impress your guests with minimal effort!

Pillsbury Biscuit Garlic Butter Cheese Bombs Recipe FAQs
What type of biscuit dough should I use?
You can use refrigerated biscuit dough for convenience and ease of preparation. If you prefer a fresher taste, I recommend using homemade biscuit dough. This allows you to control the ingredients and create a flavor that truly satisfies your palate.
How should I store leftover cheese bombs?
Store your leftover Pillsbury Biscuit Garlic Butter Cheese Bombs in an airtight container in the refrigerator for up to 3 days. This will help retain their delightful texture and flavor, making them easy to enjoy later!
Can I freeze unbaked cheese bombs?
Absolutely! You can freeze unbaked cheese bombs for up to 2 months. First, arrange them on a baking sheet and freeze individually; once solid, transfer them to a freezer-safe bag. When you’re ready to bake, you can cook them directly from the freezer; just add a few extra minutes to the cooking time.
What should I do if my cheese bombs leak during baking?
To prevent leakage, ensure that each biscuit is tightly sealed after adding the cheese filling. If you notice any leakage while baking, it’s often due to overfilling. Stick to a generous spoonful of filling, but don’t overstuff. If the cheese does leak out, simply scoop it off the baking sheet, and don’t worry—those crispy, gooey bits can be delicious on their own!
Are there any dietary considerations for these cheese bombs?
When it comes to dietary needs, it’s essential to note any allergies to dairy in your guests. The Pillsbury Biscuit Garlic Butter Cheese Bombs contain cheese and butter, so be cautious! For a dairy-free alternative, you can explore using plant-based cheese and butter substitutes, and remember to check the ingredients of the biscuit dough for any hidden dairy products.
Can I customize the herbs and spices in the garlic butter?
Definitely! I encourage you to get creative with the garlic butter mixture. While garlic powder and dried parsley are the base flavors, you can add fresh herbs like thyme or rosemary for a burst of flavor. Just be sure to adjust the quantities to your taste!
Pillsbury Biscuit Garlic Butter Cheese Bombs: Melty Goodness Awaits
Ingredients
Equipment
Method
- Preheat your oven to 375°F (190°C).
- Line a baking sheet with parchment paper.
- In a medium bowl, combine the shredded mozzarella and cheddar cheese.
- Flatten each piece of refrigerated biscuit dough, add cheese filling, fold edges, and roll into balls.
- Whisk together melted butter, garlic powder, onion powder, dried parsley, salt, and black pepper.
- Brush the garlic butter over each biscuit ball.
- Place the coated cheese bombs on the baking sheet and bake for 15-20 minutes until golden brown.
- Let them cool for a few minutes before serving.
Leave a Reply