
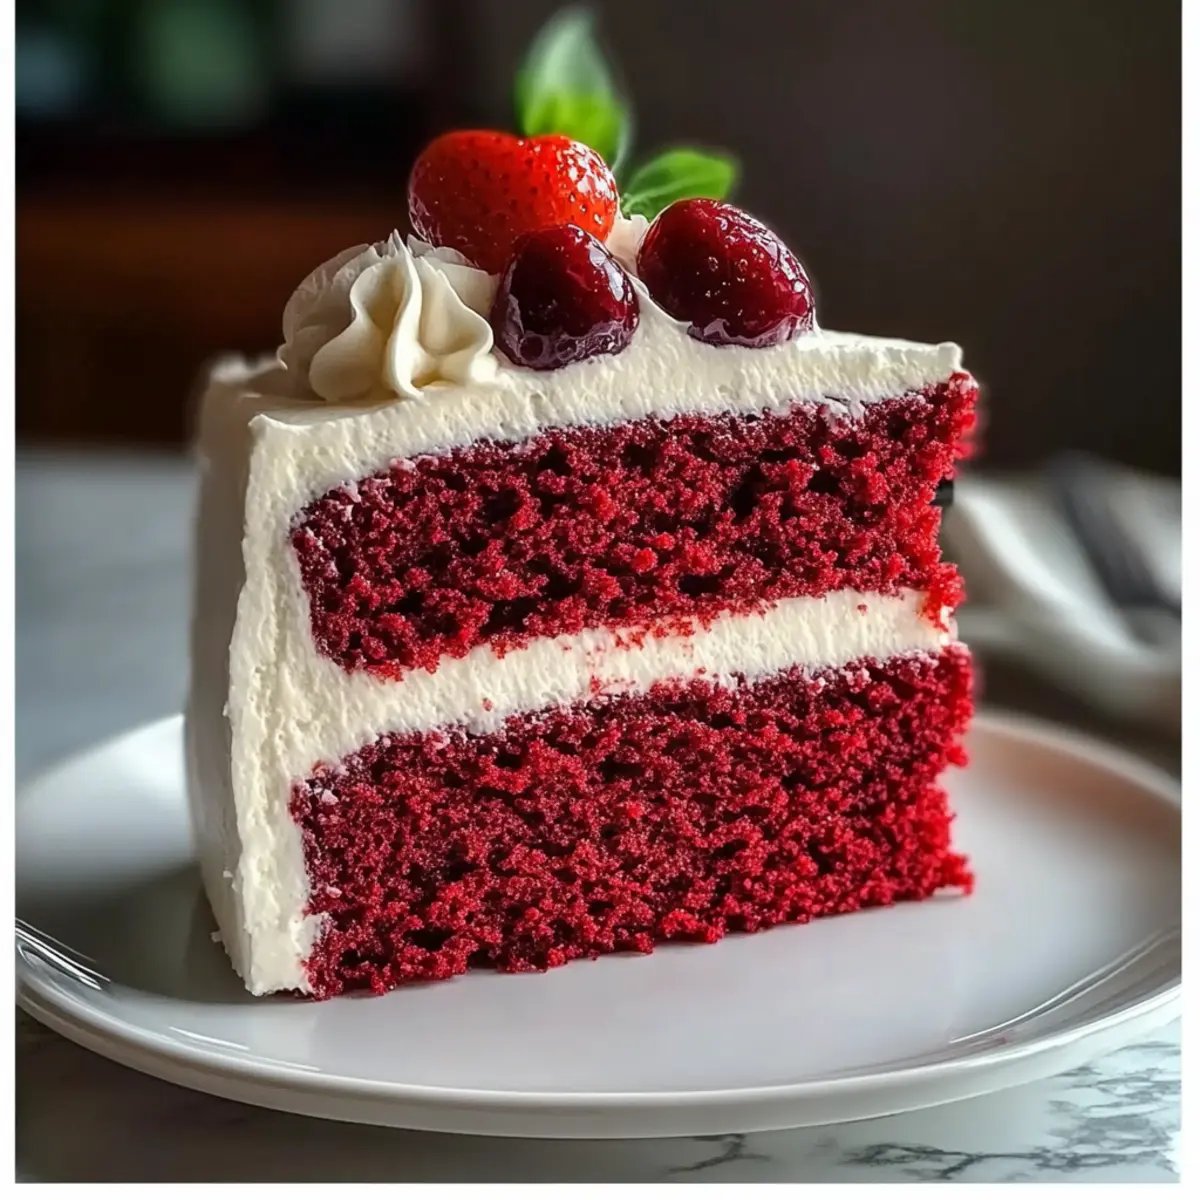
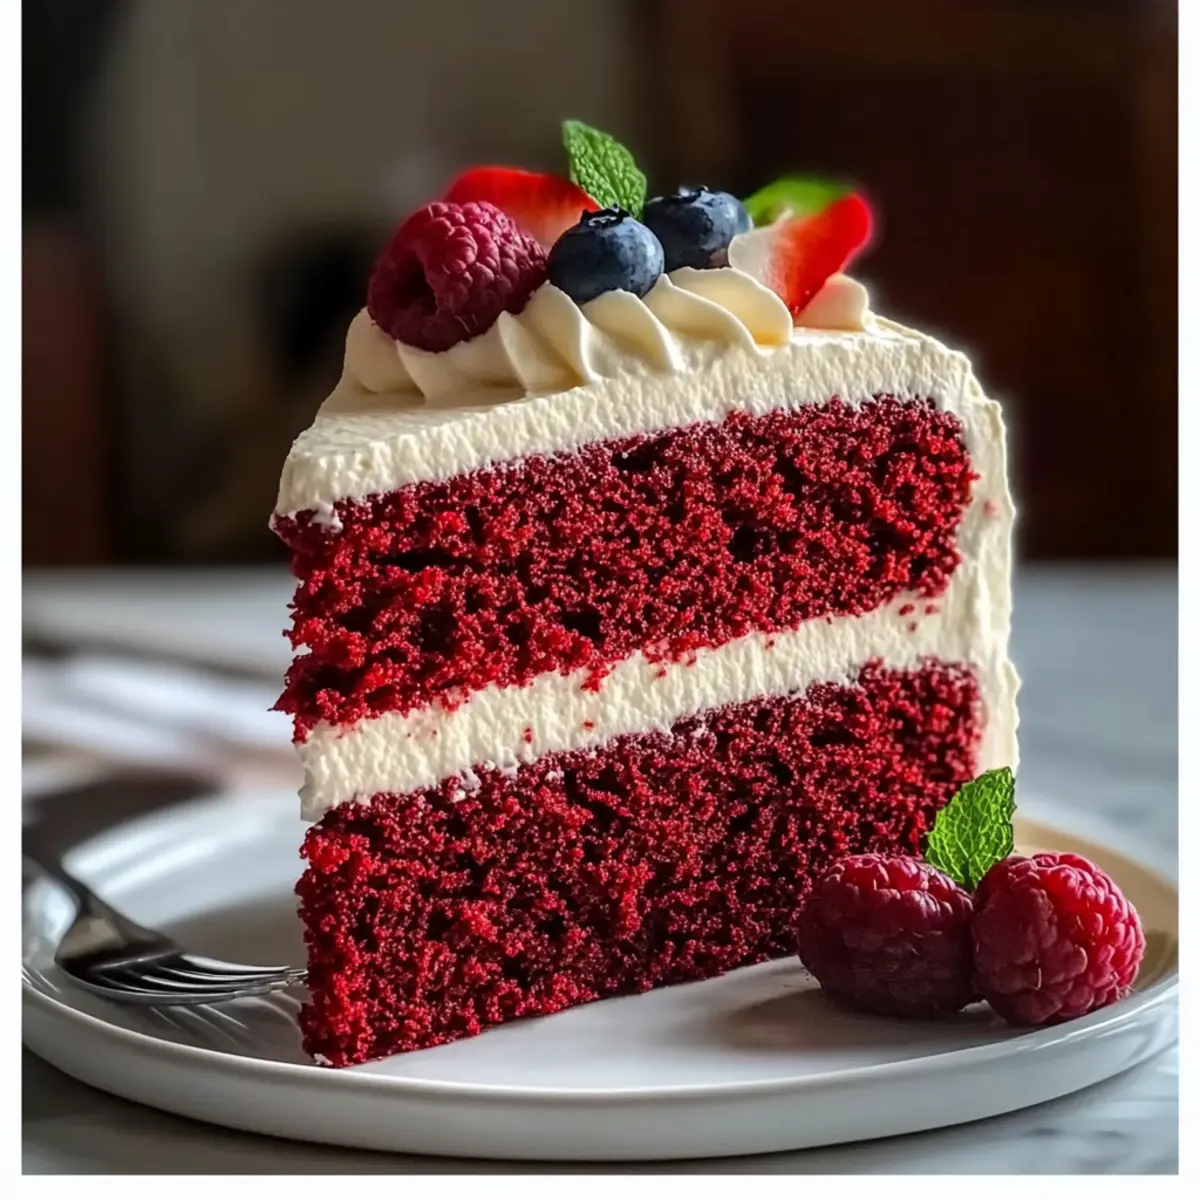
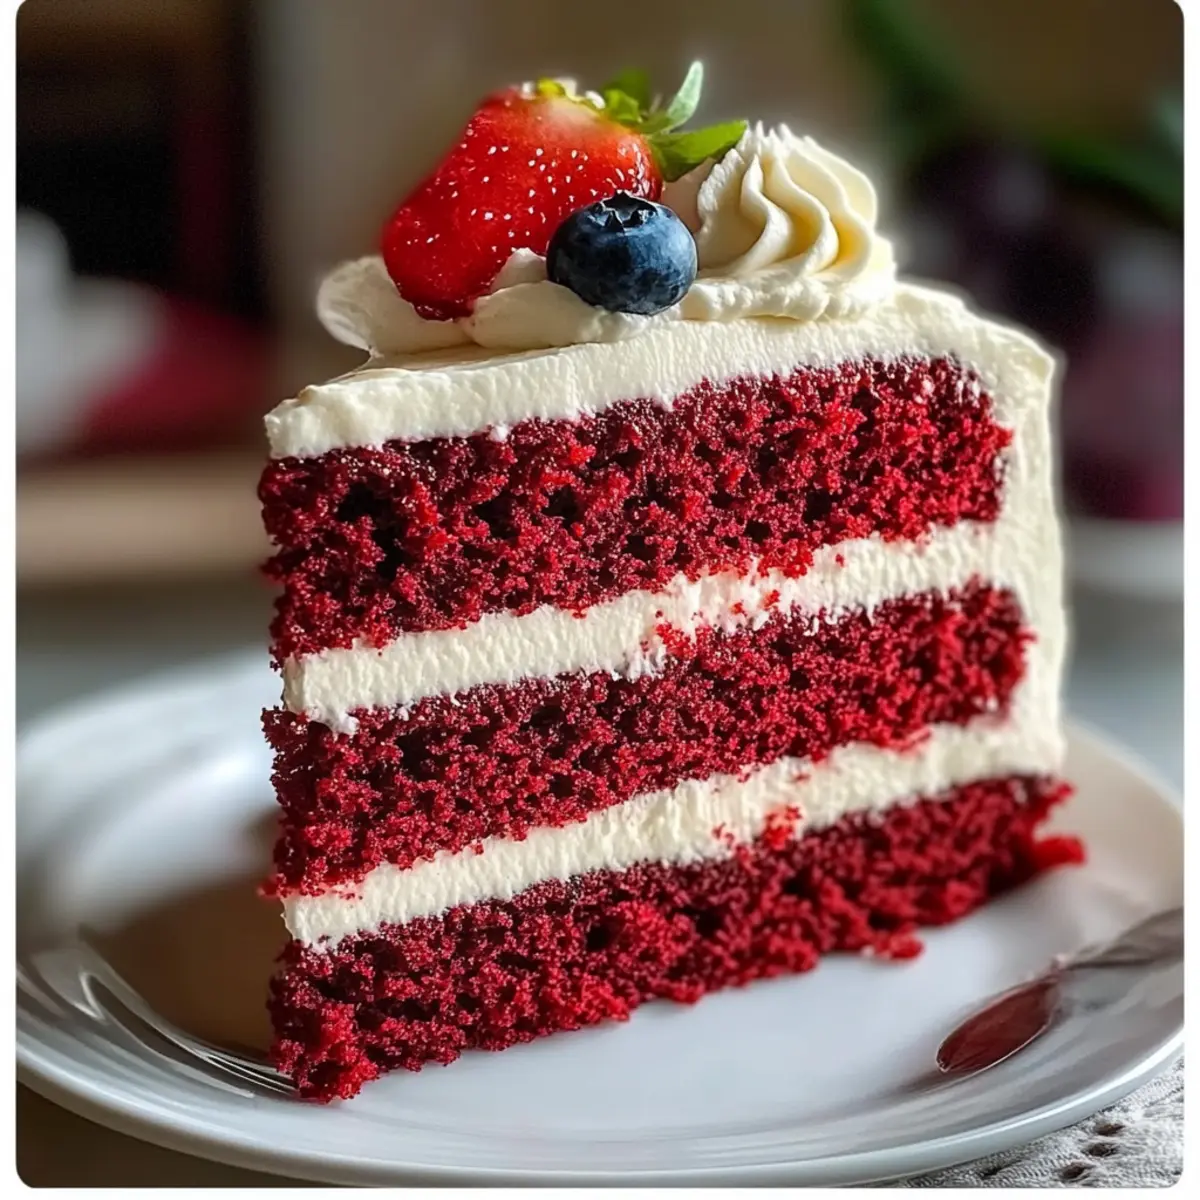
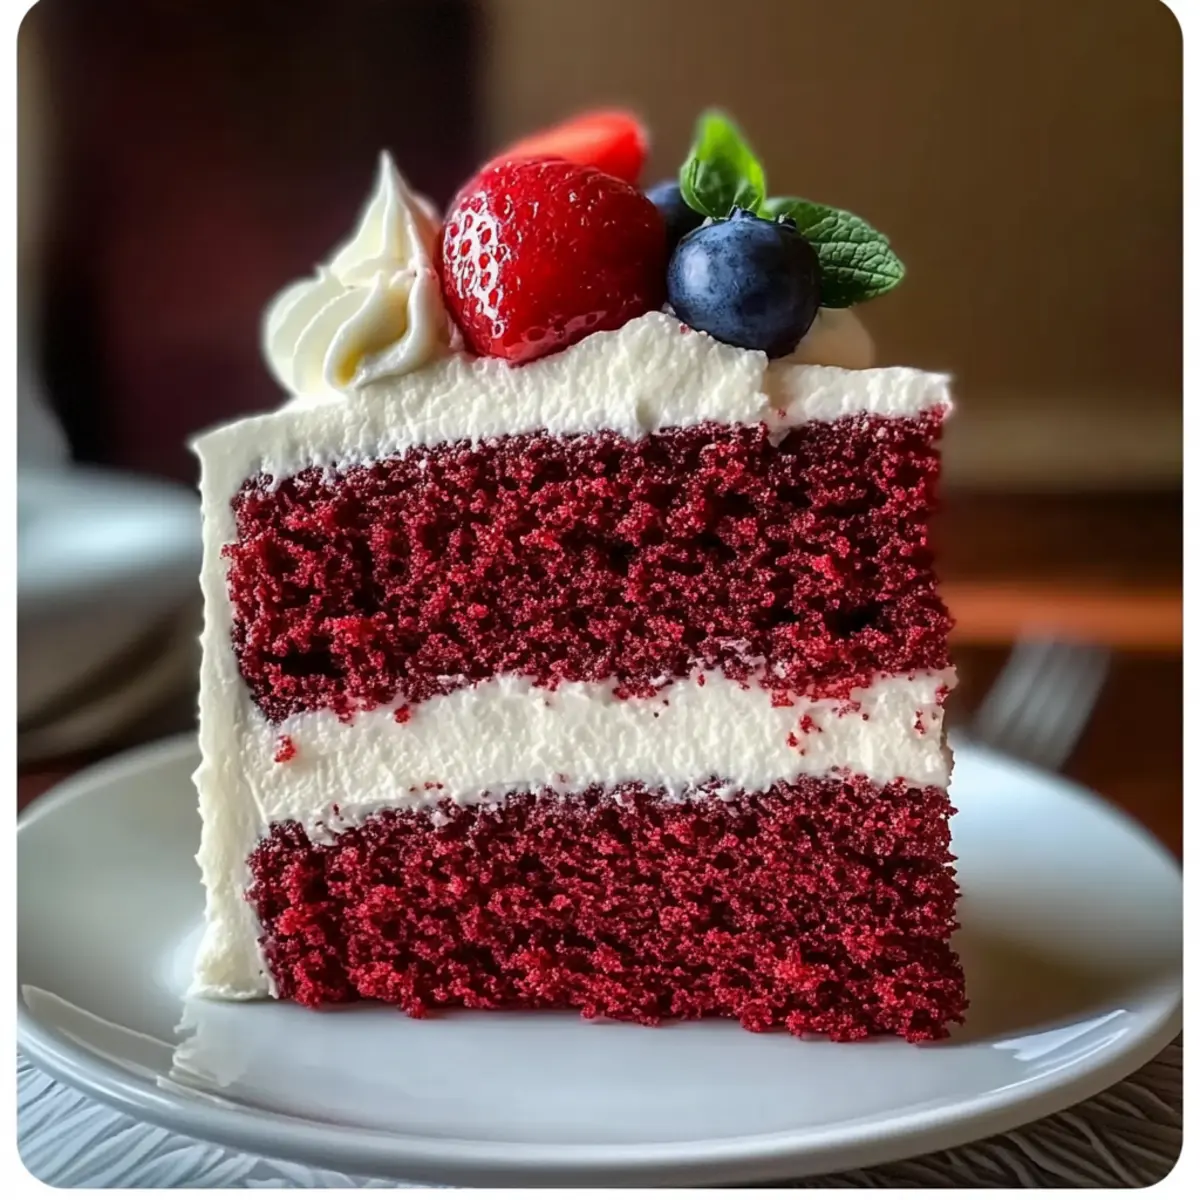
The kitchen is alive with the warmth of freshly baked treats when you decide to whip up a Classic Red Velvet Cake with Cream Cheese Frosting. This delightful dessert is more than just a pretty face; it’s a tender, moist cake that captures the hearts of guests and family alike. With its gorgeous crimson hue and velvety texture, this recipe promises to be a show-stopper at any gathering. What’s even better? It’s surprisingly quick to prepare and can easily be made in advance, leaving you free to enjoy those special moments. Let’s dive into the blissful world of red velvet and discover how to create a centerpiece that not only tastes incredible but also celebrates the joy of homemade baking. Are you ready to impress with your cake-decorating skills?
What makes this cake so special?
Indulgent, dreamy layers: The classic combination of rich cream cheese frosting and moist cake is a match made in dessert heaven. Stunning appearance: Its vibrant red hue makes it a visual showstopper at any celebration. Quick prep time: Assembling this cake is easier than you think, perfect for busy bakers! Versatile options: Customize your cake with various frosting choices or even add fruit fillings for a fresh twist. Make-ahead friendly: You can bake it a day in advance, allowing you the freedom to focus on enjoying your gathering. This recipe is a must-try, especially if you love delightful desserts like our Coconut Cloud Cake or Strawberry Shortcake Ice Cream Cake!
Red Velvet Cake Ingredients
• Gather everything you need to create a scrumptious Red Velvet Cake that will captivate every palate!
For the Cake
- All-purpose flour – This provides the structure and chewiness your cake needs; swap it with a gluten-free blend for a gluten-free delight.
- Granulated sugar – The sweet counterpart that balances tanginess perfectly; no substitutions recommended for optimal flavor.
- Cocoa powder – Adds a subtle chocolate flavor; make sure it’s unsweetened for the best results.
- Vegetable oil – Ensures moisture and softness; you can use melted coconut oil for a unique twist.
- Eggs – Acts as a binder and leavening agent; for a vegan option, flax eggs work great (1 tbsp ground flaxseed + 2.5 tbsp water).
- Buttermilk – Provides tanginess and moisture, enhancing the cake’s texture; mix regular milk with 1 tbsp white vinegar or lemon juice as a substitute.
- Red food coloring – Gives that striking red hue; you can skip this if you prefer a natural alternative.
- Baking soda and vinegar – Work together to create lift, essential for that classic red velvet texture.
For the Frosting
- Cream cheese – The rich base for your frosting; feel free to swap for buttercream or whipped cream if you’d like a different flavor.
- Vanilla extract – Enhances all flavors in the frosting; no substitutions needed, just pure deliciousness!
Now that you’re equipped with these delightful ingredients, let’s continue crafting a beautiful and delicious Red Velvet Cake that everyone will adore!
Step‑by‑Step Instructions for Classic Red Velvet Cake with Cream Cheese Frosting
Step 1: Preheat the Oven
Start by preheating your oven to 350°F (175°C). While it’s warming up, grease and flour two 9-inch round cake pans. This ensures that the cake layers will release smoothly once baked. Look for a light dusting of flour on the surfaces of the pans to know you’re set.
Step 2: Mix Dry Ingredients
In a large mixing bowl, combine 2 cups of all-purpose flour, 1 tablespoon of cocoa powder, 1 teaspoon of baking soda, and a pinch of salt. Whisk these together until the dry ingredients are well incorporated and free of lumps. This step is crucial to ensure even flavor and texture in your Classic Red Velvet Cake.
Step 3: Combine Wet Ingredients
In another bowl, mix 1 and ½ cups of granulated sugar with 1 cup of vegetable oil. Beat them together until the mixture is smooth and well blended. Next, add 2 large eggs, 1 cup of buttermilk, and 1 tablespoon of red food coloring. Stir until everything is combined, achieving a vibrant red batter.
Step 4: Blend Dry and Wet Mixtures
Gradually add the dried ingredient mixture into the wet ingredients, stirring gently to combine. Be careful not to overmix; stop when no visible flour remains. The batter should be smooth, with a nice rich red hue. This step is critical for keeping your Classic Red Velvet Cake tender and airy.
Step 5: Bake the Cake Layers
Divide the batter evenly between the prepared pans and smooth the tops with a spatula. Place them in the preheated oven and bake for 25–30 minutes. To check for doneness, insert a toothpick into the center; it should come out clean. The cakes will look slightly domed and puffed.
Step 6: Cool the Cake Layers
Once baked, remove the cake pans from the oven and allow them to cool in the pans for 10 minutes. Afterward, carefully run a knife around the edges and flip the cakes onto wire racks to cool completely. Proper cooling is key to allowing flavors to develop as you prepare the frosting.
Step 7: Make the Cream Cheese Frosting
In a mixing bowl, beat together 8 ounces of cream cheese and 4 cups of powdered sugar until the mixture is smooth and creamy. Add 1 teaspoon of vanilla extract and mix until fully incorporated. This creamy frosting will be the perfect complement to your Classic Red Velvet Cake.
Step 8: Frost the Cake
Once the cake layers are completely cooled, place one layer on a serving plate. Use a generous amount of cream cheese frosting on top and then gently stack the second layer. Frost the top and sides of the cake with the remaining frosting, smoothing it out for a beautiful finish. Your Classic Red Velvet Cake is now ready to be savored!
How to Store and Freeze Red Velvet Cake
Fridge: Store leftover Red Velvet Cake in an airtight container for up to 5 days to keep it moist and fresh without compromising flavor.
Freezer: For longer storage, slice the cake and wrap each piece in plastic wrap, then place in a freezer bag. It can be frozen for up to 3 months.
Thawing: To enjoy your frozen cake, move it to the fridge overnight to thaw. You can also let it sit at room temperature for a couple of hours before serving.
Reheating: If you prefer a warm slice, gently microwave a piece for about 10-15 seconds to warm it through.
Make Ahead Options
Preparing your Classic Red Velvet Cake ahead of time is a fantastic way to simplify your baking and free up precious moments! You can bake the cake layers up to 3 days in advance; just ensure they are completely cool before tightly wrapping each layer in plastic wrap to preserve moisture. The cream cheese frosting can also be prepared up to 2 days ahead and stored in the refrigerator in an airtight container. When you’re ready to serve, simply frost the chilled cake layers, letting them sit at room temperature for about 30 minutes before serving. This way, you’ll enjoy a cake that’s just as delicious and perfect for any celebration, leaving you more time to enjoy your guests!
What to Serve with Classic Red Velvet Cake with Cream Cheese Frosting?
Indulging in a rich slice of cake is always a special experience, but pairing it with the right accompaniments can elevate your dessert moment to the next level.
-
Vanilla Ice Cream: The creamy, cool texture of vanilla ice cream perfectly balances the rich cake and complements the flavors of cream cheese frosting.
-
Fresh Berries: Add a pop of color and freshness with strawberries or raspberries, their tartness enhances the sweetness of the cake.
-
Whipped Cream: A light dollop of whipped cream adds an airy quality to each bite, making for a light-hearted dessert experience.
-
Chocolate Ganache: Drizzle this over your cake for an additional layer of indulgence; its rich chocolate flavor harmonizes beautifully with red velvet.
-
Coffee or Espresso: The warm, robust nature of coffee cuts through the sweetness and amplifies the cake’s cocoa notes, creating a delightful pairing.
-
Sparkling Water with Lime: Refreshing and citrusy, this pair cleanses the palate and offers a zesty contrast to the cake’s richness.
-
Nutty Biscotti: Crunchy and flavorful, biscotti provides a delightful texture contrast and the ideal companion for dipping into coffee.
Treat yourself and your guests to a symphony of flavors alongside this Classic Red Velvet Cake; the options are as delightful as the cake itself!
Red Velvet Cake Variations & Substitutions
Get creative with your Red Velvet Cake, infusing it with your personal touch and favorite flavors!
- Gluten-Free: Use a gluten-free flour blend to make this cake a delightful option for gluten-sensitive friends. The cake will still be rich and moist.
- Dairy-Free: Substitute buttermilk with almond milk and mix in a tablespoon of lemon juice for that lovely tang. This dairy-free version may surprise you with its taste!
- Vegan Twist: Replace eggs with flax eggs (1 tbsp ground flaxseed + 2.5 tbsp water) and use plant-based cream cheese for frosting. A delicious vegan cake that doesn’t skimp on flavor!
- Citrus Zest: Add a teaspoon of orange or lemon zest to the batter for a refreshing burst of flavor. This adds a delightful brightness to each bite.
- Frosting Options: Swap out cream cheese frosting for fluffy buttercream, or get decadent with chocolate ganache. Each option creates a unique flavor experience.
- Layered Delight: Try adding fruit between layers, like raspberry or cherry filling, for a juicy surprise that tastes like summer. Layering is a fun way to elevate your cake!
- Spicy Kick: Mix in a pinch of cayenne or cinnamon to the batter for a warm, spiced twist that dances on your taste buds. Who knew red velvet could pack a little heat?
- Nutty Texture: Fold in chopped pecans or walnuts into the batter for added texture and richness. A crunchy bite contrasts beautifully with the soft cake!
Feel inspired? Explore more delightful treats like our Flourless Orange Cake or tantalizing Sugar Cookie Cake to impress your guests!
Expert Tips for Red Velvet Cake
-
Room Temperature Ingredients: Ensure all your ingredients are at room temperature to create a smoother batter for your Red Velvet Cake, resulting in a tender texture.
-
Avoid Overmixing: Be cautious not to overmix the batter. This can lead to a dense cake, so mix just until combined for that light, fluffy finish.
-
Check Baking Time: Start checking for doneness a few minutes before the recommended baking time. A toothpick inserted in the center should come out clean or with a few moist crumbs, not wet batter.
-
Layer Cooling: Allow the cake layers to cool completely on a wire rack. This prevents condensation, ensuring your frosting clings nicely and your cake remains light and airy.
-
Colorful Garnish: For a beautiful presentation, consider topping your frosted cake with fresh berries or chocolate shavings. They not only add color but also a delightful contrast of flavors!
Red Velvet Cake Recipe FAQs
What should I look for when selecting ingredients for Red Velvet Cake?
Absolutely! When choosing your ingredients, ensure your cocoa powder is unsweetened for the right flavor profile. For the best results, use fresh buttermilk—if it’s too sour or has an off smell, it’s time to replace it. Additionally, opt for room-temperature eggs and oils, as they mix more easily and contribute to a tender cake texture.
How should I store leftover Red Velvet Cake?
Very! Keep your leftover Red Velvet Cake in an airtight container in the fridge for up to 5 days. This will help maintain its moisture and flavor. If you want to enjoy it later, consider freezing; it keeps well for up to 3 months when wrapped tightly.
Can I freeze Red Velvet Cake, and if so, how?
Certainly! To freeze, slice the cake into portions and wrap each slice tightly with plastic wrap. Then, place the wrapped slices in a freezer bag—this keeps them fresh and prevents freezer burn. When you’re ready to enjoy, just move them to the fridge overnight or let them sit at room temperature for about 2 hours before serving.
What are some common troubleshooting tips for baking a Red Velvet Cake?
If you notice your cake turning out dense, it’s likely due to overmixing the batter, so mix just until combined! If the cake isn’t rising as expected, check that your baking soda is fresh, as old leavening agents can affect the outcome. For a perfect bake, always test doneness with a toothpick; it should come out clean, not gooey.
Are there any dietary considerations to keep in mind with this cake?
Absolutely! For those with gluten sensitivities, you can easily substitute the all-purpose flour with a gluten-free flour blend. If you’re aiming for a vegan version, simply replace the eggs with flax eggs (1 tablespoon ground flaxseed + 2.5 tablespoons water) and use non-dairy buttermilk (regular milk mixed with vinegar or lemon juice). Furthermore, always check for allergies related to common ingredients like eggs or dairy when serving to guests, especially if you plan on sharing this delightful cake!
Delightful Red Velvet Cake with Creamy Dreamy Frosting
Ingredients
Equipment
Method
- Preheat your oven to 350°F (175°C) and grease and flour two 9-inch round cake pans.
- In a large mixing bowl, combine the dry ingredients: all-purpose flour, cocoa powder, baking soda, and salt.
- In another bowl, mix sugar and vegetable oil until smooth. Add eggs, buttermilk, and red food coloring, stirring until combined.
- Gradually add the dry ingredients to the wet ingredients, stirring gently until just combined.
- Divide the batter evenly into the prepared pans and smooth the tops. Bake for 25–30 minutes.
- Allow the cakes to cool in the pans for 10 minutes, then transfer to wire racks to cool completely.
- Beat cream cheese and powdered sugar together until smooth, then add vanilla extract.
- Once cakes are cooled, frost the top of one layer, stack the second layer on top, and frost the top and sides of the cake.
Leave a Reply