
As I strolled through the vibrant aisles of my local grocery store, I was hit with a wave of inspiration for a dessert that would brighten any gathering. Enter my Red, White and Blue Dirt Cups—a no-bake delight that layers creamy pudding with crunchy Oreo crumbs in a playful festivity of color. Perfect for busy weeknights or holiday celebrations, these cups offer a fun, kid-friendly treat that requires minimal effort and maximizes joy. Whether it’s a family cookout or a last-minute get-together, they promise to steal the show while keeping everyone’s spirits high. Curious about how to whip up this delightful dessert? Let’s dive in!
Why Make Red, White and Blue Dirt Cups?
Ease of Preparation: This no-bake dessert comes together in minutes, making it perfect for busy days or last-minute parties.
Vibrant Presentation: The stunning layers of red, white, and blue create an eye-catching treat that will impress guests of all ages.
Customizable Delight: Experiment with different pudding flavors or add fresh fruit layers for a unique twist—there are endless possibilities!
Kid-Friendly Fun: Children will love helping with the assembly, making it a great bonding activity that engages their creativity.
Perfect for Any Occasion: Whether it’s a Fourth of July picnic or a birthday celebration, these cups fit any festive theme, bringing joy and deliciousness.
If you love fun, layered desserts, you might also enjoy our Mini Lemon Blueberry treats!
Red, White and Blue Dirt Cups Ingredients
For the Pudding
• Cheesecake Pudding Mix – This base provides a creamy, sweet flavor; you can substitute with vanilla or chocolate for variety.
• Milk – Essential for the pudding consistency; whole or 2% milk offers the best results, while almond milk is a great dairy-free alternative.
For the Colors
• Blue and Red Gel Food Dye – These vibrant colors add festive flair; liquid dye works too, but may yield softer shades.
For the Layers
• Crushed Oreos – These provide a delightful texture and chocolate flavor; feel free to substitute with graham crackers or gluten-free cookies.
• Gummy Worms – A fun topping that adds whimsy; fresh fruit or themed candies can be a delightful alternative.
• Whipped Cream (optional) – Adds fluffiness and creaminess; consider yogurt for a lighter option.
• Fresh Berries (optional) – Enhance both flavor and decoration with strawberries and blueberries—a great addition that complements the dessert.
These Red, White and Blue Dirt Cups are a fantastic way to celebrate any occasion while indulging in a deliciously easy dessert!
Step‑by‑Step Instructions for Red, White and Blue Dirt Cups
Step 1: Mix the Pudding
In a large mixing bowl, combine two boxes of cheesecake pudding mix with 4 cups of milk. Whisk vigorously for about 2 minutes until the mixture becomes thick and creamy. You’ll know it’s ready when it starts to hold its shape and looks smooth. This creamy base is essential for your Red, White and Blue Dirt Cups.
Step 2: Separate the Pudding
Once your pudding is thickened, gently divide it into two separate bowls. Pour 1 cup of the pudding mixture into one bowl and the remaining 1 ½ cups into the other. This separation will allow you to create the vibrant red and blue layers later, adding visual interest to your festive dessert.
Step 3: Color the Pudding
Take ¼ teaspoon of blue gel food dye and mix it into the bowl containing 1 cup of pudding, stirring until fully combined. In the second bowl, add ¼ teaspoon of red gel food dye to the 1 ½ cups of pudding. Mix thoroughly until both bowls are vibrant in color, creating the festive shades needed for your Red, White and Blue Dirt Cups.
Step 4: Layer the Dessert
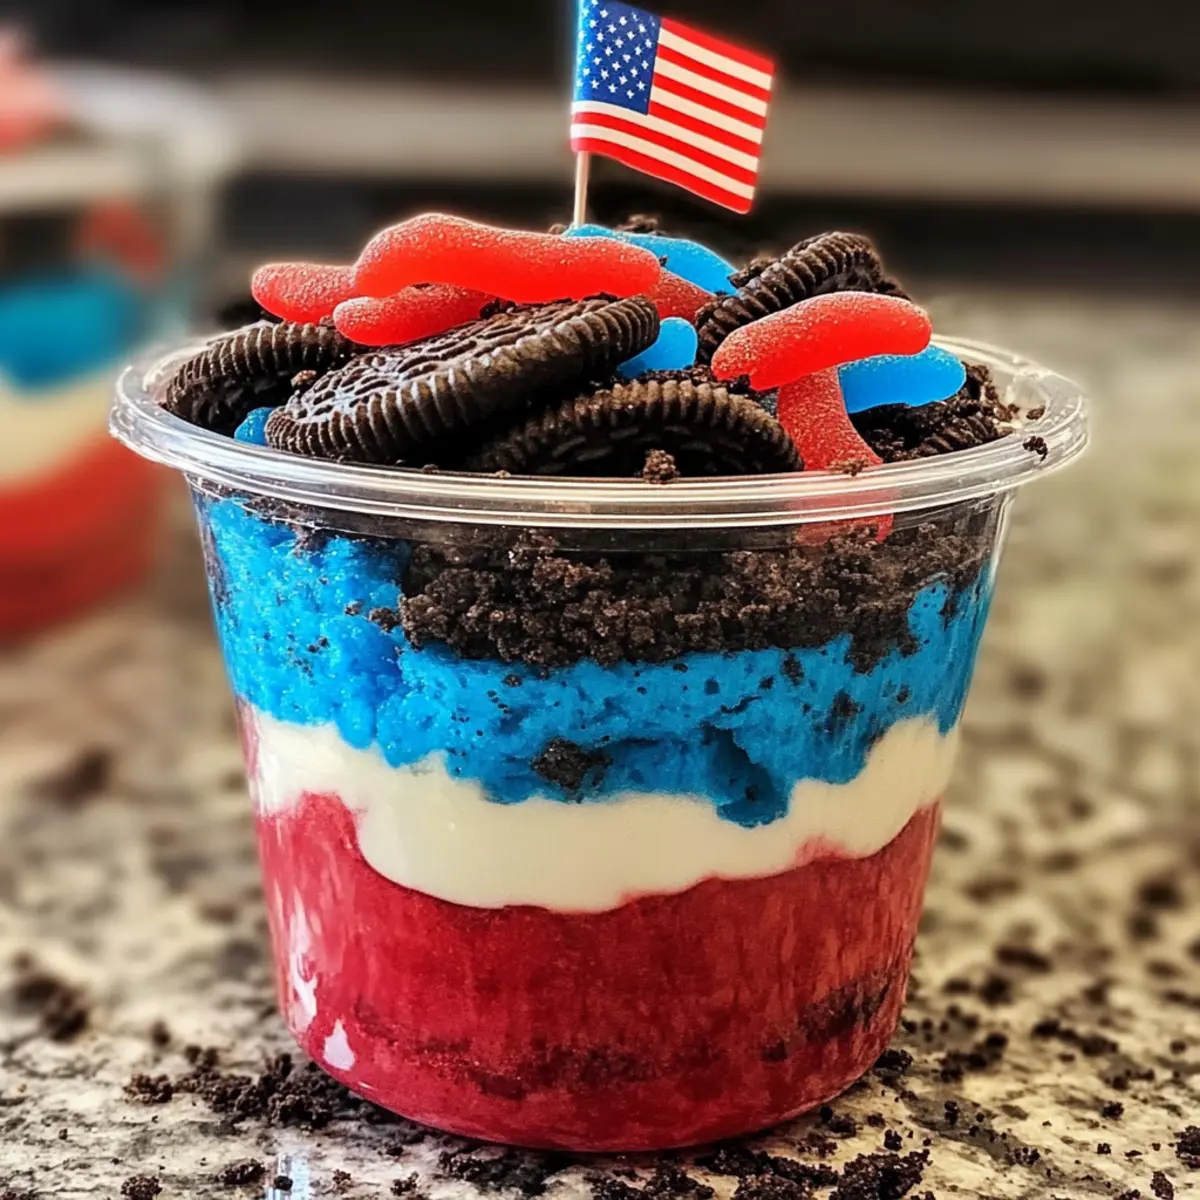
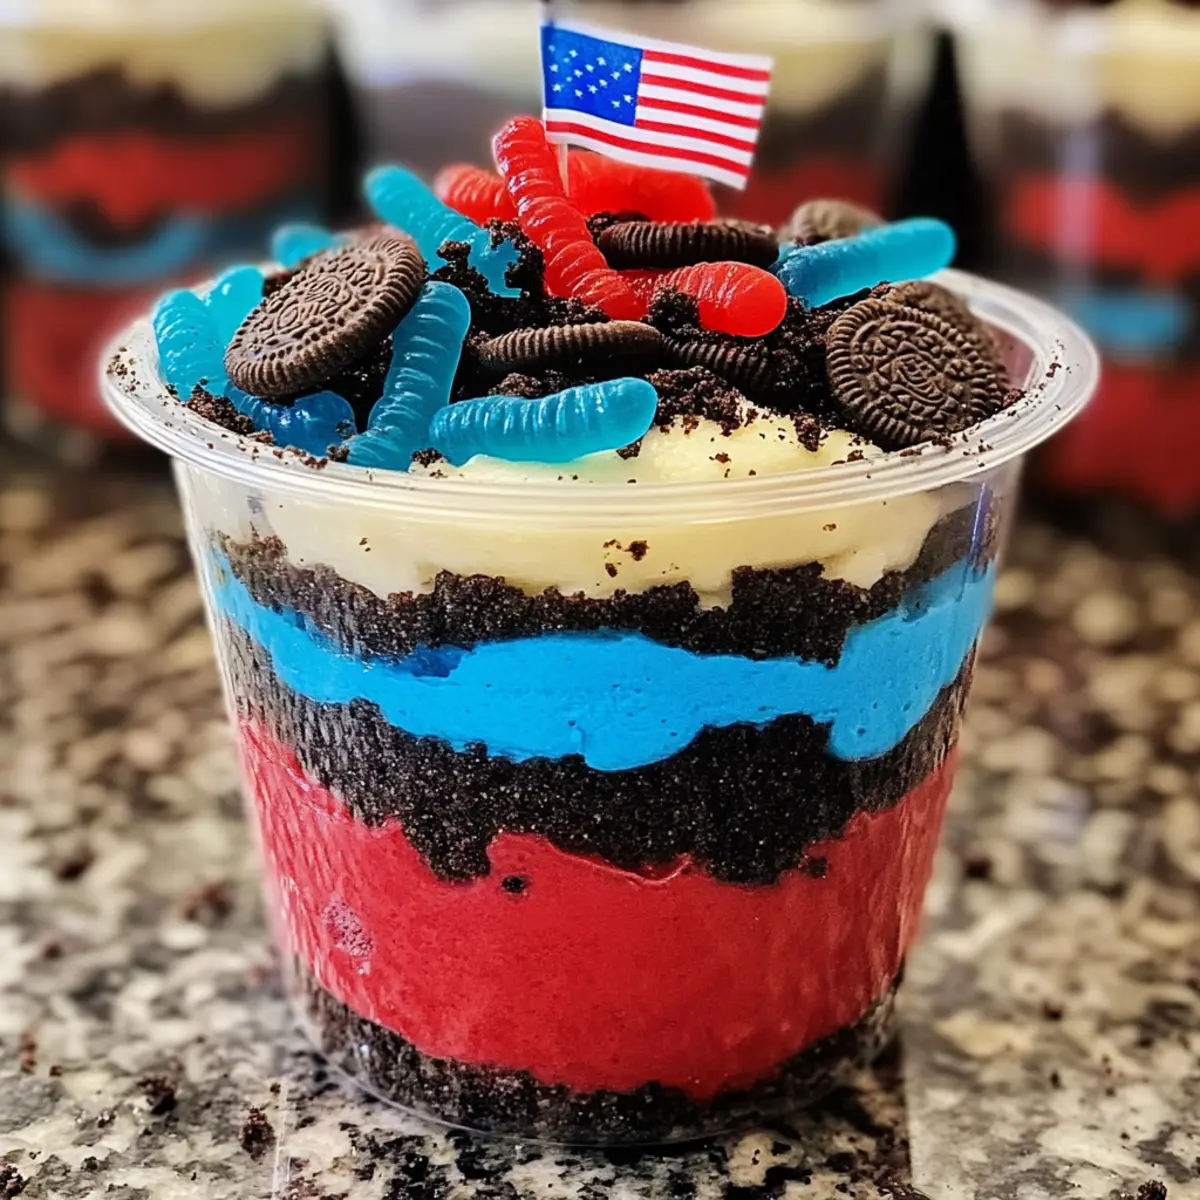
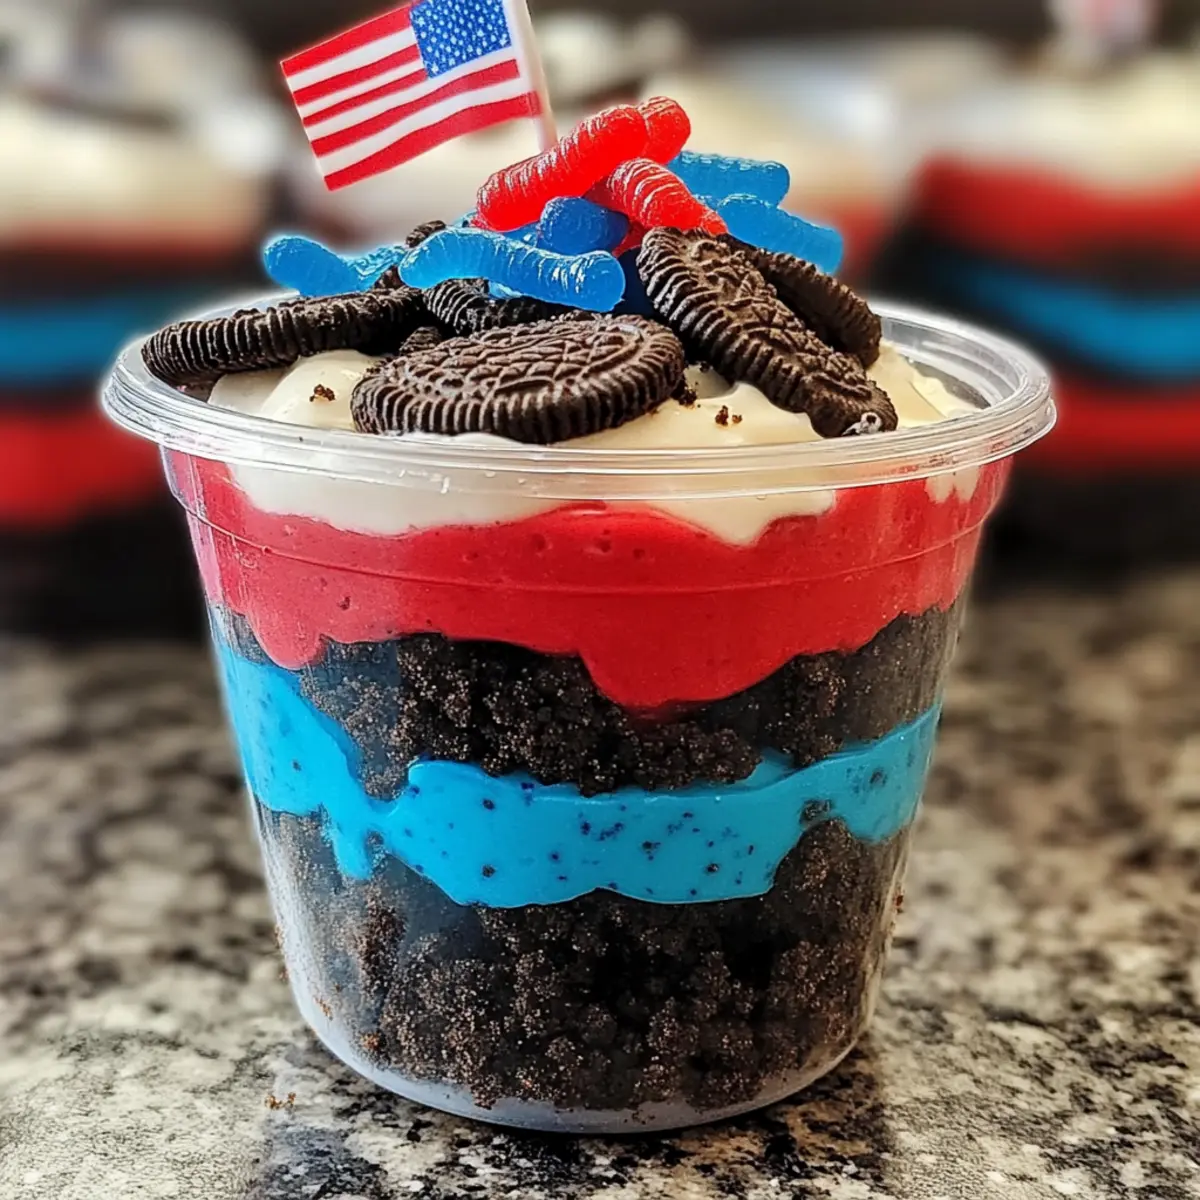
Grab your plastic cups or mason jars to start assembling the layers. Begin by adding 1 tablespoon of crushed Oreos to the bottom of each cup. Then layer on 2 tablespoons of the blue pudding, followed by another tablespoon of Oreos, and 3 tablespoons of the white pudding. Add 1 ½ tablespoons of the white pudding again before topping it with 4 tablespoons of red pudding.
Step 5: Finish the Layers
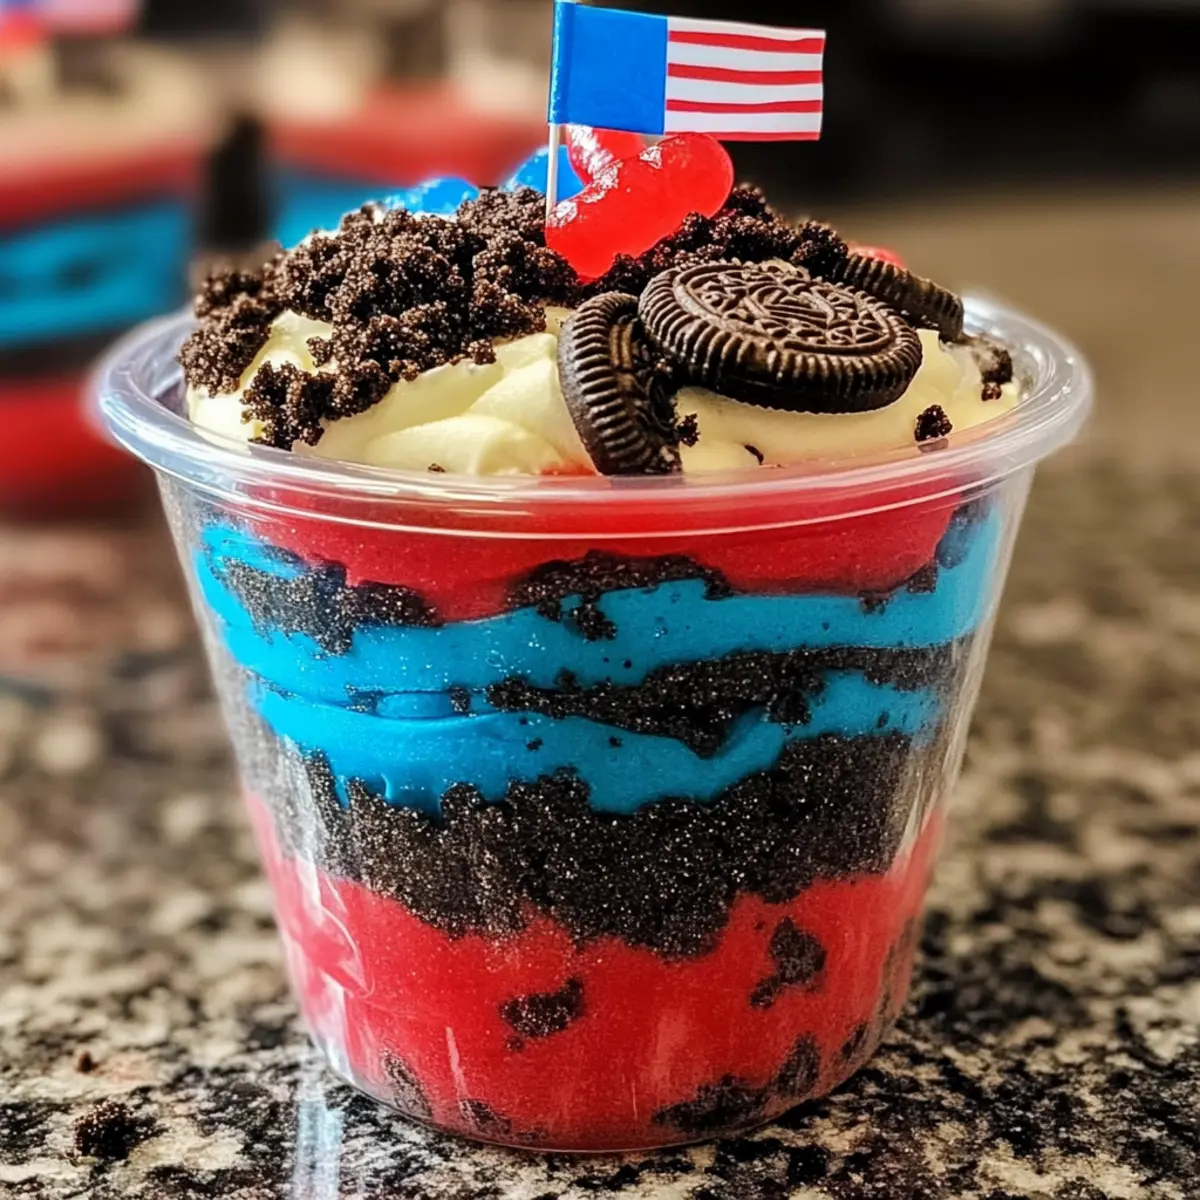
To complete your Red, White and Blue Dirt Cups, sprinkle 2 tablespoons of crushed Oreos on top. For the finishing touch, add two gummy worms and a small flag to each cup. This colorful and playful decoration will bring a festive spirit to your dessert, making it irresistible for any gathering.
Step 6: Serve & Enjoy
Chill the layered cups in the refrigerator for at least 1 hour before serving. This allows the flavors to meld and enhances the overall texture. When you’re ready to serve, delight in the beautifully layered, creamy, and crunchy Red, White and Blue Dirt Cups that are sure to impress your family and friends!
Storage Tips for Red, White and Blue Dirt Cups
Fridge: Store your Red, White and Blue Dirt Cups in the refrigerator for up to 3 days to maintain their freshness. Make sure to cover them with plastic wrap or a lid to prevent drying out.
Freezer: While not recommended, if you must freeze, place the cups in an airtight container for up to a month. Be aware that the texture may change once thawed.
Reheating: These delightful cups are best enjoyed cold. If frozen, allow them to thaw in the refrigerator overnight before serving—no reheating necessary!
Layer Preservation: To keep your layers intact, avoid stacking the cups on top of each other, as this may cause them to mix.
Red, White and Blue Dirt Cups Variations
Feel free to get creative and make these delightful cups your own with these fun swaps and additions!
-
Fruit Layering: Add fresh or frozen strawberries or blueberries between pudding layers for a burst of natural sweetness. It elevates both flavor and presentation, making every bite a summer delight.
-
Flavorful Pudding: Swap out the cheesecake pudding for vanilla or chocolate—experience a unique twist while keeping that creamy nostalgia. You can also try a flavored yogurt as a delicious base!
-
Healthier Option: Use low-sugar pudding mix and replace whole milk with almond or coconut milk, making it a lighter treat without sacrificing flavor. This is perfect for those who are health-conscious but still want something sweet.
-
Natural Colors: Instead of gel food dye, use pureed raspberries or blueberries for natural coloring and an extra fruity zing. This flavorful enhancement creates an all-natural, vibrant treat that’s beautiful and wholesome.
-
Graham Cracker Base: Substitute crushed Oreos with graham crackers for a more nostalgic flavor that pairs well with fruity toppings. Simply crush them to your desired texture and layer as usual.
-
Themed Toppings: Get festive by adding small chocolate candies or themed sprinkles to the top layer. These cute details can bring an extra burst of fun, especially for party gatherings!
-
Sour Worms: Replace gummy worms with sour candies to add an interesting contrast to the sweet layers below. The tangy bite will surprise your taste buds, making each spoonful all the more exciting.
If you love fruit layers, you might also enjoy our Lemon Blueberry Cheesecake or make it a savory combo with our warm One Pan Chicken and Vegetables. The possibilities are endless!
What to Serve with Red, White and Blue Dirt Cups?
Elevate your celebration with delightful pairings that complement the sweet allure of these vibrant dirt cups.
- Fresh Fruit Salad: A refreshing mixture of seasonal fruits adds a juicy contrast that balances the creaminess of the cups.
- Grilled Hot Dogs: Add a touch of savory satisfaction to your gathering—these classic cookout favorites are always a hit alongside sweet treats.
- Watermelon Slices: Juicy and hydrating, they echo the festive vibe while providing a cooling contrast to the richness of the dirt cups.
- Sparkling Lemonade: This bubbly, citrusy drink adds a refreshing pop, making every bite and sip a joyous experience.
- Vanilla Ice Cream: The creamy goodness of vanilla ice cream can be a delightful way to enhance the flavors of your dessert while adding a fun scoop!
- Mini Sandwiches: Light and savory, these bite-sized creations are perfect for a festive spread, striking a wonderful contrast to the sweet dirt cups.
- Chocolate Dipped Pretzels: Their crunchy saltiness and chocolaty sweetness create a delightful texture pairing for the creamy layers of the dirt cups.
- Themed Cupcakes: Adding a visual flair, cupcakes can make your dessert table even more festive and are perfect for inspired décor.
- Iced Tea: A classic beverage choice that pairs well with a sweet dessert, offering a refreshing cleanse between bites.
- Fruit-Infused Water: Light and hydrating, this drink not only adds flavor but also visually complements the vibrant theme of your gathering.
Make Ahead Options
These Red, White and Blue Dirt Cups are perfect for busy home cooks looking to save time! You can prepare the pudding layers up to 24 hours in advance by mixing the cheesecake pudding with milk and coloring it before refrigerating. When assembling, layer the crushed Oreos and pudding in cups as directed, then cover tightly and chill in the fridge. This helps keep the texture smooth and creamy. To serve, simply add the crushed Oreos and decorations like gummy worms or flags just before presenting them to maintain their delightful appearance. Enjoy hassle-free, festive treats with minimal last-minute effort!
Expert Tips for Red, White and Blue Dirt Cups
-
Whisk Wisely: Ensure the pudding is whisked until thick and creamy—underwhisking can lead to poor layering and texture issues.
-
Chill for Flavor: Prepare the dessert ahead of time and chill for at least one hour. This enhances flavor and allows the layers to set properly.
-
Color Correctly: Add gel food dye gradually, as a little goes a long way. Too much can alter the flavor and consistency of your Red, White and Blue Dirt Cups.
-
Layer Strategically: When layering, use a light hand for a neat presentation. Pressing down too hard can mix the layers and muddy the colors.
-
Fun Options: Don’t hesitate to customize! Try using fruit-flavored pudding or alternative toppings to make your Red, White and Blue Dirt Cups uniquely yours.
Red, White and Blue Dirt Cups Recipe FAQs
How do I choose the right pudding mix?
When selecting a pudding mix for your Red, White and Blue Dirt Cups, I recommend opting for cheesecake pudding for its creamy texture and sweet flavor. However, you can substitute with vanilla or chocolate pudding if you prefer a different taste profile. Just be sure to adjust any additional flavors accordingly!
What is the best way to store leftovers?
To keep your Red, White and Blue Dirt Cups fresh, store them in the refrigerator covered with plastic wrap or a lid. They can last for up to 3 days; beyond that, you may notice a change in texture as the layers may start to blend together. Enjoy them cold for the best experience!
Can I freeze the Red, White and Blue Dirt Cups?
While it’s not the ideal method for this dessert, you can freeze your cups if necessary. Place them in an airtight container and freeze for up to 1 month. However, be aware that freezing may change the texture of the pudding once thawed. To thaw, transfer them to the refrigerator overnight for the best results.
What if my pudding isn’t thickening properly?
If your pudding isn’t thickening as expected, it might be due to underwhisking. I suggest whisking vigorously for about 2 minutes until you reach a smooth and thick consistency. If it’s still runny, try adding a bit more milk or allowing it to sit for a few minutes to set before assembling your layers.
Are Red, White and Blue Dirt Cups suitable for those with dietary restrictions?
Absolutely! The Red, White and Blue Dirt Cups are vegetarian-friendly, but you’ll want to check the ingredients on gummy worms for gelatin content if you’re accommodating dietary restrictions. You can also make them dairy-free by using almond milk and a suitable pudding mix. Feel free to get creative and adapt as needed to meet your guests’ needs!
No-Bake Red, White and Blue Dirt Cups for Festive Fun
Ingredients
Equipment
Method
- In a large mixing bowl, combine two boxes of cheesecake pudding mix with 4 cups of milk. Whisk vigorously for about 2 minutes until thick and creamy.
- Once thickened, gently divide the pudding into two bowls: 1 cup in one bowl, 1 ½ cups in another.
- Mix ¼ teaspoon of blue gel food dye into the 1 cup of pudding. Mix ¼ teaspoon of red gel food dye into the 1 ½ cups of pudding.
- In your cups, layer 1 tablespoon of crushed Oreos, followed by 2 tablespoons of blue pudding, 1 tablespoon of Oreos, 3 tablespoons of white pudding, 1 ½ tablespoons of white pudding, and then 4 tablespoons of red pudding.
- Sprinkle 2 tablespoons of crushed Oreos on top, add two gummy worms and a small flag to each cup.
- Chill the layered cups in the refrigerator for at least 1 hour before serving.
Leave a Reply